Category Archives: Projects

‘Twas some time before Christmas…

Twas some time before Christmas, when all through the shop
I was just so darned busy, I thought I would drop!

The gift list was hung by the workbench with care.
“If we don’t ship these soon, they’ll never get there!”

I in my apron, glue bottle in hand,
was prepared to work hard, to make my last stand.

Sanding and planing, the dust it did blow,
covering the shop floor like the new-fallen snow.

I struggled and sweated as I wiped off my brow.
“I’m sure I can’t do this… no way or no how.”

Project pieces lay about, both tennon and mortise.
“If I progressed any slower, I just might be a tortoise.”

When what in my offended nose did I smell?
“I can place that aroma!  I know it so well…”

When in swang a monkey, hanging high by his tail.
“I’m here to help – together, we won’t fail.”

Of course, it was Iggy, the trained Shop Monkey.
He looked very dapper, his smell was quite funky.

With tool belt cinched tightly around his middle.
He looked young and  strong – as fit as a fiddle.

He was 20 inches tall, all covered in fur.
I guess it’s there so, if cold, he wouldn’t say ‘brrr…’

With eye protection on and boots on his feet,
his shop working outfit was completely complete.

“Now, what’s on this list? Something for father and mother…
We’ll finish this job, don’t you worry, my brother.”

But, raising my hand, I told the monkey to hush.
“They’ll all look simply awful if we get in a rush.”

“Not to worry, pal,” said the monkey with glee.
“We’ll get this job done, just you wait and you see.”

And, with fur and tools flying, working hard was a must.
“You know all these tools, in your skills you must trust.”

“Don’t overthink your joinery, lay out and do cut.
If you don’t get a move-on, I’ll just kick your butt.”

With motivation a-plenty, I set out to work.
“You do a good job, Tom, just don’t be a jerk!”

With project pieces cut, the work was quite simple.
I was happy it worked! You could just see my dimple.

The monkey and I, we worked at the bench.
I was no longer bothered by his terrible stench.

The tools sprung to life, and I was in awe.
Iggy shouted quite loudly, “On router and saw!

On sander and chisel! On spokeshave and plane!”
Our work was quite orderly, the pace was insane!

Together we worked, and with our combined project attack,
there, on the bench, sprung to life nine tiny wine racks.

(A note to my relatives: Right now, shield your eyes
or I will be blowing the big Christmas Surprise!)

The plans we had gotten from our friends there at Wood.
The project looked sweet, the fit was quite good.

From a stack of work pieces all perfectly milled,
from just a plain drawing, these projects distilled.

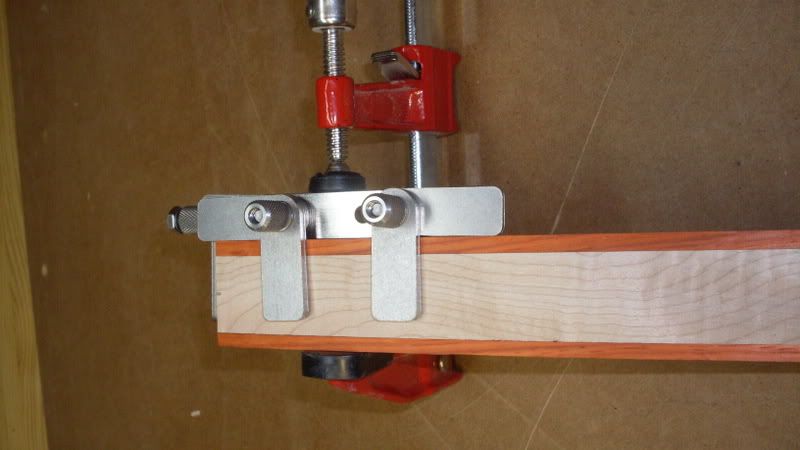
The frames are held fast with the mortise and tennon.
Try as you might, there’s just no way to bend ’em.

I sanded the pieces, then applied the finish.
Iggy said “You work faster than Popeye on spinach!”

A coat of shellac, a wipe on finish made them pop.
The look amazed both of us, our jaws they did drop.

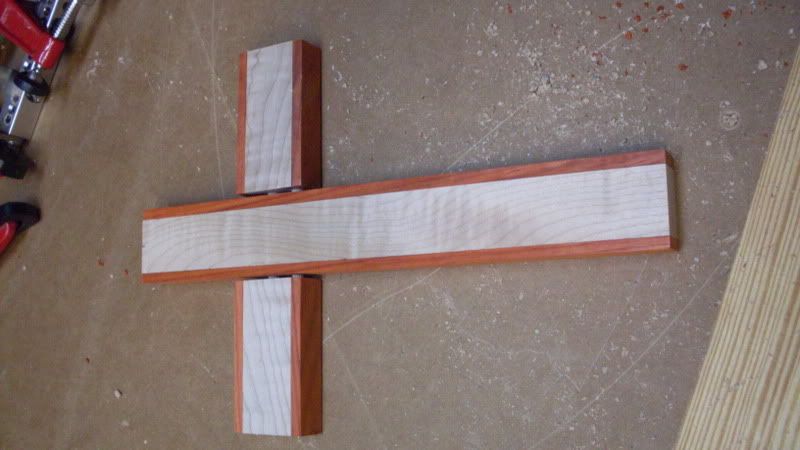
Eight tiny wine racks, made of maple and sapele.
(That’s a wood from Africa, not Brazil or New Dehli)

Eight were the same, but there was this one
made of dark wood –  it  looked nice – I had some.

The bottle supports are all of curly maple.
In Iggy’s workshop, that wood is a staple.

And riding on each was a bottle of wine.
Most of them cheap, very few of them fine.

The eight sapele projects they lined up to follow
the dark wooden wine rack, with a red foil on bottle.

The scene it reminded me of old St. Nick’s Sleigh
with Rudolph’s red nose a-lighting the way.

Iggy said, “We got them together, of that there’s no lie,
just try not to touch them ’til the finish is dry.”

“We now need a cheesy photo… go get the missus!”
“What if she won’t?”  “Well, go ply her with kisses!”

And so, in a flash, she came with her camera to snap.
She took some pictures, then went back in for a nap.

Iggy looked pleased as I reviewed the shots on the camera.
“That was some hard work.  Now, how ’bout a banana?”

And as I handed Iggy a big golden bunch,
he said, “At least – this time – you fed me lunch.”

And, as he swung to a tree and disappeared from sight,
Iggy shouted, “Get  to the post office now, not later tonight!”

Thankful for what I have – and what I can do

Raising kids today can be quite a challenge.  I want my two sons to grow up as generous young men, not thinking solely about themselves.  The holiday season always poses the toughest challenge of the year.  My wife and I have had to work hard to ensure that the holidays are not just about Me! Me! Me!, but about the spirit of giving to those who are less fortunate than we are.

For instance, at my office, we have a holiday bike drive that provides new bikes to kids who are receiving social services.  All through the year, my co-workers and I throw our pocket change into a container to add to the effort.  It’s an effective and painless way to give to the cause, and in years past, we there have been times we have managed to collect more than $250 that way.  I have encouraged my sons this time of the year to collect the pennies languishing in the bottom of their desk drawers and contribute them to the drive, and they have done so willingly.

The only shot I have of my son's cradle - 2001

Another, more heartfelt way we have given back started a few years ago as a way to clear space in our house.  I had built a cradle for my youngest son just before he was born.  It was just a plain pine model screwed together.  At the time, I thought it was the epitome of craftsmanship…

But, as my skills progressed, I soon realized that it was nothing but a simple screwed together pine cradle.  Since I was sure that I could do better when my grandchildren arrive in a few decades, I loaded the cradle into the back of our van early one morning and left it by the front door of a local pregnancy crisis center.  We attached a note:

Dear Folks:

Please be sure this cradle is given to a young mother who may not be able to afford to give her new child something nice this holiday.

Santa

I needed my sons to be there to see what generosity means this time of the year.  An anonymous donation of something special  may have meant the world to a frightened young lady.  My boys learned a lot that day, and I could see that they were getting the message that it’s great to give to others without praise or reward.

Since then, I’ve made it a point to donate other hand crafted things to that center…either more cradles or a simple rocking horse built from a plan I use.  I always drop them off with the same note.

This year, I am planning on doing more of the same. I have gotten a lot of encouragement  from my friends at Wood Magazine. They provided me with a plan to build their classic  Heirloom Cradle.  No, I decided against building the storage box…  I’m just tackling the cradle to keep things simpler in the hectic holiday season.

Thanks also goes out to the folks at Bell Forest Products, who donated the maple and walnut for the contrasting wedges I will be using to build this piece.  Thanks, guys.

Through the building process, I’ll try to remember to post in-progress pictures (I am terrible about remembering this step, aren’t I?) to document the building, and I hope to be able to drop this cradle off to the nearby center sometime before mid-December.

While I have always been a Secret Santa, this year, I thought that it would be a good idea to share this experience with my woodworking friends.  I’m sure that in your hometowns, there must be other similar facilities which serve those going through tough times.  I’m hoping that – if you are so moved – you might consider building a cradle of your own and dropping it off – anonymously.

I don’t want to have to post this, but I believe it’s important that I do. I understand that teen pregnancy or pregnancy outside of marriage can be a hot-button issue.  Just so you know, I won’t be accepting or posting any political manifestos about the topic.  However, might I suggest that if what is written here does evoke strong feelings, perhaps you might want to consider channeling your energies to building something you find more palatable, like a rocking horse for kids getting medical treatment at a nearby children’s hospital.

I know that one day my two sons will grow up, become young men, move away and eventually raise families of their own.  I just hope that the lessons my wife and I are teaching are something that stick with them, and that they pass them on to their children.

I have so much to be thankful for this year.  My wish for you is that  the holiday season brings each of you nothing but health, happiness and peace.

Happy Thanksgiving to all of you, my friends…

Stuff I’ve Built: My Krenov-Style Plane

  • October 2009

Sometimes in life, you meet people who serve as a great source of  inspiration and motivation.  For some, it might be a parent, a friend or a co-worker.  For those who served in the military, it may have been their drill instructor in basic training.

For me, this project started with a meeting with Ron Hock.  At the recent Woodworking in America conference, Ron was there as a featured vendor.  At his table was a choice selection of his plane irons.  I told Ron I was considering purchasing a smoothing plane with a little more oomph than my Stanley No. 4.  Ron was quick to recommend that perhaps the best solution might be to build my own.

That’s when I laid out the money for a 2″ Hock iron and stared looking into plans for building a Krenov-inspired model.  With the plans from Popular Mechanics and some help from Bell Forest Products, I soon had a block of bubinga and instructions to work from.

Now, I’ll tell you I was terrified to start.  I mean, what if I had just wasted all that money on the iron and the wood? A few e-mails back to Ron brought more encouragement.  “Tom, look at it this way,” Ron wrote, “If you mess up badly, you are only out about a board foot or two of wood.  You can start over and do it again.”

The first part was easy… I had to edge and face joint the board to make everything nice and smooth.  Soon, the rough surface gave way to the lovely shade I had come to expect from bubinga.  Dead flat and four square.

The next step was easy as well…. Rip one cheek at one half inch, then the plane body at 2 1/16″ to accommodate the iron, then the other cheek.  I used a cabinetmaker’s triangle to ensure everything would stay oriented.

The directions then called for me to cut the plane body block at 45 degrees. At the table saw, this took only seconds, and the results were stunning.  Dead flat on the face and a true 90 degrees to the edge.

I put a 3/4″ router bit in my table mounted router in order to make a relief groove to accept the screw that holds the iron and the chipbreaker together.  Ron’s irons have a pretty beefy screw, but it was easy to center the bit on the block and make the cut.

By simply flipping the other body blank upside down, I formed the gullet of the plane.  The instructions said to file a flat spot at the miter point of the block that holds the iron, then space the two pieces 3/8″ apart to allow clearance for the iron.  I clamped both blocks to the cheeks and carefully marked where they had to be when I glued the plane together.

I took both cheeks and stacked them together, then drilled a 1/2″ hole through the cheeks at a mark in the gullet to receive the cross pin.  The plans called for me to create a complicated tennoned rotating pin to hold the wedge in place, but Ron advised me to just go with a fixed pin – it would save time and work just as well.  I took a length of 1/2″ oak dowel I had the shop and cut it a little longer than the plan called for so I would have excess I could trim.

Then came the glue up.  I lay one cheek flat on my bench and put glue on it – staying clear of the gullet area – then put the two body pieces in the places I had marked earlier.  Then, I put glue on the tops of the body halves and one end of the oak pin.  I slipped the oak pin into one of the cheeks and then put the other cheek on the top side of the assembly.

The next step I found to be critical.  Not only did I clamp the assembly together across the width, I also clamped it down to the bench to ensure things would line up.  Once I was satisfied, I went on to build the wedge.

After cutting an appropriate piece from the remaining bubinga, I put it into the vise and started to shape it with hand tools. I didn’t want to overshoot my thickness, so I worked carefully with a few rasps and a block plane to bring things down gradually.  Before long, I had the wedge to the right thickness and I was ready to work.

I took the plane out of the clamps, and started to shape it.  I cut the plane to length and then worked on rounding over the front and back edges.  I used the band saw, rasps and a belt sander – bubinga is tough stuff. Once I was happy, I flipped the plane over and ran the sander over the sole.  I wanted it dead flat, so I kept checking with a straight edge.  Once I had it nice and flat, I finished it off with a scraper to get the surface nice and smooth.

The came the moment of truth.  Would it even cut?  I put the iron in and tapped the wedge into place.  It took some fussing at first, but once I got the iron where I wanted it, it cut beautifully!  I do need to get my hands on a plane hammer – my carpenter’s mallet isn’t going to cut it adjusting the iron.  But, other than that, the plane works great.

The time invested was so small… one Sunday afternoon.  If I hadn’t stopped to watch football and tend to the laundry, it might have taken me about two hours. The results, however, were pretty spectacular.

Not a bad way to spend a weekend in the shop!

“Prepare to Lay Siege, Centurion!”

Elementary school was so much fun for my oldest son Dominic.  He got to cut shapes out of construction paper and glue them together. He got to finger paint.  He got to color with crayons.

All of these were essential skills for the up-and-coming youngster to master.  They improved his creativity, fine motor coordination and showed us how well he was able to follow directions.

Now that he’s in middle school, things are getting more complicated.  Higher level math (I can no longer help him with his homework!), advanced science and world history classes have taken him to the next level.  Not only is the work harder, the homework assignments have become a lot more challenging.

That’s what we were working on this past weekend.  Dominic’s technology teacher (yes, he has one of them) assigned his students a difficult yet interesting homework assignment – build a catapult. You know, a siege engine used by the Roman Legions as they laid waste to opposing cities around the Mediterranean. Other than that, the assignment was wide open – no restrictions on size, materials or methods of powering the device.

Dominic sat as his desk for a while, sketching out ideas on a notepad.  Some of his designs seemed pretty far-fetched (one involved a battery operated motor), while others were very plain and uninspired.  The more he worked, the more frustrated he became.  Finally, he asked if we could look around the Internet to see if there was any inspiration – and we came away inspired.

There was a site called Storm the Castle that had plans and pictures of different catapult designs.  From large models to hurl pumpkins and potatoes to desktop models that shoot wadded up pieces of paper, the plans varied tremendously in scale and complexity.

We went back to the drawing board and came up with this design. Built of 1 1/2″ by 3/4″ sticks of red oak. Every joint was reinforced by two pocket screws and glue.  The unit itself is 18″ long by 6″ wide, with the top of the cross beam set at 8″ above the table.  I cut the pieces to size on the table saw and let my son drill the holes, glue and screw the pieces together.  We added two plywood gussets to the outside of the uprights to reinforce the piece, giving tremendous stability.

The arm was made of a 3/8″ thick by 3/4″ wide piece of mahogany. We fashioned a basket from a plastic piece from a game my son didn’t use any more and epoxied and screwed it to the throw arm.

The other end of the throw arm is ensnared in a wound nylon mason’s string that spans the base.  I tied it into a loop and wrapped the ends around a pair of dowels protruding from the side.  We really cranked down on them to add plenty of tension to the skein, and my son drilled dowels into each side to work as a catch to prevent the string from unwinding.  Catapults using this sort of propulsion method were known back in Roman times as an onager – the local name for a wild donkey with a mean kick.  Believe me, even in miniature, this thing lives up to the image.

The final touch was to add a hook and eye catch to the base and the throw arm, and tie a length of string to the hook.  Once the projectile is loaded, a quick tug on the string is all it takes to trigger the mechanism.

To test how effective our siege engine was, we searched the house and found an appropriate missile to commemorate the opening weekend of the NFL season.  A countdown – 3…2…1… – and FIRE!  The catapult lobbed the miniature foam football a good five feet, with a maximum height of about two feet over the ground.  A perfect long pass to an open receiver down field!

My son is bringing the onager to school to be graded, but he promised that he would return home as any conquering hero would to Rome – with the prized siege engine at the head of his victory column.

I told him that when he comes home, he has to use the famous quote from Julius Caesar – Vini, Vidi, Vici… I came, I saw, I conquered.

Stuff I’ve Built: The Nakashima-Inspired Bench

  • July, 2009

I have been a George Nakashima fan since my neighbor lent me his autographed copy of Soul of a Tree. Nakashima was a master at blending crisply-cut details with wild look of wood slabs cut from the log.  Live edges, bark inclusions and all make his tables something much more grand than just a plain old table.

For the past few years, I had wanted to find a suitable piece of wood to use to build my own slab bench, but my hardwood suppliers here in Florida weren’t able to easily lay their hands on such a board.  When I had mentioned what I was looking for to Eric Poirier of Bell Forest Products, he located the sweet board for me.  Hard maple with both bird’s-eye and tiger effect in it.  The wood makes the bench for me… And, the live edge of the board… WOW.

For the base, I used some mahogany and a strip of tiger maple.  My friend Craig Andrews drew out the base for me on Sketchup, and it looked very cool.  I used a jigsaw and my oscillating spindle sander to bring it to final shape.

The stretcher passes through two open mortises in the legs, giving some visual interest to the piece.  There is a top stretcher that is mortised into the two legs.  This provides a more than adequate surface to screw the top to the base.  Yes, I used screws.  The thought of cutting and chiseling through that board’s surface for through tenons didn’t do anything for me.  Maybe for a more ordinary looking piece of wood on a later project…

I had to start the finish at my hardwood supplier, Weiss Hardwoods in Largo. They had the big Powermatic wide format belt sander that took the wood from rough to baby’s bottom smooth in about three minutes. I gladly paid the very reasonable fee to have this done for me instead of trying to scrape and sand it smooth myself.

Once I got it home, I used card scrapers and my cabinet scraper to fine the surface up even more.  A coat of 1# cut shellac sealed all of the wood on the project, and I sanded that down with 400 grit wet/dry paper to make the wood velvety smooth.   I followed that with three top coats of my finishing mix on the entire project, sanding with 600 grit paper between.  Then, two coats of wipe on poly were added to the top to provide additional protection.  This was finally followed by some paste furniture wax.

This was a very rewarding project.  I love to watch people run their hands over the polished top and the live edges when they see it for the first time.  That tells me that I think I may have done Nakashima proud.

Stuff I’ve built: my kids’ step stool

  • April 2000

Being a dad is one of the best things that has ever happened to me.  Watching my two sons grow up from birth has filled me with awe and amazement.  From hearing them cry for the first time to hearing them figure out their math homework has been nothing short of a miracle.

Oh, sure, it’s had its ‘moments’, but those rough times have been more than compensated for in all of the good stuff.

The Kids' Step StoolOne of the toughest things to do as a parent is to let your kids discover their independence.  When that three-minute-old child is handed to you, he or she is 100% dependent on you.  Later, they will learn how to turn over, sit, stand, talk, eat for themselves, walk… then run.  All of this is preparation for the day they leave home and make their own way in the world.

To help my boys on their road to independence and self-reliance, I built this – a plain pine step stool.  After all, kids are pretty short and can’t reach all of the adult-sized amenities. Very roughly based on a Shaker design, it was – to that time – the most involved project I had ever tackled.

I built the sides out of pre-glued pine panels I picked up at the local Home Depot.  Those panels are pretty convenient for the beginner woodworker – they have tight joints and are made of solid wood.  The piece I bought was long enough for me to cut out both sides.

After I notched out for the step with my jigsaw, I also notched out for a back stretcher.  I saw this piece done for the fancier step stools Norm Abram built on the New Yankee Workshop and figured it would help strengthen the piece.

The step treads and back stretcher were cut from leftovers of the panel . Assembly was pretty easy – some glue and finish nails. I glued and nailed the little stretchers under the fronts of the treads to give them extra support.

I sanded the piece down with my 1/4 sheet finish sander and brushed on two coats of Minwax’s Poly Shades honey pine to give it a ‘pinier’ look.

While this step stool wasn’t made of high-end exotic hardwoods and put together with dovetail joints, it has held up for the past nine years under some pretty tough use.  Its primary home was parked in the kids’ bathroom, so the little fellas could reach the sink to brush their teeth and wash hands.  The stool even served the boys well in the kitchen where my wife and I gave them their first cooking lessons.

And, amazingly enough, my wife and I would use the stool to stand on when we painted the rooms in our home.  It was just tall enough to make trimming out the ceiling an easier chore.

Today, the piece is just as solid as it was the day it was completed.  It’s still sturdy and easily holds the weight of my boys (Who both now tip the scales over 65 pounds) and their dad (Who tips the scales at a much higher weight than when he built it).

While I would build something like this much differently now, this project wasn’t as tough as you might expect, and was pretty easy to build for a beginner with few basic tools.

Stuff I’ve Built: The Simple Cross Project

I’m from a pretty large Italian-American (read Roman Catholic) family.  My wife’s family is also Roman Catholic.  This means that during the spring of every year, we get notified about upcoming First Communions and Confirmations for nieces and nephews.  These events are pretty special, and buying a gift card to Target really won’t cut it as an appropriate gift for the child being honored.

What I came up with was the simple cross project.  This is not only a memorable hand-made gift, it’s also a great way to practice your skills on a small project and use up some of that really choice scrap wood lying around your shop.

Cross BlankIn order to make the cross a little more visually interesting, you will want to do a glue up of some contrasting woods into a blank anywhere between 1 1/2″ – 2 ” wide.  Maple and walnut make a classic combination, but any combination will work.  For this cross, I used some tiger maple and padauk that had been lying around for a while.  I glued the pieces together into a strip that measured approximately 22″ long.  You won’t need all of the length, but it’s better to have more than less…

Once the glue is cured, that’s a great time to pull the piece out of the clamps and either sand or plane them flush.  You want the pieces to be a uniform thickness, but the exact thickness isn’t that critical.  I shoot for 3/4″ thick using my thickness planer.  I’m left with a pretty sweet looking strip that’s ready to work.

The next step is to square up the ends.  I did this on my table saw with my Osborne EB-3 miter guide.  If you left your blank long and you had snipe, you will be able to clip off those affected areas.  This is also the time to start cutting the pieces to size.

Cross BlankNow is a good time to tell you that when I built these crosses in the past, I would use a half-lap joint.  It’s a very good joint for this application, but they took a long time to cut and it seemed no matter how careful I was, I could count on something going wrong… maybe the joint would be a wee bit too sloppy, maybe the thicknesses weren’t perfect.  Now, I’m using dowels to do the joinery, and I have found it to be an easier way to go.

The upright piece – with my project’s width at 1 3/4″ – should be 12″ long.  That’s what looks right to my eye.  I also like to keep the upright intact from top to bottom – I feel this makes the cross look more ‘uplifting’. The crosspiece should measure out about 2/3 of that length – 8″ side to side.  Using the half-lap method, you would cut this 8″.  Using dowels, subtracting the width of the piece and dividing the remainder in half, I came up with two pieces 3 1/4″ long.

The hanging slotBefore you get into the joinery, there’s one more step that is critical to perform.  If the cross is going to hang on a wall, you will need to provide some method for that.  Sure, there are keyhole router bits that will give you the properly shaped slot, but I have found that a small diameter dovetail bit will be adequate.  Just plunge the work down onto the bit installed in a table mounted router somewhere above where the crosspiece will be, and push the work so the bit travels toward the top of the upright.  This will give you the right shape so someone could hang this on a nail in the wall. Do it now, or it will be tough going around the crosspieces.

The Joint GenieFor the dowel joinery, I turned to the Joint Genie. I have found this to be a very precise dowel jig that gives a lot of flexibility.  It consists of a nickel plated body with through holes spaced evenly.  It also has fins on the edges – by using the fins, it’s easy to roughly center the dowel spacing on the board and allows you to index all pieces to this same spacing.  A tail fin sets the position from the end of the board consistently.

Drilling the dowel holesUsing the block with the 1/4″ dowel openings and the supplied 1/4″ bit and stop collar, I clamped the jig in place and using the dowel holes at the bottom of the jig, drilled two holes.  I repeated this operation on the other side, flipping the fins to the opposite side of the jig to get the same reference.

From there, I used the jig to drill into the ends of the cross pieces.  Again, the Joint Genie allowed me to get the proper spacing the first time out – a very useful feature.

Ready with dowelsHere’s a shot of the cross dry-fitted with the dowels in place.  I know that dowels aren’t going to provide the strength of the cross-lap, but this is a decorative piece – and I have found myself having to make lots of these (My record for one session was five).  The dowel process really speeds my joinery and still provides all the strength I need.

All I need to do now is glue it up, sand and finish, and it will be ready to package and ship.  This one is going to my Godson for his Fist Communion, but I’m sure I’ll  be building more…