
I’m from a pretty large Italian-American (read Roman Catholic) family. My wife’s family is also Roman Catholic. This means that during the spring of every year, we get notified about upcoming First Communions and Confirmations for nieces and nephews. These events are pretty special, and buying a gift card to Target really won’t cut it as an appropriate gift for the child being honored.
What I came up with was the simple cross project. This is not only a memorable hand-made gift, it’s also a great way to practice your skills on a small project and use up some of that really choice scrap wood lying around your shop.
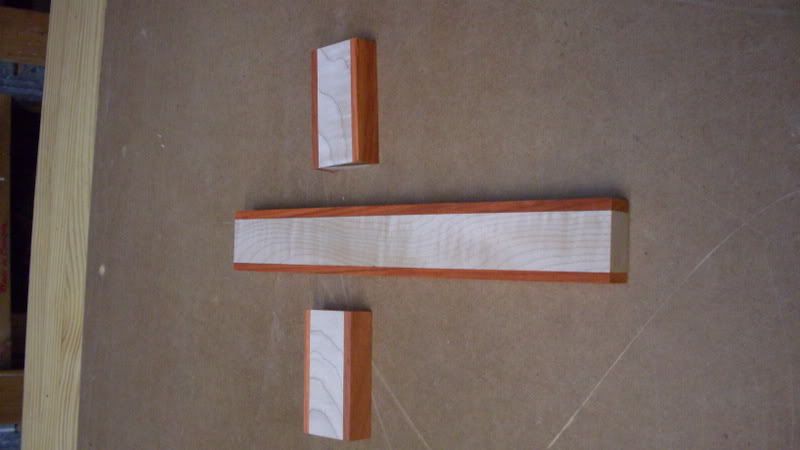
 In order to make the cross a little more visually interesting, you will want to do a glue up of some contrasting woods into a blank anywhere between 1 1/2″ – 2 ” wide. Maple and walnut make a classic combination, but any combination will work. For this cross, I used some tiger maple and padauk that had been lying around for a while. I glued the pieces together into a strip that measured approximately 22″ long. You won’t need all of the length, but it’s better to have more than less…
Once the glue is cured, that’s a great time to pull the piece out of the clamps and either sand or plane them flush. You want the pieces to be a uniform thickness, but the exact thickness isn’t that critical. I shoot for 3/4″ thick using my thickness planer. I’m left with a pretty sweet looking strip that’s ready to work.
The next step is to square up the ends. I did this on my table saw with my Osborne EB-3 miter guide. If you left your blank long and you had snipe, you will be able to clip off those affected areas. This is also the time to start cutting the pieces to size.
 Now is a good time to tell you that when I built these crosses in the past, I would use a half-lap joint. It’s a very good joint for this application, but they took a long time to cut and it seemed no matter how careful I was, I could count on something going wrong… maybe the joint would be a wee bit too sloppy, maybe the thicknesses weren’t perfect. Now, I’m using dowels to do the joinery, and I have found it to be an easier way to go.
The upright piece – with my project’s width at 1 3/4″ – should be 12″ long. That’s what looks right to my eye. I also like to keep the upright intact from top to bottom – I feel this makes the cross look more ‘uplifting’. The crosspiece should measure out about 2/3 of that length – 8″ side to side. Using the half-lap method, you would cut this 8″. Using dowels, subtracting the width of the piece and dividing the remainder in half, I came up with two pieces 3 1/4″ long.
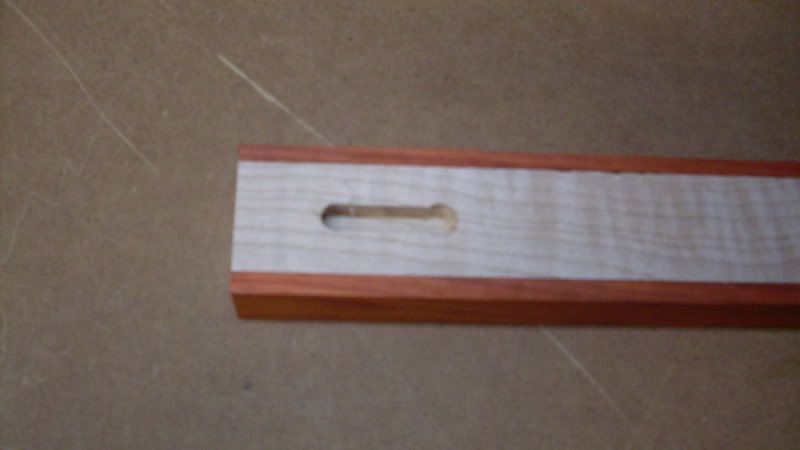 Before you get into the joinery, there’s one more step that is critical to perform. If the cross is going to hang on a wall, you will need to provide some method for that. Sure, there are keyhole router bits that will give you the properly shaped slot, but I have found that a small diameter dovetail bit will be adequate. Just plunge the work down onto the bit installed in a table mounted router somewhere above where the crosspiece will be, and push the work so the bit travels toward the top of the upright. This will give you the right shape so someone could hang this on a nail in the wall. Do it now, or it will be tough going around the crosspieces.
 For the dowel joinery, I turned to the Joint Genie. I have found this to be a very precise dowel jig that gives a lot of flexibility. It consists of a nickel plated body with through holes spaced evenly. It also has fins on the edges – by using the fins, it’s easy to roughly center the dowel spacing on the board and allows you to index all pieces to this same spacing. A tail fin sets the position from the end of the board consistently.
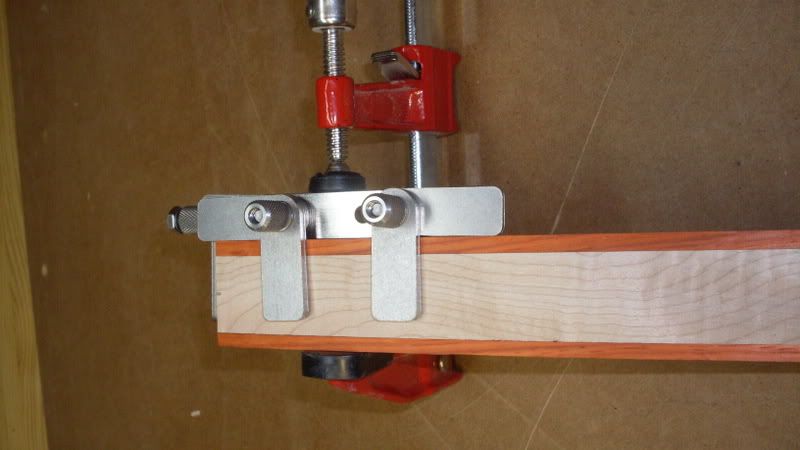 Using the block with the 1/4″ dowel openings and the supplied 1/4″ bit and stop collar, I clamped the jig in place and using the dowel holes at the bottom of the jig, drilled two holes. I repeated this operation on the other side, flipping the fins to the opposite side of the jig to get the same reference.
From there, I used the jig to drill into the ends of the cross pieces. Again, the Joint Genie allowed me to get the proper spacing the first time out – a very useful feature.
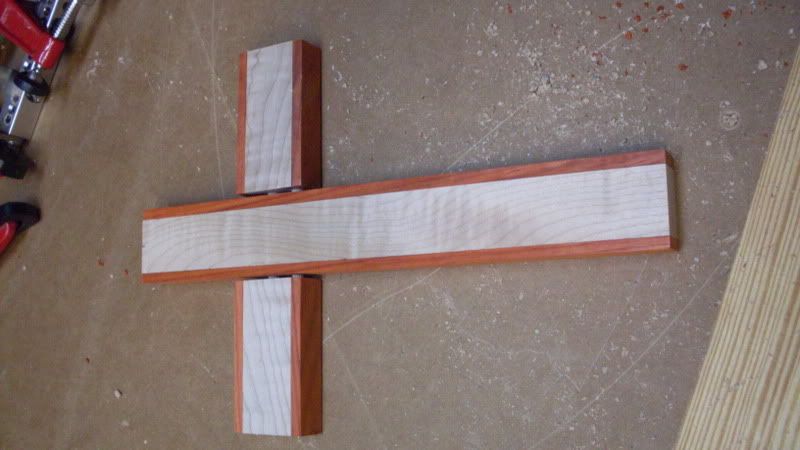 Here’s a shot of the cross dry-fitted with the dowels in place. I know that dowels aren’t going to provide the strength of the cross-lap, but this is a decorative piece – and I have found myself having to make lots of these (My record for one session was five). The dowel process really speeds my joinery and still provides all the strength I need.
All I need to do now is glue it up, sand and finish, and it will be ready to package and ship. This one is going to my Godson for his Fist Communion, but I’m sure I’ll be building more…
Interesting subject. I did the same thing for my daughter 2 years ago, only our church use Pew Banners. http://www.woodworking.org/photo/displayimage.php?album=lastup&cat=15231&pos=10 Cross made of purpleheart and yellowheart, but I did not like the broken middle cross. Built new crosscut sled to nibble away precisely, the purpleheart edges, to get the yellow inner cross to mate up. Ended up just using a sharp chisel. Mounted to a board to slice off 1/8″ piece to mount on the banner. Still have the remains for something.http://www.woodworking.org/photo/displayimage.php?album=lastup&cat=15231&pos=10
Sir:
I asked The Wood Whisperer for data in reference to a cross for a friend who parished in a Helicopter crash.
The man was my partner in crime (police officer) and he and his girlfrined went up in his helicopter and we currently feel the transmission failed. Both parties crashed to the ground and both were killed. I worked with the officer for some 21 years and worked with his girlfriend for 4.5 years. They were awesome people.
Well the other day I visited the location of the crash which happened to be next to a major highway here in Arizona. I know the family is not wealthy and I would like to build two crosses (very decorative) and place them by the roadside.
I was wondering if you would have any suggestions or make reference where I might get a plan that would not be plain, as they were special people who loved life and their friends
Thanks in advance
Greg
Greg –
I really haven’t built anything fancier than that plan… so I’m kinda at a loss of suggesting where you can look for ideas. Perhaps a visit to a few local churches might show you a few different crosses you can look at which may give you a starting point….