The coolest job in any restaurant belongs to the bartender. Sure, the chef gets the credit for the outstanding meal, the maître d’ for the ambiance of the place and the wait staff for the overall dining experience.
But, when people want to have fun and strike up a conversation, they turn to the bartender. Think Isaac on the Love Boat. Tom Cruise in that stinkin’ movie about being a bartender.

“Yes, Mr. Bond would like his martini shaken, not stirred, Mr. Sinatra wants a highball, and Evel Knievel wants two fingers of Wild Turkey before he tries to jump the fountain in the parking lot on his Harley.”
While no one may be hanging out in your wood shop, you can be just as cool by mixing your own wiping finish. Why mix your own? Instead of just relying on what a manufacturer thinks is the best mix, you can adjust your formula to fit your own needs – faster drying time, more film build, etc. Also, if you have cans and bottles of the components, you can use them in your finish instead of throwing them out.
Mixing your own finish is very easy. There are dozens of formulas out there to suit individual needs, but this is my formula I have used very successfully through the years.

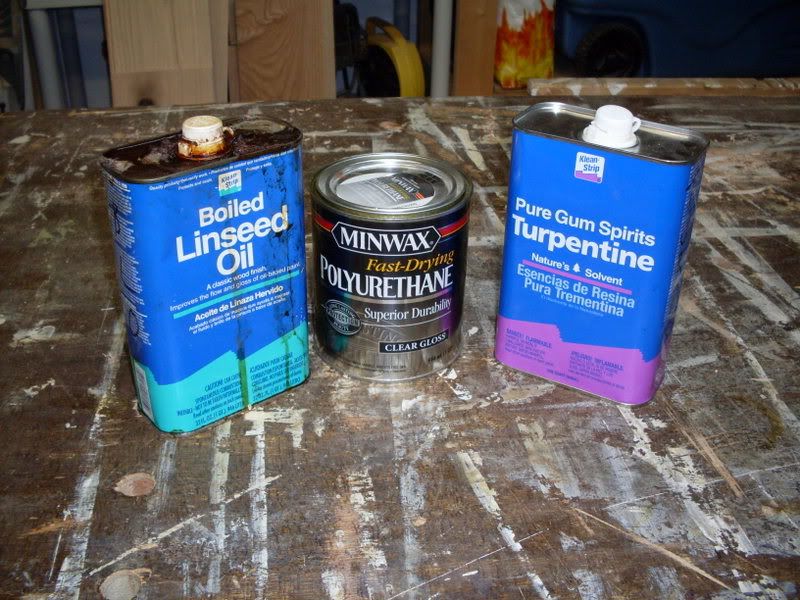
The ingredients can be found in any hardware store and start with boiled linseed oil (BLO). This natural oil helps the figure in wood ‘pop’ and gives it a rich, deep finish. The next ingredient is polyurethane or some other type of varnish. It offers a great deal of protection from water, abrasion and other hazards. Finally, you have to add a thinner to the mix. I like turpentine, but paint thinner or naptha will work as well. It makes the finish flow nicely and level without brush marks and runs.
Now, here comes the hard part – mixing it together. The ‘standard’ mix that a lot of people refer to is 1/3 varnish, 1/3 BLO, 1/3 thinner. While this does make a nice mix, I have found that I can mix it 1/2 varnish, 1/4 BLO and 1/4 thinner. It gives me a little faster build on the finish while still making for an easy wipe on.

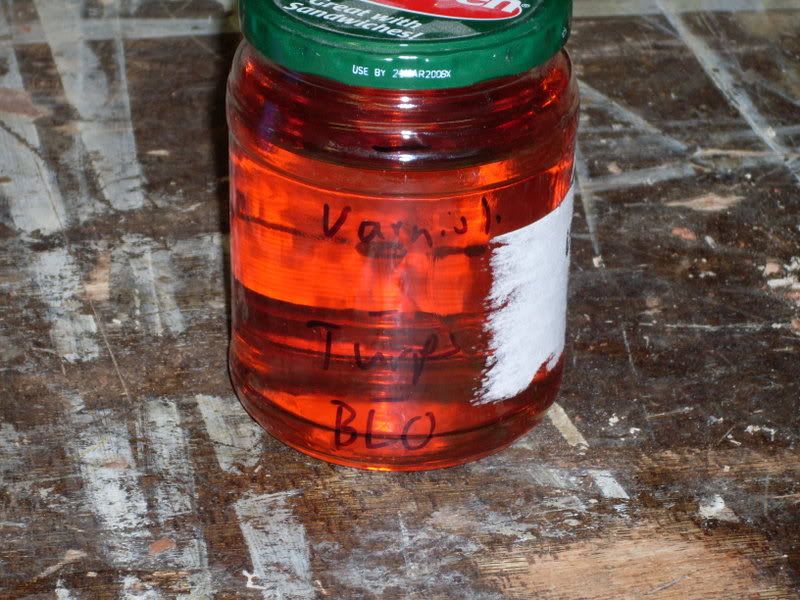
My scientific method for mixing involves an old pickle jar. I measured up from the bottom in one inch increments, and poured the ingredients up to the lines. No, you are not trying to send people to the Moon or split the atom, close enough will work…
After sanding the piece, I again prefer to wipe on a coat of 1# cut dewaxed shellac and sand it down to 400 grit after letting it cure. Then, I wipe on the finish with a rag. Don’t be bashful, the wood will soak up a lot of the finish – especially in end grain. Let it sit for about five minutes, then wipe off any excess with a dry cloth.
I love how easy the mix is to use, and I have yet to be let down.
Now, after all that hard work, I think I’ll take one of those fancy martinis to celebrate.

Thanks for the ingredients, Tom. Oh, and great pose! I especially love the Father of the Year T under that really nice jacket:D
Thanks, Vic. You’d think mixing up a finish would be brain surgery looking at how some people sweat the details. It’s really very easy.
I do clean up well, don’t I…
Actually, the shirt reads, “I’d rather be in the shop”, but Father of the year works too! 😉
Hi Tom,
Just a quick question…
Why do you first use dewaxed shellac and then the BLO/varnish/thiner mix?
Would’nt the shellac seal the wood, before having a chance to apply the mix and “pop” the wood with the BLO mix? Thanks!
I love your blog!
Hey, Jean, thanks for writing…
Yes, I do use the shellac before I add the finish and it does seal the wood – in this case, a VERY good thing.
You see, finely-grained hardwoods can be notorious for becoming blotchy. Cherry is a big time offender in this category. It does that because the grain of the wood can be wavy as it goes up the tree. It may not look like it, but the grain is edge grain in some spots, more end-type grain in others. Because these different grain patters absorb finish differently, you get splotching.
By putting on the shellac, you seal the wood. That’s the first step. The next step is that you sand the wood thoroughly with 400 grit wet/dry paper. This removes MOST of the shellac from the surface, but not all. The stuff deep down in the end grain stays put, sealing that part of the wood. Thus, you are left with no splotching.
You can read more about the process at:
http://tomsworkbench.com/2008/01/08/im-so-finished/
And, you can see a project finished this way with plenty of ‘pop’ here:
http://tomsworkbench.com/2009/07/29/stuff-ive-built-11/
By the way, thanks for the compliment about the blog. I’m glad you like it!
Oh I see!!
I get it. Thanks a lot!
So, I just finished a nice 6 drawers lingerie chest made of alder and I went right away with the “mix” after a very good sanding. I suppose if your mix is transparent, as in contain no stains or pigments, then you probably don’t need to worry about blotching right? But then, I see in your latest table project, you still applied the coat of dewaxed shellac, so my theory does not hold…
Can wood blotch even if your mix is color-less?
I like the results I obtained on my project, however one thing I noticed and that didn’t happen in my test run with a piece of wood that I polished using the same method is that in some instance, I can see quite a bit of difference in the texture/color of the wood between glued boards. I just guessed different pieces of wood would hold the mix differently and there was nothing to do about it… Maybe if I had use a precoat of shellac+sanding, I could have had a better texture blend between boards… Does that make any sense?
PS. Sorry for the long post.
I think something just “poped” in my head! 🙂
Not only does it make sense… it’s why I do it.
Yes, you can get a blotchy finish even with a non-colored mix. Cherry is NOTORIOUS for this kind of problem… I wouldn’t be surprised if Alder was the same way.
I have found that if I do glue ups and I cut the components and glue them up from the same board. This usually gives me a glue up with similar characteristics… But, of course, your mileage may vary.
Just give the shellac seal coat a chance, and I have this feeling you will be a convert…
Thanks Tom
I love using poly but the mix sounds better. I love cherry but had almost given up on using it for projects because of the blotching. I just used shellac as the only finish for a rocking horse (maple and walnut) for grandson. Will it hold up with varnish? I didn’t want to use anything else to protect the child. I did notice it sands out quite nicely.
The shellac washcoat really makes cherry a whole lot easier to apply a finish without blotching. Now, a thicker coat of shellac by itself is a great, classic and time tested finish.. so, there really isn’t any need to put on another topcoat if you don’t want. In fact, with kids stuff, you might even want to lean on shellac more than ever, since it is safe for kids to gnaw on… shellac is used to give candies their glossy coats.
Thanks for writing, Gary!
Great post Tom. I’ll have to experiment a bit too
I’ve been meaning to getting my mixologist on in the shop, but have never made it past the liquor cabinet on my way there. I may just have to put the blinders on one of these days and give it go if I actually make it into the shop.
Thanks for a great recipe to add to the finishing stockpile.
Oh, and…the picture…PRICELESS!!!
Give it a whirl. It’s a great way to finish…