Be sharp

So, this past Tuesday night, I was asked to come to the St. Petersburg Woodcrafters Guild to do a quick talk about sharpening.

Am I an expert on sharpening? Nope.

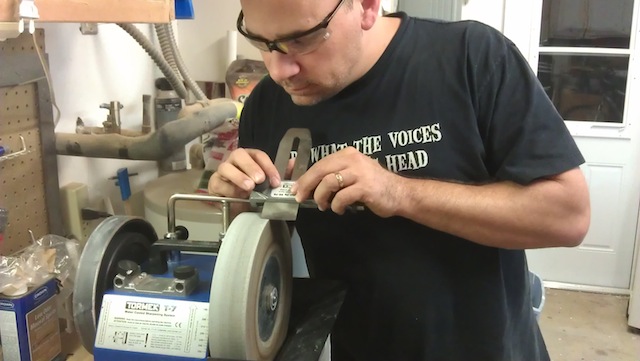
But, I have spoken with Ron Hock a ton, and I am sponsored by Tormek, so I can fake it until I make it when it comes to the topic.

DSC02880

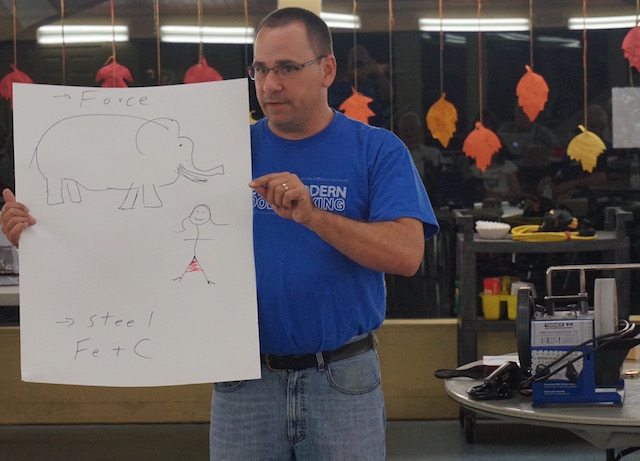
First, though, I had to talk a little bit of physics… something I know less of. I used an interesting example that I picked up from one of my high school science teachers.

A 140 pound woman wearing high heels and a 2,500 pound elephant walk onto a beach (Sounds like the start of a bad joke, right?). Which one leaves deeper footprints in the sand?

The answer is the woman, even though she may be about 17 times lighter than the pachyderm. The reason? The force of her weight is concentrated on a much smaller area than the elephant’s foot.

That’s why we sharpen tools. Sharp tools focus the force used to work them onto a smaller point, making it easier for them to sever wood fibers. Pretty simple, no?

chisel

The other thing I mentioned was that steel is basically a carefully controlled mix of carbon and iron with some other elements added to adjust the  properties of the tool. An important part of the process is how quickly the steel is cooled and reheated to relieve stresses and tempter the material. Sharpening methods that generate too much heat can remove the temper, leading to weak tools. Ron Hock gave me a great lesson on this in a 2010 article I posted called Steel Yourself! 

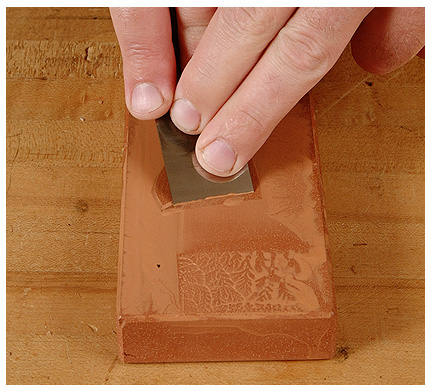
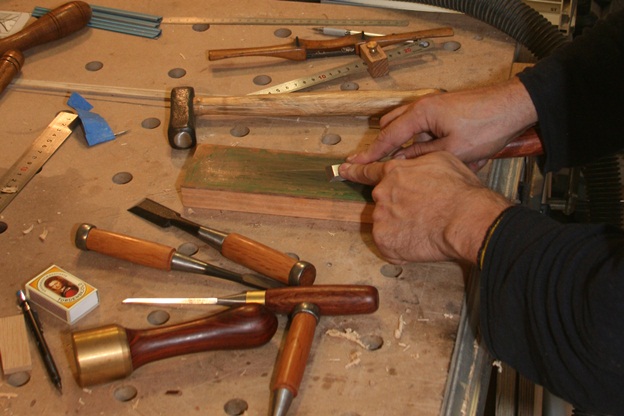
With those basics out of the way, I jumped into business, recounting tales from my 2009 post A Honing Beacon, which talked about the pros and cons of different sharpening media. I went from the cheap and cheerful sandpaper systems to the more expensive diamond stones. Basically, if you get good results from your system, why mess with it?

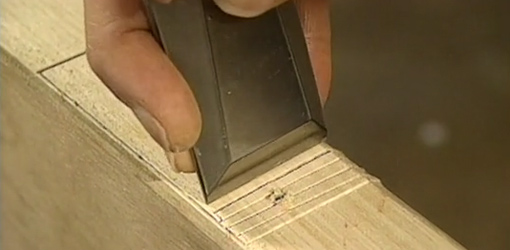
I also covered the differences between a flat ground bevel and a hollow bevel, which can be obtained by sharpening on a wheel of some type. I posted The Right Grind in 2012 which covered the difference between the two, and what a microbevel is all about.

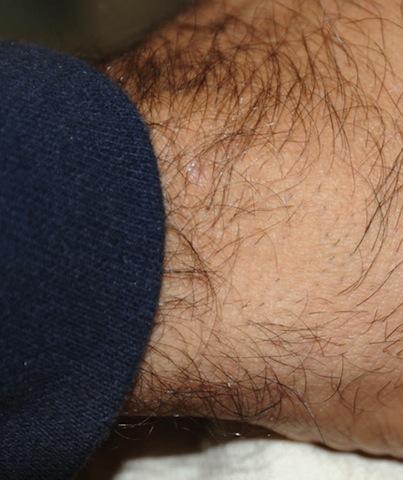
I also talked about different ways to see how sharp the blade is at the end, something I mentioned in a post called How Sharp? that I did in 2012. From creating woodworker pattern baldness to slicing sheets of printer paper, there are some tried and true methods to verify that you indeed have sharp tools.

I even went into detail on stropping back in 2012 with my article Strop! In the name of love. Stropping is that final step that puts the razor edge on tools, making them a real pleasure to work with.

While it was great to talk about sharpening, it was even better to be in front of the Guild again, sharing a little bit of what I know about sharpening and helping folks understand this important part of the craft again.

Looking ahead for holidays

Gosh, we are just a little bit less that one week from Halloween …

pumpkins

Which, of course, means that all of the stores put their holiday displays up about four weeks ago, right after they pulled the back to school stuff off the shelves.

shop 'til you drop

And, just as merchants need to plan ahead for the busiest season of the year, so do we woodworkers!  To help with this effort, it’s time to bring back the ever-popular Last Minute Elf event!

Kids

If you have been here in years past, you know what this is all about – we are in the last week of October, and you think you have TONS of time to go out and build a project or projects for the loved ones on your list. It’s going to be something over the top impressive, and you just know everyone’s going to just be wowed.

inspiration, please strike!

Only, of course, to find yourself totally stressed out in your shop the last few nights before you have to give the gift trying to figure out what to build in the first place.

What we’re looking for is for you guys to share your ideas for simple projects to build that don’t require a lot of time, material or crazy advanced skills to build or execute. Be sure to send a photo, a few dimensions and some simple instructions on how to build the piece. Maybe a few words on how the project was to build or why it was so important for you to build it.

Iggy will check out each of the projects, and for the week of December 7 – 11, we will feature the winning entries on this blog. If your project is chosen by my furry friend, I will beg, borrow or plead for a few gifts from my sponsors and anyone else who wants to help with the effort.  I will keep everyone up to date on what we come up with.

Be sure to send your entries to iggy@tomsworkbench.com, and be sure to put Last Minute Elf 2015 in the subject line.

Hold your top

An interesting thought occurred to me during the summer of coffee tables. Namely, how do you attach a table top to a table base?

One hand clapping?

Oh, this sounds like a total Zen master type question. Kind of like what is the sound of one hand clapping? You just nail that sucker down to the base and … oh, wait.

Didn’t we once establish on this blog that wood moves due to changes in humidity? Oh, yeah, we did.

Craaaack...

So, if you lock a wide table top down to a rigid base, there’s a chance that it could split due to differences in grain orientation and if you have not accounted for wood movement in your design. Believe me, you do not want to glue a breadboard end the entire length of the piece. Wait a few seasons and craaaack…. you got it.

So, what are some ways you can get around this? There are more than a few options available to you. For instance, a few years ago, I built a trestle-based work table, I captured the top of the trestles in between two battens screwed into oversized holes. The top  of the trestle simply rested between the battens and a dowel pin held it in place. Simple, elegant, and it allowed for movement.

Another technique I used on the Cotterman. Basically, I screwed the table base directly to the top using pocket screws, but only on the sides of the table which paralleled the top’s grain. Since wood moves very little along the length of the grain, socking it down in that direction provides little in the way of cross-grain issues.  That means I used just one screw on the short cross pieces of the table right in the middle to hold the top flat across its width.

For the round table, I turned to a mechanical fastener known as a z-clip. Either you can cut a saw kerf (or do what I do and use a biscuit cutter to make a small kerf) in the table supports.  One end of the clip wedges into the kerf while the other end is screwed into the bottom of the table. In this arrangement, the top is free to move, and the z-clip pivots to allow the board to move.

z clip

Sure, it may take a little bit more time and effort to design the table to accomplish these goals, but believe me, after all of your hard work and effort, you will be happy that you took the time.

A house divided

So, back in the early 1860s, Abraham Lincoln was able to see that gosh, there was something bad about to go down.

house-divided

And, he was right, what with the American Civil War which took place from 1861 – 1865.

But, I’m sure if he was talking about a workshop, he might be saying something along the lines of a shop without a pair of dividers is really not a great place to get any work done.

Why not?

MartinPlate

Well, these babies have been an indispensable part of a craftsman’s tool kit for centuries. As you can see from this plate from woodworker Thomas Martin from 1813, a pair of dividers is a critical piece of layout equipment.

Dime StoreIf that’s the case, why have I been relying on something like this?  I have bought my share of plastic dividers at the back to school sales for years, and those suckers would break, wouldn’t hold worth a darn and were just difficult to work with.

DSC02862

I tried to upgrade mine by going with these I picked up at an office supply store. They were better, but the non-marking leg has a point that is adjustable, which means that it’s bound to slip into the leg when you need it to sit firmly on the piece you are measuring. The other problem is that the marking leg is a small piece of graphite which fits into a channel on the leg – difficult to find a replacement for.

DSC02863

So, with these wedding projects coming up that require dividers to do some accurate layout, I sprung for a pair of these. They weren’t all that expensive, coming from Grizzly Tools, but they are solid. Both legs are pointed, which means I can use them with or without a pencil. They lock down solidly, and they are heavy-duty, a real handful.

DSC02864

What can you do with dividers? Well, there is the obvious – you can trace out arcs and circles.

But, how about stepping off evenly-spaced measurements across the face of a board? Stepping off measurements for dovetails?Bisecting an angle? 

bisect

Doing all of this without math? Sign me up!

Now that I have my new set of dividers, I have chucked my old sets, degreased the new ones and wiped on a good coat of paste wax to keep rust at bay.

Now, to take them for a spin to see what they can do!

Pass the rock!

So, for the past few weeks, our family has been moving on from the loss of my father in law. And, it’s been hard, but the impact has been significantly lessened by the fact that life continues on.

Carolina and Kenny

In fact, there is some great news that the family got. First, we found out that my niece Carolina (you remember when I built her hope chest, right?) announced that her boyfriend popped the question, and she said yes.

Seth and Dena

After that,  we got the news that our nephew Seth dropped to one knee and proposed to his girlfriend, and she answered in the affirmative…

Then, as if the good news wouldn’t stop coming, our neighbor’s daughter had the question popped to her, and SHE said yes as well.

Woah. Great news all around!

But, what’s a woodworking uncle to do?  I mean, we’re going to be headed to a LOT of ceremonies in the upcoming year, and I’m going to want to shine when it comes to showcasing the skillz.

So, I started looking for appropriate wedding gifts to give. A cutting board? Meh, too pedestrian. A hope chest? Already done for Carolina. A picture frame? Shesh, they are probably going to get a dozen of those…

Iggy has an idea

Wait a second. What if I did something special that they could treasure for years to come that could serve as a picture frame, hold memories and demonstrate some rudimentary skill as a woodworker?

Would it be possible?

box

I think so. I’m thinking a two-part project. The first being sort of a deep wooden memory box with a picture frame as the cover. This way, the couples could put a photo from their big day in the cover while storing other treasures of the big event – the wedding invitations, some other important favors, etc. inside.

Now, a box out all by itself on a shelf would be plan and BOOOORing. What this project would need is a special stand of some type, and I’m thinking that perhaps this past Sunday’s Weekly Plan might be what fills the need.

A Roubo bookstand

The Roubo bookstand would be an excellent way to showcase the box, suspending it above wherever it will be placed and really making it look snazzy.

Fortunately, two of the weddings aren’t planned until next spring, but one may be taking place around New Year’s Eve, so I may have to put my behind into gear and make these pieces a reality.

There’s nothing quite like a challenge, right?

Stuff I’ve built

The round coffee table

Here in Florida, there are license plates that go on about the endless summer we experience.

Endless_Summer_plate

But, as you know, I promised Rhonda that this was going to be the summer of coffee tables, and I was glad that I was able to meet the deadline.

The Cotterman capped off the back room with a large, rectangular table built from construction-bin-sourced clear southern yellow pine, featuring a bottom shelf for storing games and other goodies.

The table, top view

The front table I wanted to be a bit more refined. As you can see, I opted to not put storage in this table, as the front entertainment center expanded our storage considerably. Also, our front room isn’t all that large to begin with, so by shrinking the dimensions a bit, I am able to make walking around the table a little easier.

flared legs

This is how the flared legs look in place. By keeping the outside points of the legs inside the diameter of the table top, I can reduce the number of stubbed toes someone is going to have to endure.

Made of some gorgeous walnut, I hope that this table serves us well for years to come. In fact, Rhonda and I may need to start looking to replace the couch up front to something a little snazzier to match how nice the table looks.

Next up, some good family news for a change. Developments which will require the services of a woodworker. But, the details will have to wait for a later post!

The Weekly Plan

Roy Underhill’s Roubo Bookstand

Andre Roubo is a well-known 18th century French woodworker whose work has inspired thousands of workbenches. However, his masterwork L’art du Menuisier, he had plans for more than just his workbench.

RouboStand

Roy Underhill of the Woodwright’s Shop shows the plans that Roubo had drawn up for a bookstand made of a single board. The interesting part – the wooden knuckle joints allow the pieces to pivot while never being separated.

In his own unique way, Roy shows how this is done with simple hand tools. It’s a must-see.

part of the Wood Talk Online community