Category Archives: Projects

Stuff I’ve built: Carolina’s hope chest

April, 2010

(Yes, I am aware that there are very few close-up photos of this project.  I was rushing to get this finished and given in time for this past Sunday and it totally slipped my mind.  However, I asked my niece to snap a few photos to add to the article… coming soon!)

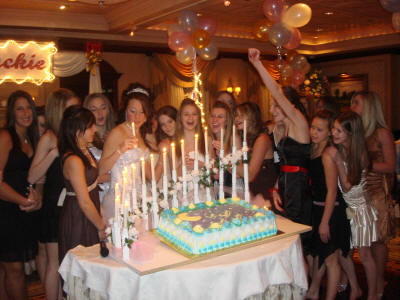
Regardless of where you go in the world, you are likely to find ‘coming of age’ ceremonies for kids reaching their mid-teens.  Confirmation in Roman Catholic churches, Bar or Bat Mitvahs in the Jewish faith and the Quinceañera found in Latin American cultures.  Debutante balls. Getting your driver’s license. All of these ceremonies show the community that the child has now reached an age where he or she can start taking charge of his or her own life.

In most western cultures, we celebrate a Sweet 16th party for girls.  This tradition goes back to the bad old days, when life expectancy was only a sobering 45 or 50 years.  When a young lady reached that milestone, she was considered eligible to be courted for marriage in order to  start a family while she was still young and healthy.

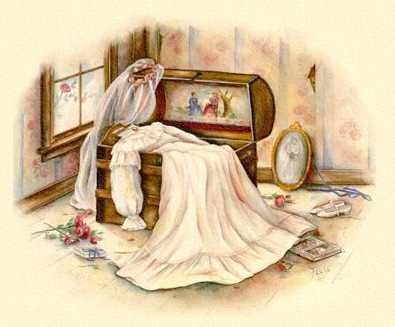
To help get the young lady ready for marriage, the family would start to build her trousseau or dowry – the items she would bring with her into the union. Cooking pots and pans, serving dishes, linens and other daily items were typically included, as well as any small favors given to her while she was younger – perhaps a treasured blanket made by a grandmother or something else with meaning.

In order to safeguard these items, many times a hope chest or dowry chest would be built.  This way, the items could be collected and stored until the big day, when it would be loaded onto the horse and buggy for the trip to the couple’s new home.

Starting in the 1950s, with the arrival of registering for bridal gifts at local department stores, the tradition faded into memory in many families . But, of course, as a woodworker, I can’t let such a tradition go silently.

Since I don’t have a daughter of my own, I feel a close tie to the four nieces in my family.  Carolina, the eldest, recently celebrated her 16th birthday.  Since I knew she was going to be busy with parties involving her friends, and she was going to be joining us for Easter dinner this past Sunday, I figured I could be a little late with her present – a hope chest.

Many thanks to the folks at Wood Magazine for providing the plans for this blanket chest in the November 2009 edition, and I can’t say enough about Eric Poirier and the folks at Bell Forest Products who contributed the gorgeous tiger maple for this project.

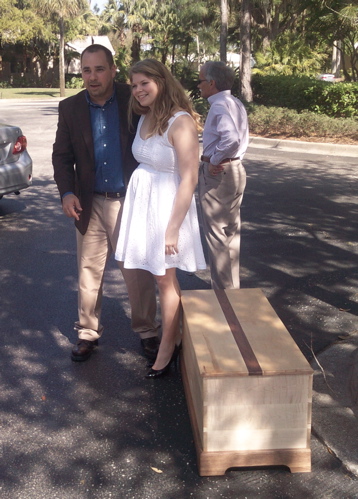
The body is glued up (now you know why I was posting so much about panel glue ups this past week!) tiger maple with variably-spaced dovetails cut on my Keller jig.  The top has battens across the middle glued right at the center and screwed in to allow it to expand and contract while still remaining flat.

Figuring the maple might look a little too stark without any contrast, I glued a strip of walnut down the middle of the top and also used walnut for the base molding. Since I also messed up the miters on the base molding (I know, don’t dwell on the accidents!), I rounded the mitered molded top over with a rasp and sandpaper.

We had been leaving clues for Carolina all week. The sound of the table saw on her phone mail.  A few hints on Facebook.  But, she didn’t have any idea what was coming.  We ate Easter brunch together with many of our family members, but didn’t let on what was in the trunk.

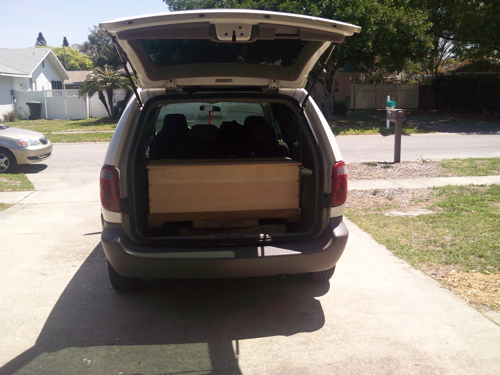
After we left the restaurant, we all proceeded to the back of the minivan for the big reveal.  I told Carolina that I had gotten her a new set of jumper cables to keep in her trunk as a present for getting her driver’s license.  She didn’t fall for it.

As I was opening the tailgate of the van, a thought ran across my mind.  Would a girl born in the age of text messages, the Internet and other modern conveniences even like something as old fashioned as a hope chest?  When I lifted the canvas drop cloth that was hiding the chest from view, I got my answer.

She loved it.

Do I want her to go out and get married now?  Nah, she’s still too young.  But, knowing that the hope chest I built will be part of her life from here on out is a pretty amazing thing.  Maybe something she will share with her daughter or granddaughter when she reaches her sweet 16.

Now, only three more nieces to go!

Stuff I’ve Built: The Trestle Table Base

July 2005

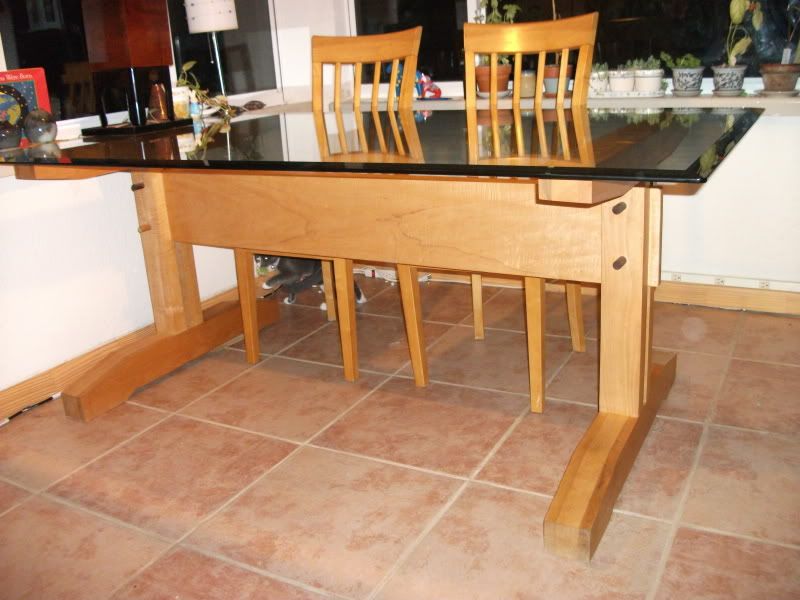
Before our neighbors had their daughter and son, they had a very cool all-glass dining room table. A glass top and two pedestals each made of 12″ wide glass strips joined at a 90 degree angle with two screwed together brackets.  It was stylish. It was striking.

And, after they had kids, and those kids started to walk, they discovered just how unstable it was. In fact, after one energetic evening of their son and daughter running near the table, our neighbors ended up holding the heavy table top once a little one slid into one of the table bases.

To help get the dining table issue under control, they asked if I could build a sturdy wooden base for the glass table top.  Something that would be a little heavier, a little wider and a whole lot more stable.

Since the husband of this couple was born in Japan, I thought I would go with an Asian-looking trestle table base. Something a little more graceful, something a little more muscular and something out of maple.

I built a pair of trestles starting with a massive base built up from three strips of  maple.  The middle strip was cut and glued into the sandwich allowing spaces to make ready-made mortises.  The same process was done for the top trestle.  Rather than build the upright support in the traditional manner, I glued two uprights into place, using the space between them as a mortise to receive the crosspiece. The uprights are glued and through doweled into the trestle base and bracket to ensure they don’t go anywhere.

And, what a crosspiece it is. A solid piece of maple – 8″ wide by 2″ thick.  Planed and sanded, the ends are tenoned to fit between the uprights. I drilled 1″ diameter holes in the uprights and drove dowels through the uprights and tenon to hold it in place.  I think it gives the piece a nice accent.

I sanded and scraped the piece smooth and finished it with a coat of 1# cut of dewaxed shellac sanded smooth with 600 grit paper.  Then I applied several coats of wipe-on poly to give a tough finish.

Today, their family has grown to also include a dog, two cats and their much older, bigger, faster and stronger children. And, the glass table top sits firmly on top of the table base, unmoved by the commotion and evening dinners.

Not bad for the strong silent type.

Woodworkers are a generous bunch

When you think about generous people, the first group of people that cross your mind might not be woodworkers.

Think about it.  We want tools for our shops.  We want prized timbers so we can build killer projects. And we relish each commissioned job that comes into our shop – a chance to buy even more new tools!

And yet…

My first group woodworking project happened when Gail O’Rourke invited me to the American Sycamore Woodworkers Retreat for the charity Build-A-Thon to benefit the American Cancer Society. Imagine my excitement. Flying halfway across the country to go to a professional workshop with woodworkers more immensely talented than me, each working toward a common goal.

I went back for the next two Build-A-Thons over the next two years, the last one benefiting Habitat for Humanity. Each time, the experience was uplifting, instructional and thoroughly enjoyable.

Since I started writing this blog, I have seen many other heart-warming stories brought to life by woodworkers  A nationwide effort to turn pens for service men and women to write home with.  A group of retirees who build instructional toys for teachers in the local school district.  An agency that helps disabled American veterans find employment in a woodworking-related field.

The more I see, the more I come to realize that woodworkers are really a generous bunch of folks.

This generosity now continues with Marc Spagnuolo, the Wood Whisperer. After helping Wood Whisperer guild member Duane Moore with a steamer trunk project, Marc discovered that Duane had received some troubling news about his cancer treatment.

To do just a little bit to help Duane, Marc has launched Woodworkers Fighting Cancer.  This is the first Wood Whisperer Guild Build – a small Shaker Table – and is donating $5 from his own pocket to the American Cancer Society for each Guild member who builds the project and sends him a picture.

Since he first rolled out the idea, others have offered donations toward the cause.  Marc keeps an up-to-date contribution ticker on his website, and as of this posting, he has raised more than $1,200 for the cause. Eagle America, Festool, Rockler, WoodWerks and Bell Forest Products have all lent their corporate support toward this effort, as have many individuals who visit his site. For those who don’t want to participate in the build or don’t want to join the guild, Marc has included a donation button.

Looking at an effort like this, I can’t help but feel as if woodworkers are giving from deep in their hearts.

And, I should also stop being surprised by this generosity… it seems to be the norm among woodworkers.

Stuff I’ve built: Purpleheart and Maple Cutting Board

February 2010

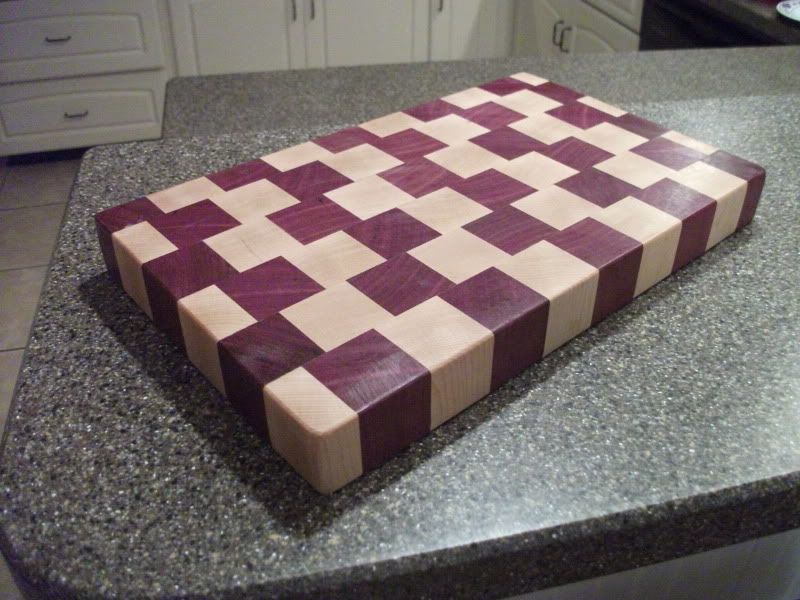
There’s nothing quite as simple – yet complicated – as an end-grain cutting board.

Sure, it’s just a flat, thick piece of wood you cut food on.  However, if you want it to be really durable, you want it oriented so that you are cutting on the end grain.  That’s the tough stuff..

Fortunately, there are many good plans for end-grain cutting boards out there.  Wood Magazine has a good one, as does the Wood Whisperer. Each of these plans offers step-by-step instructions on how to build them.

The wood for the board came from Bell Forest Products, and included a sweet piece of maple and another of purple heart.

I started by jointing and planing the boards flat and true, then ripping them into strips.  I glued the blank together with alternating strips.

Once dry, I took the boards out of the clamps and planed the assembly dead flat. Then, I crosscut the panel into 1.5″ thick strips, rotated them end for end and then stood them up with the end grain facing upward.  I shifted the pieces into a pleasing pattern and glued them into place.

While my glue up was pretty good, I still had to use a belt sander to get everything into perfect shape on the top.  First, 50 grit was used to get the pieces flush, then 80 and 120 to smooth things out.  Then, I hit it with my random orbit sander with 120 grit and 150 grit.  Since the top was going to see some abuse from knives, I didn’t want to make it too smooth.

I finished it with polyurethane thinned about 50% with mineral spirits, allowing the finish to soak all the way through the board and then wiped off the excess, as per Marc Spagnuolo’s instructions.  That seemed to do the trick.

Now, here comes the hard part.  I had originally built two boards, but I won’t be seeing them in my house.  I already gave one to a really nice couple who has us over their home  for gourmet dinners and really fine wine.  The other one?  Well, when my mom saw it, it became hers.

Oh, well… At least when I go to these homes, I’ll know the meals I’m eating were prepared on them!

Stuff I’ve Built: ‘Mars and Venus Rising’

January 2010

No, I don’t wear a beret, sit in coffee shops debating the merits of Karl Marx and snap my fingers when the improvisational jazz band finishes playing a set.

But, I do enter an annual art contest.

It’s that time again, when the National Arts Program co-sponsors an art contest here at the county courthouse.  County employees, relatives, volunteers and retirees are welcome to submit their projects for judging.

Amidst the many paintings, photographs and sculptures, I have entered my woodworking again.  In the past years, I have done pretty well in the competition, earning a first place in the adult intermediate category for the Contemplation Bench and Pagoda Box.  I took a second place red ribbon last year for the Fujiwhara Chest.

This year, I am back with two projects.  One, the Nakashima-Inspired Bench, was already featured in the blog.  Click here to read more about that project which has already gotten more than a few ooohs and aaaahs….

The second project is new, but you have seen elements of it already.  Remember last August, when I posted my article about bending wood?  And, when I made the entry about laying up a matched  veneer sheet?  You were actually seeing elements of this.

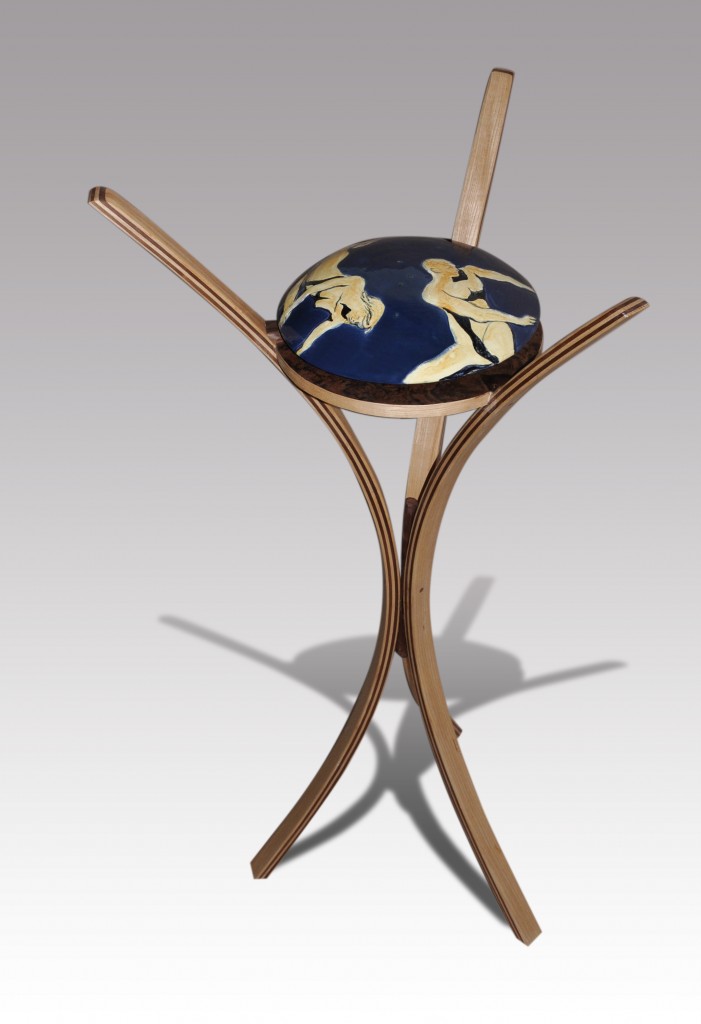
This project is called ‘Mars and Venus Rising’ and is a collaborative effort between myself and a very talented ceramic artist named Debra Lansdowne.  We have worked together in the same department for the past 11 years, and her work is incredible.

The stand was constructed of three bent ‘legs’, each made with alternating layers of walnut and ash.  The three are connected to a walnut piece in the middle of the ‘waist’ with dowels, epoxy and plugged screws.  I was going to try to do this without screws, but I kept having issues with one of the legs, and figured the small walnut plug I put in would  be a  visual accent.

The top is a circle of 3/4″ plywood veneered with some very sweet walnut burl.  It is secured with plugged screws and epoxy.  The edge is banded with ash veneer to stick with the overall theme of the project.

I had a bear of a time getting the angles right when I notched the disc around the legs.  I ended up with a small gap between the inside faces of the legs and the disc, which I covered with small pieces of walnut shaped into sculpted triangles.

I sanded the heck out of this and finished it with a seal coat of 1# dewaxed shellac.  Once dry, I sanded it down with 400 grit wet/dry paper, blew off the dust and wiped on three coats of wiping poly.  I was tempted to use my homemade oil/varnish/thinner mix, but I have heard that oil gives ash a very yellow appearance.

Debra’s part of the project is an upside-down bowl. She threw the12″ diameter bowl and sculpted the figures of a man and woman into the wet clay.  She glazed it and fired it in her home kiln.  This process added subtle colors to the finish and gave it a nice glossy look.  Finally, she glazed a smaller bowl to the inside of the larger piece in order to give it lift above the disc.

The awards presentation will take place on February 1, and I’m interested in seeing just how well our joint project shows.

If we win, we will split the prize money. My share may be just enough for me to buy a beret!

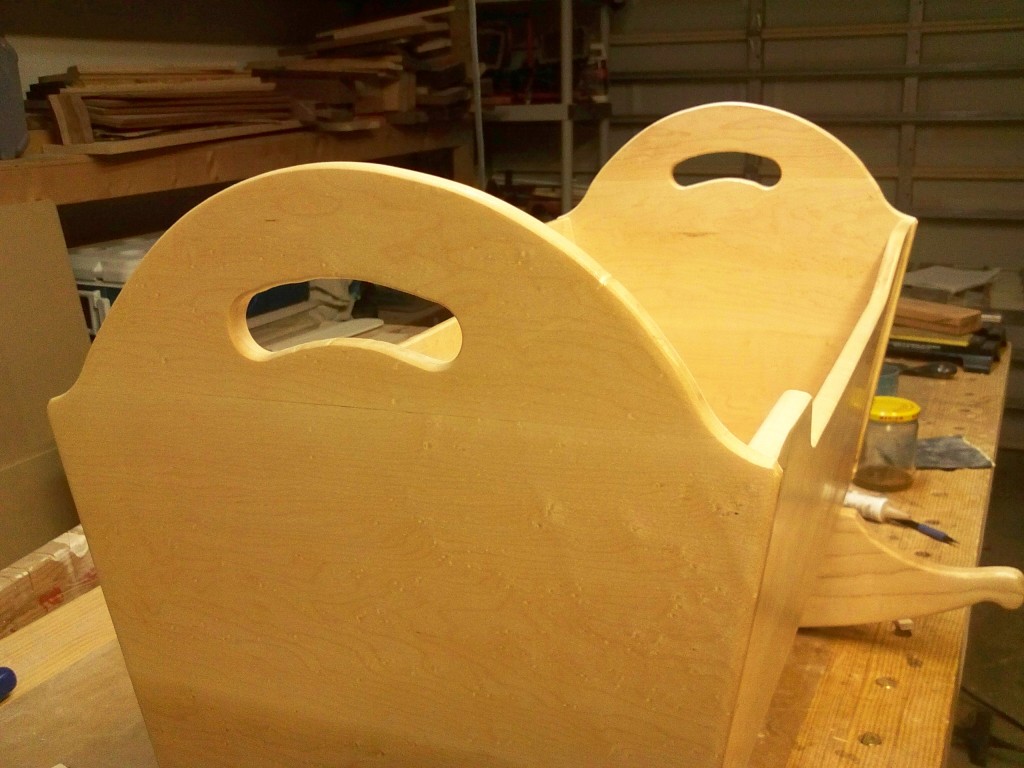
Stuff I’ve Built: The Cradle

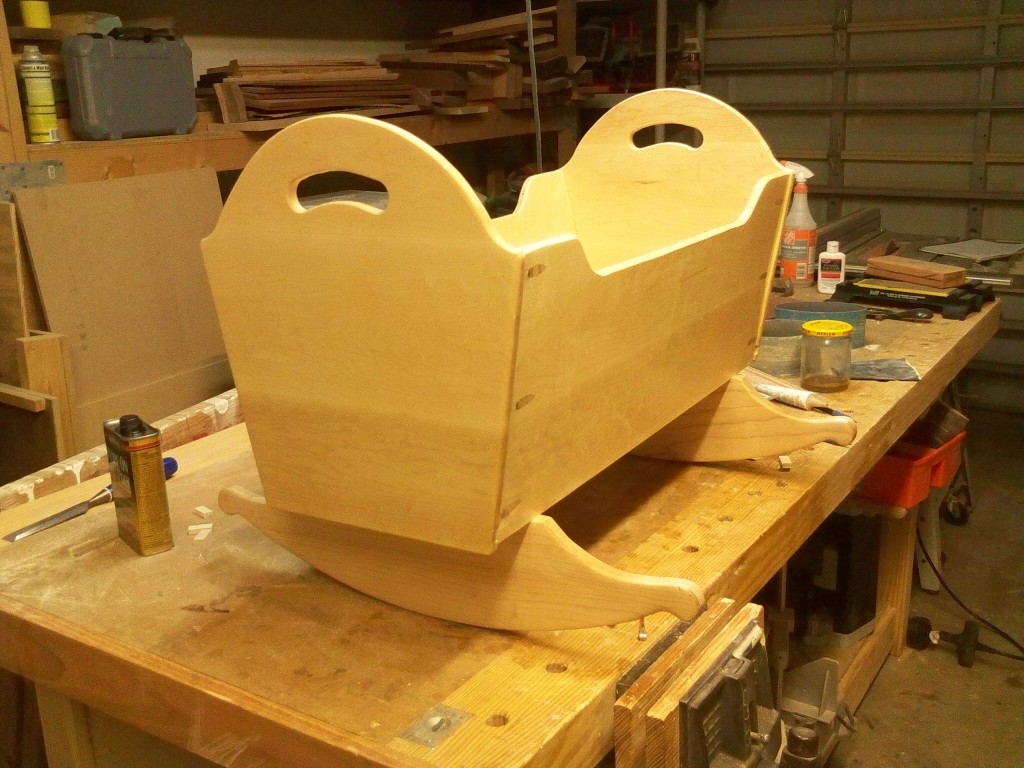
This is one of those projects that was supposed to be done a few weeks ago.  When I first posted my entry about building a cradle to donate to a local pregnancy crisis center, it was supposed to be ready in time for Christmas.

However, I don’t think that the need for it has gone away.  It’s done now and ready to be dropped off anonymously to be given to a new mom.

The original patterns for the cradle came printed on standard letter-sized paper and had to be joined together to create the full sized working plans.  That took a little time to understand, but was very easy and allowed me to create the flowing curves on the piece.

The original plan for the cradle was to be a knock-down design which could be stored safely after a child outgrew it, waiting for the next new family member should a new one arrive. After discussing this plan with my wife, she brought up a very important point.  If I was donating the cradle anonymously and someone had a question about how to set it up, how would they know what to do?

At that point, I decided I should modify the plan to permanently attach the sides to the head and foot board.  Fort this application, I chose plugged pocket screws, but I could have easily chosen dovetails or some other joinery method.

The handles were easy to cut. Working from the patterns, I located two center point for 1″ forstner bit holes and connected them with a flowing curve.

As I cut each piece to size, I finish sanded them and rounded over all the edges, paying special attention to the areas that were going to get handled.  This was much easier before everything was assembled.

The finish was a thinned down coat of Zinnser Seal Coat (mixed half and half with denatured alcohol).  Then, A thorough sanding with 400 grit paper to get the surface super smooth, then three coats of wipe-on poly to offer more protection.

Again, I would like to thank the folks at Wood Magazine who donated their cradle plan and the guys at Bell Forest Product for donating the beautiful maple.  Thanks, guys.  I appreciate your generosity!

Now, to get the cradle into the car and get it down to the pregnancy crisis center before they open at 8:30…. I hope they like it!

Stuff I’ve Built: The Christmas Tree decoration

My Christmas Tree decoration

  • December 1999

This sad Charlie Brown-looking tree decoration was actually far more sophisticated than it looks.

My mom had just given me my first router for my birthday.  It was a fixed base, 1/4″ collet model that wasn’t very powerful.  I had six bits all stored in a neat wooden box, and I was ready to roll.

With the holidays fast approaching, I thought that a simple, holiday-themed decoration would be in order.  With a 1 x 6 pine board and chunk of dimensional southern yellow pine, I struck on this idea.

I cut out the tree part with a jigsaw and cut the SYP block down to size with a hand saw.  That’s when the router came out.  I chamfered the edges of the block – top, bottom and sides.

The real fun began.  I measured the thickness and width of the base of the tree and carefully marked where I wanted to cut a mortise.

Yes, a mortise with a fixed base router. I fired up the trigger with the router up on edge, then gently tipped the router bit into the work.  It was a little hairy at times, but the mortise cut very well.

I test fit the tree into the base, then, to permanently fix glue the joint, I set the base into Bondo auto body filler.  I had the stuff around, and figured it would create a watertight bond.

I finished it with some green, yellow and brown craft paint and stuck the tree out on the porch. The first thing you see when you walk up to the front door during the holidays.  We will go to a local park and pick up a few pine cones to scatter at the ground around it, just to add some ambiance.

Over the past ten years, that’s where this decoration has sat during the holidays.  It’s one of the first decorations that comes out of the attic at the start of the season and one of the last that goes away.

Even in its tenth year of service, we would never dream of giving it up.  It still marks that our home is ready for the holidays, and we wouldn’t have it any other way.

Thank you all for reading Tom’s Workbench through the holidays, and may each of you have a very Merry Christmas.