 At the recent Woodworking Show, one of the highlights was to get reacquainted with Jim Heavey. Jim is the Contributing Craftsman with Wood Magazine, and, just as last year, he brought his funny approach and common sense tips to his seminars.
This year, Jim’s talks were based on building and using jigs and fixtures. For those who get to see this presentation, Jim doesn’t disappoint. His first supposedly 45 minute presentation stretched to nearly an hour and a half, and the audience sat spellbound, hanging on every tip he presented.
In this first presentation, Jim flatly told the audience that in these tough economic times, we all have to get the most out of our tools. Jigs and fixtures not only make tools like a table saw multi-taskers, they also increase the accuracy and safety of the tool as well.
 Never was this more evident than in the first fixture he built – the zero clearance insert. With a scrap of ½” multiply or baltic birch plywood, you can pump out a dozen or so blank inserts for your table saw. You can make them so cheaply, that Jim advised that you make them for your commonly used blade setups – one for a regular kerf blade, one for a thin kerf, a separate one for different common dado set ups… and you can still have a few blanks laying around for specialized setups with bevels.
The sacrificial fence he made was a little more complicated than the average board-clamped-to-the-fence. It was built like a torsion box with two sides of MDF and some middle ribs. With glue and screws on all but the middle ribs, even the slightest potential movement of the other face is prevented. Also, even after the first face is chewed up, you can still set the amount of blade buried in the fence by flipping the jig over and referencing off the good back side. Jim advised that woodworkers should built two versions – one that is the length of the fence and another that is about six feet long. The longer fence can trail behind the rip fence and gives a broad reference fence for a long sheet of plywood to rest against while doing rips.
 Jim also showed that by flipping the ‘fence’ of a sliding cut off jig to the front of the sled, you can keep it from tipping off the table saw. A marked improvement over ones built with a trailing fence.
As the jig projects were rolled out one after another, Jim acknowledged that the jigs were plans which appeared in Wood magazine. However, he was quick to point out, “Hey, this stuff isn’t rocket science. If you look at the jig and come up to play with it after the presentation, you should be able to go back to your shop and build something similar.”
In his second presentation, Jim could have billed himself as a magician. In the front of the audience, he showed a beautiful mission style night stand with through mortises and exposed tenons made of quarter sawn white oak. The joinery looked very complex and appeared to take an entire arsenal of tools to craft, but, as he said, “Everything – including the mortises and tenons – was cut on a table saw.”
As he described the methods he used, it became clear how it was done.  The capital letter I shaped cutout was done by ripping the board in half, cutting the decorative cutouts with a scroll saw and then gluing back a ½” spacer. The mortises were cut by slicing out a ¾” stick strip, crosscutting that strip and then gluing it back together spaced far enough apart to allow a corresponding tenon to fit inside. Even the tenons were inlaid strips.
“Really, it’s THAT easy,” he kept saying as he explained his techniques. When he was done, the audience members came forward to inspect the work, and were able to find where the cuts were made only after careful inspection of the piece. “Oh, and when someone tells you how good your project looks… SHUT UP and take the compliment. They will only see it if you point it out.”
I’m sure I’ll be working with a few of these techniques in some upcoming projects.
Again, while most – if not all – of these techniques were described in the pages of Wood Magazine, having a professional – and quite talented – craftsman there to explain each of the operations was valuable.

 Drawers in woodworking projects can be very useful. They can be dainty affairs, holding just a few pens and pencils, or they can be massive and built to withstand an entire file drawer’s worth of files and papers.
 While it may not spring to mind as a first choice of materials to work with, woodworkers have used miles of plastic laminate on their projects. Whether to create a tough writing surface for a student’s desk, a counter top for a busy kitchen or as a way to build doors which can double as dry-erase boards, plastic laminates are versatile, relatively inexpensive and, unfortunately, have a reputation for being difficult to work with.
 There’s something to be said for momentum when you are working on woodworking projects. For some projects, you can go from the first milling operation to totally done in a day. For other projects, it may take longer because they are more involved.
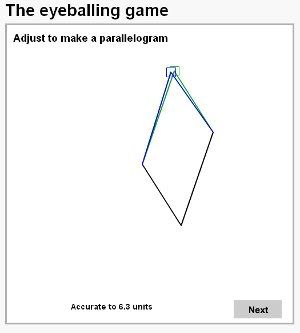 So, do you think you have a set of high quality calibrated eyeballs? Can you bisect an angle on sight or put your finger on the exact middle of a circle without measuring?