Category Archives: Shop Talk

Sometimes a bench is a bench

I’m sure there are one hundred ways to build a work bench, and all of them are correct if they meet your needs.

…………………….– Danny Proulx, Building Woodshop Workstations

You wanna brew up an instant argument? Find a group of woodworkers and ask them their opinions about brands of pick up trucks.

For the record, I drive a Toyota Corolla. I chose this car because it gets me from point A to point B with a modicum of comfort while using as little gas as possible. It has a reputation for reliability. The fact that it also happens to be able to hold my entire family is a bonus. Other than that, I really couldn’t care what make the car is.

A traditional benchBut, when you drag Ford, Chevy, Dodge, Nissan, Toyota and other manufacturers into the mix, people become defensive about their trucks. Boastful. Arrogant. “My Ford will tow your Chevy to the junk yard when it dies.” “My Dodge is a beast and will out perform both of your toy trucks.” This conversation can drag on for hours while people go back and forth essentially over what is a utility vehicle designed to carry a load of items.

In much the same way, woodworkers have a tendency to look at their workbenches and compare how they stack up to others. Whether a woodworker believes a huge steamed beech bench modeled after some European standard is the only way or a solid door on sawhorses is their preference, a great deal of personality is invested in the decision.

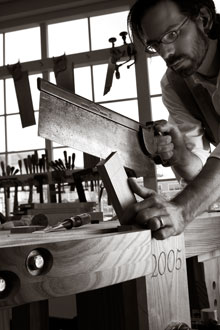
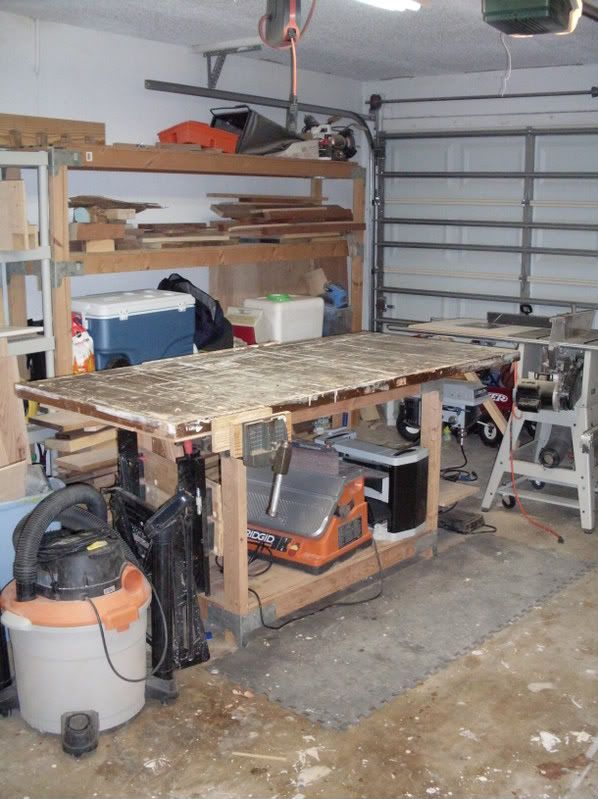
I have been looking at my workbench recently. Sure, Big Ugly still answers the call without a whine or whimper each time I go into the shop. She serves me well. But, I’m thinking it might be time to do some upgrading.  Some extra features.  A little more heft.

Workbench by Chris SchwarzThat’s where I’m getting stuck.

At the recommendation of many woodworkers, I recently picked up Workbenches, the first book written by Popular Woodworking Editor Chris Schwarz. The book has been touted as a seminal work, required reading for woodworkers of all levels of experience.

I’ve got to hand it to him. I think Chris has written a very well researched book on the topic of workbenches. Besides old photos of woodworkers actually using their benches from bygone ages, his book is replete with drawings, block prints and ads from tool and bench manufacturers from years gone by. This really helped me get an idea of just how these specialized shop tools has evolved from the first flat rock to today’s high-tech offerings.

Chris offers outstanding plans with measured drawings and step-by-step instructions in exacting detail. Chapters devoted to stock selection, bench accessories and the best methods to accomplish certain tasks make this book an invaluable reference for any shop. It’s written in a style where – yes – I didn’t want to put it down.

But, I do have a quibble with the author on a few points.

Workbench drawingNo doubt Chris is imminently more qualified than I to write about all things woodworking. He’s worked with the best. He’s held some of the most expensive tools ever manufactured in his own hands. He’s perched in an enviable position from where he can monitor the latest developments in the craft. When he speaks, his voice carries with it a great deal of authority.

For some reason, his book hit me the wrong way. Chris makes excellent points about the shortcomings of many bench designs. He validly points out that many benches today are glorified kitchen counters – with no access to clamp materials from below – or overgrown dining room tables. However, the way he belabors the point seemed to set uneasily with me.

Frank KlauszHe speaks about other designs – some of which he designed for Popular Woodworking – as if they are somehow beneath a serious woodworker. “Build it like that, and you’ll be terribly disappointed,” is a common refrain. Perfectly serviceable benches such as the 24 hour bench and the $175 bench are dismissed as ‘starter’ benches, perfect for customizing as you would an old Volkswagen Beetle.

What iced me from the book was when he pointed out the shortcomings of the benches found in the shops of Tage Frid, James Krenov and Frank Klausz. There is no question that these men have built incredible works of craft – and art – from their modest benches. While maybe not the ‘perfect’ forms, the quality these men have produced speaks volumes for their ability to use these benches effectively.

And, that’s without saying a word about the Japanese masters such as Toshio Odate who create their masterworks without even touching a western-style bench.

Chris at his benchChris describes his first exposure to the French-inspired Roubo workbench as a near religious experience – divine inspiration into the perfect form and function of what a bench could become. In some ways, I wish he would position himself as less of a Zealot when considering bench forms. Unfortunately, there will be many starting woodworkers who will walk away from this book thinking that any workbench – other than those recommended by Chris – would be a waste of time. Indeed, I can see many up-and-coming woodworkers stymied by the impression that they MUST build a Roubo before they dare touch a tool.

Listen; there are dozens – closer to hundreds – of published plans out there to help you build a workbench. From ultra-quick, ultra-cheap weekend benches knocked out a few 2 x 4’s and some plywood all the way to the could-double-as-an-altar-in-some-minor-woodworking-religion uber-benches – there’s something out there for everyone.

Before you go out and build your bench – consider doing what I’m doing. Look at plans. Lots of ’em. Ask yourself some questions. What am I going to use this bench for? What’s my budget? What skill level do I have? How much space is there in my shop?

An old bench with stories to tellSure, you can’t plan for any eventuality. I could hit the lottery next week, quit my day job and woodwork full time. Of course, my kids could need glasses, braces and piano lessons too…

What kind of bench you work on is a personal decision you will have to make. Ask around. Take all of this input with a grain of salt, understanding that everyone will offer his or her opinion based on what works for them.

Then, go boldly, build your bench – and get back to the fun stuff – woodworking!

By the way, here are some resources I’ve already checked out:

For your viewing pleasure…

Woodworking shows are NEATO!As much as I hate to say it, my wife and I love TV. I know, we live in Florida, surrounded by all of the natural beauty people come to see on vacation. We should be living outside.

That being said, we do spend quite a bit of time outdoors, but the TV seems to be a constant companion many nights. Especially when our favorite shows come on.

My wife is addicted to reality TV. Dancing with the Stars. The Next Food TV Star. American Idol. Heck, if it’s got to do with people making total fools of themselves and being voted off the (stage/island/ship) by washed up celebrities, she’s all about it.

PBSFor me, well, there is the History Channel. And the Discovery Channel. And then there’s PBS. What I love most about PBS is the fact that there are woodworking shows on it. The New Yankee Workshop. The Woodwright’s Shop. The Woodsmith Shop. Everything comes screeching to a halt while I get my fix of design, technique and construction.

The only problems with the PBS offerings is that they are few and far between – only once a week on my local PBS station. And, then there’s the fund drive. Seems as if the fund drives take place every other month. Don’t they always seem to preempt the woodworking shows with programs on pseudo-scientific ‘body cleansing’ seminars and money management lectures? I’ll consider making a pledge donation when are those shows going to be preempted for some serious woodworking offerings.

DIY NetworkSo, what other options are out there? There is the DIY Network. Sure, they offer such shows as David Marks’ Wood Works and Amy Deevers’ Freeform Furniture. Being a government employee married to a teacher, our family budget doesn’t allow us the opportunity to subscribe to the higher tier cable channels. Even if we did, that would be another excuse to watch even more TV, cutting even deeper into my shop time. And, every dollar spent on cable means fewer tools in the shop!  And, I’m sure you can all understand the need for more tools in the shop…

HGTVSince we have the basic cable package, you might think that Home and Garden Television – HGTV – would be a good place to search for woodworking shows. Unfortunately, HGTV was bitten by the ‘design’ bug that’s been plaguing cable TV for years. Years ago, you used to be able to watch New Yankee Workshop and This Old House reruns on HGTV. Not anymore. Most of the shows feature interior designers who promise complete redos of rooms with a splash of paint and some new throw pillows. Many of these shows have a ‘carpenter’ on staff. Their job is to build ultra cheap furniture and shelves from MDF and brads in the fastest time possible. By the way, many of these ‘carpenters’ seem to have issues with shop safety or even – in some cases – a grasp of what they are working with, referring to the MDF as Multiple Density Fiberboard.

Video BlogsWhat’s a woodworking show junkie like me to do? Fortunately, help has come in the form of the Internet. Many forward-thinking bloggers such as Marc Spagnuolo, David R. Pruett and Charles Neil have taken the bull by the horns and produce their own video podcasts. The mainstream woodworking magazines such as Popular Woodworking and Wood Magazine have embraced video as well, offering much more in-depth detail than can be put into a magazine article.

The Woodworking ChannelAnd, if you can’t get your fix there, there’s always the Woodworking Channel. This site serves as a clearing house for some outstanding video productions. You can watch Sam Maloof craft in his shop, catch interviews with woodworkers at trade shows and even watch episodes of shows no longer airing in station rotation.

In order to get my woodworking video fix, it’s been necessary to turn the TV off and fire up the computer. But, given that I can watch these Internet videos whenever I want, I now have something to do when people are being voted off the stage by Paula Abdul.

Tools I use – My Keller Dovetail Jig

Keller 1500 Journeyman Dovetail Jig

Keller Journeyman 1500 jigWhether fair or not, dovetail joints are widely considered the mark of true craftsmanship when it comes to woodworking. While some find hand cutting dovetails with a saw and a sharp set of chisels a rewarding experience, others want to cut the joint with a minimum of fuss and a great deal faster.

Back in the 1970’s, David Keller perfected the through dovetail jig that bears his name – the Keller Dovetail Jig. Since those early days, a number of other manufacturers have introduced their jigs and other dovetailing systems. Some are relatively simple, while others have a rather steep learning curve.

When I went to Woodcraft a few years ago to buy a dovetail jig, the Keller Journeyman 1500 came highly recommended. An excellent balance of price, ease of use and flexibility, this jig has proven itself time and again in my shop.

Projector StandThe kit comes with special bearing guided bits (1/4″ shank) that work with the jig, the jig fixture itself and a clearly-written instruction manual. You have to secure the jig to a backer block made of wood or a stack of sheet goods that fit a particular measurement. To adjust the tightness of the joint’s fit, you adjust the jig forward or backwards on this backer block.

Since I had never used a dovetail jig before, it took some time to carefully go through the measurements, but it was worth it. The results were very good the first time out.

Variably spaced dovetails can be made easily by cutting the necessary tail slots in the pin board, and then cutting all of the pin slots on the tail board, then removing the unnecessary ones with a sharp chisel.

My first dovetails
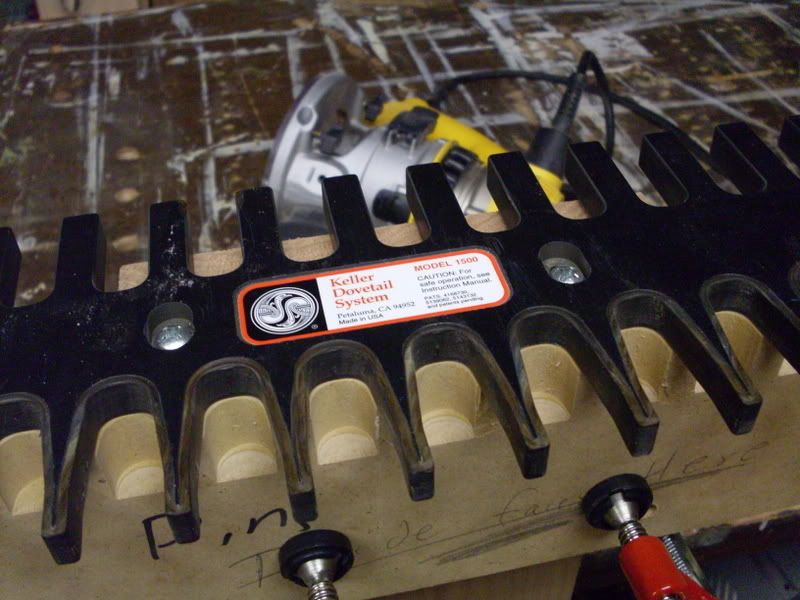
The one caveat with this jig – as with many others – is you have to carefully mark where the joints will align. This is a very important skill to master whether you cut the joints by hand or by machine. A striking knife – even a cheap Xacto knife from an office supply store – will work well.

Also, this jig only allows you to cut through dovetails. To make drawers which appear to have a half-blind dovetail, you can glue a thin piece of material to the drawer’s front. A simple and elegant solution that will allow you to stretch your showy wood supply.

An important tip – when you arrange the jig and the wood in your vise, be sure to put the backer block between you and the wood – this ensures the router cuts into the wood from the side opposite you, throwing the wood chips away from you while you are cutting.

While there are other jigs out there, I can see myself coming back to this jig time and time again. It’s really that easy. And, judging from what I saw on the Keller website, there are even more applications that can be mastered.

A tour of my shop

Have you ever wondered just what the heck my shop looks like? Sometimes, with my work schedule this time of the year, I wonder too…

Well, my old digital camera died, and I got a new one. Rather than snap pictures of the kids, I took the opportunity (or used it as a good enough excuse) to finally get out into the shop and take a few pictures.

Welcome to the shop!

This was a gift from my wife – sort of a little bit of a welcome to the shop sign. I kinda like it – and I remind everyone about its status when they arrive.

Shop Overview

This is the shop overview shot – what you might see on a typical weekend day if you stroll past the front of my house. Yes, I have converted the two car garage into my shop. It’s a comfortably sized space that I share with some kids toys, some mechanical systems and the laundry equipment.

Clamp Corner

This is what you see at first when you look to the right as you walk into the shop. Here’s where the rolling clamp rack, 14″ band saw and dust collector are parked here. This is also where I keep the scrap buckets for offcuts.

The tool stack

This entirely unattractive piece (which doesn’t lean nearly as badly as the camera is making it appear to – guess I have to learn how to take better pictures) of shop storage I threw together from two pieces of 3/4″ CDX plywood. I needed a way to stack up some of the tools I had acquired, and this fills the bill. Compressor at the bottom, router equipment up from there, pocket screw jig and sharpening equipment above that, and tool rehab projects in the plastic bins on top.

The side bench

This is my side bench. The cabinets came from a friend’s kitchen remodel, and serve me well in the shop. The uppers store my finishing supplies, the lowers store hardware, finishing rags and other goodies. This is also the location of the plane shrine. The top is an excellent place for me to stage project parts when I’m working on other components on the main bench.

Also, you’ll notice my rolling tool cart I got last Christmas. It holds most of my hand tools, keeping them dust free and easy to grab.

The front bench

This piece is my front bench. The lowers store power hand tools, while the uppers hold fasteners, glue, tape and other goodies. I will do some work on smaller projects and parts of larger ones, and I do most of my sharpening here. Unfortunately, this is also the surface closest to the door, so my wife will leave things that have to go back out to the garage here as well. It can get cluttered!

The Table Saw

Of course, this is my Ridgid table saw. Since it’s right at the garage door entrance, I can rip longer pieces easily by opening the door. You can see I also built a router table top into the right wing. I have a Freud FT2000 mounted under there, which does a great job. I spend a good deal of time in this area.

Big Ugly

Here’s my big ugly bench. Work on the top, and storage for the spindle sander and planer below (which also happens to add a great deal of mass to the bench – a big plus). The bench serves as and outfeed table. Normally, I can work up near the vise and rip off the table saw and not have issues… I just have to make sure I can clear the stuff on the bench top.

My wood stash

Shhhh… I don’t want anyone to know about this area… but most of my wood stash was given to me by some friends and other ‘people’ who don’t want to be named. It’s a decent pile of cherry, walnut, maple, poplar and oak. I could tell you where I got it, but I’d have to kill you after. Ultimately, I need to find a better place for this stack somewhere else in the shop (perhaps overhead). But, for right now, it’s an OK set up.

Now, for a quick matter of blog housekeeping – my wife and I are celebrating our 15th anniversary this week – so, don’t look for a link of the week this week. I’ll be back on Sunday, however, with a brand new quick poll.

Thanks for visiting!

Yes, but is it art?

So many things in life are subjective, aren’t they?

Do you think that was a good movie? Wasn’t that the best wine you ever tasted? Hot enough for ya?

As a hundred people the same question, and you will no doubt get 100 different answers. “That movie has plot holes so large, you could drive a truck through them.” “The wine reminded me of a subtle mix of mouthwash and pine tar.” “If you say another word about how hot it is, I’ll kick you in the shins.”

There are no right or wrong answers, just opinions.

Dogs playing pokerThen, why is it that when it comes to woodwork, there are so many ‘experts’ out there who claim to know exactly where the line between craft and art is drawn?

Sure, I can appreciate that the oak pantry I built for my kitchen is 100% utilitarian with just a little bit of decoration so it could pass as ‘furniture’. And, a famous painting, like the one of the dogs playing poker (I love that one) is art that you hang on the wall.

Stele II at the National Sculpture GardenThe line does get blurry when considering other forms. Last year, I was taking a family trip to Washington D.C., and had a chance to walk through the National Art Museum’s Sculpture Garden. Some of these large-scale pieces were really eye-catching, showing a lot of originality and creativity.

Then, I came across this piece. It was ‘sculpted’ by Ellsworth Kelly in 1973, and it’s called Stele II. It is exactly what you would think it is… a one-inch thick piece of steel cut with rounded corners and allowed to weather naturally, thereby losing its shiny nature through the past three and a half decades.

No doubt, the artist did put a great deal of time, energy and thought into crafting this dramatic piece… about the same amount of time, effort and care you might find that a steel worker at a shipyard put into cutting an identical piece out of a larger plate. Yet, this qualifies as high art, and is ensconced in one of the nation’s premiere sculpture venues.

Shaker ChairNow, take a look at a gorgeous piece of furniture, and there will be a different classification. Here’s a chair built by a Shaker brother sometime around 1850. Knowing about the Shakers and their practices, there’s a very good chance the wood was carefully selected for its strength and joint holding abilities. It was precisely split – not sawn – from the blank to provide even more ruggedness. Turnings were done by either a treadle or hand-cranked lathe. The joints were cut by an expert hand using keenly sharpened hand tools. Except for the turned finials at the top of the seat back, it is devoid of all ornamentation.

Yet, the chair is a work of sculpture in its own right. It looks like there is an impossibly small amount of wood to support a person’s weight, yet these antique chairs can support 250 pounds or more.

But, don’t expect to find piece like this in an art museum. No, you’ll find those pieces in a craft gallery. Not quite fully recognized as art, a piece like this is viewed in a completely different light.

Why would I bring up such an esoteric point? I’m glad you asked.

National Art ProgramAt my job, this is the third year that the National Arts Program is holding an art contest for current and retired employees and their family members. As I have for the past two contests, I’m entering this year’s with a project that will spotlight my woodworking talents.

The past two years have been very successful for me. I took first place in the Intermediate Adult class for my Contemplation Bench and Pagoda Box. Both brought pretty hefty prize money, which I immediately put toward the purchase of new tools.

While I was enjoying my accolades last year, one of the artists who didn’t win came up to me and told me that I shouldn’t enter an art contest with a craft project. “It’s not fair to the true artists in the field.”

I chalked that comment up to being her opinion.

And, of course, it’s my opinion that I might have another winning project in the works.

What’s the plan, man?

A three year strategic plan. A financially sound retirement plan. A solid game plan.

Seems these days, no matter where you look, people are planning. A lot. For good reason. If you were to do something without a plan, you might never achieve your goal.

Woodworking Plans
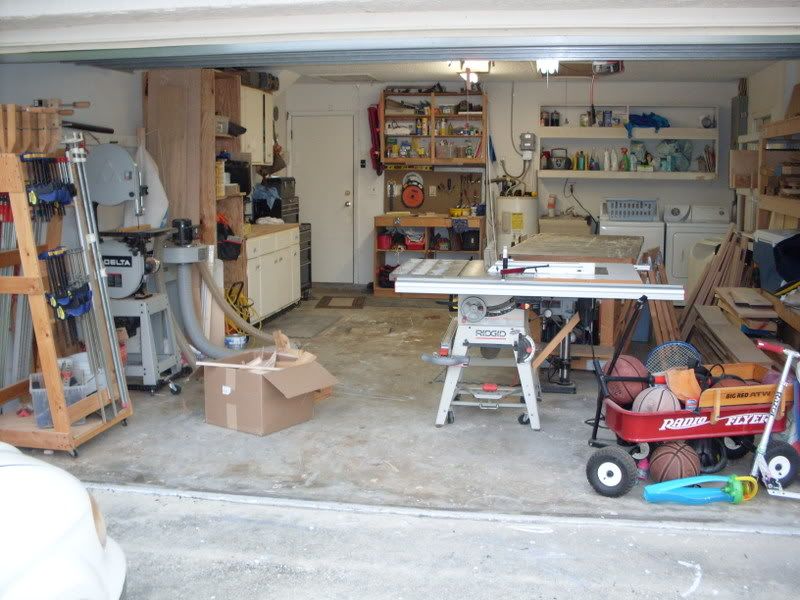
When it comes to woodworking, there are lots of plans out there. Plans to build new shops. Plans to squeeze the maximum amount of space out of your existing shop.  Heck, there are even plans to clean your shop. But, those are usually put at the bottom of the to-do list.

The plans most woodworkers deal with are project plans.  From the most rudimentary sketch  on the back of a cocktail napkin to elaborately produced plans with complete cut lists and 3-D projections of what the final piece will look like, there are plans out there for every level of woodworker.

After woodworking for a decade, I’ve (finally) come to the realization that there are basically three different types of plans out there to choose from:

  1. The purchased plans.  Whether you go to a website such as U-Bild, a magazine like Popular Woodworking or buy a book at place like Borders, you can find dozens of plans published by woodworkers from around the world.  These are typically very easy to follow, frequently with step-by-step instructions and helpful hints.  The only problem with these plans are that your project will frequently look exactly like the hundreds – or thousands – of pieces cranked out by other woodworkers. Adding your individual touch does require making some choices with wood selection, trim and other decorative elements, but can take a run-of-the-mill project to a new level if done properly.
  2. Sketchup planThe next type of plan are shop-drawn ones made to reproduce an existing piece of furniture.  Whether it’s from a drawing of a project you saw in a museum or a picture of an exquisite antique piece you wanted to bid on at an auction, these projects can be fun to plan and build.  I find myself looking at pictures of projects from the modern masters – Krenov, Nakashima, Maloof – and sketching out ideas of how I would build pieces.  Sure, your project will strongly resemble what exists, but, in some cases, that’s a good thing.  Also, again, you can work your own signature touch in to a project that makes it your very own.  One day, I really do plan on building a Maloof-Iovino inspired rocker…  That’s the plan, at least.
  3. Finally, the most rewarding way of all to arrive at a plan is by letting your creativity run wild.  Now, I do have to preface this by saying that it’s really tough to come up with a truly 100% original idea.  A chair typically has a seat, some way to support the seat above the ground, and a back rest.  A table typically has a top you can place something down on and some way to hold it off the floor.  A bookshelf… well, you get the idea.  That being said, there is no limit to the amount of creativity you can put into a project when you come up with the design.  For example, if you take a look at Doug Stowe’s boxes, they come in a bewildering array of sizes, materials, finishes and forms.   Sure, they are all basic boxes, but with some creative thinking, each is its own one-of-a-kind creation.

Regardless of how you choose to plan out your next project, just remember to save yourself a lot of hassle and try some of these simple tips:

  • Drafting Draw the piece out to scale.   Once you start cutting and shaping boards into component parts, you will want to know exactly how large that piece needs to be.
  • Plan your joinery.  Is this the project you use dovetails on, or will you stick with something simpler like splined miters?  The call is yours, but you will have to cut the boards to different lengths to cut each of these joints accurately.
  •  Take your time.  Rome wasn’t built in a day, so don’t think you will hand-craft that elegant highboy in in a weekend.  Make sure you are working accurately so the piece will come together beautifully in the end.

Sounds like a plan to me!