Category Archives: Shop Talk

We’ve come to an understanding

The dreaded belt sander
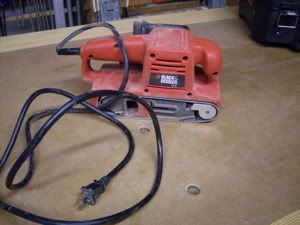
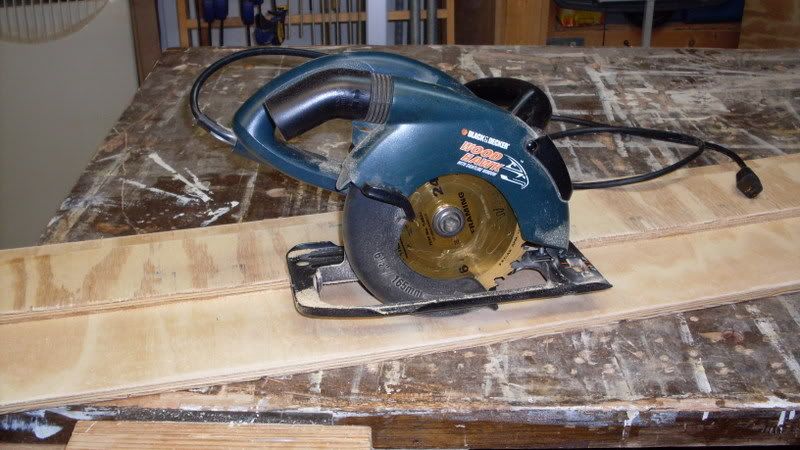
I’d like to take a moment to introduce you to the tool I love to love – and hate.  This is my belt sander.  A Black and Decker homeowner’s model I picked up at a local Wal Mart about six years ago.

Before I go any further, yes, I am quite aware that I advertise myself as a hand tool enthusiast.  It also obviously has a tail that plugs into an outlet.  Many of you are also thinking that there is no place in the fine woodworker’s shop for one of these crude instruments of sound and dust.  Besides, it’s not even made by a ‘serious’ woodworking tool manufacturer.

It’s all true.  This bright orange baby (by the way, I believe it might be bright orange so motorists can avoid it when it’s pitched into a road) uses some of the most diminutive belts out there – 3″ x 18″.  Even it’s lousy dust bag doesn’t work any more.  I used to take the time to put it on the sander, but it developed a hole near the top zipper that just blows dust straight up into the air.  And, it’s a very hungry machine.  I affectionately call it the belt saw, because if you leave it on the work for too long, it digs out one heck of a divot in the wood.

So, why keep it?

Even in its total nastiness, it’s another one of those shop essentials I can’t seem to do without.  Just recently, I was working on my Christmas presents, I had to reach for it several times.  First when I was making the end grain cutting boards.

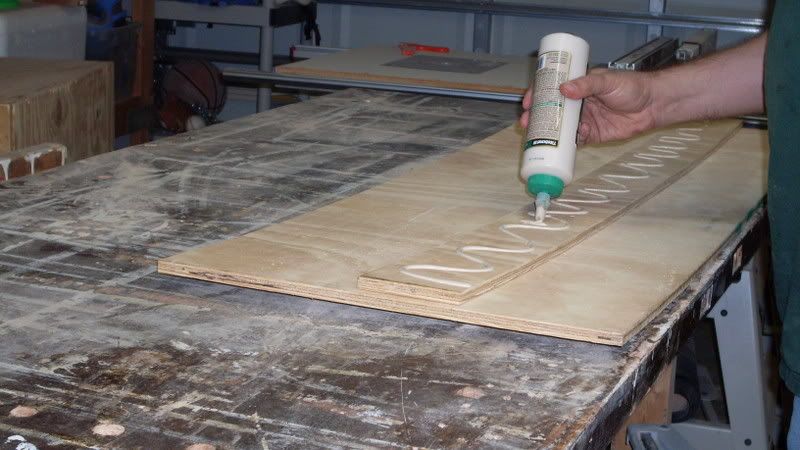
In my last post, I alluded to the fact that my milling and gluing operations need to become a little more exacting.  So, when I pulled them from the clamps, they were pretty uneven. So, I had to mosey down the street to the local Home Depot, where, much to my surprise, I discovered that Norton actually makes a line of sanding belts in that tiny size.  There were three grits to choose from – 50, 80 and 120, and I bought the two packs of all three grits.

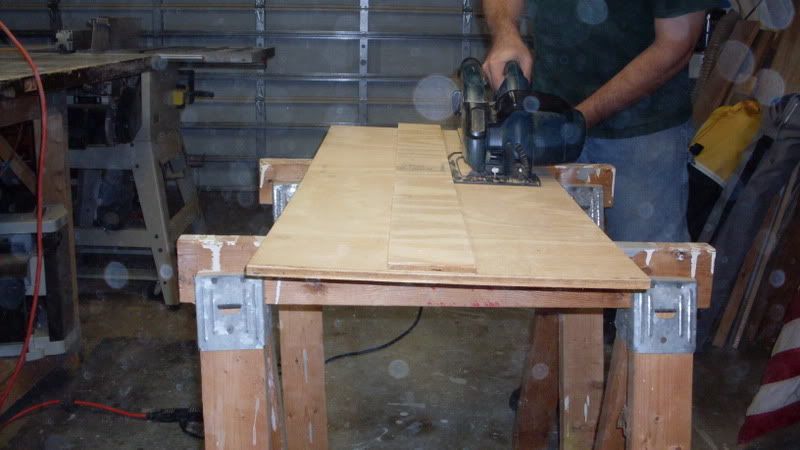
While it did take the better part of a Saturday afternoon to grind the unevenness out of the boards, I knew it was much safer than trying to run the end grain boards through the planer.  With my iPod on under my hearing, breathing and eye protection, I grooved while my errors were erased totally, leaving a perfectly smooth board.  No mean feat, given that end grain is very tough stuff – making it an excellent choice for end grain cutting boards!

I changed grits to the 80, then finally to the 120 for those last very light passes, leaving just enough for me to sand out with the random orbit sander.

Later, when I tried out the Kehoe jig for a set of the photo bookends, the belt sander came out again.  I trimmed the dovetail splines as close to the work as I dared, and then used the belt sander to take them down flush with the board.

Are there better ways to accomplish these tasks?  Sure. I could get out with a block plane and use that.  But, for some reason, I seem to get better results using the belt sander for the heavy lifting and the hand tools for the fine work.

So, I’ll keep my belt sander.  For now.  It does what it does, but it does what it does pretty well.

But, I’m definitely keeping a wary eye on that tool!

Setting a proper table

The router is one of the most versatile tools in the shop.  Dovetails, mortises, tenons, decorative profiles, rabbets… the list goes on and on.

While they are extremely useful hand held, mounting them into a table dramatically expands their usefulness. I discovered this when I first bought a little bench top Skil router table for my tiny fixed-base Craftsman router.  Suddenly, I was cutting joints and profiles I never knew were possible.

Norm and his deluxe router tableThings have really changed since those early router experiments, but I still turn to my routers to do dozens of chores in my shop.  While my skill with a router has increased, so has my experience in dealing with router tables.

I’m gonna come right out and say it.  If I had the space, I would definitely build a full-blown all-the-bells-and-whistles router tables just like the one that Norm Abram built.  It would be a dedicated router station where I could do everything I would ever possibly need to. Unfortunately, in my two-car garage shop, space is at a premium, so a dedicated router station all by its lonesome is out.
The next option I considered – and built – was a table saw wing mounted router table.  It seems as if everyone who is space challenged in their shop has built or installed one, and they all seem to swear by it.  So, I went out to the local Home Depot and dipped into their scrap offcut bin.  Much to my surprise, there were two offcuts of melamine covered particleboard in the bin for a few bucks each.  So, I took ’em home, biscuited them together and with the help of a few piece of angle aluminum and some bolts, I was able to replace the right wing of my Ridgid saw.

Router table wing in sawThere.  All of my router problems were solved.  Weren’t they?  Oh, sure, the router table takes up absolutely no new space in the shop – just the footprint already reserved for the table saw.  And, I can use the table saw fence to guide my work past the bit.  I even built a pair of router fences that secure to the slots in the rip fence in case I had to bury the bit behind the fence.  All seemed ideal…

But, then it happened.  I was routing a profile on the edge of a piece of oak to make molding for a project.  Basically, I would route this profile on each of the long edges of the board and then rip them free.  That’s when it hit me – how could I use the same rip fence for both operations?  I tried setting then resetting the fence for each operation, but the pieces never seemed to come out right.

Auxiliary Router TableThat’s when I built my auxiliary router table.  Made from a sink cutout of Corian, this router table is designed to sit on a pair of sawhorses or to be clamped in the jaws of a Workmate.  Since this photo was taken, I built a fence based on a design in found in Danny Proulx’s book 50 Shop Made Jigs and Fixtures.  I even routed slots into the Corian for t-track so I could run the fence on the table.  And, in the event I ever need to bring my router table on the road, it’s ready to travel.

This setup works very well as a router table.  And maybe one day, I might consider removing the router table from my table saw’s wing.  But, since I went through all that work to begin with, I’ll just leave it there in case I ever need to use it again.

In the photos, you may have noticed that I have attached my Freud FT2000 router to a Rousseau router plate.  Permanently mounting a router base or a dedicated router to a router plate is one of the smartest ways to use a router table. This way, rather than trying to unscrew a router base from your hand held model and screwing it to a table, you can just pop the router out and mount it into another router table in mere seconds.  Sure, router plates tend to run about $40, but that cost is easily recouped after you realize just how much time it saves you.

Another important thing is that I never use a miter slot when working with a table mounted router.  Sure, they seem convenient.  However, unless you are using a self-squaring table saw style fence for your router setup, there’s a very good chance that it won’t be parallel to the fence.  What I do us use a backer push block to guide the workpiece along the fence. Not only do I get incredible control, the push block also prevents any blow-out on the back side of the work.

Hey, every shop really does need a router table.  Just take your time and carefully consider what you want to build or to buy before commiting to one.  And, if you move into a large enough shop, you’ll be certain to find plenty of space to build a proper router table to satisfy all your wishes.

The Crack of the Bat

Broken Bat at home plateYou know you have come to a new place in your life as a woodworker when the mention of a monumental baseball decision involving wood draws you away from your morning coffee.

That’s just what happened to me this morning while ESPN was on the back room TV.  During one of the updates about the Major League Baseball (MLB) owner’s meetings in Las Vegas, a decision was made to allow players to continue using maple baseball bats.

What’s the big deal?

Well, it’s actually kind of important.  But, first, let’s talk a little bit about bats.

In officially sanctioned MLB games, wood is the only material allowed for bats.  In other leagues and age groups – from Little League games for kids through NCAA games, aluminum bats are the  norm.  In fact, you can tell what level of competition is being played by simply listening to the sound the bat makes when it strikes a ball – a ping for an aluminum bat, and a satisfying crack for wooden models.

A collection of batsFor MLB’s formative years, two different types of woods were used to make bats.  Hickory, due to its very tough nature, and ash, due to its strength and lighter weight.  Hickory became less popular through the years because it is a heavier wood.  With pitchers throwing faster balls, bat speed (which is higher with a lighter bat) became a much more important trait than plain slugging power provided by a heavier bat.

Ash bats reigned supreme in the major leagues until 1997, when MLB sanctioned the use of maple bats.  Maple, again, has several favorable characteristics when considered as a bat material.  It has tremendous strength and durability.  Maple is, however, a heavier wood than ash – so something had to be done to level the playing field between these two woods.

Enter the folks at Sam Bat, the first manufacturers of maple bats.  What they discovered is that by cupping (hollowing) the barrel end of the bat, they could lighten the weight and shift the balance to fine tune the bat’s sweet spot – the area where the batter can get the most power out of his or her swing.

Broken Bat at pitcherThe maple bats caught on like wildfire.  Slugger Barry Bonds used a maple bat the year he broke the MLB home run record, which led many hitters to switch to maple.  Today, approximately 60% of MLB players prefer maple bats.

So far so good, right?  Well, not so fast.  While the maple and ash bats both do a great job smashing line drives into left field, observers started to notice a disturbing trend in how the bats performed when pushed beyond their limits.

Broken wooden bats are a fact of life in the major leagues.  Pitchers routinely throw in excess of 90 miles per hour, with some fireballers throwing at or near 100.  Today’s hitters also do a tremendous amount of weight training to increase their power at the plate – something almost unheard of during baseball’s golden era.  And, of course, that’s without even touching on the recent steroid controversies…

As you can imagine, the forces at work are incredible.

When these bats break, the two woods behave differently.  Studies have shown that bats made of the more traditional ash wood tend to crack and splinter when they break, while maple bats tend to shatter violently and in large pieces.  It has a lot to do with the different grain structures of the woods.  Ash’s structure tends to be ‘longer’ while maple’s is a bit ‘stronger’.

Broken bat into standsTwo serious injuries occurred at Dodger Stadium in April this year. Pittsburgh Pirates coach Don Long suffered nerve damage after a piece of a shattered maple bat struck him on the side of his face as he stood in the visiting dugout, watching the flight of the ball. And Susan Rhodes, a fan seated four rows behind the visiting dugout, needed surgery to repair a broken jaw after a chunk of a broken maple bat sailed into the side of her face.  Numerous near misses and minor injuries have also taken place at stadiums, leading to questions about the future of these bats.

While there is considerable documentation that the maple bats tend to be more prone to catastrophic failure, MLB’s safety committee has reviewed more than 1,000 broken bats from the past season and determined that they are still approved for use in games.

The smart thing might be to mandate that everyone use ash bats exclusively.  However,  North American ash production is being threatened by the spread of the emerald ash borer.  Should the harvest be further threatened, other woods may need to be considered for bat production, or the major leagues could possibly have to adopt a different material, such as composite bats or aluminum bats.

Then, we’ll all have to look forward to the sound of the ping of the bat…

For more reading:

Great Jigs: The Square Assembly Jig

The Square Assembly Jig
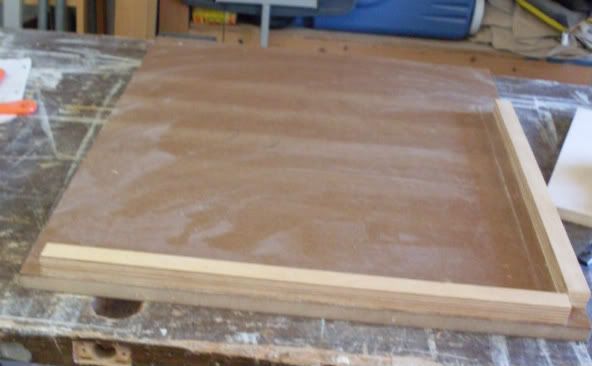
This is one of those projects I have always thought about, but never got around to building.  That was until I had to build a box that had mitered corners.  Trying to square those slippery joints and keep the joints aligned… well, that was tough.

The square assembly jig couldn’t be any more simple.  I took a scrap sheet of 3/4″ MDF I had laying around the shop – about 2 x 3 feet.  I then took a scrap of 1/2″ cabinet grade birch plywood and ripped 1″ wide strips.  I made sure the scrap MDF was perfectly square, then I glued and bradded a double stack of the plywood strips to the table, again ensuring I was perfectly square.  I held the ‘junction’ of the two strips apart by about 1″, so I could see any miter joints I was gluing up.

The Jig in Action
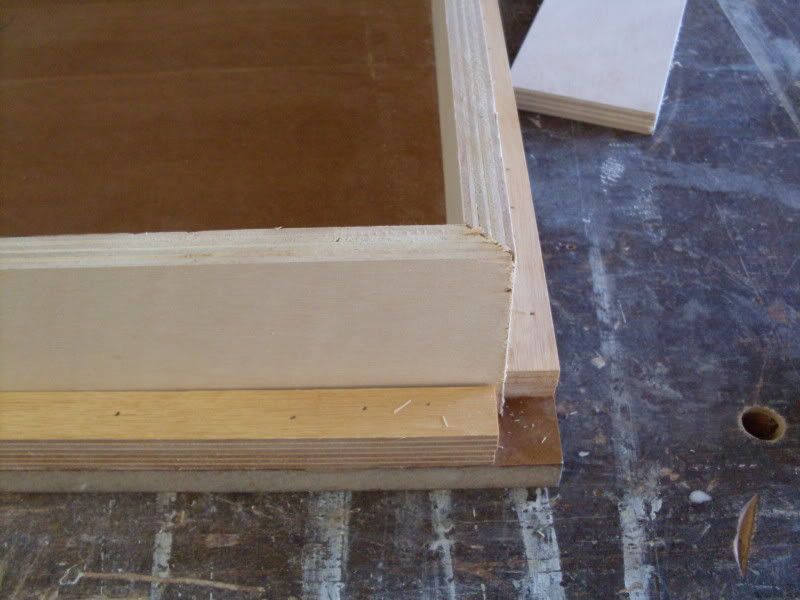
After I built this, I finished it with four coats of polyurethane to help prevent any glue from sticking to the jig.

To use the jig, simply glue up the joint you want to build.  Then, you can clamp the piece to the plywood strips however you see fit.  Once the piece is glued up with the boards tight to the plywood fences, your assembly will be square.  Pretty clever…

The best part of the jig is that you can use short clamps to grip the boards on small peices, or you can use the plywood fences as a contact point for larger bar clamps.

Great Jigs: The Sawboard

Wanna turn your basic circular saw into a precision cutting machine?

The sawboard piecesBelieve it or not, there is a way to get extreme precision with your circular saw for a small investment of some scrap sheet goods, screws and wood glue.  You can build one of these babies and use it to break down sheet goods with no hassle and minimal measurements.

So, how do you do it? (click on images for larger sized views)

Build yourself a Sawboard.  I found this plan on the Internet and decided I just had to build one for myself.  I have an 8 foot model, and wanted a shorter one for use on smaller pieces.  So, that’s what I built recently in my shop.

Gluing the piecesFirst of all, I took this scrap of B-C plywood lying around the shop.  It’s 4 feet long, and about 22 inches wide.  I ripped a 4 inch wide piece on my table saw and sanded the edges of what would become the top edge to prevent any splinters.

Next, if there is any bow in the pieces, put them so the bows cancel each other out and the sheets will lay flat once screwed together.  I put on a good bead of wood glue and used 3/4″ screws to hold the pieces together.  Now, you have to remember to keep this piece roughly centered on the bottom piece, and allow at least the distance from the edge of your circular saw base to the blade on both sides.  The precision comes from the next step.

Cutting to sizeOnce you have the pieces screwed together, what you want to do is set the edge of your saw’s base against the fence and make a cut.  You will automatically have a guide that will be the exact distance between your saw’s base edge and the blade.  It’s genius!

To use the Sawboard, mark where you want the cut to begin and end on a peice of sheet stock.  It doesn’t matter if you want a straight cut or an angled one, because the saw will give you a perfect cut.  Clamp it down with the edge of the guide over the two marks and cut away.

The Finished SawboardIf you clamp the Sawboard to the ‘keeper’ side of the cut, the jig actually presses down on the wood fibers, keeping them from lifting.  A pretty nifty idea.

To get the best out of the jig, just lay the piece you want to cut over a pair of wooden saw horses, and set the depth of the blade a little deeper than the thickness of the keeper and the jig so you barely score the top of the saw horses.

Simple and elegant.  I love it!

Tools I Use – My Clamps

There are certain statements that are beyond refute.The sun rises in the east.  The only two things that are unavoidable are death and taxes.  Bread always lands butter-side down.

And, as most woodworkers will agree, you can never have too many clamps.

Here’s the arsenal that I work with on my shop-built rolling clamp rack. I have what I consider (especially given that I’ve seen other woodworker’s collections!) a pretty modest, yet fully functional setup.

The short Side of the rack

This side I call the ‘short’ side of the rack – all of my frequently used short clamps are parked on this side.  From the top down, here’s what I have:

An assortment of handscrews.  Sure, they can be a pain in the rear to get aligned the right way, but these clamps will work when none other will do the job.  They can get a solid grip on angled pieces, and can also serve as a ‘kick stand’ for cabinet components when assembling them.

My 6″ Quick Grip clamps.  These babies are some of the most versitile ones in the shop.  Holding jigs, clamping small parts, breaking apart components (They switch to spreaders) and any one of dozens of other tasks.

Staying on that top rack, you’ll see some medium duty 4″ F-style clamps with the red heads.  Got them from Lee Valley and they are really nice little clamps when I need more pressure than the Quick Grips can offer.

Next, I have a clamp and edge guide.  I haven’t used this one much recently, but, when I need to cut or route a straight edge, that’s the one I look for.

Two 3/4″ pipe clamps.  I break these five footers out whenever I need a greater reach.  The pipes are threaded both ends, so I can use a coupler to get a 10 foot clamp if need be.  Also, these are great for squeezing an assembly square if it’s racked.

Down from there, I have my 12 inch Quick Grips, and a set of ultra-cheap discount F-style clamps.  None of the bars is straight, the heads slip and they don’t clamp all that well.  But, I can’t bring myself to throw them out, because they are the clamps I used when I started out.  Sentamental fool….

Clamp Rack - the long side
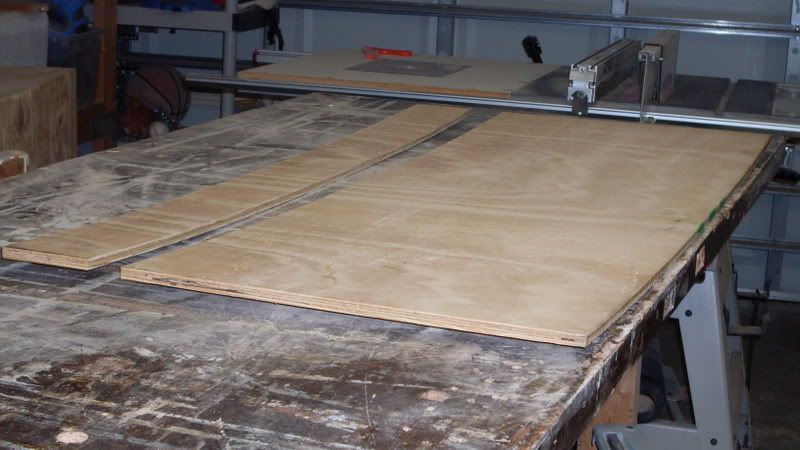
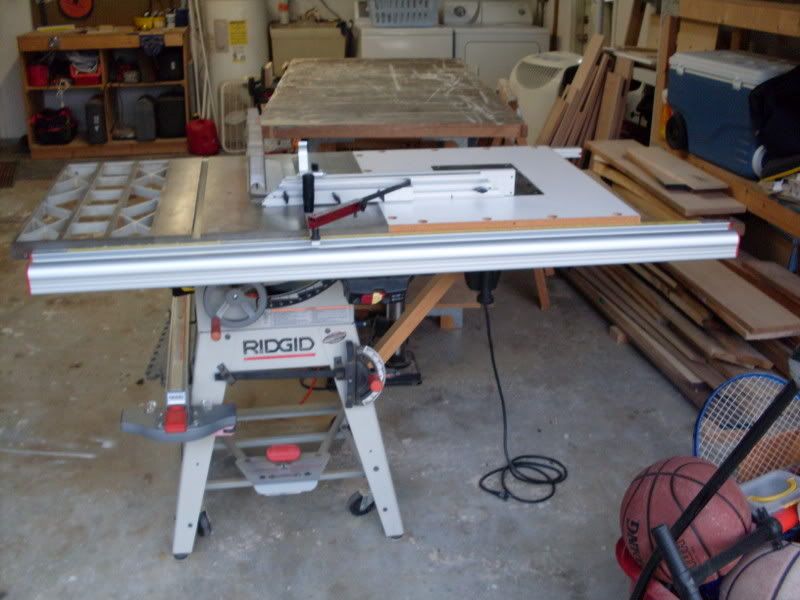
On the flip side, this is where the bigger clamps call home.  This is where I go when I need the muscle to glue up big projects.

From left to right, I’ll start with my first serious clamps.  These 36″ aluminum channel clamps were the first ones I purhchased to glue up larger assemblies. I like these because they are lightweight, give me tremendous pressure and are easy to use.  If you had to buy longer clamps for the first time, these are the ones you should get.

From there, we go to the 50″ Bessey K-Bodies.  These clamps are BUTTER.  Large clamping faces, robust clamping bars… what can’t these babies do?  Really nice for large assemblies.  They have become my first go-to clamps.

The next clamps I’m not 100% sure I like yet.  These are the aluminum assembly clamps that Lee Valley recently sold.  I’ve only used them once and didn’t really like the way they worked.  I’m sure all I have to do is get more practice with them….

And, of course, four 25″ Besseys… nice for putting together smaller projects.

The bucket at the bottom contains an assortment of band clamps, Rockler right angle clamping jigs, spring clamps and other assorted odds and ends.  I use them, but not for every application.

Where the A-Frame meets, I decked the area in and store my eight 24″ clamping cauls I cut out of common 2×4’s.  They are great for holding panels flat while the glue dries…

And, yes during large glue ups, I find myself thinking, “Ya know, this job would go easier if I had more clamps…”

My very own tell-all book

Marcia!  Marcia!  Marcia!In case you have been living under a rock, a lady by the name of Maureen McCormick recently published her memoirs.

Why is this significant?  Well, Ms. McCormick once played the lovely and talented Marcia Brady on the super-cheesy 1970’s sit com The Brady Bunch. You remember her – her younger sister Jan kept lamenting, “Marcia!  Marcia!  Marcia!” as she was elected president of her class, made the cheerleading squad and later went on to share the Nobel prize as she figured out a new way to split the atom.

Apparently, her years after the show were – to put it mildly – tumultuous.  Problems with drugs and other issues plagued her life after the show ended.

Now, I have no plans to buy her book and learn all of the sordid details.  It is interesting, however, to see just how many people are willing to put to print the details of the evolution of their lives and careers for the public to read.

It’s funny, because I have a similar book on the bookshelf in my living room.  Is it professionally printed?  Nope.

Does it tell all the intimate, embarrassing details of my life?  Nope.

The project book coverHowever, it does – in a way – chart my woodworking progress through the years.

About 10 years ago, when I first started woodworking, I needed a notebook to jot down some ideas.  Hey, I had a circular saw, a drill, a doweling jig and a whole lot of enthusiasm. I picked up one of those marble-covered composition books – you know, the ones with the black and white covers and the stitched binding – and started sketching out projects that I was picturing.

The first pages of the book...Those front pages do tell kind of a funny story about projects that never saw the light of day, designed with just unbelievably bad technique.  Many of those babies really needed to be strangled in their cribs.

The best part of this book, however, happened on the back 20 pages.  I took the time to color the edges of those pages with a red marker and start listing the projects I built on those sheets.

The listings are very simple.  The name of the project.  The month is was completed.  Who was it built for – my home, a friend, a neighbor?  Did I make any money from it?

At first, the projects seemed to take forever to get started.  Simple projects, such as a step stool for my son to use to reach the bathroom faucet, took about four months to build.  Other months, I was able to crank out project after project.  I could tell when I got my portable shop air conditioner – that’s when I started actually building stuff during the heat of the Florida summers.

The most important function of this list, however, is for me to look back at what I have already built and see where I’ve come from.  I have a few stars next to projects that were big steps for me.  The first project I built.  The first time I built stuff to give as a gift.  The first time I sold a piece. The first time I cut dovetails.  Each milestone brings back the memories of where I was, what I was doing and who I was building with.

My trips to a woodworking school that I used to go to in Indiana.  Yup.  Got ’em there.

The times when I worked with my brother-in-law at his house?  There they are.

The times when my sons would come out and help me build projects?  You betcha.

The cool thing is that everything I have built is listed there.  No matter where those pieces are today, my list keeps reminding me that my work is out there somewhere.

If you are a hobby woodworker, you might want to consider starting your own book.  Remember, when you build, you aren’t only building projects – you are also building memories.

OK, I have to admit that sometimes I get embarrassed when I look back at some of my stinker projects.  But, hey, we all have those from time to time.

At least the public doesn’t have to read about them…