I saw this and just had to post it. Look familiar?

Remember to wear your safety glasses before carving your pumpkin…

I saw this and just had to post it. Look familiar?
Remember to wear your safety glasses before carving your pumpkin…
 Walking into any large retail store is always an
  interesting experience. Because mass merchandisers have to think well into the coming months, they have to push the products for events quite a long time from now.
My kids were barely out of school for summer break (maybe a month) when retailers started putting out their back-to-school selections. Once the tykes were back in class, the displays shifted again – this time, the Halloween stuff came out. Of course, now we’re looking at Christmas items everywhere…
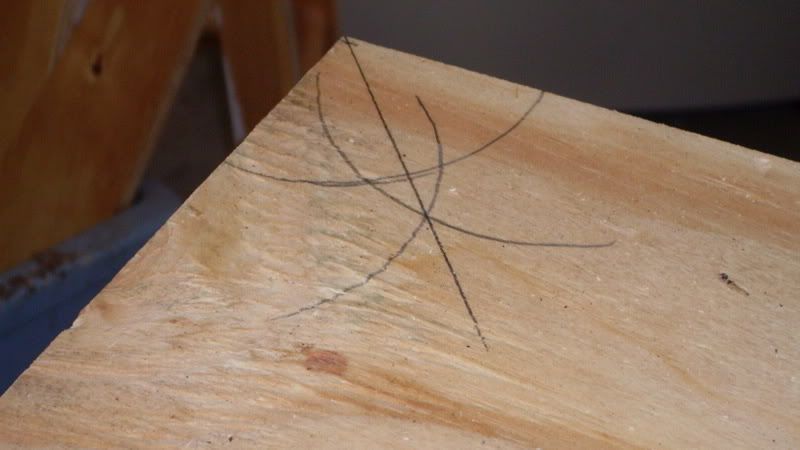
When the Halloween stuff hit the shelves, the wheels started spinning in my head. This project is a miniature pinch-toed coffin made out of one sheet of 1/2″ CDX plywood. Most of it was assembled with glue and brad nails, and glue blocks add some reinforcement for the sides and bottom. The toughest part of the build was getting the angles right on the sides. To get the angles right, I bisected the angles using a compass and used a sliding T-Bevel to set the blade properly.
 I got some galvanized T-hinges from the hardware section and used those to operate the lid. When we are out of the season, I’ll put all of the decorations into it and use it for storage up in the attic.
I finished it by rolling on two coats of an exterior primer and two coats of exterior house paint. Hey, it’s going to be out in the elements. I went to the local crafts store and got the large RIP letters for the lid. A nice touch.
 I have it chained to a tree in front of my house (unfortunately, in my neighborhood, nice seasonal decorations have recently developed this nasty habit of ‘walking’ away…). To complete the look, I added a green flood light and a fog machine, which spills an unearthly green lit fog across the lawn when it’s activated. Pretty cool stuff.
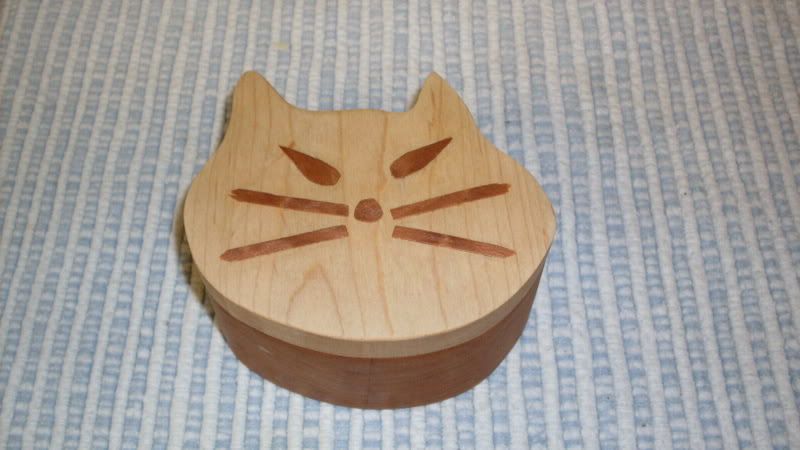 This is one of those projects that you don’t want to build, but want to put yourself into 100% once you agree to it. Recently, a friend’s cat passed away quite unexpectedly. It was pretty traumatic for her, and she asked if I would be able to build something for her to keep some of his keepsakes in – his collar, a clipping of his fur… stuff like that.
At first, I wanted to build a basic rectangular box out of some exotic woods, but I hadn’t yet built a full-blown bandsawn box. I figured this would the an excellent opportunity to give it a shot.
The body of the box was cut from some 2″ thick cherry scrap, and the top was taken from a waste piece of maple I had planed to 3/8″ thick for a previous project. You see why now you can NEVER part with a scrap of wood!
Once the pieces were milled square and true, I sliced a chunk off the bottom of the piece for the box bottom. Once I had done that, 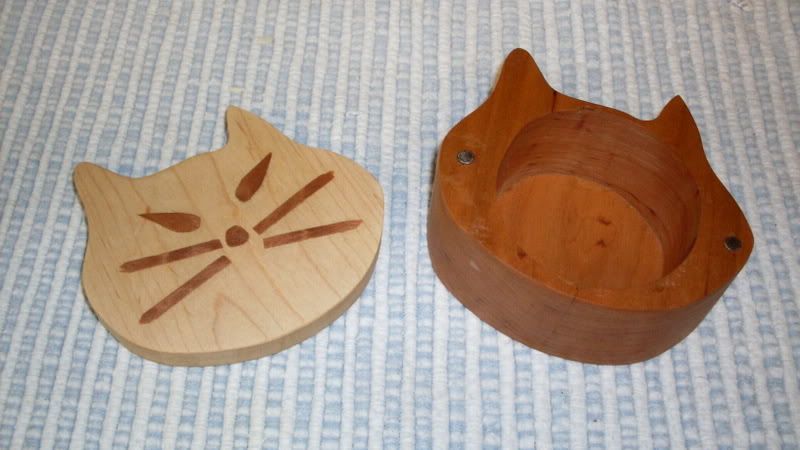 I taped together a sandwich of the pieces – the two cherry and the maple. I cut the outside of the box, then cut out the circle on the inside of the middle piece.
There was a tremendous amount of sanding required to get the box into shape. Apparently, my narrow blade had too many teeth per inch, leading to tremendous burning, especially in the cherry. That’s something I’m correcting by getting a 3/16″ blade with far fewer teeth…
Once I glued the peices together and sanded again, I inlaid four rare earth magnets – two in the top and two in the body – to serve as a ‘latch’ for the box to keep the top affixed.
Before finishing, I cut some scrap veneer pieces to make the eyes and whiskers and glued them on with hide glue. This way, it was easier to scrape and sand the leftover bits of glue off the maple.
Finishing included my standard wipe on of 1# dewaxed shellac. After letting it cure and sanding it down with 400 grit wet-dry paper, I wiped on two coats of my own homebrew finish.
I guess I hit the mark. Shortly after she recieved the box, she called me, in tears, to thank me for the project. At least I was able to help her through a tough time…
 For those who follow along at the Wood Whisperer Blog, Marc Spagnuolo has featured one of my latest projects as his featured Project of the Week.
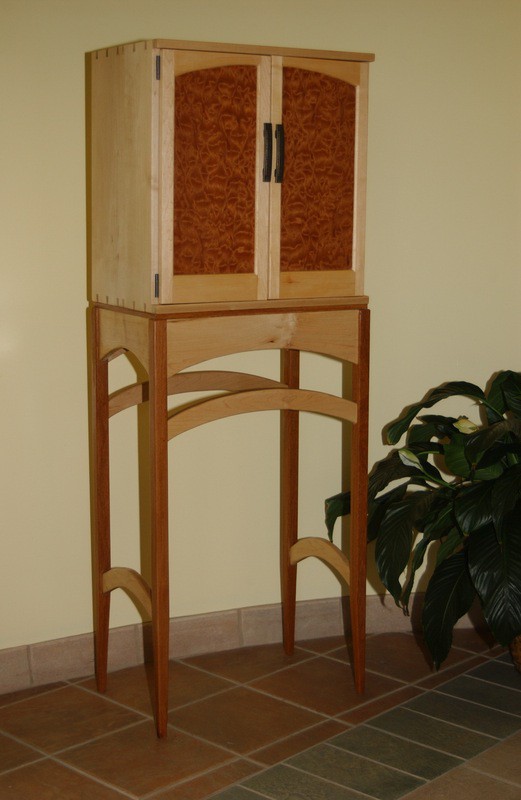
This is a Krenov-inspired chest on stand I built mostly out of offcuts I purchased at Weiss Hardwoods in Largo, Florida. I wanted the base to have a little movement and grace, so I cut the rails and stretchers with a curve in them. Both the front and back curves have identical arcs – as do the two sides.
The chest is made of maple and is dovetailed with my Keller Journeyman jig. I was able to use variable spacing by following the simple instructions Dave Keller wrote up in the manual.
The top rails of the doors echo the identical arcs in the aprons and rails, and the panels are veneered sapele wood I got from Veneer Supplies dot com.
The write up I put on Marc’s blog goes into great detail about the construction. But, what I loved most about this project was the number of firsts. My first veneered project (Loved it). My first attempt at a Krenov Cabinet. My first variably spaced dovetails.
The Fujiwhara Chest was recently dropped off at the county’s personnel office – the coordinating office for the annual art show sponsored by the National Arts Program. I will find out at a reception late on October 1 how the piece fared. With any luck, the judges might see some merit in honoring the piece.
Just as an FYI – I have also put the piece up for sale for $1,000. I’ll be donating a portion of the proceeds to my county’s Christmas Bikes program which allows employees to contribute to purchase bikes for underprivelidged kids.
I’m sure there are one hundred ways to build a work bench, and all of them are correct if they meet your needs.
…………………….– Danny Proulx, Building Woodshop Workstations
You wanna brew up an instant argument? Find a group of woodworkers and ask them their opinions about brands of pick up trucks.
For the record, I drive a Toyota Corolla. I chose this car because it gets me from point A to point B with a modicum of comfort while using as little gas as possible. It has a reputation for reliability. The fact that it also happens to be able to hold my entire family is a bonus. Other than that, I really couldn’t care what make the car is.
 But, when you drag Ford, Chevy, Dodge, Nissan, Toyota and other manufacturers into the mix, people become defensive about their trucks. Boastful. Arrogant. “My Ford will tow your Chevy to the junk yard when it dies.” “My Dodge is a beast and will out perform both of your toy trucks.” This conversation can drag on for hours while people go back and forth essentially over what is a utility vehicle designed to carry a load of items.
In much the same way, woodworkers have a tendency to look at their workbenches and compare how they stack up to others. Whether a woodworker believes a huge steamed beech bench modeled after some European standard is the only way or a solid door on sawhorses is their preference, a great deal of personality is invested in the decision.
I have been looking at my workbench recently. Sure, Big Ugly still answers the call without a whine or whimper each time I go into the shop. She serves me well. But, I’m thinking it might be time to do some upgrading. Some extra features. A little more heft.
 That’s where I’m getting stuck.
At the recommendation of many woodworkers, I recently picked up Workbenches, the first book written by Popular Woodworking Editor Chris Schwarz. The book has been touted as a seminal work, required reading for woodworkers of all levels of experience.
I’ve got to hand it to him. I think Chris has written a very well researched book on the topic of workbenches. Besides old photos of woodworkers actually using their benches from bygone ages, his book is replete with drawings, block prints and ads from tool and bench manufacturers from years gone by. This really helped me get an idea of just how these specialized shop tools has evolved from the first flat rock to today’s high-tech offerings.
Chris offers outstanding plans with measured drawings and step-by-step instructions in exacting detail. Chapters devoted to stock selection, bench accessories and the best methods to accomplish certain tasks make this book an invaluable reference for any shop. It’s written in a style where – yes – I didn’t want to put it down.
But, I do have a quibble with the author on a few points.
 No doubt Chris is imminently more qualified than I to write about all things woodworking. He’s worked with the best. He’s held some of the most expensive tools ever manufactured in his own hands. He’s perched in an enviable position from where he can monitor the latest developments in the craft. When he speaks, his voice carries with it a great deal of authority.
For some reason, his book hit me the wrong way. Chris makes excellent points about the shortcomings of many bench designs. He validly points out that many benches today are glorified kitchen counters – with no access to clamp materials from below – or overgrown dining room tables. However, the way he belabors the point seemed to set uneasily with me.
 He speaks about other designs – some of which he designed for Popular Woodworking – as if they are somehow beneath a serious woodworker. “Build it like that, and you’ll be terribly disappointed,” is a common refrain. Perfectly serviceable benches such as the 24 hour bench and the $175 bench are dismissed as ‘starter’ benches, perfect for customizing as you would an old Volkswagen Beetle.
What iced me from the book was when he pointed out the shortcomings of the benches found in the shops of Tage Frid, James Krenov and Frank Klausz. There is no question that these men have built incredible works of craft – and art – from their modest benches. While maybe not the ‘perfect’ forms, the quality these men have produced speaks volumes for their ability to use these benches effectively.
And, that’s without saying a word about the Japanese masters such as Toshio Odate who create their masterworks without even touching a western-style bench.
 Chris describes his first exposure to the French-inspired Roubo workbench as a near religious experience – divine inspiration into the perfect form and function of what a bench could become. In some ways, I wish he would position himself as less of a Zealot when considering bench forms. Unfortunately, there will be many starting woodworkers who will walk away from this book thinking that any workbench – other than those recommended by Chris – would be a waste of time. Indeed, I can see many up-and-coming woodworkers stymied by the impression that they MUST build a Roubo before they dare touch a tool.
Listen; there are dozens – closer to hundreds – of published plans out there to help you build a workbench. From ultra-quick, ultra-cheap weekend benches knocked out a few 2 x 4’s and some plywood all the way to the could-double-as-an-altar-in-some-minor-woodworking-religion uber-benches – there’s something out there for everyone.
Before you go out and build your bench – consider doing what I’m doing. Look at plans. Lots of ’em. Ask yourself some questions. What am I going to use this bench for? What’s my budget? What skill level do I have? How much space is there in my shop?
 Sure, you can’t plan for any eventuality. I could hit the lottery next week, quit my day job and woodwork full time. Of course, my kids could need glasses, braces and piano lessons too…
What kind of bench you work on is a personal decision you will have to make. Ask around. Take all of this input with a grain of salt, understanding that everyone will offer his or her opinion based on what works for them.
Then, go boldly, build your bench – and get back to the fun stuff – woodworking!
By the way, here are some resources I’ve already checked out:
Down in St. Petersburg, Florida, there is a kids museum named Great Explorations. They recently had to surrender a loaned exhibit which addressed TV production because it was scheduled to go to a new museum.
Since our office has surplus TV equipment from a recent equipment upgrade, we stepped in to donate the cameras, switchers and surplus monitors which would have only gone to a warehouse until they were disposed of.
However, when the old exhibit was pulled out, all of the set was removed with it. We had to build new set walls for the exhibit.
So, guess who they tasked with the project? 😀
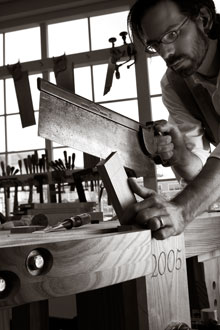
Basically, a TV division employee and I spent two days building three 8 foot by 10 foot walls and mounted them so they would be free standing AND be able to endure the bumps, kicks and handling of large groups of excited children.
We framed the walls just like you would frame a residential wall – 2 x 4 studs 16″ on center. The studs were screwed to the top and bottom plates and we skinned them over with sheets of 1/2″ cabinet grade ply. We had to cut out an area for three stacked TVs to be mounted, and I framed them out just as you would frame out a window in a wall, complete with a header, sill and cripple studs.
To mount them, we tied the structure back to the existing walls with 2×4 standoffs, mending plates at the top and middle of each panel intersection, and Tapcon screws driven into the concrete floor. To test their stability, I ran and literally threw myself at the wall. All 200 pounds crashed into the structure, and it barely moved. My shoulder, however, stung a little bit. I guess that proves the wall can take a beating.
Once they were mounted, the museum’s painting crew came in to do some embellishment. With the opening scheduled for August 22, you can tell that the site is a mess. But, it is coming along nicely. Here are some shots:
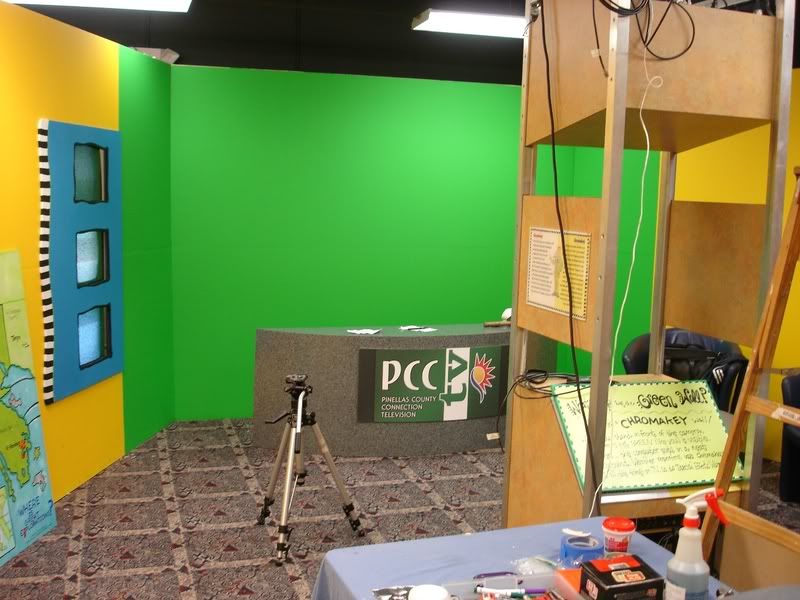
Here’s an overview shot from the back of the studio exhibit. The green wall in the back is set for chromakey. This means the kids can sit at the news desk and report, and any type of video can be rolled in behind them. The video rack in the middle of the room is from the old exhibit, and needs to be replaced.
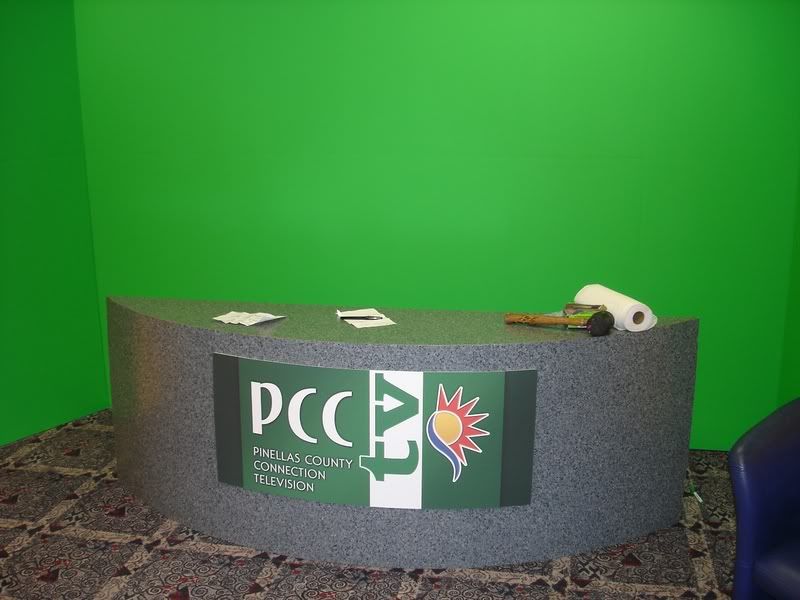
Here’s a closer view of the news desk. The kid newscasters will sit behind the desk and read the news from a teleprompter stationed in front of them. PCC-TV is the county’s TV station.
This area to the right of the news desk will eventually serve as the ‘Assignment Desk’ for the newsroom. Kids will be able to select stories for the teleprompter and video to put ‘behind’ the anchors. A built in desk – which I may still be called upon to build – and some computer terminals will go here.
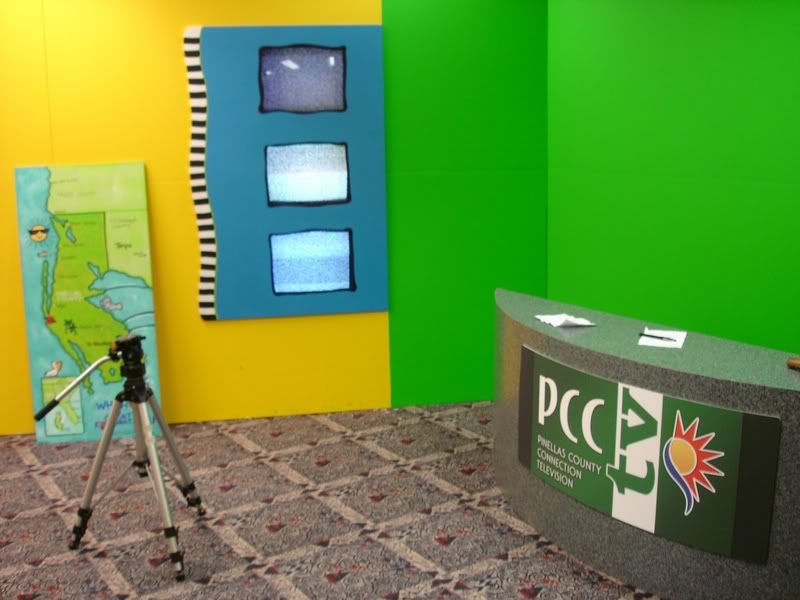
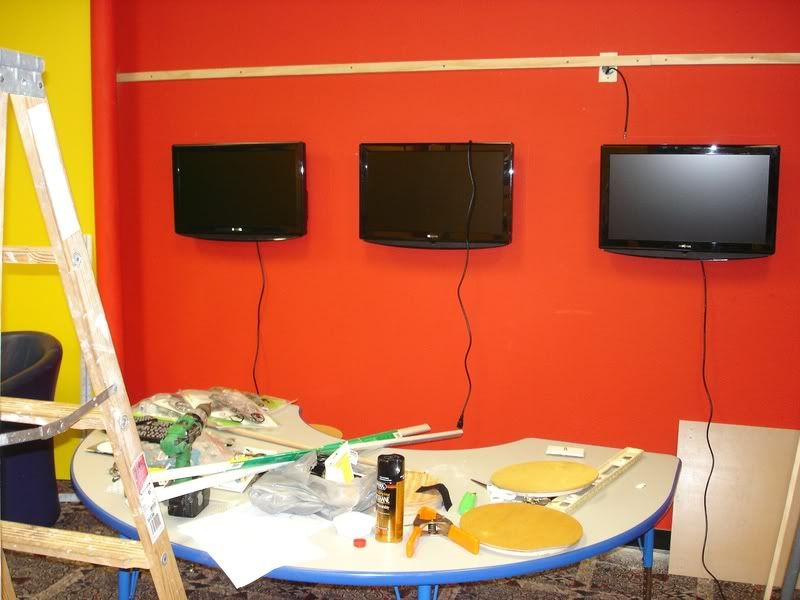
And, this area to the left of the desk will be the start of the weather center. Further down the wall, there will be a weather map mounted, and the three TV’s will display the PCC-TV live feed, Bay News 9, the local 24 hour cable news station and possibly CNN.
When I get down to the opening, I’ll be sure to post some shots of the completed studio.
September, 2007
I love weather. I also love woodworking.
 What better way is there to satisfy both of my passions than by building a wooden weather station?
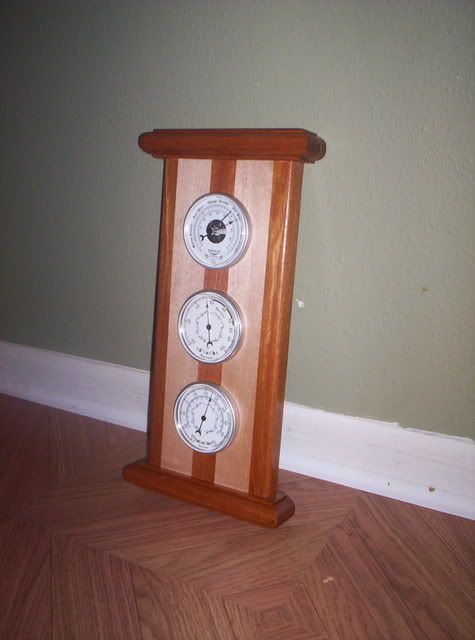
This was one of those projects I really enjoyed building because it was built with free scraps. The Brazilian cherry and maple were cast offs from a neighbor’s shop that I was able to put to work.
For the body of the station, I laminated strips of maple and Brazilian cherry, then bored the holes for each of the instruments. The top and bottom of the station are moldings I shaped on the router table. I shaped a rectangle of wood and then ripped the pieces from the larger piece, making for a much safer operation.
I used glue and pocket screws to attach the top and bottom, and discovered just how easy it was to split the wood. There are two small splits where even the finest pocket screws were too much.
I sanded the piece down to 220 grit, and finished it with the Rude and Crude method – 1# cut of dewaxed shellac, sand with 400 grit, then apply two coats of Danish Oil.
The instruments were purchased from Lee Valley, and they include a thermometer, barometer for measuring atmospheric pressure and a hygrometer, which gives a fairly accurate reading of the relative humidity. Unfortunately, because I have the station indoors, I’m reading the temperature and humidity inside my office.