Category Archives: Tools

Living with it

One of the greatest things about building a built-in project is that you can put it into use before the piece is totally done. And, since I installed the boxes on our front entertainment center, we have been using the piece to hold our TV, stereo, Blu-Ray player and other goodies.

We have moved in to the entertainment center
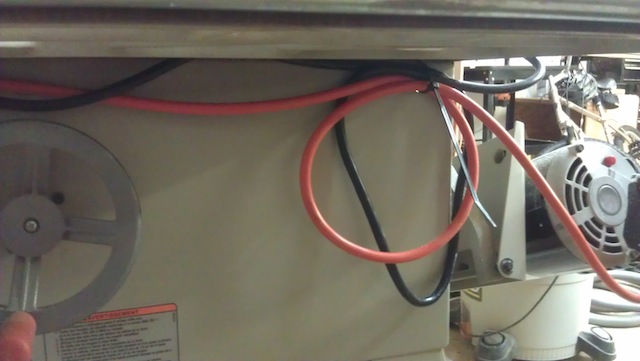
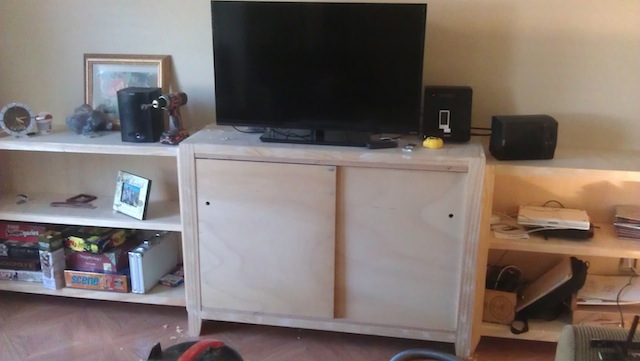
The bad part? Well, when you have to do more work on things, you have to move all of those goodies around to keep them out of harm’s way.  I have been drilling holes to feed cables into the setup, tacking down wires and doing other tasks required to get things in order.

Of course, one important thing that is coming up is sanding. Now, I would normally never give sanding a second thought – in my shop. But, in the living area of the house, keeping dust under control is going to be a big deal. After all, getting sawdust in the electronics, all over the surfaces and in the air is a big no-no.

The FEIN setup
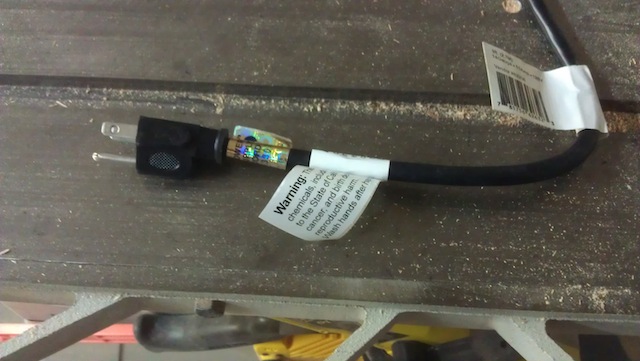
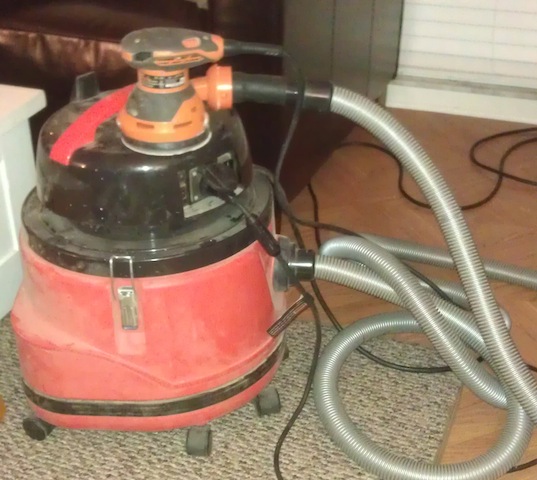
That’s why I am happy that I have a dedicated dust extractor for the random orbit sander. I got this when my friend Paul and I were working on his office system, and it had proven its worth time and time again in the shop. The collector hooks up to the sanders, saws and router table and keeps the dust and chips down to a manageable level. Even better, it has an outlet on it that you can plug the tool into which triggers the collector when you turn the tool on, and stops the collector five seconds after you release the trigger.

But, would it work on the house?

Rhonda goes a-sanding
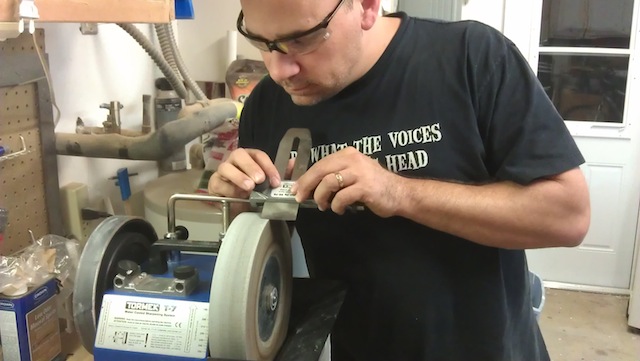
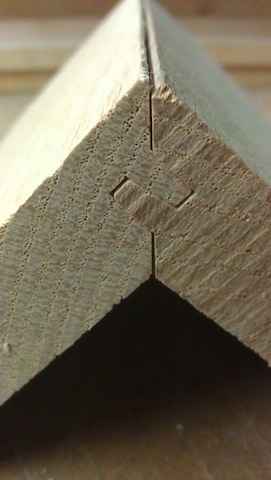
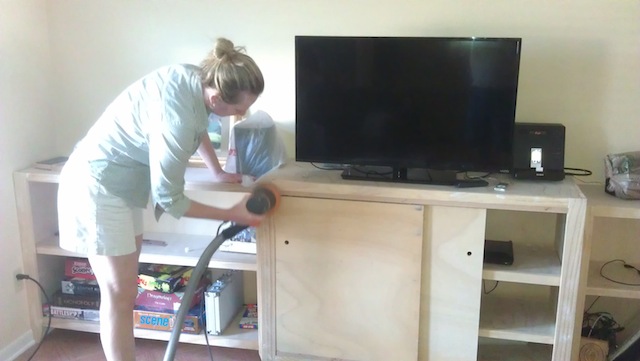
This past weekend, after a few fun family events, we put the collector and sander to the test. Actually, I say ‘we’, but Rhonda offered to do the sanding, and I was more than happy to turn the task over to her. With a 150 grit pad on the random orbit sander loaded on, she proceeded to take care of business.  She was able to level any irregularities in the joints, break the edges and get everything nice and smooth.

The best part?  No dust wafting through the house. This is great.

Fortunately, there isn’t much more to do on this project. Some finishing touches, priming and painting on the cases, and building three solid oak tops for the pieces, and we can move to decorating and cable dressing the piece.

Then we can really start living with the entertainment center.


The handiest tool

I have a confession to make.

Every time someone asks me, “Tom, what’s your favorite woodworking tool?” I always fail to tell the truth. It’s not because I’m trying to delude anybody. It’s just that I forget the one tool that finds its way into my grubby mitts for just about every project.

No, it’s not the joiner plane I mention frequently. Nor is it the table saw or the chisels. Instead, it’s my cordless drill.

My old Ryobi looked like thisThis past weekend, I bought a new one, making it – I believe – the fifth one I have owned. First, there was the Ryobi 12 volt. Uber cheap, it was the drill that showed me that I didn’t necessarily have to have a cord connected to the wall to be an effective tool. It served me well for about a year before the NiCad batteries crapped out on me.

My old DeWalt looked like thisThe DeWalt 14.4 volt I owned was awesome. That was a compact model that was built like a tank. It could handle all of the drilling and driving tasks I sent its way. I had that one for about three years of loyal service until, again, the NiCad batteries just gave up the ghost. Oh, sure, I could have bought new batteries, but the darned things cost more than a whole new drill setup.

My Kobalt looked like this I was later gifted a Kobolt drill with a Li-ion battery. The new battery technology was great, but something happened inside the drill after about half a year. I was putting up some fence panels in my backyard, when the drill suddenly stopped moving. For some reason, the drill seemed a little underpowered, so instead of going through the warranty mumbo-jumbo, I decided it was time to move to another drill.

My old Porter CableI picked up a Porter-Cable drill kit (complete with a battery powered circular saw) about two years ago, and that served very well as my primary drill. Again, it could handle just about anything I could throw at it. Drilling holes, driving screws, mixing thinset mortar with a paddle attachment. Yes, I still have some hardened thinset on one of the batteries.  The problem?  You guessed it.  The drill came with NiCad batteries, and after two years of charges, it started not holding charges anymore. I noticed during the start of the cabinet build that I was swapping batteries about every hour or so, and I wasn’t doing a lot of work with the drill. And, as you might imagine, new batteries cost more than a whole new setup. I needed a new way to do this….

The new Ridgid drill

That’s why this past weekend, I picked up a new Ridgid cordless drill. I went big orange because of their lifetime warranty – which happens to also include the battery packs. So, if they go south, I can get new ones.

This drill is solid in my hand, with a 30 position clutch – an essential when driving screws. It has two speeds – slow for driving screws and fast for drilling. My Porter Cable drill had a light in line with the chuck on the drill, where the Ridgid has and LED light at the base of the handle, giving a much better illumination of the area you are working. It may seem like a luxury, but let me tell you, working inside a dark, cramped place, the light is worth its weight in gold.

Just like my old DeWalt, the drill is also far more compact than my last one, which will allow me to work inside smaller locations, making cabinet work that much easier.

And, like the old Kobolt, it’s a Lithium-Ion battery. What’s the difference?  Well, from everything I have read, when NiCad batteries start to run out of juice, the drill’s performance drops off significantly. When the Li-Ion batteries run low, they still provide top performance until there is no more juice.  The charger also recharges the batteries very quickly, meaning less down time waiting for batteries the charge.

There’s nothing quite like the feel of a good quality cordless drill in my hands – especially when building an installing cabinetry. I can drive screws to build the boxes, then drill pocket holes in face frame members to accept screws. Switch to a forstner bit to drill holes for cable runs between cabinet boxes. Drive long screws through the cabinet backs to attach the boxes to the studs.

Yeah, I really do like my cordless drill, and this one one promises to be a solid performer for years to come. Look for this one to be by my side on some more upcoming projects.

What was under the tree?

Between trips to the doctor this past week, there also happened to be this little event called Christmas. Well, Christmas Eve and Christmas Day, both of which were celebrated with much mirth and merriment… and food. Glorious food.

I must have been a good shop monkey this year, because Santa left some choice items for me under the tree this year. There was quite the haul for the entire family, with the kids getting lots of gift cards (what else would two teenage boys want?), Rhonda getting a few nice things (an extra kayak paddle for those awesome beach days) and I got a few totally awesome things as well.

Martha B. Day, baby

First, I mean, come on. This shirt is totally the bomb. You may have never heard of Martha B. Day school, but my brothers and I sure have – that was our elementary school back in Bloomingdale, New Jersey. I had seen this shirt online during a school fundraiser, and I just thought it was too funny to pass up. Granted, I haven’t been inside the building since June of 1980, but it’s good to get some strange looks from folks as they pass.

The Leatherman

This little beauty is something I will be using a lot. Just before the holidays, my son Dominic needed a multitool, and I gave him my old Husky one I had picked up at Home Depot. It served me well for years, but it was time for me to upgrade to a genuine Leatherman. This is one of the more entry-level models, but it has a ton of features which will serve me well for years to come.

Drill press and table

I already put that Leatherman to good use when I assembled the big present… my brand new Woodpecker drill press table. Once I moved my little drill press into its new home on top of its rolling stand, I have found myself using it a ton more than I had expected to. The only thing holding me back from using it more was the simple plywood table I had bolted to the press years ago. No slots, no fence… just a larger place to work on.

Rhonda picked this gem up from my friends over at Infinity Tools. After I had hinted that I wanted to improve the work-holding options on the drill press, she checked out their site to see what they offered. A blog post they had written a few months ago showed the features on the table, which convinced her this would be the right one for my shop.

Just as the father in A Christmas Story hid Ralphie’s Red Ryder Air Rifle behind his desk, Rhonda has snuck the large table into the house and hid it under the banquette until all of the other presents had been opened. That was some kind of surprise.

Woodpecker's Famous Red Tracks

Before we went off to our Christmas Day celebration at Rhonda’s sister’s house, I spent the morning assembling the table and getting everything ready for installation. The red anodized aluminum tracks were easy to install, and the fence bolts fit right into the slots, providing me a great guide surface for accurate drilling. A pair of flip-up stops will make drilling mortises a piece of cake, and a pair of hold down clamps will help keep the work secure, ensuring precision and safety.

Insert

The folks at Woodpecker even included a replaceable insert for when I chew up the original. How very thoughtful.

Now, I feel as if I can fully welcome the drill press into the arsenal of shop tools, taking its rightful place next to the other tools that help me get my work done.

And, with my sinus headache fading into memory, I just might get started on a new project for the living room. But, that’s another post for another day.


A new tail

Hey, everyone, Iggy here. Now, I’m not normally a power tool kind of monkey, but I have a soft heart for them. I mean, they help the tailless one – and hundreds of thousands of other, far more talented woodworkers – cut joints, size wood and other important tasks.

This poor saw...The only problem with this mook is that he must be abusing the heck out of it. I mean, let’s take for example this poor, unassuming table saw.  What has it ever done to Tom over the past decade plus?  It’s been a solid performer, cutting whatever he could throw at it. And, when he wasn’t careful, it would bite him… but, that’s another post for another day.

This poor tail...But, could you believe the abuse he threw at this saw – especially it’s tail?  I mean, what does this guy have against tails?

The plugLook at this, where the plug is anchored to the cord. What was he doing with it? Nothing ever good comes from pulling on tails, Tom. Absolutely nothing. The worst part was he kept trying to cover this mess up under scads of electrical tape.  Bad Tom.

My name is nickAnd, as if it couldn’t get any worse… come on, Tom. Seriously?  How did this one happen, right in the middle of the cord? Did you buy stock in an electrical tape company?

The replacement itemsFortunately, I had some time today to help this poor saw get back into shape. It involved a replacement power cord – 14 gauge – and some crimp-on quick connectors.  It didn’t take too much effort to slide the power switch off, open it up and replace the power cord. I would have taken some pictures, but, believe me, it wasn’t all that exciting. Just disconnecting the old wire, reconnecting the new and mounting the switch back in place. Maybe five minutes worth of work.

Getting LoopyOnce everything was buttoned back up, I bundled up the wires with some wire ties, and even gathered the extra wire from the plug and to the motor up in a loose loop to provide stress relief in case the big galoot decides to yank on the tail again. Bad Tom.

The new plugNow, the saw has a brand new power tail, ready to give a lot more service. Only if the Tailless one uses it with care.  Got that?

Frankenplane

I am a few weeks late for a Halloween post, but today I celebrate the creation of – the Frankenplane…

The Frankenplane risesThese planes are probably more common than you may believe. Basically, it is a Stanley No. 5, just with parts and pieces from planes of different eras. The body of this plane has been featured on the blog before, when I snapped the cap lever.  The cap lever came from a 1960’s era No. 4 smoother, and the iron is a replacement. The tote is a replacement as well.  Who cares if the parts are the same age, does the plane work?  I wanted to find out!

One of the things I have heard from both Roy Underhill and Chris Schwarz is that the Jack Plane – the No. 5 – is the plane that should be getting the most work. It can hog off wood cross grain quickly, and get just about any rough board into fighting shape in short order. But, to do that, the iron has to be ground to a camber, or have a curve at the business end.

iron comparisonsBasically, this curve for a jack has to fall somewhere between the nearly straight across smoother iron (left) and the extreme curve of a scrub plane (right). This gives the iron the ability to scoop out wood quickly…

But, how to get that kind of curve, especially when I use a Tormek for sharpening?  Fortunately, by changing technique a little bit, I could achieve the graceful curve with little effort. The manual addressed the ability to get a cambered iron by emphasizing that some extra time and downward force exerted on one edge of the iron, easing that pressure as you slide the iron across the stone and then reapplying the pressure on the other side.  It took a little getting used to, but the iron took shape very quickly

Side to SideAfter the initial grinding, I was able to regrade the stone to the finer setting and really polish up the bevel. After that, I took the iron out of the jig and stropped off the burr on the leather wheel. Easy peasey lemon sqeezy.

Strop 'til you dropI assembled the Frankenplane and set up a board in the vise on my bench. As they say, the proof is in the planing, and the plane cut beautifully.  I tried planing across the grain – it worked. I planed diagonally – it worked. And just look at these lengthwise curls… this plane is ready to be thrown back into use.

That's just plane cool!Now, it will have an honored place in the new tool chest, next to the smoother and jointer, ready to work on the next project.


A sharp option

Until the big post World War II building boom, most carpenters on job sites used hand tools to do their work. And, at that time, it was easy for any woodworker to go into a store, pick up quality built tools of the trade and make a living plying their vocation.

An ad for Disston sawsOnce circular saws and other power tools – pressed into service and perfected in wartime factories –  became more affordable, traditional hand tool companies reduced their offerings – and their attention to detail – on their products. Famous names such as Stanley, Buck Brothers and Disston let much of their hand-tool expertise fall to the wayside.

As woodworkers rediscovered the joy of working with these tools, many new manufacturers jumped into the fray, offering tools as good as – if not better – than the originals. The only problem is that these tools – once available at a modest price – now command a premium, with some saws fetching nearly $1,000, and some planes costing nearly as much as my first car.

There's gold in that there rust!So, as a new hand tool woodworker, the biggest challenge comes down to a choice between selecting a brand new tool at a premium or an old one and learning the skills necessary to bring an old used tool back to life.

There are some other tool manufacturers who are turning out hand tools of very good quality without the premium price tag. One of those companies is Thomas Flinn and Company. They have been making saws since 1925, and are the only remaining firm making saws in the city of Sheffield, England.

My Flinn sawsOver the decades, this company has purchased the names of some respected saw companies, such as Lynx and Pax. I have been using a Pax gent’s saw for a few years now, and I recently received a tenon saw with a stained beech handle from Bora Tools.

The saws are very well made and are very comfortable to use. The teeth are sharp and both saws track straight, making sawing a real pleasure. On the Gent’s saw, the handle is turned of American Walnut. Now, I do have to admit, using a push saw with a handle that is frequently seen on Japanese pull saws takes some time to get used to, but it is a handy little saw for doing small, fine work.

The tenon sawThe larger tenon saw (a 12″ model) has a stained beech handle. It has a heavy-duty crimped brass back on the saw, giving it heft and keeping the blade absolutely rigid – a definite plus when cutting straight lines for joinery. The handle fits my big hand very well, but could be a little large for those with smaller paws. Of course, a rasp, file and sandpaper could make your saw’s handle as custom as you would like.

There is also a wide assortment of other types of saws – panel saws, dovetail saws.. the works. As someone who is definitely looking to improve his hand tool work, these are pretty sweet saws to work with.

The best part? The saws from these lines are not on the expensive side of the equation by any stretch of the imagination.  The ones with the beech handle cost less than the more premium models with the walnut ones, but cut beautifully and are still made of that famous Sheffield steel.

So, if you are looking to get into hand sawing without shelling out the big bucks or spending time learning how to sharpen, the brands offered by Thomas Flinn and Company are solid performers.


Eureka

There was this guy back in ancient Greece. He was pretty smart. His name was Archimedes, and he created a bunch of things. The Archimedes screw. He was able to describe how a lever worked in great detail. He even supposedly invented a ‘heat ray’ that focused reflected sun rays on to attacking ships, supposedly setting them on fire.

Eureka!But, the biggest thing he did was figure out the Archimedes Principle. This describes how to measure the mass of an object by measuring how much water it displaced. Faced with trying to find a way to determine if a crown was made of pure gold or something a little less valuable, he thought he would soak in a tub to think about it. As he slipped in the water, he noticed that the level of water in the tub rose. The synapses fired, and, “EUREKA!” Which is exactly what he was reported to say as he leaped out of the tub and raced outside to announce to the world his discovery. In the buff. That must have been an exciting day for Archimedes – and the rest of the folks out on the street.

Lock Miter BitWhile I didn’t discover something as important as that, I did have my very own fully-clothed eureka moment in my shop.  It involved my nemesis, the lock miter bit. Yes, the same bit that caused me to swear it off years ago. However, the folks over at Infinity Cutting Tools told me that they had the answer to my problem, and that I should give it a try.

The lock miter master jigThis is the tool, the Lock Miter Master Jig. It’s a piece of aluminum with a pair of rare-earth magnets that attach to the bit. The fun part is that when it is registered, the long tick marks point to the exact center of the bit profile. By adjusting the bit to these marks, it becomes easy to get a good result using the bit.

Find that centerThis, of course necessitates finding the exact center of your board. Those set up blocks that most bits come with are great – if your wood is exactly that thickness. Free from set board thicknesses, heck, anything’s possible. I use a center finding ruler to get things lined up properly, but you should be able to do that without one. Use the center line on the board to set the height of the bit, and then the fence depth, ensuring it is centered on the board.

Push sticksNow, one of the most important parts of this set up is to use featherboards and push blocks. Seriously. This is a big bit that removes a lot of stock in one pass, so everything you can do to keep positive control on the work is going to make it a safer and more accurate operation.

Close the gapAnother important step is to close the gap on the fence as much as possible. This helps to keep the possibility of things going wrong to a minimum.

Ooops...Now, I’m sure the folks at Infinity aren’t happy that I showed this shot, but this jig is not foolproof. I am a much better fool than they could have anticipated. The reason I show this is that you have to ensure during your measurements that the jig is perpendicular to the fence when you measure the center of the board. If not, yes, it is still possible to make a big boo-boo…

Getting betterThere, that’s much better. Not perfect, but hey, for a second pass in a hot, sweaty Sunday in the shop, that’s much better than I had done after HOURS of working the old way. Just a few more tweaks, and I’m sure I’ll be looking at perfect joint after perfect joint.

Eureka!