Category Archives: Tools

They get no respect

I can’t even begin to tell you how much I love movies starring the late, great Rodney Dangerfield. Caddyshack. Back to School. Easy Money. This guy was comic gold, and the movies he was in are still timeless classics.

The master himself

He is well known for his self-deprecating sense of humor. Basically, the guy got no respect. How bad?

  • When I was a kid I got no respect. The time I was kidnapped, and the kidnappers sent my parents a note they said, “We want five thousand dollars or you’ll see your kid again.”
  • I asked my old man if I could go ice-skating on the lake. He told me, “Wait til it gets warmer.”
  • Once when I was lost I saw a policeman and asked him to help me find my parents. I said to him, “Do you think we’ll ever find them?” He said, “I don’t know kid. There are so many places they can hide.”

At that, he would adjust his tie, and keep the one-liners coming.

The reason I bring up Rodney is that there are some tools in my shop that get no respect, but boy, do I love them anyway.

Bora trigger clamps

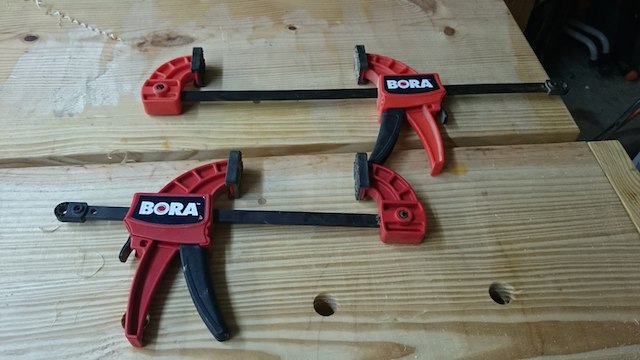
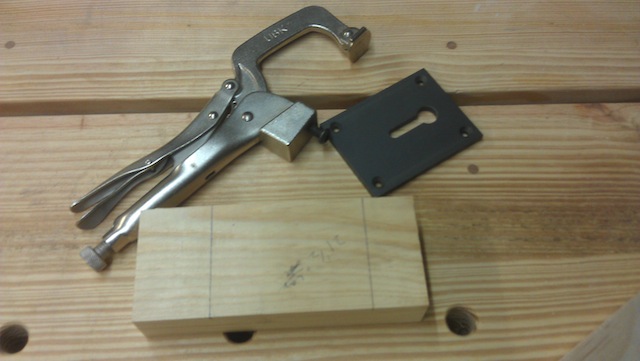
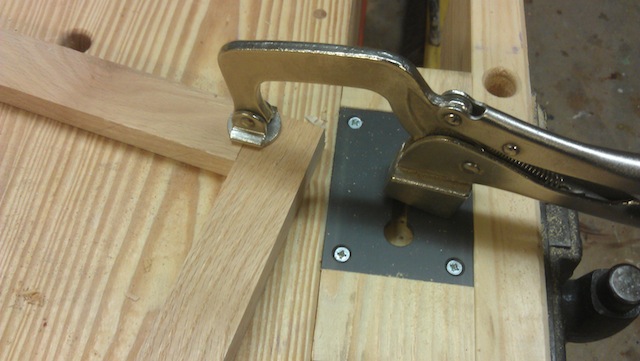
These quick action trigger clamps are the bomb. My favorites are these babies from Bora, and they are just about some of the handiest things to have around the shop.

Now, they aren’t long enough to glue up huge panels, but that’s OK, because there are tons of times when I wish I could have a third (or fourth or even fifth) hand in the shop, and they fill the bill nicely.

Assembly squares

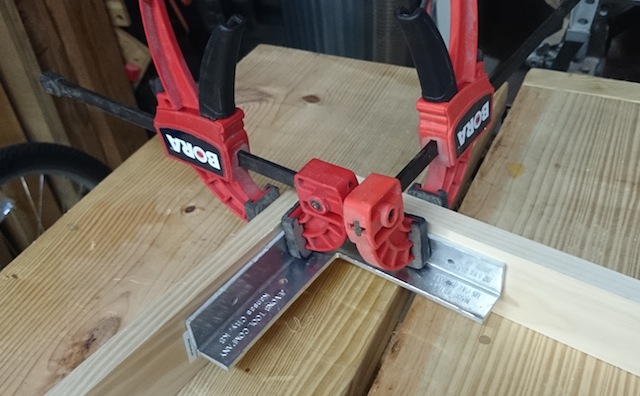
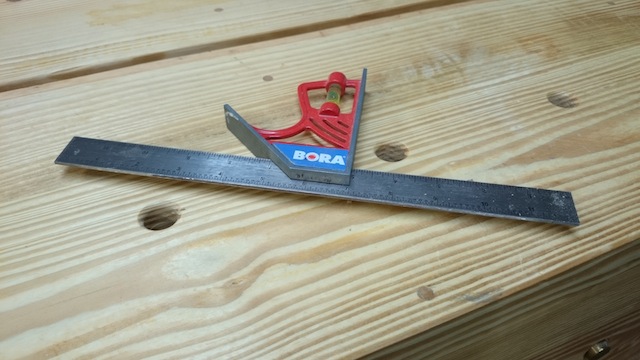
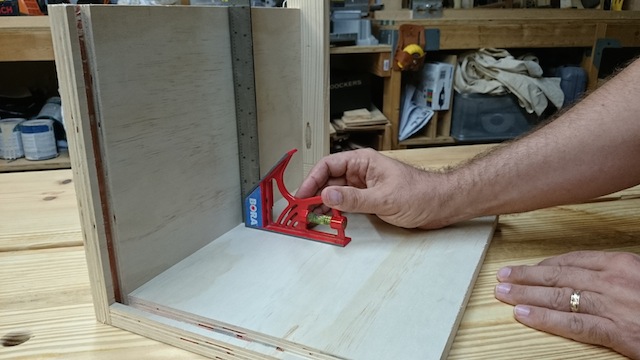
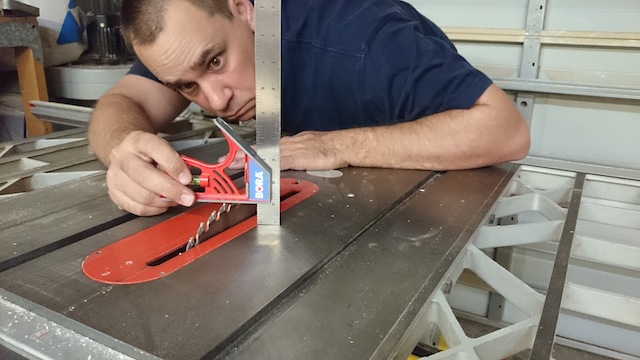
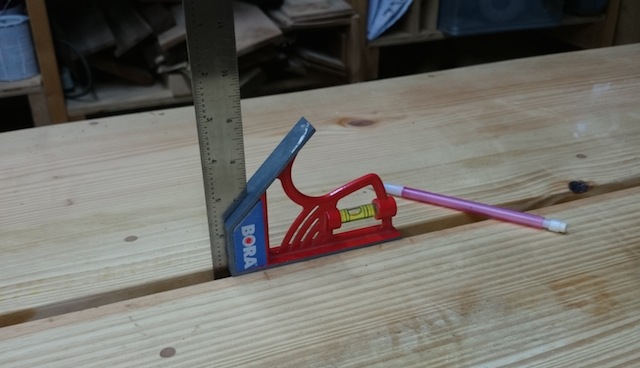
For instance, when I assemble projects (after my misfortunes on getting things square) I use some assembly squares to help keep things at 90 degrees. There’s no easier way to make this happen than to use these little guys to grab the square and hold everything true until things are joined properly.

Holding down the Kreg

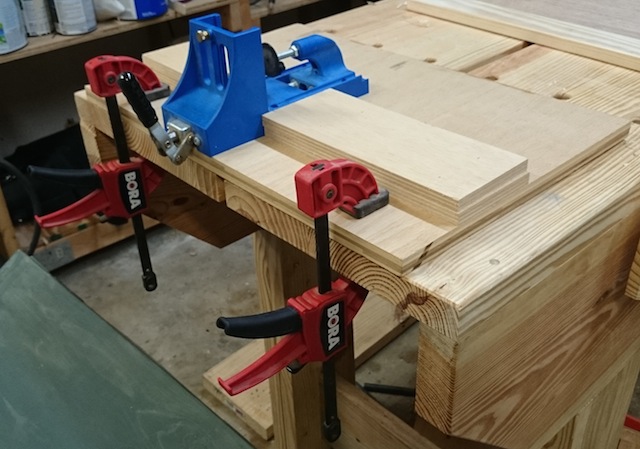
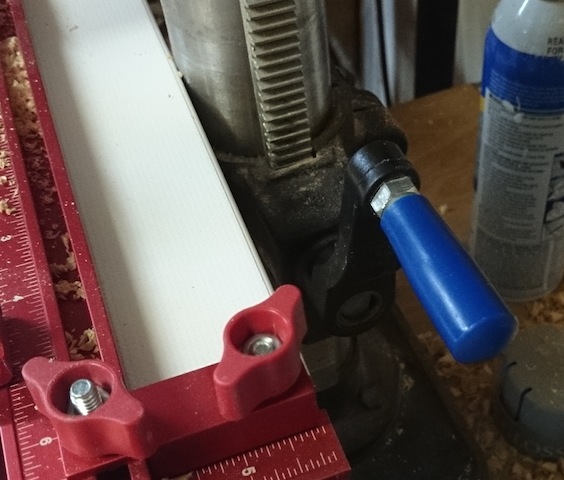
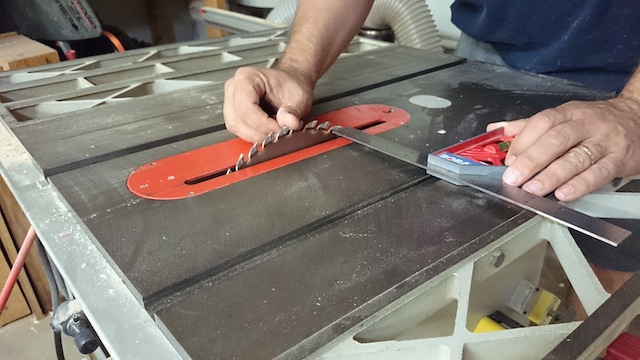
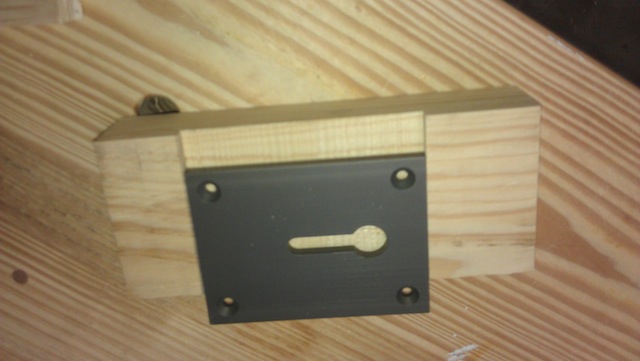
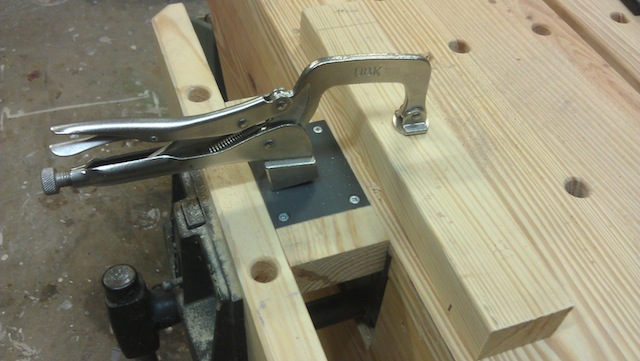
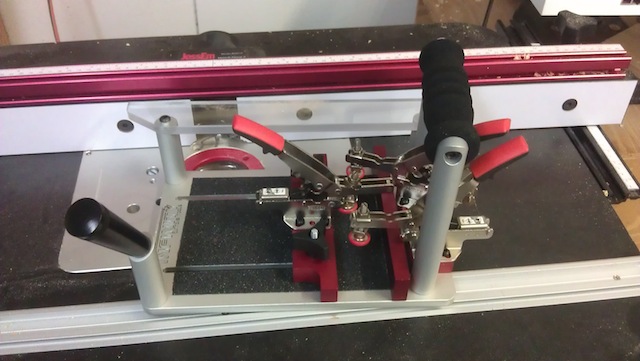
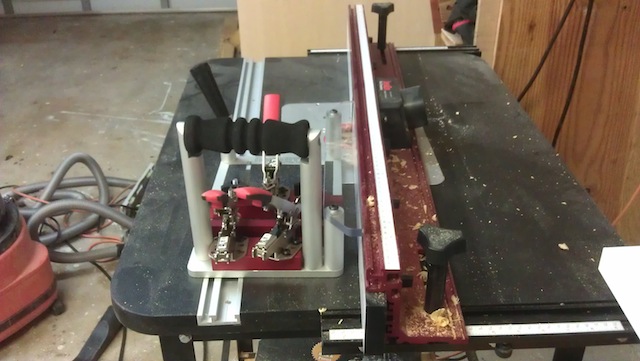
Another great time to use these babies is when I am holding tools down to the bench. Whether it’s the combo belt/spindle sander or the Kreg pocket hole jig, securing the tool to the bench really helps eliminate one potential problem of having the tool walk on me. These honeys grab nicely, and allow me to focus on getting the work done, rather than trying to manage the work and the tool.

Stop holder

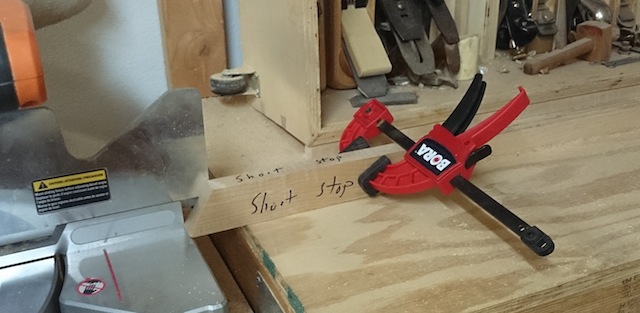
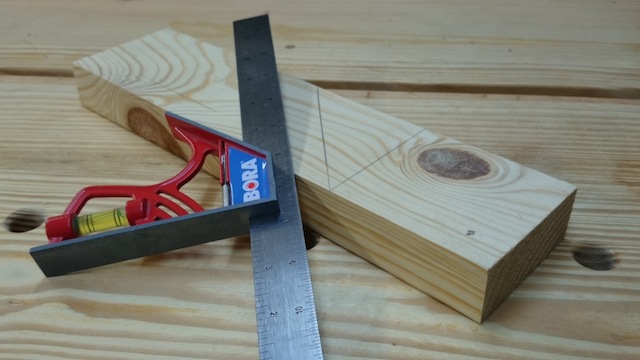
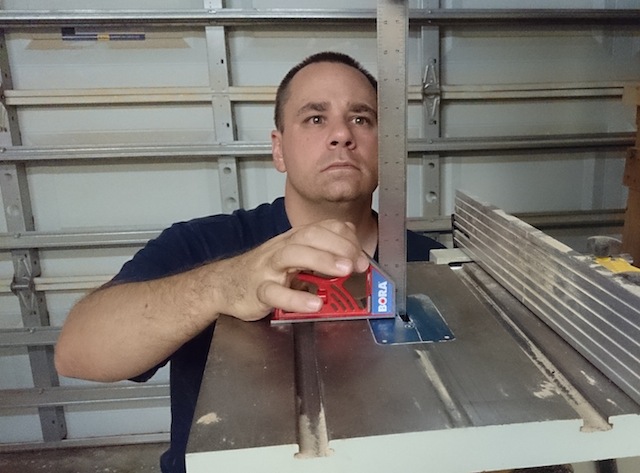
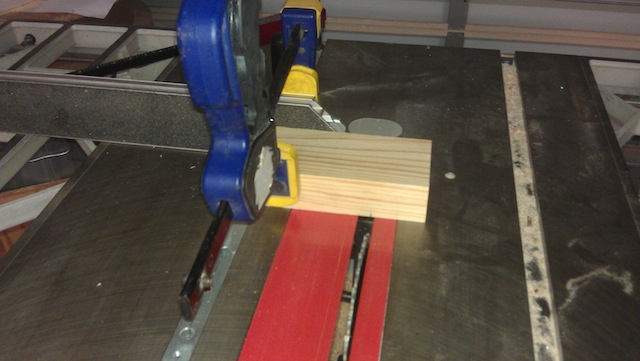
And, when it comes to setting up stops on tools like my miter bench, these sucker shine. Once I get the right measurement, I can break out the stop that I use (yes, I understand that’s not Cal Ripken) and clamp the stop to the miter table’s fence.  This way, I can get accurate cuts without exposing my hands to the dangers of the whirly, spinny, toothy thing…. I can use these on all types of jigs for the miter saw, band saw, router table, table saw or anything else that can eat fingers.

Sure, the don’t get a lot of respect, but, hey, they definitely earn their keep in my shop!

The stripper

Here in the Tampa Bay area, we are known for a lot of stuff. The beautiful sandy beaches. The glorious sunshine. Water recreation like fishing, swimming and boating.

2001.. not the movie

Oh, and we’re apparently also well known for our ‘adult dancing’ establishments. In fact, not too far from where the Tampa Bay Buccaneers play football (On Dale Mabry Highway), there are a number of – ahem – ‘reknowned’ businesses. Namely, Mons Venus and 2001. Yes, that’s the picture of 2001’s building, and I’m willing to bet they don’t screen the Kubrick classic there.

But, that’s not the kind of stripper I am referring to in this post. There are some times when you have to cut a number of narrow strips of wood to build a project. Maybe you want to build a curved lamination. Maybe you are creating strips of wood for stringing. If you turn to your table saw, your first inclination to cut these thin strips might be to push the rip fence close to the blade, turn the saw on and start pushing.

Danger!

Not so fast. This can be a very dangerous act. First of all, that small strip of wood is pretty much assured get bound between the rising teeth of the table saw blade and the fence and be thrown back at you. And, just how narrow of a push block are you planning on using to maintain control over that thin strip?

It is a much safer option to rip the piece from the outside of the board – away from the rip fence – so the piece will fall free after the cut is complete. But, how do ensure that all of the strips are the same thickness?

Infinity's thin ripping jig

That’s where I got some help from my friends over at Infinity Cutting Tools. I picked up one of their thin ripping guides, and it has helped make what could be a challenging job a piece of cake.

Zero Clearance

But,before you use it, it’s always best to switch to a zero clearance insert for your table saws. This jig allows you to rip some VERY narrow pieces, so you want to improve the odds that you will get a clean cut that won’t get sucked into the table saw cabinet.

Set the gap

With the jig set in the miter slot, you can use a spacer to measure the clearance between the end bearing and the teeth of the blade. By using a feeler gauge, I was able to set the gap exactly at 1/8″… a nice thickness for bending.

DSC_0203

Once the gap was set, I slid the jig until the bearing was about one inch behind the front teeth of the blade. Using the rip fence, I captured the board between the roller bearing and the fence. With this done, it was a simple matter to fire up the dust collector and start cutting.

Post cut

With the first pass done, you can see the strip lying to the outfeed part of the table, with the board under plenty of control pushed past the blade. To set for the next cut, I retrieved the board, reset the fence until the outside edge contacted the bearing, and repeated.

See those strips

With this jig, I was able to make identical, repeatable cuts in the board, which will come in handy the next time I need to cut a series of strips.

After all, I’d much rather be working in the shop than cruising Dale Mabry. Besides…

Hi, Rhonda!

The view is much better here!

Banish the knuckle banger

I love my drill press set up. Since I put that table on it and mounted it on the rolling tool stand, it has been a real solid performer. Sure, it could be more powerful or have a larger throw, but for the number of times I use it, it’s not that bad.

The crank

The only problem with it is this little bit of joy down behind the table. It’s the crank that raises or lowers the table. When the drill press had only the small metal table mounted on it, this was perfectly adequate. It would allow me to move the table up and down to adjust the piece in relation to the drill.

But, with the new table mounted to the press, it has become a real knuckle banger in the back. The crank handle barely clears the table, making this simple chore a real pain in the posterior. Which means that I am less likely to use the feature, which means I’m really not getting the most out of my tool. I needed another solution.

The Gator GripAnd, I found it at an automotive store. It is known as the Gator Grip, and it had really helped me solve this problem. Basically, it’s a ratchet socket that is filled with spring-loaded steel pins, allowing the socket to grip nearly any shape bolt or nut head and turn it.

The piece that the handle was mounted to is a steel dowel with one flattened side, and the handle has a set screw that fits onto the flat side of the dowel. So, the Gator Grip is able to fit onto the dowel and give me the control I need to raise or lower the table. With the ratcheting action, the table’s location is no longer a concern.

Ready to raise or lower

Now, I can adjust the table however I see fit, and it takes only a few seconds to outfit the ratchet properly. With the tool only costing about $10, it was a pretty cheap fix for a challenging problem.

A splendid combination

Back over the holidays, I was the proud recipient of a genuine Leatherman multi tool, and I have got to tell you it has been worth its weight in gold. Not just because it is a handy set of pliers, a very sharp knife or a quick way to open a beer at the end of a hard day. It’s worth it’s weight in gold because it does all of that in one tool. A real multitasker.

My combination square from Bora

That’s why I am falling in love again with my combination square from Bora Tools. Oh, that baby is handy. It gives you a whole bunch of different operations all in one tool that’s easy to keep close by while out in the shop.

First, it’s a square. Yes, I know that sounds obvious, but that gives you something to check your project for square during assembly…

Squaring an assembly

Plus, a great guide for marking out joinery or cut lines. Unlike a regular square, combination squares let you draw both 45 and 90 degree lines on your workpiece right out of the box.

45 - 90 - HIKE!

Let’s go a little farther with this. Power tool setup is made a ton easier with a combination square. Say you need to ensure your band saw blade is square to the table. That’s an easy one to set up with this tool.

square that blade

But, what about checking to see if your table saw blade is aligned with the miter slots and not out of whack. How can you do that?  Easy. Just place the measuring head in the slot, extend the blade until it contacts a tooth at the front of the blade. Using the same set up, push the combination square to the back, rotate the blade so the same tooth is touching, and you will see immediately if your blade is off kilter.Check the alignment

Need a precise way to check the blade or bit height of a cutting set up? It’s in there!

Hey, that's just what I wanted!

My favorite thing about my combination square is that it is very handy, and works well with my split top Nicholson bench. Hey, when you need to keep the square right at hand, it’s easy to just slip it into the split and it’s good to go.

My square is handy

Just think, I haven’t even begun to scratch the surface with this tool. You can take the blade out and use it as a steel rule. You can use it to find the center of a round item. Gosh, there’s almost enough stuff for a second post!

Pretty pink princess pencils

I have two sons. Which means, when it comes to Christmas, birthday or other gifts, we tend to lean more toward Nerf guns, Legos and action figures. So, I missed the Barbies. The Easy Bake ovens. And, I missed the princess gifts.

Girls playing princessWhile it’s kind of sad, I know I would have been lost in the weeds trying to do the princess thing. Oh, sure I would have eventually done well shopping for my daughter, but it would have taken a lot of practice to get good at it.

Ooooh... PrettySo, you might wonder why I have these on my workbench. Let me start off by telling you that these are mechanical pencils, and they are indispensable. I much rather prefer mechanical pencils to wooden models for a few very important reasons.

First, if the lead breaks on a mechanical pencil, you simply have to push the button on the eraser to advance a new length of lead to jump right back to work, instead of looking for a pencil sharpener to get to the point.

Marking with a pencilAnother great feature of mechanical pencils is that since the lead is the same diameter from the point to the end, the line stays the same width along the entirety of the mark. Try doing that with a sharpened wooden pencil, and you are going to end up with a fine line where you start and a much wider line the more you mark.

When I buy my mechanical pencils, I always buy them in big packages, usually at the start of the school year when the supply is plentiful and the prices are low. It also doesn’t hurt that during that time of the year, Florida exempts school purchases from sales tax, making the deal a little sweeter.

But, why the pretty sparkly aqua, pink, purple and orange princess colors?

Now now boysDo these guys look like they would be caught dead in school using a pretty princess pencil? This way, I can pretty much guarantee that my mechanical pencils will stay in my shop, and not be spirited of into backpacks to never be seen again.


Hold it down

I have used my Kreg pocket hole jig for the past six or seven years with a great deal of satisfaction. It was the K3 model, and I have used it to build a lot of projects around the house.

Pieces partsBut, there were these items that came with the kit that I wasn’t sure what to do with. They were a steel plate with a keyhole slot in the middle and four countersunk screw holes on the corners. There is also a clamp that came with it, with a bolt that obviously engaged the plate that could be used to hold work pieces down to a table.

But, I wasn’t about to mortise this into my new workbench. Not on your life.

I had to come up with some way to use this. One Saturday, I saw an episode of the American Woodshop featuring Scott Phillips and the idea hit me. I could do what he did!

Ready to dadoFirst, I needed a block of wood. I had a nice piece of Southern Yellow Pine left over from the workbench build, so I was able to cut it to the size I needed and marked out the width of the plate and set it up to dado out a little material to help hold the plate in place.

A nice fitThere, a nice fit.  Now, for the next step, I had to head over to the drill press. After all, I had to remove the material just beneath the keyhole slot to allow room for the bolt on the clamp to drop below the surface of the plate. That was easy work with a forstner bit.

The forstner bitOnce that was done, I screwed the plate into place, using four high-quality wood screws to ensure a good purchase in the wood.

Clamped and ready to go To use this clamp setup, it’s an easy matter of clamping the block with the plate on it into the jaws of my vise, slip the bolt on the clamp into the keyhole slot and then secure the work down to the bench.

Face Frames

Sure, it works as a great hold down, but it works even better as a large face clamp for when I assemble face frames with pocket screws.

After using this set up in the shop for a few days, I do have to ask myself why I didn’t think of that!


The smooth sled

After years of listening to music stations on my ride in to work, I have discovered the joy that is sport talk radio. Sure, there are some big talkers out there, but I have found a great morning show on 98.7 FM – The Fan radio.

The Kirk and Dinger Morning Show

Two time Stanley Cup champion Chris Dingman and his co-host Kirk McEwen talk serious sports on the Kirk and Dinger Morning Show. In addition to the regular who’s-going-to-get-traded-who-do-you-think-will-win-this-weekend kind of sports talk, they frequently open the phone lines for listeners to weigh-in on a particular sports question. The other day, the pair and the rest of the crew posed an interesting question – are you a Summer Olympics fan or a Winter Olympics fan?

For me, hands down, it’s the winter games. It’s all the speed that really interests me. Watching the skiers tackle the downhill slopes, the ski jumpers sail through the air or the hockey players chasing down the puck in world-class competitions, that is pulse pounding.

My favorite event of all, however, is the four-man bobsled. I will drop whatever I am doing when I see the time trials begin in that. The start is just organized chaos as all four athletes try to get the speed of the sled up as high as possible to shave hundredths of a second off the fastest time. They scream down the track, hugging the turns, and then try to stop the massive sled at the end of the course.

They also universally have someone ringing a cowbell at the start of the race. I remember hearing this going all the way back to the 1980 Winter Olympic games in Lake Placid, New York.

Not only are today’s sleds impressive to watch race, they are models of safety and smoothness. Again, in a race where hundredths of a second mean the difference between gold medal and no medal, an incredible amount of engineering goes into each sled.

Another place where a sled is useful is on a router table. Oh, sure, many times a simple router fence or a bearing guide can keep your workpiece on track, but what about the times you want to rout a profile on the end of a workpiece – say, when making a cope cut on the rail ends for a set of doors?  What then?

Well, you could go freehand – and mess up your pieces, make a trip to the emergency room, or both. Or you could use your miter sled or a fixture that runs in a miter track.

This could work.. a miter gauge

That’s a great idea, but the problem is that the router bit is a single point on the router table, meaning that the router fence doesn’t need to be parallel to the miter slot to get a decent cut. With this situation, you can see how trying to use both the miter slot and the router fence means the fence could either fade away from or pinch toward the track, making it a challenge to get a good cut.

The fence fade

A better idea is to use a contraption that rides along the fence, making it easier to guide the work along only once reference point. Now, I have used something as simple as a piece of plywood with a handle nailed to it, but this sled I picked up from my friends at Infinity Cutting Tools is the bomb.

The pro coping sled First, it holds the workpiece tightly down to a base, preventing any movement away from the bit as it is fed through. These hold-down clamps are easy to use Bessey models, and they hold the workpiece – as well as a backer board to prevent blowout on the back edge.

What runs against the fence is the clear visor, which allows you a good view of the work going through the bit while preventing any chips from flying up to hit you in the face.  A great feature.

Check out the tail viewPlus, it has some great handles that afford the user a firm grip on the sled, helping to keep positive control over the work as it pushes across the table.

The real test comes when you have to make a coping cut. I put the coping bit from the set I have into the collet of my router and adjusted the height and depth of cut with the fence. From there, I put the sample piece and a backer into place and clamped everything down.

While I have successfully used this bit set before, I had always worried about the safety and precision of the cut on the cope ends. Well, the first test pass showed I had nothing to worry about.

The cut

I can see myself using this sled for years to come as I build new cabinet doors and chest panels. I’m going to say that using a coping sled gets a gold medal in my book.