The golden door

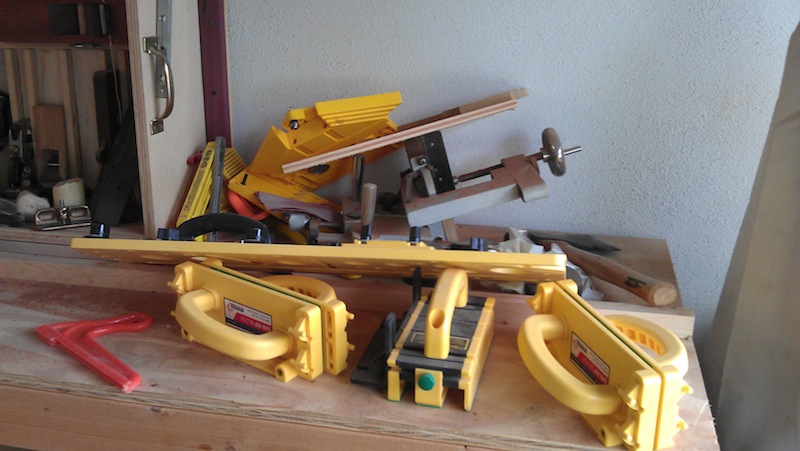
My shop is in my garage… You know this.

And, when the weather is pleasant enough to get some low-humidity breezes, its a real pleasure to open the front garage door and flood the shop with light.  But, sometimes that also floods the shop with mosquitoes and other flying insects. So, maybe it’s not the best idea to open the big garage door.

I could open the side door, but I have to remember to use a wedge to keep it from flying shut if a breeze comes along – and I’m back to the mosquito issue I mentioned before.

The old door

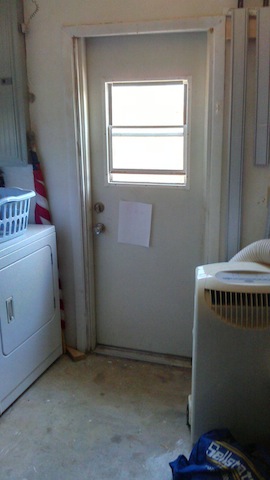
That’s why many years ago, I replaced the rotting, solid wooden door with a steel model that had a working window in it. This way, I could open the window to allow the breezes to blow through the screen, and shut everything up when I was done with it. I also discovered that when I put my portable air conditioner unit’s heat exhaust hose out the screen, I could cool the shop pretty well, making summer woodwork a more pleasant happening.

The broken frame

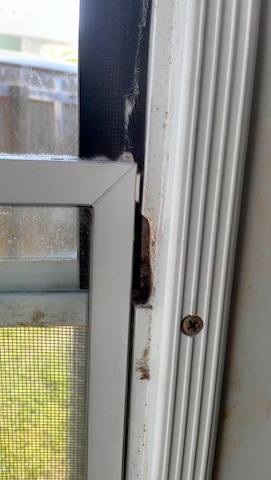
Unfortunately, the old door was about as cheap as possible, and the plastic window frame for the tiny window broke out – to the point where I was relying on good old fashioned duct tape to hold the glass in. That wasn’t acceptable anymore.

So, I went off to the local home improvement emporium and got a new door. This one is far more secure than the old model, and a whole lot more decorative.

The new door in place

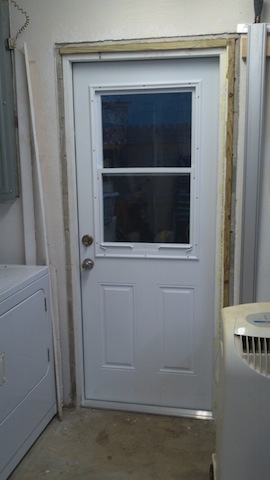
The window is much larger, and meets hurricane codes for wind load. That’s a good thing, given where I live.  The setup is beefier than the old door’s window, providing a 20 year warranty on the sucker. Not bad.  Plus, it’s tracks work very well, making it easy to open as much as I need to, and will prevent the air conditioner hose and fitting from sliding out of the window, making a nicer seal with the door.  All I need to do is trim it out, and we are done, ready for years of service.

Sure, it wasn’t a woodworking improvement. But, as far as climate control and security are concerned, this is a real keeper!


Interred with honor

Here in the United States, we are commemorating Memorial Day, when we remember those who made the ultimate sacrifice for our country during wartime. Sunrise ceremonies are planned at cemeteries and veteran themed parks to honor those brave men and women who gave all.

While those service members who have fallen in battle are laid to rest with great ceremony, their brothers and sisters in arms who return from foreign fields come back home to resume their lives. Many achieve financial success and are blessed to be surrounded by loved ones for many years after their service is complete. When their time comes to pass, their funerals are well attended by family and friends, and they are laid to rest in dignified coffins or urns.

A military funeral

Unfortunately, many other veterans have difficulty when rejoining society back home, and – due to many factors – can find themselves destitute, alone and homeless in their last days. When these indigent veterans pass away, the Veterans Administration makes the final arrangements, which include cremation and interment. This interment usually involves housing the remains inside of a cardboard box.

This is why the Woodcrafters Club of Tampa began a project a few years ago. In order to help provide a more suitable final resting place for these indigent veterans. Working closely with the Veterans Administration and other allied agencies, the club began an ambitious project of building burial urns to contribute to the effort. The Tampa Bay Times newspaper did an article about the project shortly after it began last year.

A collection of burial urns

There are a number of specific requirements for these burial urns. They have to be about 9 inches wide by 7 inches tall by 7 inches deep, and the tops of the urns have to be affixed to the sides and the bottom is secured by screws once the remains are inside. Beyond these specific requirements, the design and material choice is completely up to the woodworkers to decide.

While most of the urns are built as boxes, an number of them are turned on lathes by talented turners. Most of the urns are build with pine or oak, but more exotic woods have been used as well, including special pieces taken from the builder’s own collection of prized woods. Many cabinet shops and other hardwood suppliers in the Tampa Bay area are more than happy to donate wood to the cause, helping to provide the raw materials so the woodworkers can concentrate on the craftsmanship that makes these so special.

Completed urns with the craftsman's touch

Many of these urns are sent to a local laser engraver who marks the urn with the seal of the branch of service the veteran served in, making each of these hand crafted urns that much more special.

Since the program’s inception, it has spread to many woodworking guilds in the Tampa Bay area and around the country. I have seen many of these urns built by the members of the St. Petersburg Woodcrafters Guild to be sent over to the Veterans Administration, each accompanied by its builder who beams with pride and the satisfaction of knowing that they are giving back to those who serve so selflessly.

While you may be out today celebrating Memorial Day with friends and family, be sure to take a moment to think about those who have served and be sure to give thanks in your own way for the sacrifices they made.  Happy Memorial Day.


Link of the week

Tremont Nails

Centuries ago, nails were a very important – and expensive – method to join boards for projects. So valuable, in fact, that old homes were routinely burned down so the old nails could be recovered and used in a new structure.  Why? Because each one had to be forged by hand by a blacksmith.

Beautifully forged rose head nails.

Today, nails are cranked out by the millions in factories and sold for dirt cheap. But, those new nails don’t have the charm or period appearance of those classic ones. If you are looking for those kinds of nails, there is a company that can help you with period authentic models.  Tremont nails has been making nails in the traditional method using period nail making machines more than 130 years old.

They have a wide selection of rose head nails, cut nails and other period types that can lend a flair of authenticity to your next project.


auf Wiedersehen

It has been my pleasure over the past six years to welcome many new blogs to the woodworking blogosphere. I have seen many of them come along – some making a big splash, while others have flown under the radar. I have seen some with very short runs, while others keep going on a steady pace.

Kari teaching carving

About one month after I started my blog, a very talented woodworker came onto the scene – and she had longevity on the internet.  Talk about expertise. This blogger forged her own plane irons, built her own planes, demonstrated in clear language how to carve and threw herself into the online woodworking community with reckless abandon, much to our benefit.  During the six years of her blog, she has thrown open the doors of her shop to invite us in to see how she does her work. To show us examples of outstanding pieces she saw at different museums and other places she had visited. She showed us where she was going to teach and how she instructed her students. She showed us the definition of determination when learning new techniques. And, she showed us the meaning of patience as morons like me asked countless questions about what she was doing and how I could do the same things in my shop.

Kari: The early days

By now, you must know I am referring to Kari Hultman of the Village Carpenter. Earlier this week, she announced on her blog that she was making her last post.  It’s totally understandable why she did this. A recent health scare in her family caused her to refocus on the important things in life, and I applaud her for her decision. This also allows her to woodwork on her own schedule without having to worry about ‘feeding the beast’ on a regular basis.

Just another day at the office for Kari

In many ways, Kari is kind of like the Beatles of woodworking. She is leaving the online woodworking world at the top of her game on her own terms and on her own timetable. Each of her recent posts is still a masterpiece of clear communication and awesome woodworking knowledge, and I’m sure she could continue to produce online woodworking content until the cows come home. But, for now, the Village Carpenter door has closed, and I will be waiting to see when a new one opens.

Thanks, Kari!

Does this mean that Kari is giving up woodworking?  Heck no. She’s going to continue working in her cozy Pennsylvania shop, producing more museum-quality pieces. She will still be out there at woodworking conferences, rubbing shoulders with other appreciative woodworkers. And, I’m sure, that one day in the future, she will be contributing again to the online woodworking community.  I can feel it in my bones.

Thus, the title of today’s post.  In German, the farewell of auf Wiedersehn does not mean goodbye, it means ‘until I see you again.’ Kari, here’s to you, until we see each other again in the online woodworking community. Thanks for everything.


A push-stick penthouse

Of course, there were many reasons why my recent kickback accident happened.  I was cutting without using the splitter. I had a temporary lack of focus while I was completing the cut. And, all of the featherboards and push blocks I should have been using were heaped in a pile at the end of my miter saw bench.  Groovy…

The jumble

Yeah, this was an area I had been meaning to get to since I built the miter bench last year. I simply tucked my hand planes in the till over there and kept looking at the void of space where I could have put my table saw organization station, and I swore I would get to it. Well, gosh darnit, now sure is the time!

Fortunately, I had some leftover plywood from the banquette project, and thought it would be a good material for the simple shelf system. And, hey, 3/4″ cabinet grade plywood looks cool in a shop. Makes you almost think you are going upscale on your shop furniture! But, before I made any cuts, I was sure to put the splitter and blade guard on the saw. You know, you can never be too careful about this kind of stuff.

Look!  A splitter!

The piece was insanely simple to build – an open cabinet 24 inches wide by 36 inches tall. I broke it into six storage cubbies, each holding different push blocks, hold downs, featherboards and the like. After I put in the last screws to hold the bottom shelves, I tacked in a few cleats for some top shelves to sit on.

It's in place

Yes, I know that I should cut a few shelves to sit up on those upper cleats to complete those babies, but it’s getting late, and I probably shouldn’t be working while I’m too tired… remember, that’s another important safety consideration! But, I think I can rest easier knowing that my table saw safety gear is someplace where I can get to it easily. There. No more excuses!


Quick Poll

Routers are pretty impressive tools. They can cut edge profiles, make moldings, cut joinery… I mean, what can’t they do?

There are times, though, that you discover that in your woodworking, you tend to cut a particular joint a particular way time after time in your projects. And, sometimes, setting up for those cuts can take a tremendous amount of time to get the bit height, fence settings and other tweaks down perfectly to ensure a good setup. Sometimes, it might just be easier to buy an additional router and keep it permanently set up than start over from scratch every time you want to do that operation.

A permanent setup for a lock miter bit would be a good dedicated router station

That leads to this week’s poll.  In your shop, do you have at least one router setup that you keep ready to go all the time?  Maybe it’s a bit set to the right height in a dedicated router table, so it takes only seconds to clamp to a bench and get to work.

By the way, thanks Chris Wong for this poll idea!


part of the Wood Talk Online community