Tool review: The BitVise

I have a friend named Sjoerd who works for Valfor Tools. He sent over one of their tools recently, and he asked for my feedback on it.

It’s a pretty simple looking device, but when it comes to working with router bits, it sure does come in handy.  It’s called the BitVise, and it provides a very valuable third hand when it comes to router bit maintenance.  Think about it – a rabbeting bit set may have multiple bearings to adjust the depth of cut. A reversible frame and panel door bit. A slot cutting set. How do you get a good grip on the shank to work with the bit while doing the delicate work of holding on to the bit, the screw and the washers that come with the set while you make the changes?

This tool just might be the answer.

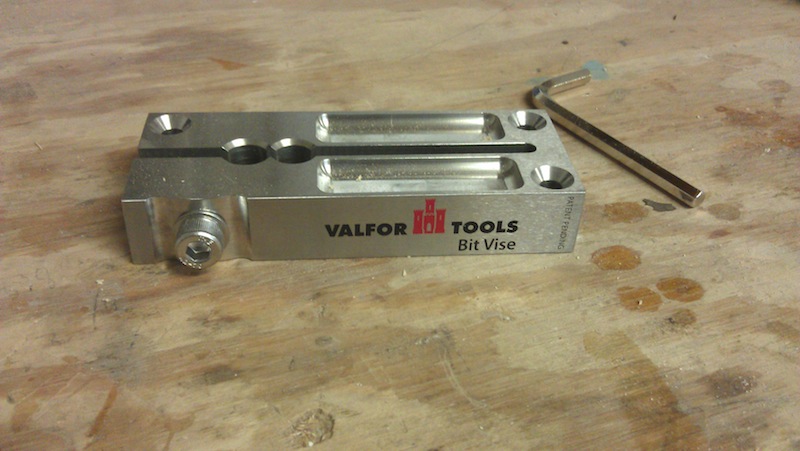
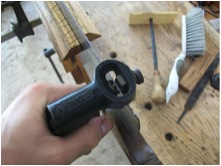
The bit vise

It’s a substantial piece of milled stainless steel with a slit milled into it with a pair of holes in that slit. One is for 1/2″ inch shank router bits, the other for 12 mm shanks. The slit in the block is opened and closed by a bolt, which allows the bit to be inserted and then tightened down on a shank.   If you also work with 1/4 or 8 mm shank bits, you will need to use a reducer in those holes to get a grip on the shank.

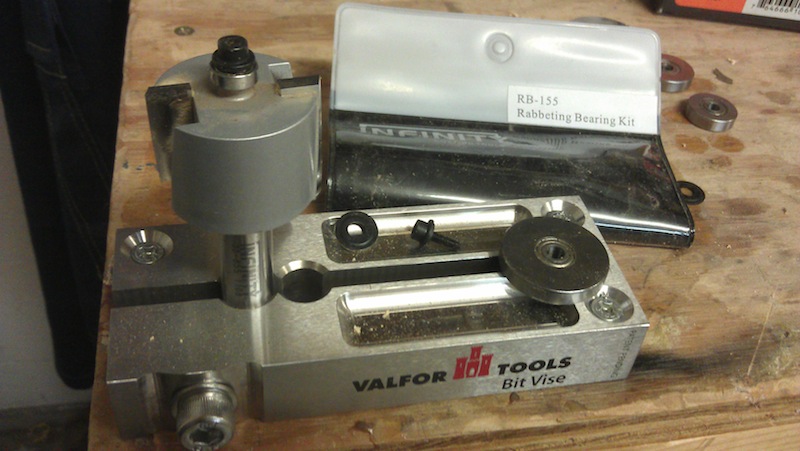
The top has three holes for you to mount the vise on a bench, eliminating the possibility you may dump the entire setup onto the floor.  There are also two milled channels on the top, where you can rest those small bits of hardware until you need them.

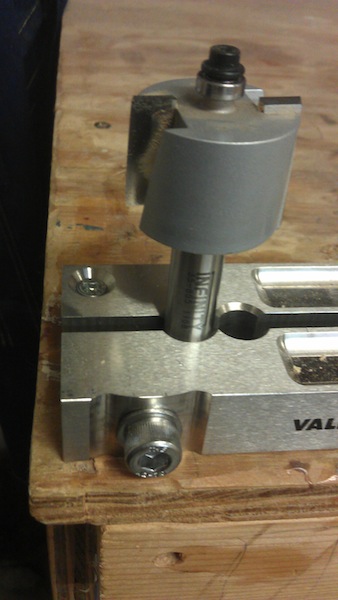
A bit set in place

With a bit set firmly into place – like this mega rabbet kit I got from Infinity Tools, it’s now a simple task to break out the allen wrench to change the bearings. Since I don’t have to worry about the bit slipping out of a regular vise or hardware dropping into the cooling vents of the router, I can work with more confidence on the bit set up.

The pieces parts

Now, imagine doing other tasks like cleaning pitch off the cutters, or passing a diamond hone over the carbide edges a few times to ensure they are sharp and ready to go for the next use.  Sure, it may be a one-trick pony, but the one trick it does is pretty handy.


Quick Poll

Woodworking is many things to many people.

For some, it’s a fun and easy way to spend a Saturday afternoon.  For others, it’s the continuation of a family legacy, carrying on the work of a parent or grandparent.  Some may even consider it a form of therapy, getting them out of their daily routine.

While it may seem clear cut to some, for others, it’s a debate.  Is woodworking an art, or is it a craft?

Sure, this is typically discussed among the high-minded folks at some fancy gallery opening, but it’s an interesting question. Since most woodworking projects have a function, they are considered craft.  But, come on.  A George Nakashima table, with its use of live edges of boards and tastefully placed butterfly keys certainly isn’t the same as a plain old coffee table.

So, this week’s poll is trying to get to the heart of the matter – do you believe woodworking is art, craft or something else?


###

Link of the week

eHow’s science projects for testing the strength of glue

So, the kids are about done with school, but they still need to be kept occupied and their curious minds engaged during the summer break. Why not conduct a little experiment?

Glue test!

EHow has a great page to help you and the young scholar in your life to conduct a simple strength test on glues. This process will teach your students about the scientific method, how to prepare samples and how to record results. While you may get a few grumbles at first, projects like this can be a lot of fun, and it will also help you get an idea of just how strong your glues really are.

The page also links to other glue experiments that can be done. Just in case you want to continue the fun!

The saw gets ripped – part two

So, now that Andy Gibson has sharpened the blade of my old Disston rip saw, the next thing he wanted to do was to build a new handle for it. I mean, come on, he’s an artist. So, once he got to that, here’s how he made things happen:

Just about everyone has a saw hanging around that could use a new handle. If you are a flat worker the idea of carving a handle can be scary, to say the least. Don’t be scared to make a new handle for that old saw. After all, what do you have to loose?

The tools I used to make this handle include a band saw, scroll saw, a few common drill bits, a few rasps and files, and sand paper. Yes, there is no escaping the sanding.

The first thing to do is select your piece of wood. I chose a piece of cherry, but many other hardwoods will do. It was an off cut that has been hanging around the shop for a while. Start with a piece at least 1 full inch thick for most saws. The piece I had was 8/4 thick, and I ripped then planed it to get started. The old handle was 7/8” thick, and I like to start a little thick. It’s easier to bring the thickness down after the initial shaping than to try to add thickness. I would say it is best to work with a piece of Quarter sawn stock, but this is not a hard and fast rule… In fact the piece I used ranges from rift at the top and flat sawn at the bottom of the handle. Just position your handle so that it has as much long grain running through the thin parts of the handle as possible.
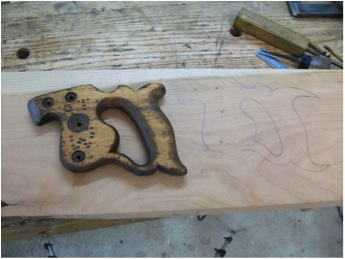
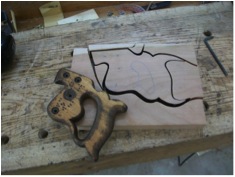
Tracing out the saw handle

I used the original handle for the saw as a template for the new. I simply laid the old handle on top of the blank and carefully traced the shape. Take your time, because all the curves make this a little tricky. You may need to trace it a few times to get it just right. The horns on the original were long since gone, so I got my French curves out and drew them back in going by eye and also looking at a picture of the original I found on line. I used a brad point bit to mark the location of the bolt holes. This is possibly the most difficult part if the task, as you want these holes to be right on so they match up to the holes in the saw plate.
Cutting out the handle

Now it’s time to cut the handle. I use my band saw with a ¼” blade to cut out the handle. In the past I have used a bow saw to do this, and you could use a scroll saw or even a coping saw to do this job. Now you have to remove the part inside the handle. For this, I used a scroll saw. Take your time  cutting out the handle; the smoother your cuts, the easier it will be to remove the saw marks.

The next step is to make the slot for the saw plate to slide into. I did this with a large back saw and a rip panel saw. I marked the center of the handle with my marking gauge, and marked the base of the cut. Take your time cutting the slot. You could use a smaller, finer toothed saw such as a dovetail saw to score the cut around the handle, then finish with the larger saw. Try to use a saw that will cut a kerf the same width as the saw plate you are making the handle for. For me, this was my rip panel saw. Be careful not to force the saw plate into too narrow a kerf, as it will split and crack your new handle.
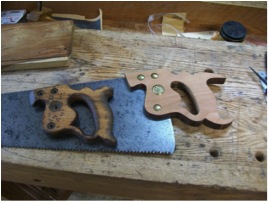
The handle is fitted

Drilling for the hardware is the part of handle making I least like. You need bits to fit your hardware, but the closest I had was a 1” and 5/8” forstner bit and brad points to drill out for the shaft of the blots. With the centers of the holes marked, start with the largest bits and move to smaller. First I drill the counter sinks for the heads of the bolts, then I drilled a small hole through the handle and used it as my center point to drill the countersink on the other side of the saw.  Then I drilled the hole for the threaded shaft of the bolt, and finally used a step drill to drill the larger hole for the nut side of the saw bolts. Now we can check the fit. Hopefully the holes all line up.

Now is the time to fine tune the thickness of the handle. I left mine a bit thick for the bolts so I used a Stanley #4 hand plane and planed it down to the thickness on each side I needed… this ended up being right around 7/8” and finally I deepened the countersink for the bolt heads with the fostner bit.

Now it’s time to shape that handle. This is the easiest part in my opinion, but the part that most likely scares the first time shaper. There is one tool I would recommend you think about getting – a saw handle makers rasp from tools for working wood. I use this rasp for a lot of shaping, not just saw handles. Along with this rasp I use an old Nicholson #50 that belonged to my grandfather.
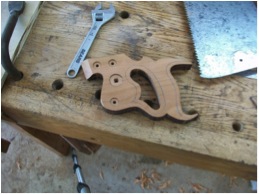
Preparing to shape the handle

Where to start? Take a pencil in your hand, use your finger as a fence and draw a line around all the faces to be shaped about 3/8” in on both sides of the handle. Grab your coarse rasp and start cutting at a 45* angle until your get to your pencil line. You may need to switch to the saw handle makers rasp, because it is curved and gives more room when shaping the inside of the handle. It is also safe on the back so you don’t chew into the other side of the handle. Once you are down to the line you can start rounding everything. Your hand and eye will tell you when you have it right. It’s that simple. A word of warning; be careful when clamping the handle in your vise, if you only clamp where you cut the kerf for the saw plate you can crack the cheeks or even break them clean off. Try to clamp over areas of solid wood. It’s a pain in the butt, but much better then starting over.

Now it’s time to sand, sand and sand some more. I started with 120 grit,  but 80 is a good point also. If you have a half round and rat tail file, you may want to use them before sanding to get rid of the rasp marks. Files are also great for working the flat areas on the outside of the handle to remove the saw marks. Now just sand till you are happy with the finish of the wood… I sanded to 220 then I polished the handle with 0000 steel wool.

The last step is to fit the top edge of the handle to the top edge of the saw plate. I leave this edge about 1/16” tall so I can sand the top edge till it perfectly follows the top of the saw plate. I used my stationary belt sander for this, but a block plane and a sanding block will do the same job.
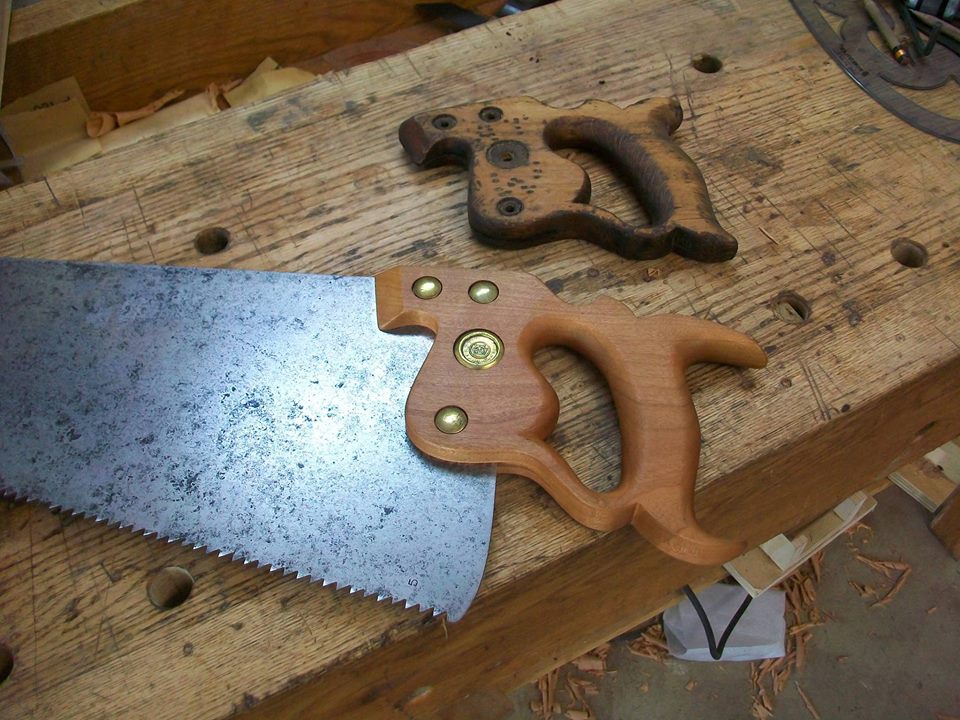
The saw in its newfound glory

I used a finish on this handle called Odie’s Oil. It is rapidly becoming one of my favorite finishes. It is all natural with no chemicals and smells good to boot. It is an oil and wax based finish originally developed for floors, and is super easy to apply. Simply rub on a thin coat, it goes a long way, wait a half hour or so and buff it all off. Wait a few hours and apply another coat in the same manner. I did 3 coats on this handle.

That’s it! Tom, I hope you enjoy your new saw handle.

Thanks, Andy, I think I will.  Now, I need to build a low saw bench so I can start using this baby on a regular basis!


The saw gets ripped – part one

One of the benefits of being an officer in the St. Petersburg Woodcrafters Guild is that I get to meet so many awesome local woodworkers who I would have never had the opportunity to meet otherwise.

Case in point – Andy Gibson. This guy is a young up and comer who builds ukeleles (and, now guitars, but that’s another post for another day), workbenches, and also has a penchant for sharpening old hand saws and returning them to fighting shape.  I asked Andy if he could sharpen my old Disston No. 7 rip saw, and he said he would be happy to sharpen it for me. Not only is the saw sharp, I also have a two-part post that he wrote for your reading pleasure.  Without any further ado, here’s part one – the sharpening.  Take it away, Andy!

A lot of woodworkers love to use their hand saws but for some reason think that there is a black art to sharpening that hand saw. I don’t think there is and hopefully at the end of this article you won’t either. I think a lot of this fear of sharpening started because most of the hand saws we start with are neglected and poorly sharpened to begin with… so let’s get started.

In order to sharpen a hand saw you will need a few tools; a flat file, a triangle file of proper size, a sharpening stone, a saw set, a couple wood scraps, and some form of saw vise.

Andy's saw vise

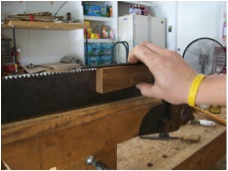
Let’s start with the vise. I made my own, but many antique versions can be had at flea markets and the like… all you really need are a couple flat boards you can use to clamp the saw blade and keep it steady for sharpening…

The saw teeth

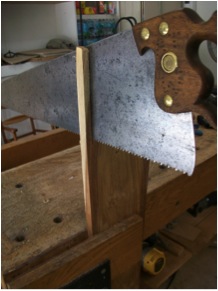
The first step in sharpening is to get all the teeth in line… when you are done you will want all the teeth tips to be the same height. That way all the teeth shave off wood. If half the teeth are short only the tall ones will cut and the saw will cut slowly and more roughly. Take the flat file and a square scrap of wood as a guide and file down the teeth running from heel to toe until you get a small flat on the top of each tooth… if the saw is badly “jointed” you may have to do this in step in multiple steps.

Gauging the teeth

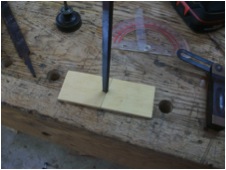
Once the teeth are jointed you can take your triangle file and start cutting your teeth… Wait! you need a guide. A rip saws teeth “rake” typically 8* meaning that they lean back at 8* off of 90* take you other scrap of wood and drill a hole in it slightly smaller than the tip of your file and draw your 8* line on it, then press your file into the hole making sure the file side is in line with you 8* line… now you have a guide for your file, just keep that piece of wood level as you sharpen and you file will cut the proper rake into the teeth.

A guide for your saw file

I always start filing at the heel and work forward… you can mark the flat tips of the teeth with a Sharpie marker to more easily see your progress. Your goal here is to use you file to just remove that flat you made while jointing the saw. When filing the teeth you are cutting more material away from the back of the tooth, not the face (another way to say this is you are removing more material from the hill side of the tooth then the cliff side) Once you have filed to the proper angle and removed the flat you are sharp… if your saw was badly out of joint, you still have low teeth… so go back and re joint the saw. If you had to make more strokes on some teeth then others to get rid of the flat, it is a good idea to re joint and re file. The reason it’s better to do the jointing and shaping of the teeth in steps is so you don’t joint too much of the teeth away and get irregular teeth. On Toms saw I jointed the saw 3 times. If you have a tooth that has a big flat after jointing file on the back side of that tooth until you have almost removed the flat, then move to the next tooth. Take your time. If your file begins to squeak or skid across the metal as you file, your file is dull and it is time to rotate to a fresh side… files wear out. When the file is dull, it’s time to move on. Saw plates are hard steel so on a saw in poor shape you can easily use all 3 sides of the file and in some cases even need a second file to get all the reshaping and sharpening done.

You need to pick the right triangle file for your saw… you want a file that has sides that are roughly twice as tall as the teeth on the saw your sharpening. It the file is to big it will cut to round of a gullet (the space between teeth). If the file is too small you will dull unevenly. I know that Tools for Working Wood offers a guide to selection the right file for the tooth count of your saw.

The saw set in action

Once you have the saw filed to your satisfaction and all the teeth are in line and nicely pointy with no flats, it is time to set the teeth… my favorite saw set is a vintage Stanly 42x, however the 42x is no longer available new and you would have to find one either on eBay or at flea markets of from old tool suppliers. There are some decent new sets being sold by companies such as Lee Valley and Tools for working wood that work well. In fact for small toothed saws this is really the only set available. Look closely at your saw and set the teeth in the same direction that they were set before. You may want to mark a couple teeth at the heel of the saw so you know which way they are leaning, especially if you are going to be doing a good deal of filing. Don’t try to set the teeth in the wrong direction because there is a good chance the tooth will snap off.  I would say to err on the side of less set, it is easier to add set then to take it away. Once you have all your teeth set, I take my triangle file and make one last light pass over each tooth.

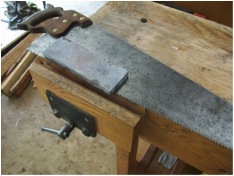
Everybody must get stoned

It’s now time to stone the saw. Take the saw and lay the plate flat on your bench and run your sharpening stone lightly from heel to toe one or two times. This will remove any burrs from filing and remove a small amount of set. This step also polishes the tip of the tooth and makes the tip that much sharper.

Testing... testing.. one two three

It’s now time for a test cut. I try to follow a straight line. If the saw drifts in one direction, it has too much se on that side. Take the stone and make one pass on the side that the saw drifts toward, then make another test cut. If the saw tracts straight’ you’re done. If the saw still drifts make another pass with the stone. If the saw binds in the cut you may need to add more set, readjust your saw set and reset, file, and stone your saw.  That’s it! As with anything, it may take a little practice to get it right, but the more saws you sharpen the better and faster you will get.

A few final thoughts on sharpening. I personally always file from one side of the saw. Some people say to file every other tooth then flip the saw and file the teeth you skipped. This may have merit on a crosscut saw but is not necessary on a rip saw. I even file my cross cut saws from one side, that way I don’t have to make a different guide and my filing always comes out more Consistent. I don’t worry about making a burr on the teeth, I stone my saws after filing to remove any burr and it has never been an issue for me. Filing a cross cut saw is very similar to filing a rip accept you hold the fill at 15* off of 90* to the plate… on a rip saw you file straight across (90*).  You typically also add a little rake on a cross cut, say 12* as opposed to 8* on a rip saw.

On Wednesday, Andy will share his secrets on how to make a brand new saw handle for an old saw.


Quick Poll

Chairs. They are some of the most ubiquitous pieces of furniture in a home. Dining chairs for the kitchen table. Easy chairs for the living room. Bar stools for the area to unwind after work. You can bet there will be many chairs you can look at by simply walking from room to room in your home.

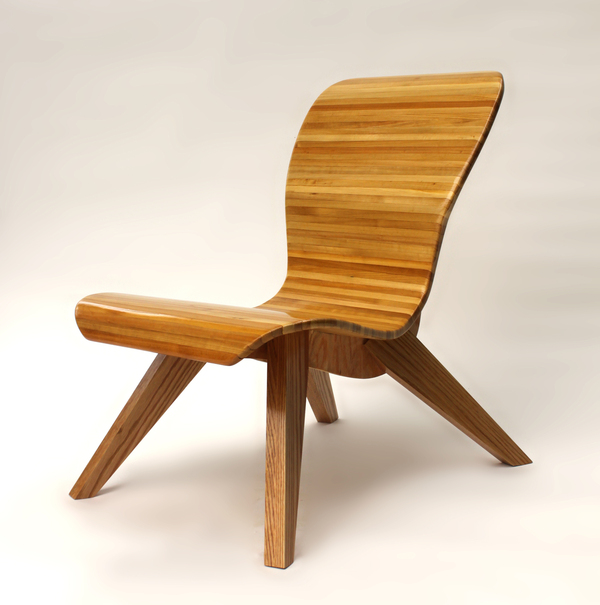
A modern looking easy chair

And, yet, chairs can be some of the most complicated woodworking projects out there. The angles have to be right. The joints have to be very sturdy. It has to be light enough to move around, yet heavy enough so the user can feel confident about sitting on it. And, if those challenges weren’t enough, it also has to look good.

So, for today’s quick poll – have you ever build a chair, and would you do it again?


Link of the week

The Digital Woodworker

Some woodworkers love to turn. Others love to use hand tools. Still others love to fire up their ultra-high-duty powered tools and let the sawdust fly.

But, a woodworking blog about tortilla presses? Llamas? Dude, get ready for a trip to Nik Brown’s blog!

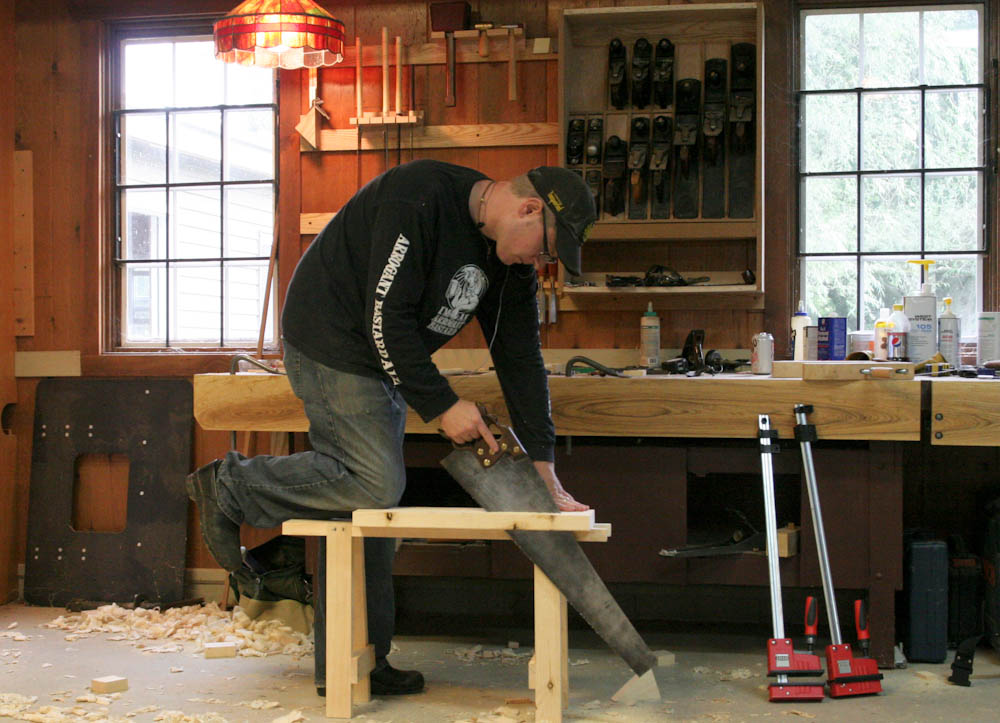
Nik Brown getting down with the rip saw

Nik is one heck of a Renaissance guy. His blog covers many different aspects of woodworking. Hand tool selection? It’s in there – with his blended East meets West approach. Milk paint? You betcha – it’s a great finish, and Nik takes the time to tell you why. Photography? Welding? Llamas? Hey, it’s his blog!  Let him write whatever he wants!

I would say that Nik is serious about his fun, but he is about as goofy as I am, so it’s safe to say he takes his goofing around seriously. He’s been a big time supporter of the blog, and my hat is off to him.


part of the Wood Talk Online community