Link of the week

The National Association of Woodworkers in New Zealand

So, you think there’s no woodworking south of the Equator?  How silly of you…

A gorgeous vase turned by Bruce Wood of AuklandOn the island nation of New Zealand, there is a national association of woodworkers, comprised of clubs and guilds from all around the country. From this landing page, you can find information on upcoming events, a guide to the local hardwood scene and the schedule of guild meetings.

It’s a handy resource in case you are going on vacation, want to establish a sister-guild partnership or just want to marvel at the woodworking going on in the land of the Kiwis.

Book Review: Hybrid Woodworking

  • by Marc Spagnuolo
  • ISBN-13: 978-1440329609

GoodfellasDo you remember that scene in the movie Goodfellas?  Robert DeNiro’s character (Jimmy the Gent) and Ray Liota’s character (Henry Hill) were meeting for breakfast, and Jimmy was very excited, because it was a big day for Joe Pesci’s character (Tommy). He was about to be made… become a full-fledged member of the Mafia. And, that was a big deal, especially for Jimmy.

As far as Jimmy was concerned with Tommy being made, it was like we were all being made. We would now have one of our own as a member.

In many ways, I feel the same way about my good friend and mentor Marc Spagunolo, and the great news that his book Hybrid Woodworking is now out for public consumption. He got his big break through hard work, consistent blogging and determination. I got my copy a few days ago, and I have got to tell you that I am impressed by what I have read.

Hybrid WoodworkingThe premise of the book is pretty simple… there are people who use only power tools, there are people who use only hand tools, and then there are the 90% of woodworkers who use whichever tool does the job most effectively. Marc covers the basic principles of how he handles this blending of tools in his shop.

The book starts off with him giving the basics about power tools and hand tools, and which ones he finds himself using for nearly just about every project. Table saws, routers and thickness planers share equal billing in this book with hand saws, rasps and planes. He has some surprising go-to hand tools in there – his Stanley No. 80 cabinet scraper and router plane get lots of face time in the book, not necessarily what you would expect to see in a shop in 2013.

Marc tunes his bandsawAfter the basics are out of the way, Marc turns to his philosophy about blending these tools in the shop – the power tools are for the heavy duty grunt work, the hand tools are for the finessing and perfecting the pieces before the assembly goes together. Cutting dadoes and rabbets. making dovetail joints with a band saw and (I love) his method for making easy to set up half lap joints.  Now I know to look for the sliver.

Marc's sharpened Japanese chiselsTool maintenance is also a big part of the book, and surface preparation in preparation for a finish is covered in great detail, with plenty of options for those who want power or hand tools.

If there are any knocks on the book, there are but two trivial ones. First, at the end of the book, Marc features some of his Wood Whisperer Guild projects, but he didn’t include plans for those. I would have preferred to see maybe one or two projects with how-to steps included for the reader to build along with, and the other one would be a little instruction on how he gets his beautiful finishes.

Goofing around with the author, circa 2006.The best thing about this book, however, isn’t necessarily the instruction. It’s the way Marc comes across in writing as friendly and encouraging as he is in person and on his videos.

I would strongly recommend this book. And, I hope that Marc, unlike Tommy in Goodellas, continues to have a great career producing even more books.

Continuo successo, mi amico!

A new tail

Hey, everyone, Iggy here. Now, I’m not normally a power tool kind of monkey, but I have a soft heart for them. I mean, they help the tailless one – and hundreds of thousands of other, far more talented woodworkers – cut joints, size wood and other important tasks.

This poor saw...The only problem with this mook is that he must be abusing the heck out of it. I mean, let’s take for example this poor, unassuming table saw.  What has it ever done to Tom over the past decade plus?  It’s been a solid performer, cutting whatever he could throw at it. And, when he wasn’t careful, it would bite him… but, that’s another post for another day.

This poor tail...But, could you believe the abuse he threw at this saw – especially it’s tail?  I mean, what does this guy have against tails?

The plugLook at this, where the plug is anchored to the cord. What was he doing with it? Nothing ever good comes from pulling on tails, Tom. Absolutely nothing. The worst part was he kept trying to cover this mess up under scads of electrical tape.  Bad Tom.

My name is nickAnd, as if it couldn’t get any worse… come on, Tom. Seriously?  How did this one happen, right in the middle of the cord? Did you buy stock in an electrical tape company?

The replacement itemsFortunately, I had some time today to help this poor saw get back into shape. It involved a replacement power cord – 14 gauge – and some crimp-on quick connectors.  It didn’t take too much effort to slide the power switch off, open it up and replace the power cord. I would have taken some pictures, but, believe me, it wasn’t all that exciting. Just disconnecting the old wire, reconnecting the new and mounting the switch back in place. Maybe five minutes worth of work.

Getting LoopyOnce everything was buttoned back up, I bundled up the wires with some wire ties, and even gathered the extra wire from the plug and to the motor up in a loose loop to provide stress relief in case the big galoot decides to yank on the tail again. Bad Tom.

The new plugNow, the saw has a brand new power tail, ready to give a lot more service. Only if the Tailless one uses it with care.  Got that?

Quick Poll

November is more than half over?  Hanukkah starts on Thanksgiving Day? Is it me, or does it seem as if this year is whizzing by?

Which, of course, means that we are pressing up against some tight deadlines when it comes to the holiday gift building.

The Last Minute ElfFor some of you, well, you were out there in July, putting the final coat of finish on your holiday gifts. For others? Well, I’m guessing you are waiting for inspiration from the Last Minute Elf week coming up the first full week of December.

But first, you have to let us know… are you in for gift building this year?


Link of the week

Old Fashioned Milk Paint

This past week was the first time I have used it, and now I am hooked.

Old Fashioned Milk PaintIt’s milk paint. And, this Earth friendly, old time finish is made of milk protein, limestone and a few other ingredients. It’s really easy to apply with a brush, rag or by spraying and gives a great look to your projects.

While it gives a great look to projects such as Windsor chairs, it can really be used for any kind of project to give an interesting and non-toxic finish.

If you have never tried it, you have to give it a shot.

Frankenplane

I am a few weeks late for a Halloween post, but today I celebrate the creation of – the Frankenplane…

The Frankenplane risesThese planes are probably more common than you may believe. Basically, it is a Stanley No. 5, just with parts and pieces from planes of different eras. The body of this plane has been featured on the blog before, when I snapped the cap lever.  The cap lever came from a 1960’s era No. 4 smoother, and the iron is a replacement. The tote is a replacement as well.  Who cares if the parts are the same age, does the plane work?  I wanted to find out!

One of the things I have heard from both Roy Underhill and Chris Schwarz is that the Jack Plane – the No. 5 – is the plane that should be getting the most work. It can hog off wood cross grain quickly, and get just about any rough board into fighting shape in short order. But, to do that, the iron has to be ground to a camber, or have a curve at the business end.

iron comparisonsBasically, this curve for a jack has to fall somewhere between the nearly straight across smoother iron (left) and the extreme curve of a scrub plane (right). This gives the iron the ability to scoop out wood quickly…

But, how to get that kind of curve, especially when I use a Tormek for sharpening?  Fortunately, by changing technique a little bit, I could achieve the graceful curve with little effort. The manual addressed the ability to get a cambered iron by emphasizing that some extra time and downward force exerted on one edge of the iron, easing that pressure as you slide the iron across the stone and then reapplying the pressure on the other side.  It took a little getting used to, but the iron took shape very quickly

Side to SideAfter the initial grinding, I was able to regrade the stone to the finer setting and really polish up the bevel. After that, I took the iron out of the jig and stropped off the burr on the leather wheel. Easy peasey lemon sqeezy.

Strop 'til you dropI assembled the Frankenplane and set up a board in the vise on my bench. As they say, the proof is in the planing, and the plane cut beautifully.  I tried planing across the grain – it worked. I planed diagonally – it worked. And just look at these lengthwise curls… this plane is ready to be thrown back into use.

That's just plane cool!Now, it will have an honored place in the new tool chest, next to the smoother and jointer, ready to work on the next project.


Stuff I’ve built: My Dutch Tool Chest

There was an old commercial from the 1970s… Someone would ask, “Is it soup yet?” and the patient, ever suffering hosuewife would say, “No, not yet.” Eventually, she would yell, “Soup’s on!” and everyone would come running.

The chest is finished
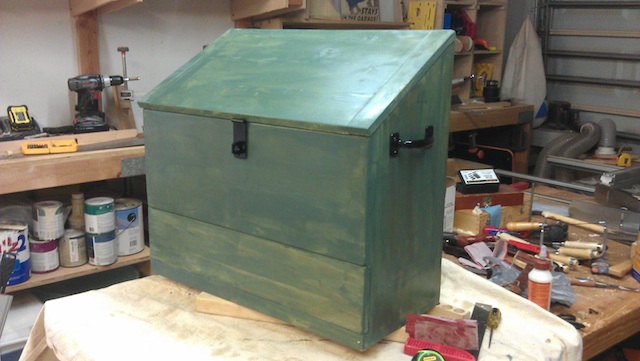
Well, just like that housewife was relieved to feed her hungry brood, I am relieved to say that yes, indeed, the soup is on! I finished the Dutch tool chest this past Saturday, and I couldn’t be happier with it. Based on the design by Chris Schwarz in the October 2013 edition of Popular Woodworking magazine, this baby is the bee’s knees.

Bare chalk paint
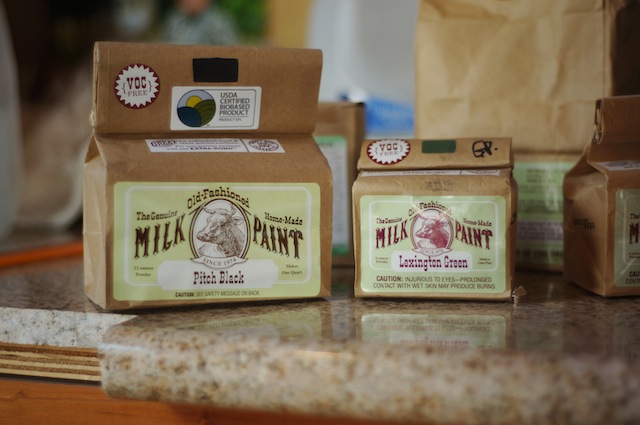
After building a breadboard end for the lid, I was able to start finishing the piece. This is the first time I have ever used milk paint, and I can tell you now for certain that I will be using it again.   I used the product from the Old Fashioned Milk Paint company, and it’s pretty wild stuff. I brushed it on with a foam brush and let it dry. It became a chalky mess, but a coat of boiled linseed oil on top really deepened the color.

I used the Sea Green color, but I can assure you that I didn’t need the entire pint. The company’s owner told me that leftover paint powder can be saved in a clear jar and used later.

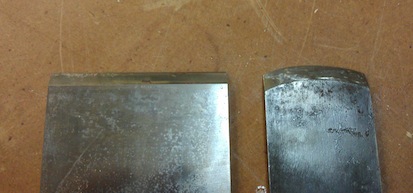
The inside is left totally bare – no finish at all. Chris was pretty adamant that the smell of varnishes or oils would just get trapped inside, and I’m not going to question the guy who has built lots of tool chests.

Tool Splay
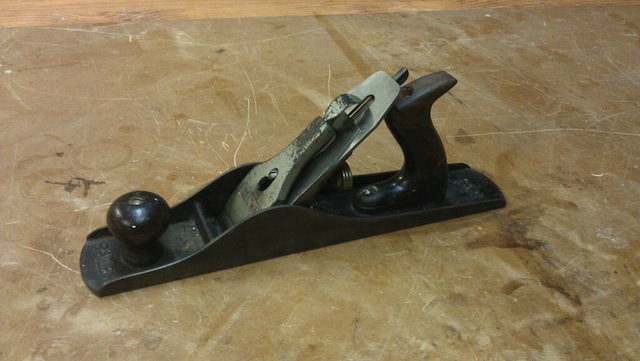
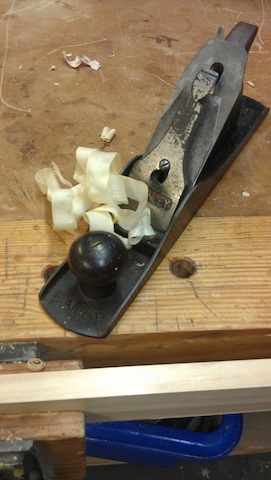
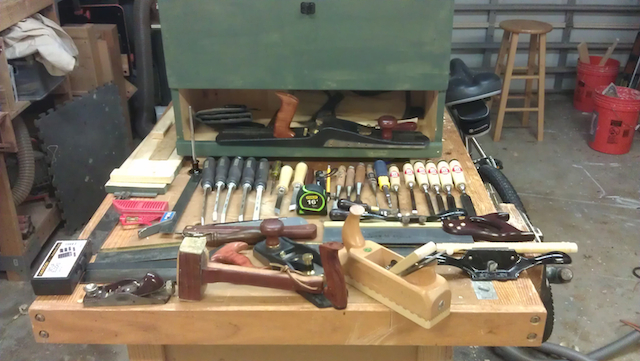
The fun part about the piece is just how much you can store inside of it. This is just the collection of items I can fit in the top till… planes, chisels, saws, marking gauges…. the works. With these items now handy to my bench, I can get to them a whole lot easier than I used to by rummaging around in the steel tool chest I have. BTW – that steel chest will now be used to house some power tool accessories…. Pretty clever.

Tucked Away
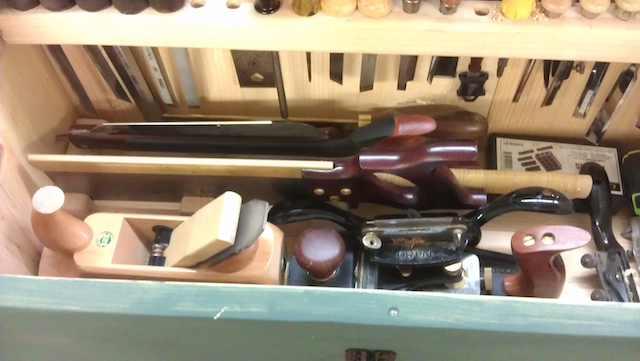
Tucked away, the tools fit nicely into chisel racks, a saw till or on the floor of the top of the case. Since I don’t envision taking the pieces around a lot, I guess I’m not going to need to really secure things down all that well.

Parked next to my bench, however, it will be great to have everything close at hand.

Downstairs
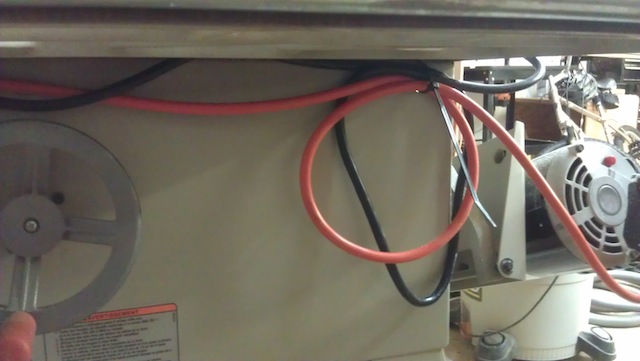
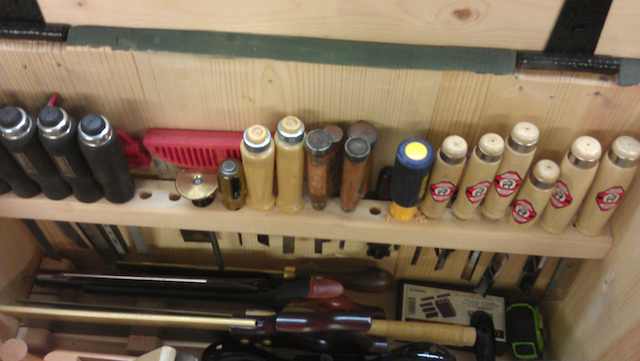
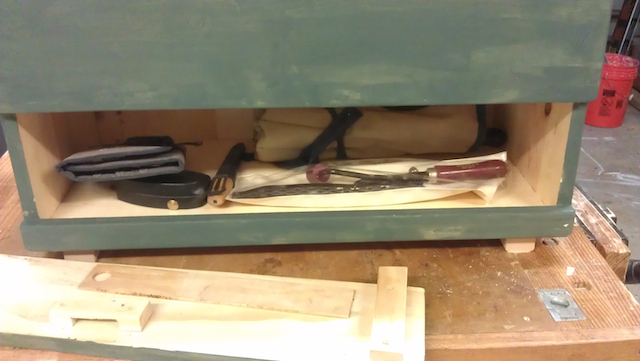
Downstairs, the one tool bay is able to house a ton of tools as well. I’ve put scrapers, rasps, my manual drill and other goodies into the bay behind the drop front, and since they are all protected in cases and tool rolls, I have no fear they will bang around.

Open wide!
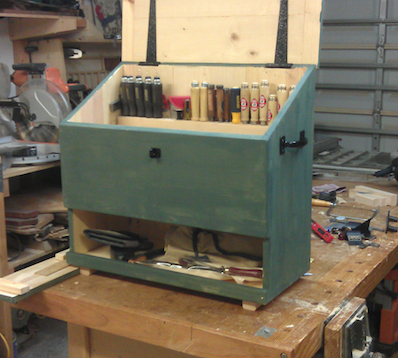
For the hardware, I passed on the hand-forged pieces and just went with the home center variety hinges, hasp and handles. They are surprisingly sturdy for a tool chest this size. But, again, this chest was sized to keep just those essentials close at hand so you can reach them with ease, helping to keep the weight down.

Lock it up
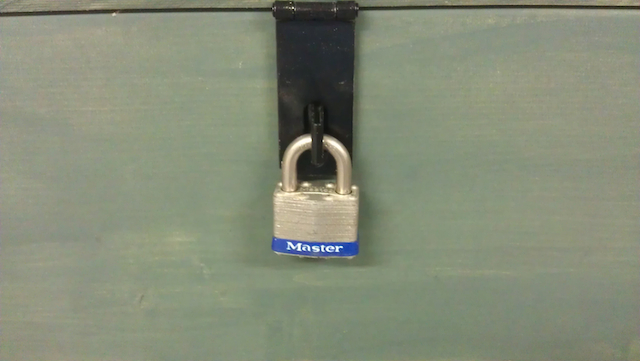
Finally, there is a lock. I have had this Master padlock since I was in college, and I have never found a use for it.  I don’t envision the need to lock the chest up in normal use, but if I ever do have to move the chest, this will help keep the contents enclosed so they don’t get out.

Nice rack!Making this tool chest a pretty handy thing to have around the shop.  Now, to build something with the tools inside…

part of the Wood Talk Online community