Category Archives: Projects

My first pen

OK, I’m gonna come right out and say it… the Kodak Zx3 is a totally rocking video and still camera. But, it’s lack of ability to attach an external microphone is a HUGE problem when you are trying to show how you can turn a pen while standing in the middle of a busy and noisy woodworking show hall.

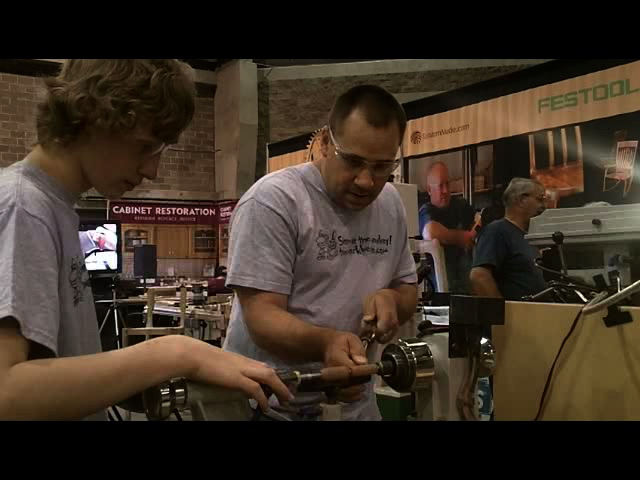
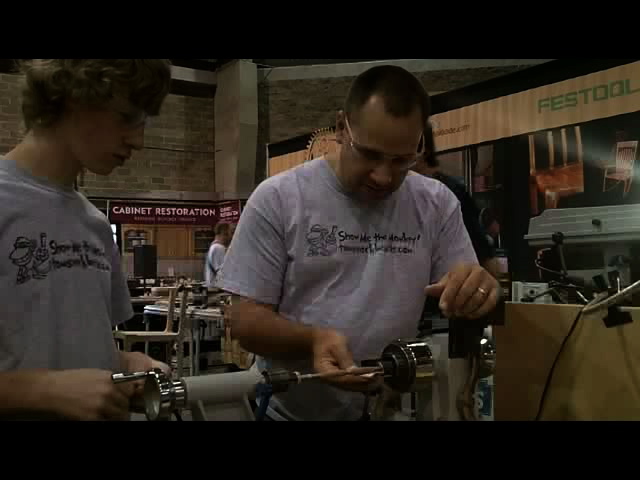
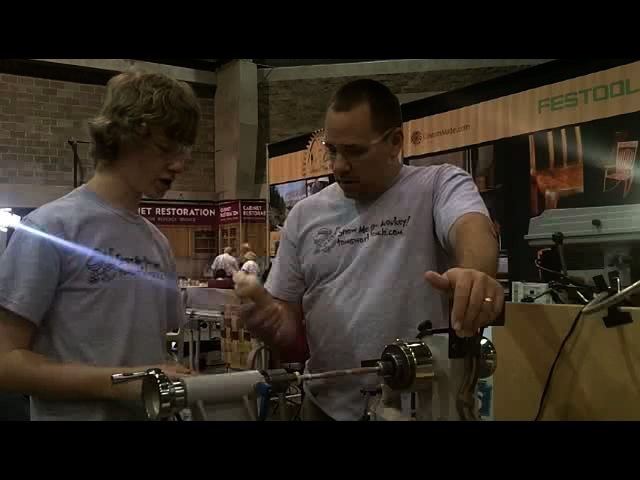
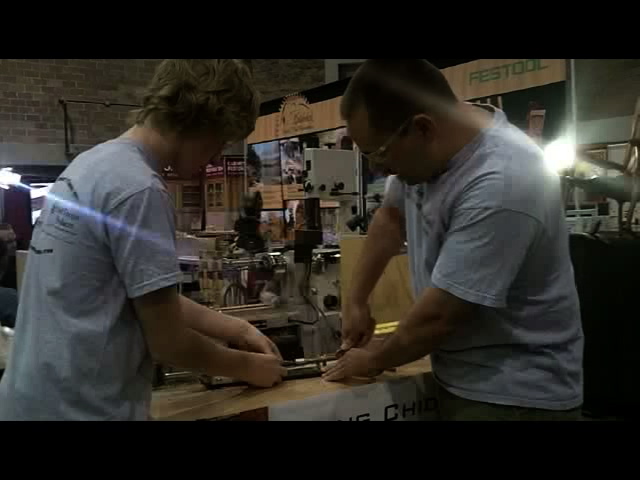
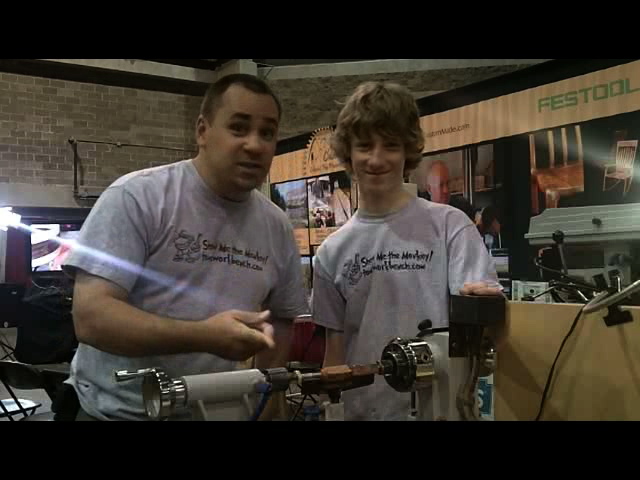
Fortunately – while you can’t hear anything – at least you can see me turn my first pen on a lathe. Rather than make you strain to hear the discussion between me and Tano Chickwick, I’ll grab some stills to show you how it went.

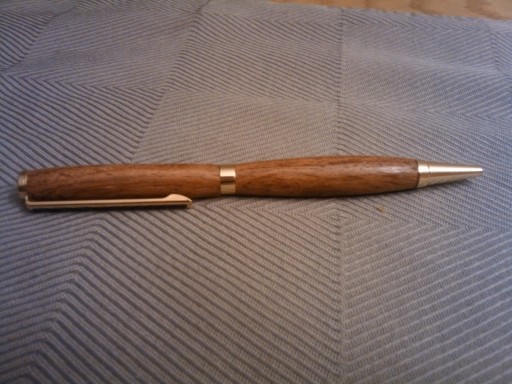
Tano’s setup is pretty cool –  a mini Delta lathe attached to a rolling stand.  We used a bowl gouge, a skew chisel and an assortment of sandpaper grits to get things into shape.  Tano had taken the liberty of drilling the pen body and gluing a tube inside two pieces of bubinga. They were put in the lathe on a threaded mandrel with spacer bushings separating the pieces.

If you are looking for  these pen turning supplies, I know that my friends over at Eagle America have a great selection of mechanisms, turning blanks and tools. And if you are looking for exotic woods for turning a pen with a lot of personality, Bell Forest Products has a wide selection of woods – from African Blackwood to Zircote.

Once things got spinning, Tano put the gouge in my hands and let me go to work. The going was kind of tough at first, since the gouge was working against the sharp square corners of the blank. Before too long, things got a whole lot smoother.  Tano kept reminding me that the critical dimension to hit was the diameter of the spacer bushings.  This way, the wood would blend with the pen’s ring, tip and clasp, making for a very smooth feeling pen.

When things were close, I turned to the skew chisel. The tool was a whole lot tougher to handle than the gouge… I kept wanting to hold the handle too low, afraid the cutting edge would grab and flip the tool out of my hand.  With some patience and a whole lot of coaching, I was able to slice a finer finish on the pen and get everything to the right dimension.

Next up was sanding.  No, this kind of sanding is much easier than sanding a larger project… it’s hard to get a piece of furniture to spin on the lathe and let it rub against the sandpaper!  We started at 100 grit, then did 180, 220, 320, 400 and 600.  Hold a piece of sandpaper against the piece with the lathe running and bingo… sweet sanding.

Once we rolled through the grits, Tano stopped the lathe and hand me sand the  piece from top to bottom. This way, there would be no cross-grain sanding scratches.

From there, we brought out the friction polish. A little squirt on some paper towels, the lathe went back on and I moved the towel from top to bottom while the piece spun. The moment the  polish hit the wood, I got excited. The color on the bubinga was incredible and successive coats just make things look better. A glob of Renaissance Wax was smeared over the pen body and a little more buffing made the piece glow.

After this, we pulled the pen body off the lathe and the pieces off the mandrel. We moved to the front of the bench where we had a pen press waiting.  First, the tip was pressed into the bottom of the pen, then the clasp into the top of the other piece.  The fit on these pieces was very tight and the pen press proved to be an essential tool.  The pen’s transmission went into the top of the tip segment of the body and was pressed home (Of course, I had to ask if it was a manual transmission or an automatic transmission… shesh). From there, an ink barrel was installed, a gold ring went over the transmission and the two pieces were hand pressed together.

Stop the clock. A total of – maybe – 25 minutes from blocky blank to sleek pen. I’m not sure, but with this proper coaching, I think I could be convinced to get into a lathe and try my hand at making some more.  After all, the holidays are only about nine months away… it’s never too early to start thinking gifts!

 

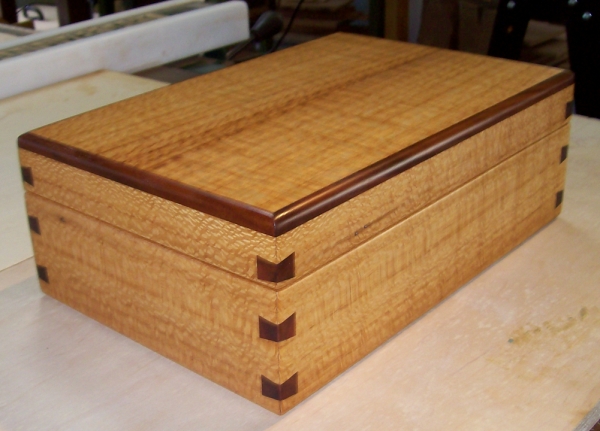
Don’t box me in

There are some woodworkers out there who know exactly what their next project is. That new workbench. The dining room table. The book shelves in the den.

And, if you do know exactly what your next project is – go forth and build.

However, if you are like me now, you may be finding yourself between projects. I have a few ones on the horizon I need to start on, and after a busy December and January, I’m still sharpening, cleaning and doing other general tidying up. If you are in this situation, you should be building a decorative box.

“But, Tom, I don’t NEED a box.” I hear you out there. What the heck are you going to do with a small decorative box?  You don’t need more knick-knacks to dust, and your desk at work can’t possibly hold another thing.

However, decorative boxes are some of the coolest projects out there, and they can help you hone your woodworking skills like nothing else. Here are some of the reasons why I like them so:

* Reach for new designs. Do you build mostly Shaker style furniture? Just Arts and Crafts? Go out on a limb and stretch your sense of design. Find inspiration in nature, classic pieces of furniture, architecture… wherever. Go with the flow.

* They don’t require a great deal of material. If you have some treasured scrap offcuts cluttering your shop, they are perfect for a decorative box. Besides, if you really get fouled up, you can trim off the bad parts and build a smaller box (been there, done that, got the t-shirt).

* They are easy to move around. Last summer, I spent a lot of time hauling big cabinet boxes around for my friend Paul’s home office. Small boxes can be moved around the shop with little effort, and can be milled, joined, assembled and finished on a corner of your bench. You can also easily put them aside if you get involved in a larger project.

* Embrace your options. Want to try a new form of joinery? Hand cut dovetails. Build a box joint jig for your table saw. Perfect your splined miters. How about a new technique? Veneer. Frame and panel. All hand-tool construction. Thinking outside of the proverbial ‘box,’ you can develop new woodworking skills that can work on all different kinds of projects.

* They challenge you to do your best. Very few people will climb under the dining room table you build to check your joinery. Even fewer will attempt to pull down a wall-mounted cabinet to see how you attached the back. But, people will pick up boxes.  Hold them. Turn them in their hands. Examine them from all angles. Smaller projects with fewer pieces give you the opportunity to really take your time, but still finish before you grow tired of the project.

* They make awesome gifts. Sure, it’s only March, and it seems as if we just came out of a major gift-giving season. But, graduations are coming soon, as is the traditional wedding season in spring and early summer. It’s never too soon to start thinking about building something if you have a big event ahead. Small boxes are perfect for holding jewelry, photos and other small, precious items. Plus, they are insanely easy – and inexpensive –  to ship.

While you may not be a big fan of decorative boxes, there are some very good reasons to give them a go. You might just be surprised how much fun you have building them – and how much you will learn in the process.


It’s about time!

Building things for yourself – and gifts for others – is one of the greatest pleasures in the shop. And, when it comes to these projects, the ones that get used the most are nearly always the most appreciated.

A picture frame to hold a treasured photo for a friend’s desk is a useful gift. A cutting board that’s used for meal prep – useful. A bookshelf that holds a child’s collection of picture books – useful.

A wooden project with a clock in it – wow. Impressively useful. Looked at several times a day to keep track of appointments, meal times and bed times. “Clocks are exceptionally useful,” said Tim Walter of Eagle America, “But, they are so much more… they become a focal point in the room and help make a statement.”

Tim pointed out that clocks can be built in all shapes, sizes and styles. They can hold pens and pencils, be part of the lid of a box, or something even more imaginative. “If you want to start small, small desk clocks can be built with dynamic designs and wild glue ups, or with more traditional forms. For these clocks, try going with a small clock insert. With just a forstner bit, you can turn your project into something timeless.”

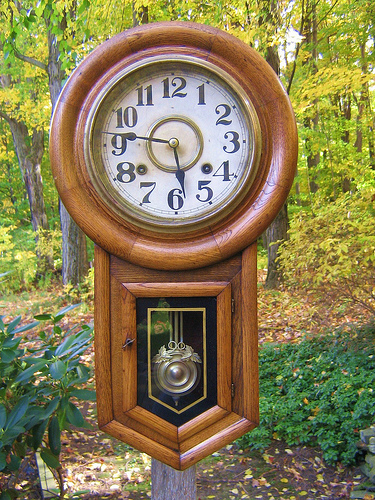
Going larger, you can go into mantle clocks or hanging wall clocks. “Now we start getting into larger statement making clocks. Mantle clocks offer a great deal of flexibility in design and material choice. Inlays, moldings, different face options – these larger clocks are easier for all to see.” Tim also told me that many woodworkers love the challenge of building schoolhouse or regulator style clock – a clock with a hanging pendulum. Eagle America sells plans for those who would like to build their own clocks from scratch and seek out their own works, or kits which include the mechanical works.

“Then, there are the big ones.. the grandfather clocks. For those really looking to showcase their talents in a big way, a full sized case clock is definitely the way to go.” Eagle’s ultimate clock plan is a mission style, full height grandfather. While the plans call for the traditional white oak, remember, the woodworker is the boss. “You want to go out on a limb and make yours out of figured maple? Cherry? Something exotic? Go for it. After all, it’s your piece.”


Stuff I’ve built: The Valentine’s Day box

Oh, do I love my band saw now. All of the stuff I had planned on doing with it… well, I can now!

For instance… I wanted to build a little something special for my wife for Valentine’s Day today. The project I wanted to build had to be small so it didn’t stand out like a sore thumb on my bench. It had to use up some of the pretty scraps of wood I had around the shop. And, it had to be something special.

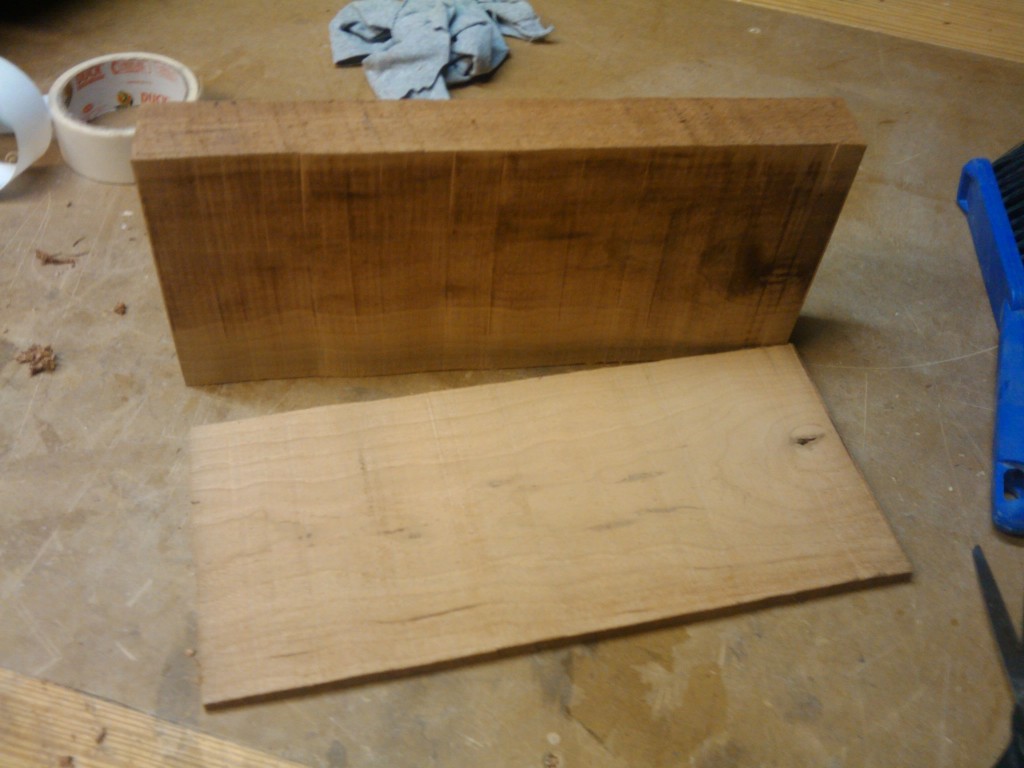
I dug around in my wood stash and found a scrap of 8/4 cherry and some 3/8″ birds eye maple.  Why not a bandsawn box? Not only would it be small, it would be fun.

First things first, I had to resaw off the bottom of the piece of cherry.  Just about 1/2″ thick, thick enough to serve as a solid base for the box. I left it with the bandsawn marks on it… I was going to come back to sand it after I had everything marked and cut out.

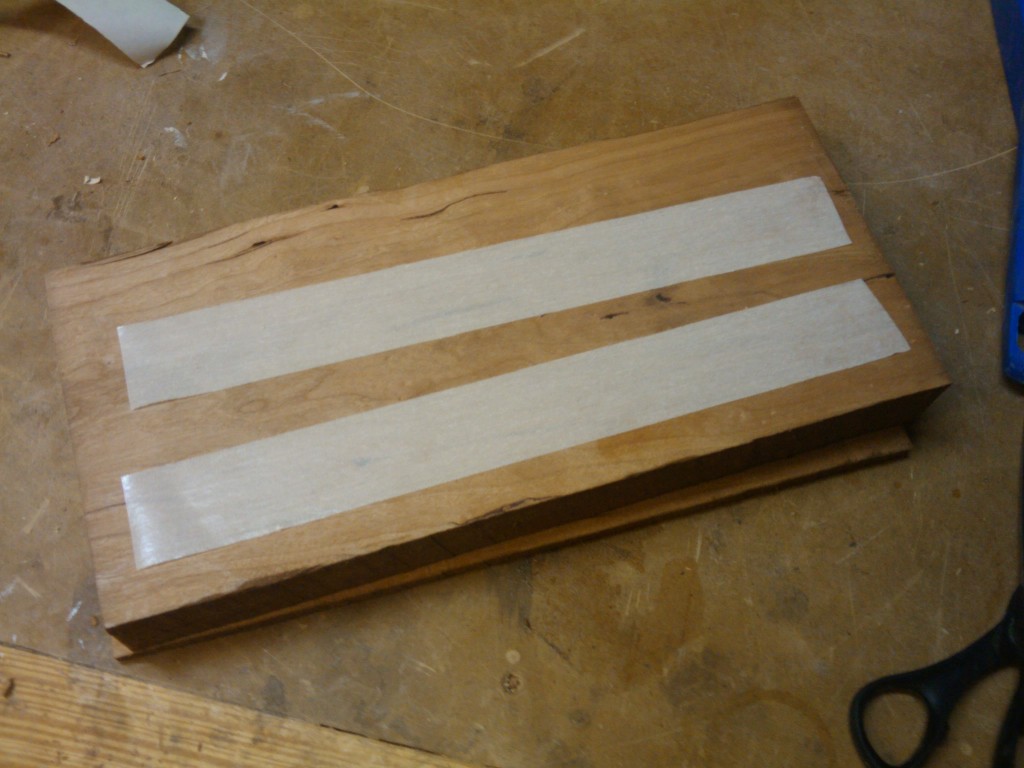
I then used some cloth double stick carpet tape to stack the pieces together before I cut them out on the band saw.This way, they would all come out with the same shape. I was careful to match the grain and stick them together tightly.

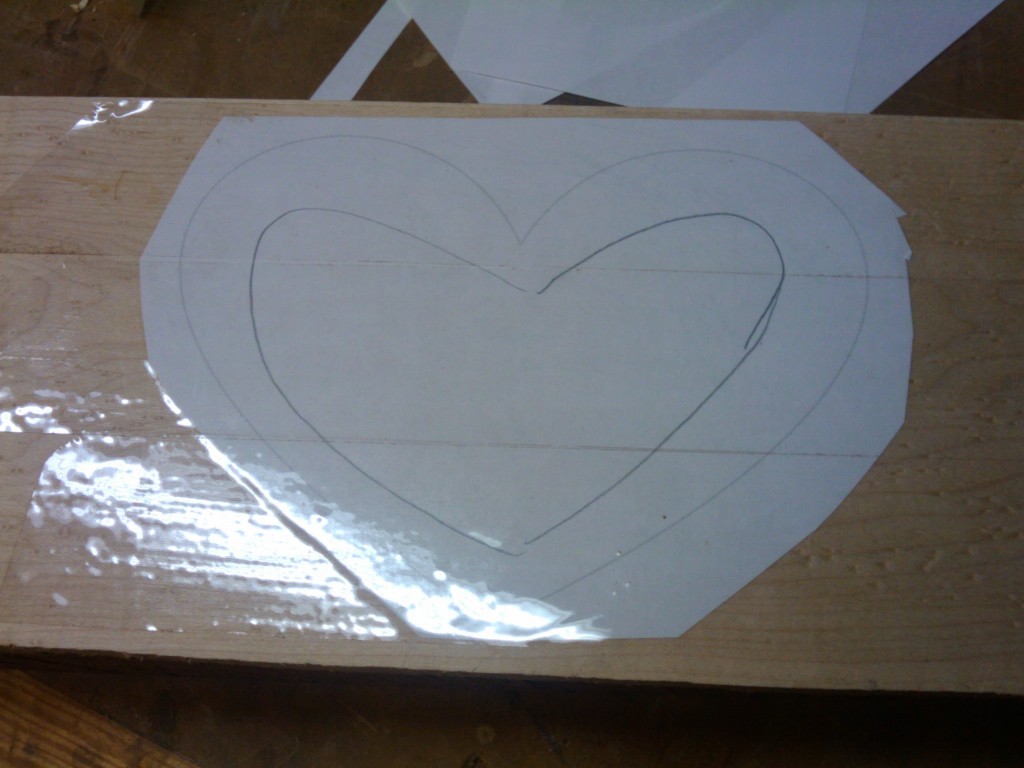
I found a line art drawing of a valentine on line and printed it off on my inkjet printer.  While messing around with the image, I traced what I believed the inside cutout would look like, and I taped the image down to the wood. Now, after I cut the first one, From here,I took it to the saw and with a 1/4″ blade, followed the line.  Not only had I cut the shape in the wood for the box, I had also cut the pattern free from the board… suddenly, I had a perfect pattern if I ever wanted to make another one.

I separated the layers and traced a line about 1/2″ in from the outside of the  edge of the middle piece. I sawed this out from the middle, making the cavity for the box. I had to cut through the outside wall of the box, but I was going to be able to glue that shut when I glued the bottom to the box.

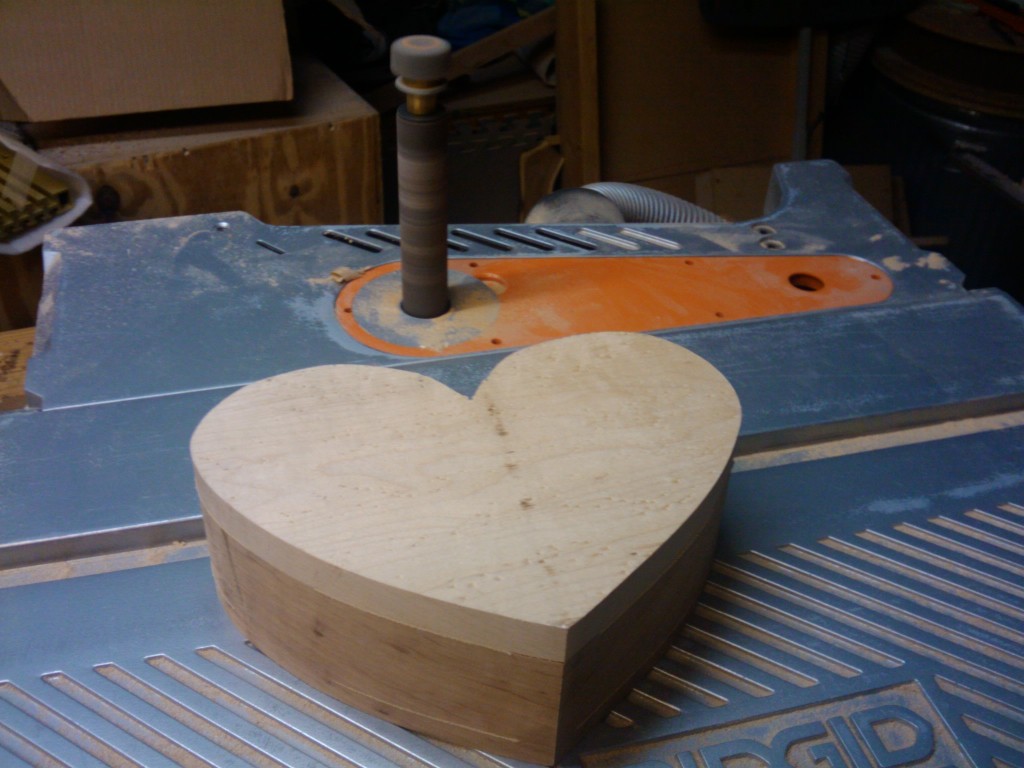
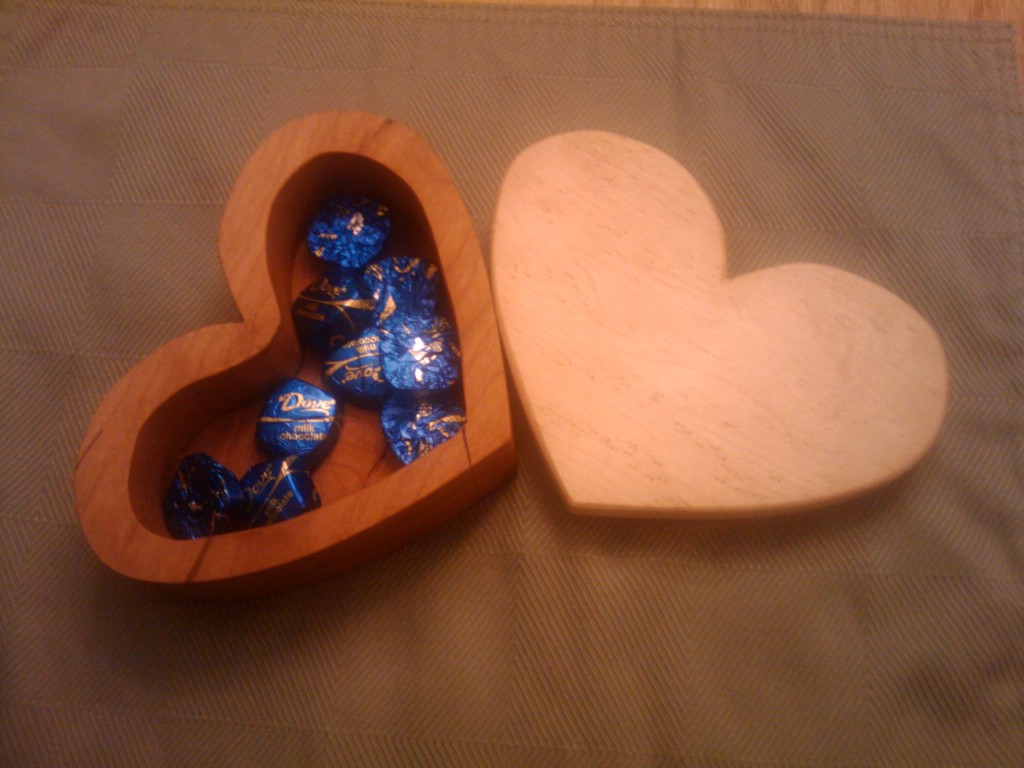
The next -and probably most important – tool I turned to was my Rigid combo spindle and belt sander. This gem of a tool with the spindle allowed me to sand the bandsaw marks out of the inside of the box before I glued everything together. I also sanded the box bottom so when I glued it together, I would be nice and smooth. I then glued the box middle to the box bottom. I then used the belt sander attachment to perfect the sides and lid of the box to make it nice and smooth. I hand sanded the top of the cleft of the heart, because I couldn’t get the spindle or belt sander into there.   Finally, I used the random orbit sander to hit the top and bottom and chamfered the lid and body.  I applied the finish a few weeks ago – I wanted to make sure that the smell was gone when I put some chocolates in it for my wife…

Overall, this was a great project… it checked all of the boxes on my list… and my wife loved it.

Stuff I’ve Built: The Bible Box

February 2011

Our church’s youth ministry is planning on sending some of the kids on a trip to see the Pope at World Youth Day in Barcelona, Spain. The organizers are looking to host a dinner dance to help raise funds to make that happen. As part of the program they are looking for donations of food, decorations,  DJ services – the whole shebang.

And, donations of items to enter into a silent auction, with the proceeds going to help the fund grow.

I’m sure they’ll end up with the basics – items to put into themed baskets (A night at the movies, a day at the spa…), golf outings at local courses, services from parishioner’s businesses… the works.  You knew I couldn’t let this opportunity pass…

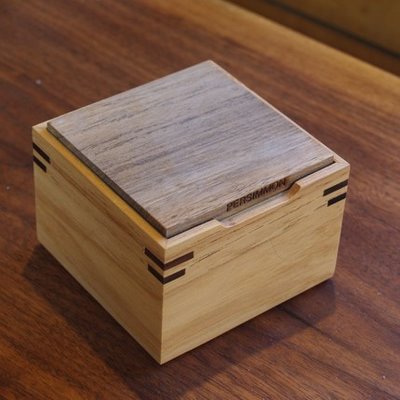
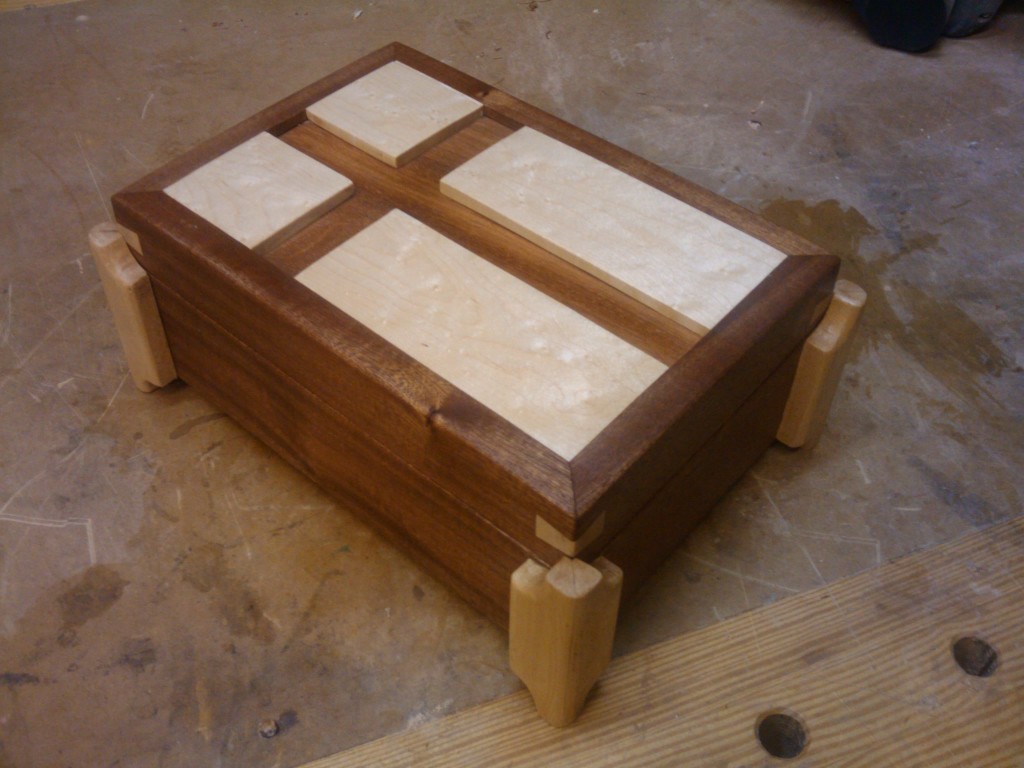
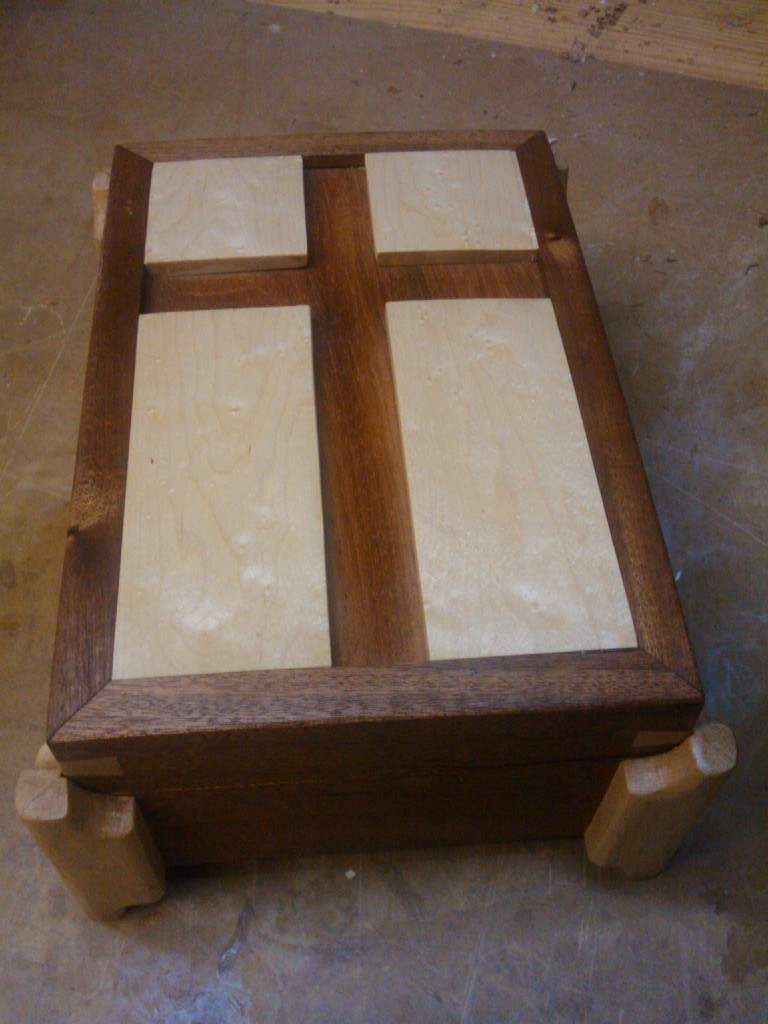
So, I set to work on building a Bible box for the auction – someplace for the family to put the good book, a set of rosary beads, palms from Palm Sunday and other items. I built the sides from a set of sapele boards I had first laid out and mitered for a project that went terribly wrong. Yes, these boards were supposed to be the twin box to the one that went south.

I cut and planed the box top and bottom from wider sapele pieces and fit them into dadoes to form the lid and the bottom, and then glued the mitered box together.  I then cut the lid of the box free at the table saw. This was a delicate operation – you don’t want to cut all the way through on the passes.  The key is to leave a little ‘web’ of wood at the top of the cut, and once all of  the cuts are made, slice the box lid free with a utility knife. This way, the lid won’t get free and ruin the cut.

As I laid out the cuts with my Kehoe Jig to reinforce the corners, doubts started to enter my mind. How would this box look different than all the others I was building as of late?  They all seemed to have three our four splines in them down the side, no feet, lift off lids … No, I had to do a couple of things to make this box stand out.

I started with  some pieces of bird’s eye maple that had been sitting around for a few months. I planed them down to about 3/8″ thick when I built the last project with them months ago, but I can’t remember why…

I then cut some pieces of the maple into quarters and glued them onto the lid to create the shape of a cross. Once it was glued into place, I brought out the random orbit sander and brought it even with the ‘rim’ of the top. The cross shows up as a ‘negative’ relief … I think it looks cool.

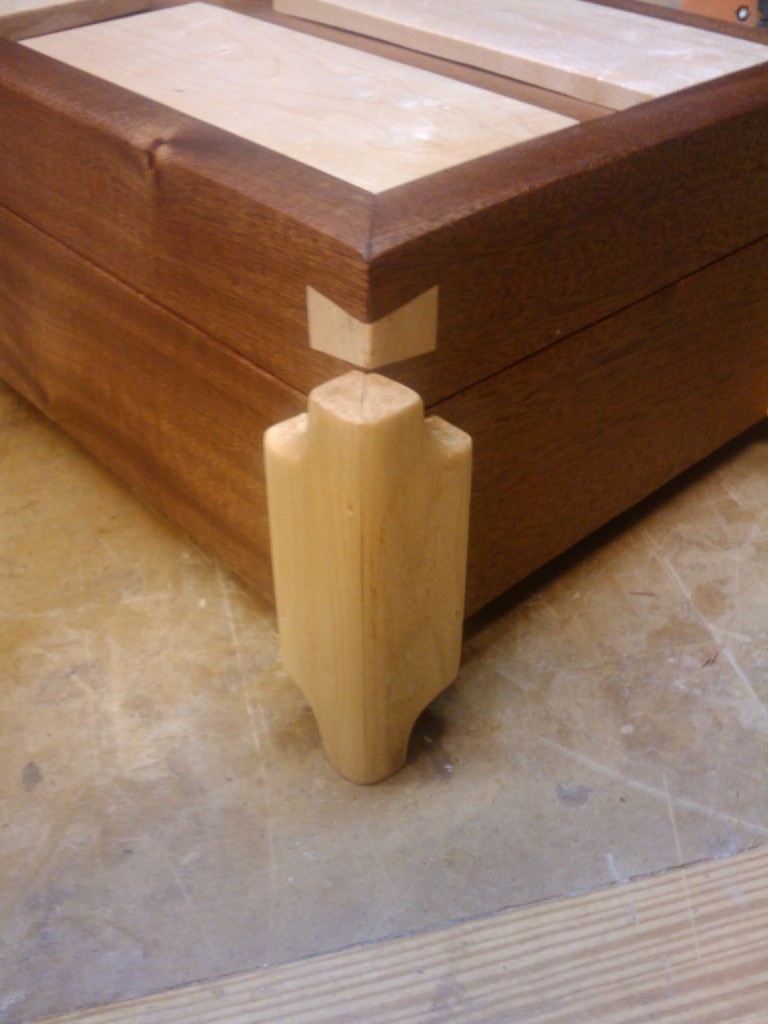
Then, I ripped a section of maple to about three inches wide.  I then bevel ripped the board down the middle at 45 degrees and cut the pieces so they would come together as a mitered assembly.  A quick cut at the band saw left me with ‘outside’ edges that curved up and down to form smaller feet, and I left the tops a little longer than the height of the box body to reference the top. A little bit of liquid hide glue allowed me to rub the joint together and have it hold while drying.  I love that trick.

Once the glue dried, I then glued them to the outside of the box and held them in place with a band clamp wrapped around the outside.

Since the lid’s corners weren’t secured, I figured what the heck, and I threw some Kehoe splines into it.  I kept them maple to continue with the contrasting wood theme.

The finish is my typical formula – a 1# cut of dewaxed shellac, followed by a thorough sanding with 320 grit paper and two coats of Watco Danish Oil. Once it was all done, I dropped it off at the church. I went to one of the ladies who was helping with my sons’ religious ed classes and told her it was for the auction. I have this feeling it may not make it to the auction – someone on the staff may buy it!

The most difficult thing about this project happened during construction. A good friend of mine looked at it on the bench and said, “Funny, it looks like the Holy Humidor.”  From that moment on, all I could do was think about lining the box with cedar and putting a few stogies in it!

Stuff I’ve built: Centered

January, 2011

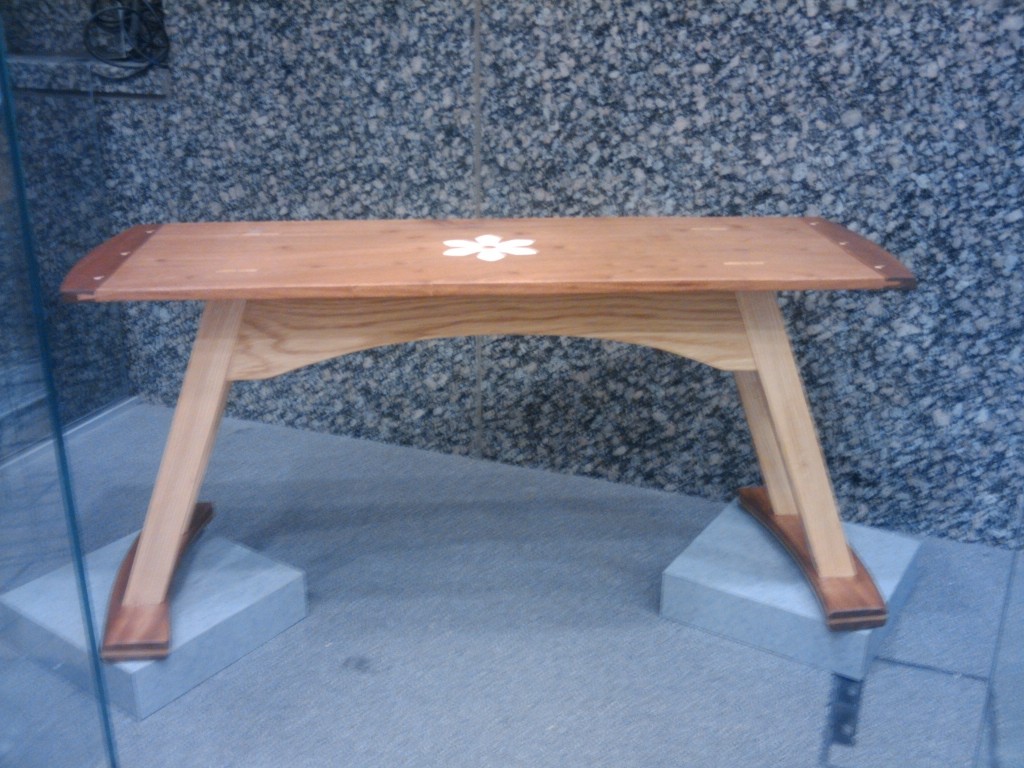
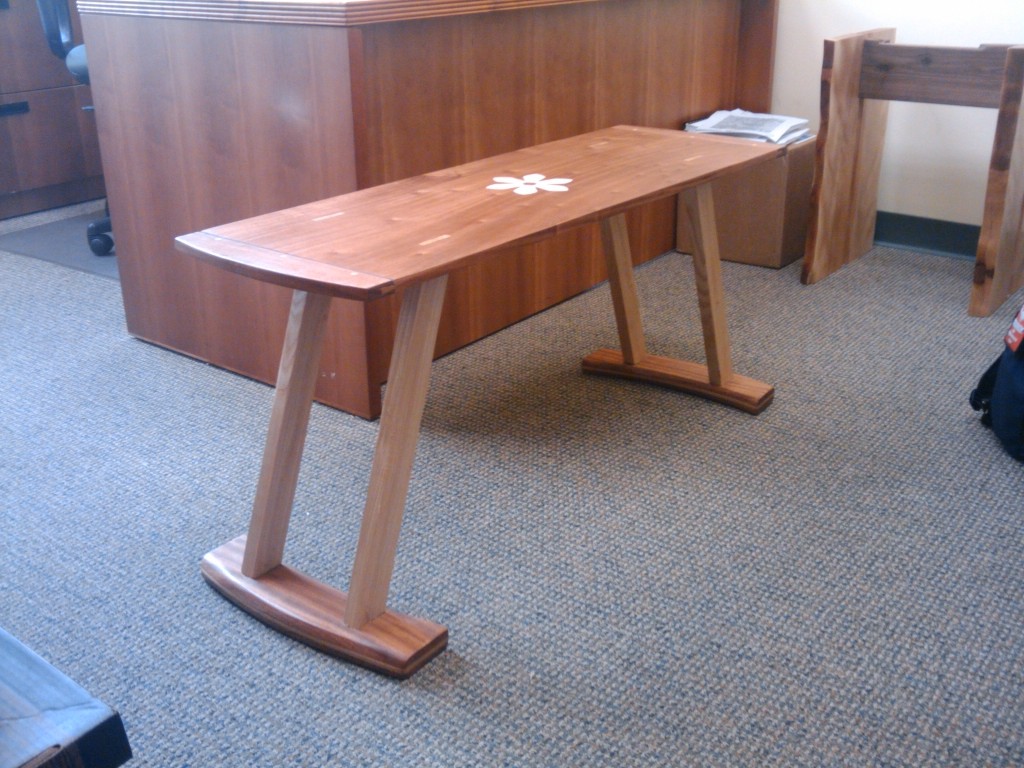
I had to name this piece before I submitted it to our annual art contest. Heck, I had to name it before it was even done. If I had the chance to do it all over again, I would have named it The Cat, because it has used up about seven of its nine lives.

Let me explain. This whole thing started when I found a very wide slab of sapele at my local hardwood supplier’s place a few years ago. I thought, “Gosh, this would make a nice table top one day.” That board sat in my shop for a long time before I had an idea.

That idea was angled tennons. I should have guessed this was a bad idea from the beginning because online searches brought back few results. But, who am I to let a few details get in the way? After all, it was cheap wood!

Back in September, I finally got around to sketching something out. Cutting angled tennons was going to be the easy part, but, how on Earth was I going to make the angled mortises? Drill them? Hand chisel? Phased plasma rifle?

Before I went too sci-fi, I remembered the article I had written about mortising magic. Now, if it worked for mortises perpendicular to the board’s surface, why not at an angle? So, I marked where I wanted the outside of the mortises to land, set the table saw and ripped the sides. Then I measured the width of the mortises I planned to cut, set the rip fence and ripped the ‘fillers’. Once these narrow pieces were cut, I cut sections out of them at 20 degrees, and then carefully glued the entire top slab back together to restore the wood’s grain pattern. BINGO, baby!

I let the top sit for a few weeks, waiting for more inspiration to hit. How to dress up this big top? How about some breadboard edges? Never cut any in my life, but it’s a good time to learn. I cut two sections of Sapele and grooved them to work as ends. How about the main table top? I tried first to hand-cut the tennons that would fit into the edges, but that didn’t work too well. Sapele is very brittle and splinters easily. I totally messed things up. How now?

Eventually, the idea hit me to lean heavily on blue painter’s tape and a backer board as I pushed the top over the dado stack. So, I trimmed the messed up parts off and taped the snot out of the edges. I set up the dado and pushed the board through. WOO HOO! It worked. I drilled for three dowels, elongated the outer two holes in the tongue and assembled them with some glue right in the middle. I tapped the dowels into place, gluing the middle one and just putting a touch of glue at the top of the two outside dowels. This way, the top could expand and contract, and the dowels would stay put. I cut sweeping curves on the outside of the breadboard edges and sanded them very smooth.

I put the piece aside for a while. Worked on the cabinet pull outs. Worked on the Position of Strength base. Discovered I was wasting too much time, and had to move to the next step. The inlay. You remember the one I nearly messed up but saved with the epoxy fill? OK, got that done, and glued the mortises in place through the top. I’m flying now!

Of course, I had totally forgotten about the feet. When I milled the top, I had taken the opportunity to mill some extra ash and sapele and glued those pieces into blanks. They were just sitting on my side bench, taking up space in the shop. How was I going to make those blocky feet look better? While mulling the options over, I cut the mortises to hold the leg tennons with the mortising chisels my wife and kids gave me for my birthday. That was fun.

Inspiration hit while I was looking at the breadboard edges. How about curving the outside of the feet? I traced the curve from the top on to the front edge of the legs and used the bandsaw to cut it out. They looked better, but still too blocky. I added a curve on the back side of the feet that mirrored the front curves… better. Then, just messing around, I clamped one of the feet into my vise and started using the spokeshave to bevel the top edge. Soon, I was beveling back both curves at a 20 degree angle to match the legs. Both bevels are parallel, which gives the feet a little more grace and lightness.  Ohh, that was supposed to be the weakest part of the design… looks better now!

I sanded and finished the piece and brought it to work. Hmmm… it didn’t show well. Something didn’t look quite right. The top was just too ‘light’ in comparison to the rest of the piece. It looked like an ironing board. Add to the impression that the first few people who saw it tried to sit on it. Hmm, we had a problem. How to fix it?

I remembered that I had a long rough piece of ash back at home. I opted to put an ash apron under the top. How large should it be? I played around with the proportions and decided that 5 inches would do the trick. I resawed, planed and cut the pieces to size, matching the angles found on the legs. Better, but still too blocky. How about a curve cut out of the bottom? Now it looked better. I glued and pocket screwed the apron into place (my only real option with the piece already glued up), sanded it and finished it to match. The apron added strength to the piece and gave it a more balanced appearance.

I turned the piece in a week ago, and it’s sitting in the locked glass case in the courthouse lobby. The reactions have been pretty positive. I’ve heard it described as ‘whimsical’ – not really something you would expect to see.

At 3:00 today, I’m going to find out how well this and the Position of Strength pieces placed. Hopefully, the judges will decide that my persistence with this piece was worth it. I’ll have an update on Wednesday…

Stuff I’ve built: Position of Strength

January 2011

It’s art contest time again at the county courthouse (Brought to us through the National Arts Program), and again, I’m in the contest with a collaborative effort between myself and talented ceramic artist Debra Lansdowne.  Normally, I’ll post multiple views of the project to show how things are made, but the shot below links to a very high resolution image that shows how this simple project was put together.

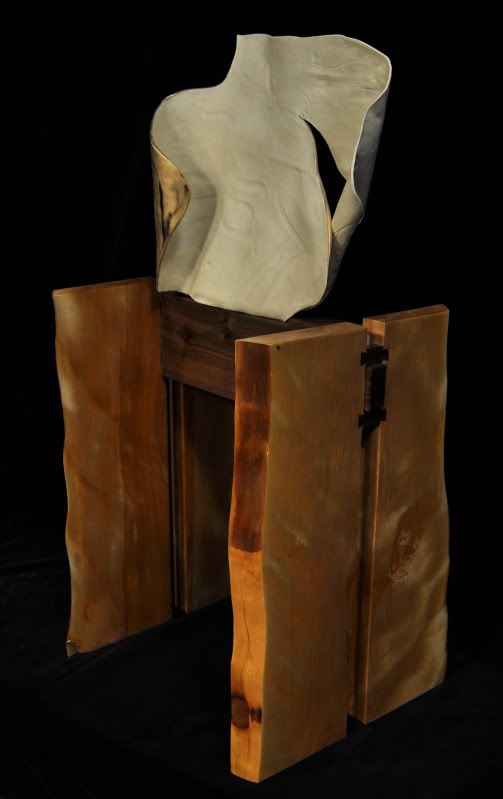
The base was my responsibility. Debra had showed me her sculpture – an interesting piece made out of a single sheet of clay. It’s sculpted to look like the torso of a well-muscled man (it almost looks like he’s also wearing a cape, floating in the wind off his right side). Unlike last year, she had the sculpture done and was looking for me to create a base.

I had to build something that would show strength and a lot of visual interest. During my lunch hours, I sketched out ideas on a notepad in my office. Maybe something with bent legs like Mars and Venus Rising, the project we entered last year. Nah, we’ve already been there. Maybe something with a Greek influence. Meh… that would be something to easy to expect. Eventually, inspiration struck me, and I sketched up something that looked a whole lot like the final project.

A quick e-mail to Eric Poirier of Bell Forest Products led to a search of the kiln – and this piece of live-edge slab flame birch.  This is the board I was having a bear of a time smoothing a few weeks ago. I cut the slab into 24 inch long segments, then ripped them down the middle with my track saw. They were perfect right off the bat, requiring just a little touching up to get smooth inside faces.  I carefully maintained the order and arrangement of the segments so they would stay in matched pairs as I laid them out.

The slabs are joined by a pair of  walnut ‘pins’ that are joined to both sides by sliding dovetail joints. I went with the sliding dovetail because it would be a tight holding joint and add visual interest to the piece.

Once those pins were in place, the next step was to find a walnut stretcher.  Fortunately, I had a chunk of walnut – 8/4 by 8 inches by 24 inches long. I shortened it a little bit, and then cut a tennon on both ends to fit in the void between the two slabs and the pair of pins.  The fact that the stretcher had some knots in it added to the appearance as far as I’m concerned. On the top of the stretcher, I custom carved out a pocket where the base of the sculpture would fit in snugly when on display.

I affixed the stretcher in place with a 1/2 inch dowel drilled through the pins.  It was a basic, available at your local home improvement center kind of dowel, but it fit beautifully and locks everything together.

Once everything was in place, I finish sanded the piece down to 220 grit.  Once I cleaned off the dust, I coated the piece in a 1# cut of dewaxed shellac and sanded it with 320 grit paper when it was dry. I then applied two coats of Watco Danish oil, sanding between each coat. Finally, I buffed on a coat of wax to finish things off.

The artwork is due to be delivered on January 24, so this one is done.  Meanwhile, I have another project on the bench I made some progress on this past weekend.  I’m hoping to have that one done in time for the contest, but it’s gonna be close.