Category Archives: Projects

Some finished shots

I had a lousy weekend. No, nothing went wrong in the shop, and the wife and kids are all doing well. I just had some health ‘issues’ which needed to be resolved.

Since I’m here relaxing at the house, I realized that I have left you hanging on a few projects. Ones which I wrote articles about, but never showed you the final piece. Well, today I’m going to fix that.

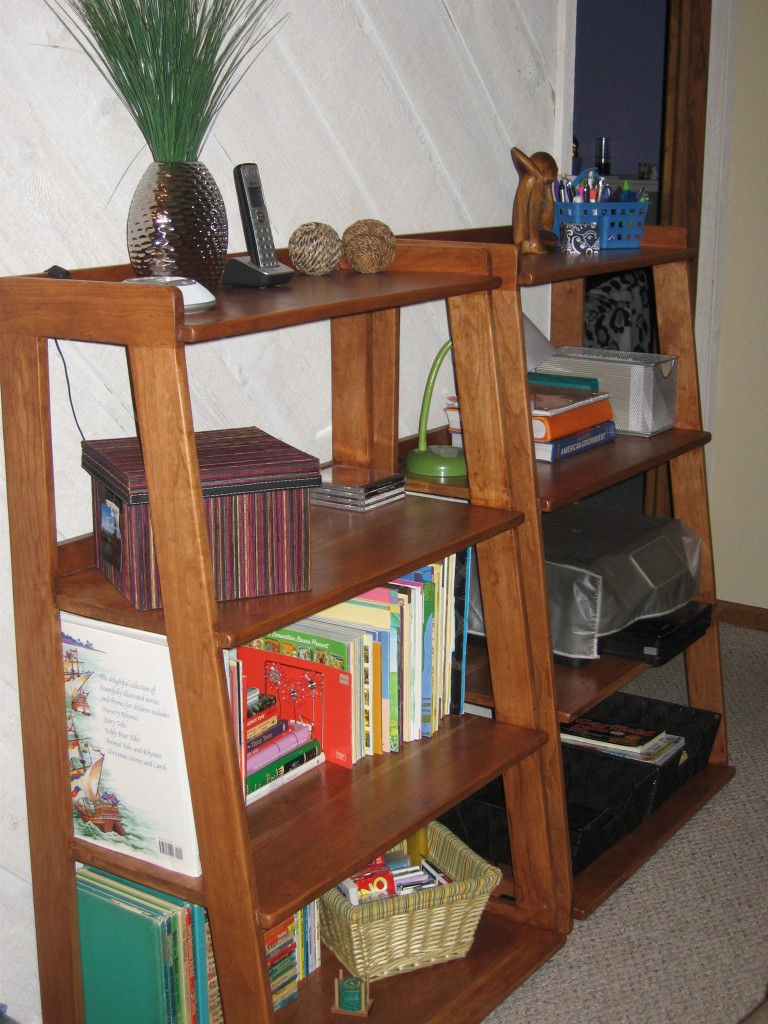
First, here are those stair-stepped bookshelves in place. As you can see, my friend Carla wasted no time getting them in to their final location and loading them up with goodies. I like the way you can look into the side of the cases to see what’s stored there, and she likes the width of the lower shelves for larger storage.

I do have to go to her house to install some leg levelers on the shelves. While they sit very stable on the carpet, one unit has a bit of a wobble on hard floors. Since they are planning on replacing the carpet one of these  days, I figured it would be good customer service to head over there and install those potentially necessary pieces.

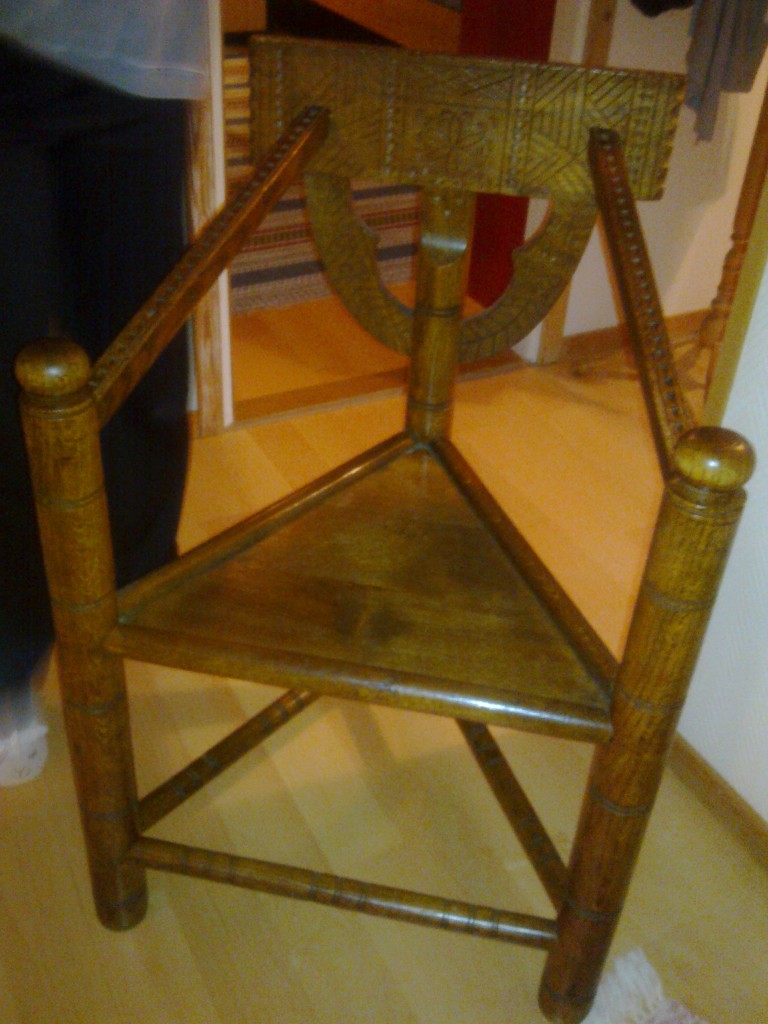
The other piece is the Munkstol. After I repaired the round tenons in the piece, I glued it all together with hide glue and replaced a few dowel pins which were holding the chair together. The challenge with this chair is that it is triangular, so getting good clamping pressure on the joints took a little bit of work and finesse. In fact, what I did was glue the front assembly together and clamped it until the glue cured, then clamped the other parts in place. It took some muscle and a few naughty words, but now it’s good to go.

Rhonda and I brought it to our neighbor’s home once it was done. Our neighbor was so happy, she took a picture and sent it back to the family in Sweden.  Once that happened, gosh, the praise started coming in two languages!  I’m glad that Google offers its free translation service…  otherwise, I’d be sunk.

Now, I meant to finish the rocking horse over the weekend, but that plan went by the wayside. I’ll get that done this week (I hope) and then I have to move on to the next project.

Great weather. A busy shop.  Fairly decent health. Hey, what else can you ask for?


Woah, big fella!

Back in late 1999, I was still just a budding novice woodworker (sometimes it’s tough to tell that I have improved any), I wanted to build a new project. I think this was my third. But, what to build? I had already built something for my wife.

There was also someone else who was very special in my house – my oldest (and my only at the time) son Dominic. I had already missed the window to build him a cradle. I could have built something practical like a bookshelf, but where’s the fun in that?  That’s when I decided on a rocking horse.  And, I think it’s safe to say that the client was pleased.

Fast forward a dozen years. Marc Spagnuolo is running a charity build where he’s donating $1 for every completed rocking horse plan that is built.  I have been building a rocking horse or cradle to donate to a local pregnancy crisis center every holiday season. And, that little boy who loved his rocking horse so much has been bugging me to get more shop time.

Thus, a plan was born.

So, this weekend, Dominic and I went to the nearby Lowe’s to pick up a glued up project panel and the other supplies. And, we had to make two trips to the local print shop to get the plans enlarged to the right size.  Apparently, 200% in one FedEx store doesn’t mean 200%.  But, Emily at the local shop was able to get everything printed up nicely, and we were off to the races.

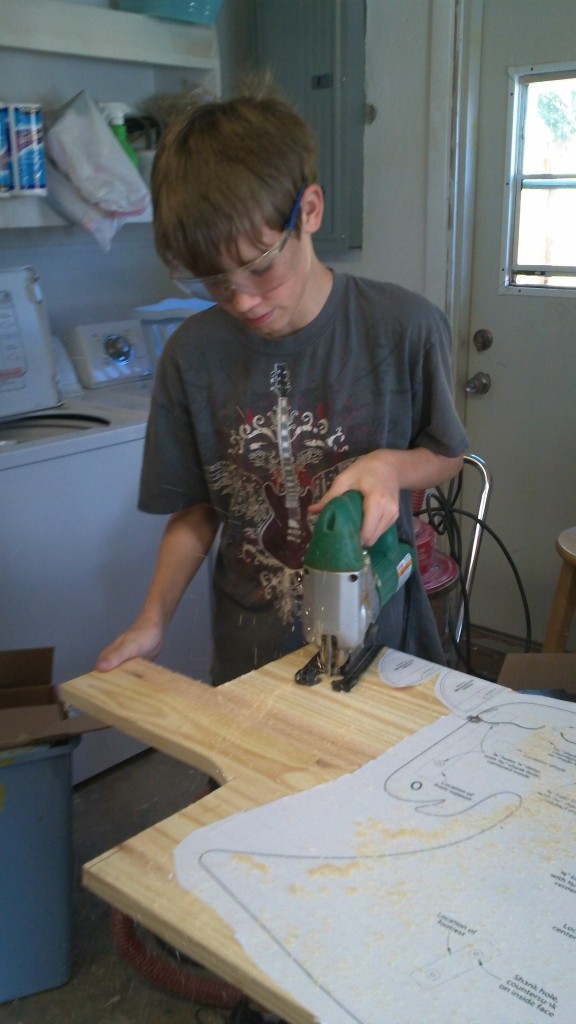
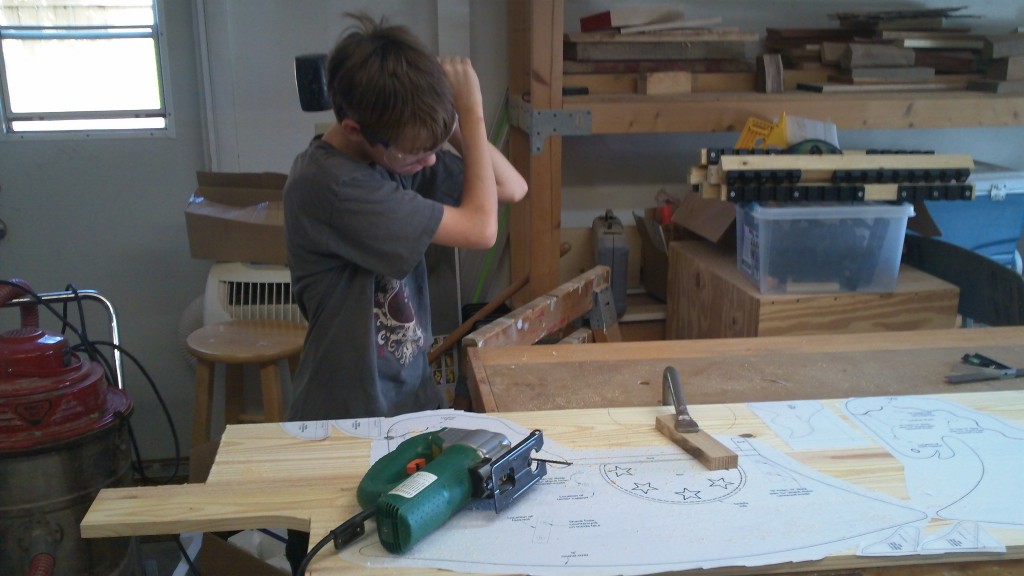
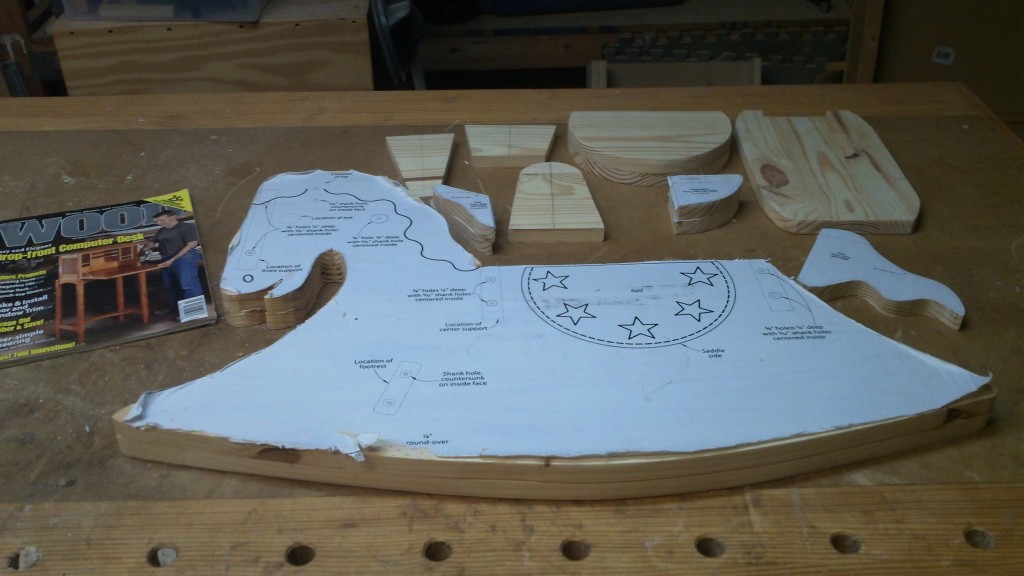
Since Dominic had used a jigsaw in his tech class at school, he wanted to show off his mad skillz. So, we spray mounted the plans to the board, and Dominic got right to work with my jig saw. First, he cut off the parts of the board that we had drawn out the smaller parts of the project on. I took those over to the band saw and made those cuts while Dominic cut out the sides of the horse outline.  We were using my holdfasts to keep the board down to the bench, and he was VERY energetic using the mallet to snug them down.

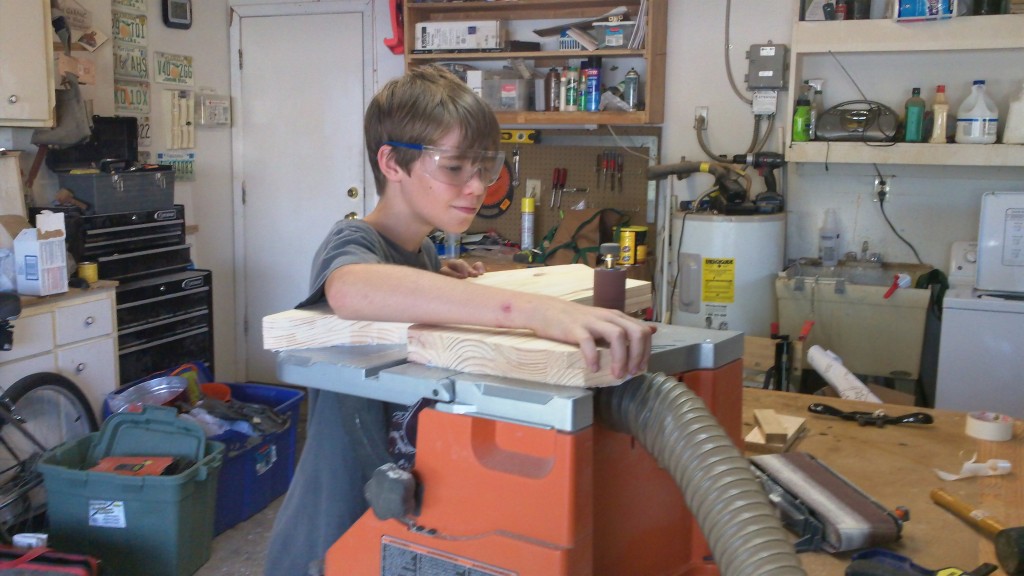
After we cut things out, I broke out my Ridgid spindle/belt sander, and we started smoothing out the rough cuts.  And, they were pretty rough, but that’s what the sander was for!  Dominic took to the sander with skill. I watched him closely at first, but he was so good, I was able to back off and take a few pictures.

Did we get as far as we wanted to today? Nope. Dom had the idea we were going to have a fully assembled horse waiting for a finish on it. Ehh, what we do have is a stack of edge sanded, cut out pieces ready to have pilot holes drilled, surfaces sanded and finish applied.

Dominic left the shop sweaty, covered in dust and energized by the build. I left with the pride a father feels when his son grows up and finds the joy in working with his hands. My buttons were bursting. It brought a tear to my eye…

Hey, Marc and Nicole… Having an infant is a great thing, and you will enjoy every minute of parenting a little one. But, when they get old enough to work in the shop… that’s when it gets GOOD!


The busted chair… y’all are good!

OK, so this morning, I’m wrestling with the reality that I have to bore some very accurate holes into some very thin turned spindles that are now missing their tenons. I thought about this while dropping my son off at school. I thought about it when I got my cup of coffee and turned on the computer. Heck, I thought about it during a brief meeting I had this morning.

That’s when inspiration hit me… in the form of a guy named Steve Sander who commented on my post over at my Google + account. His suggestion was so blindingly simple, I just had to come home and give it a whirl.

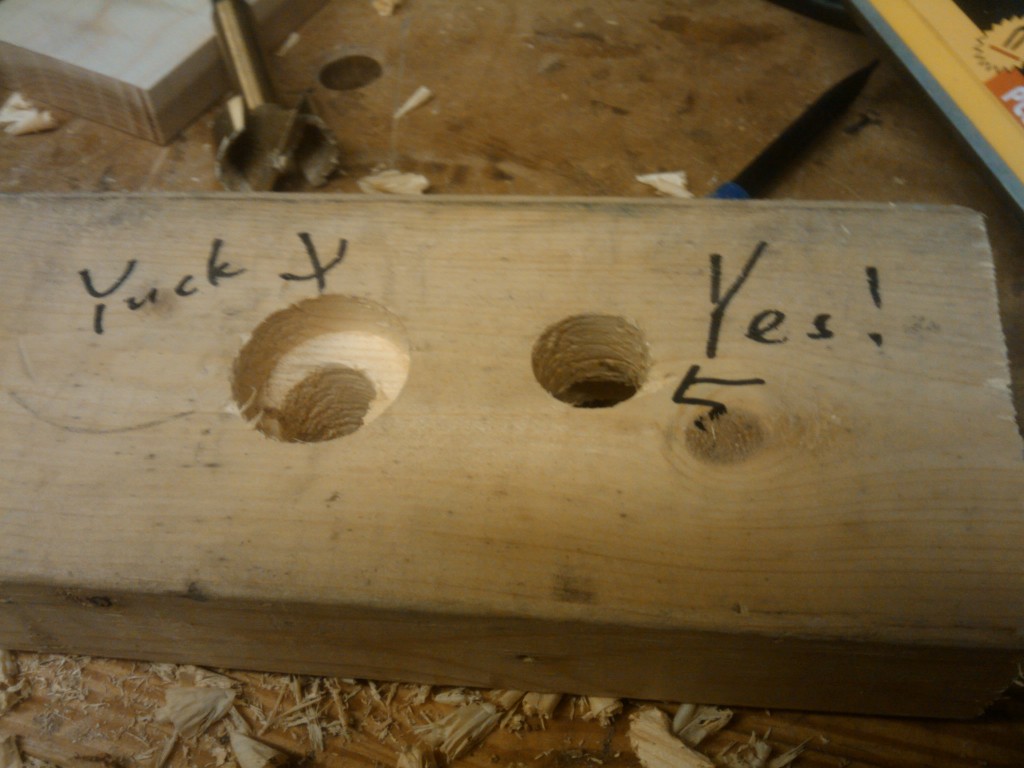
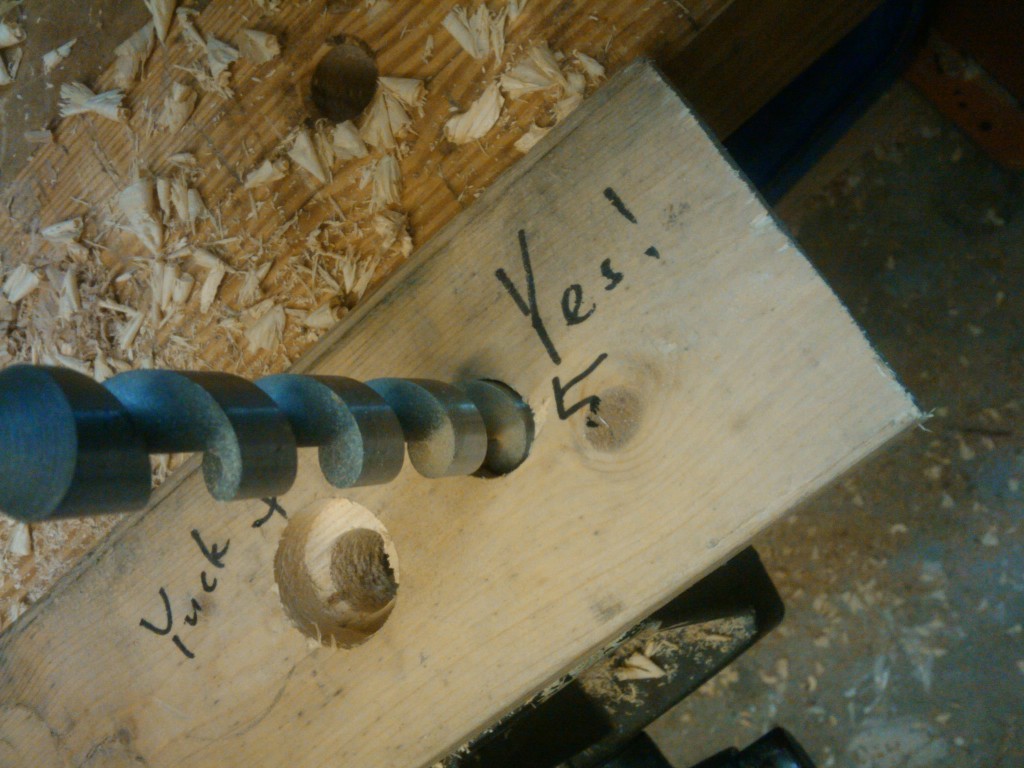
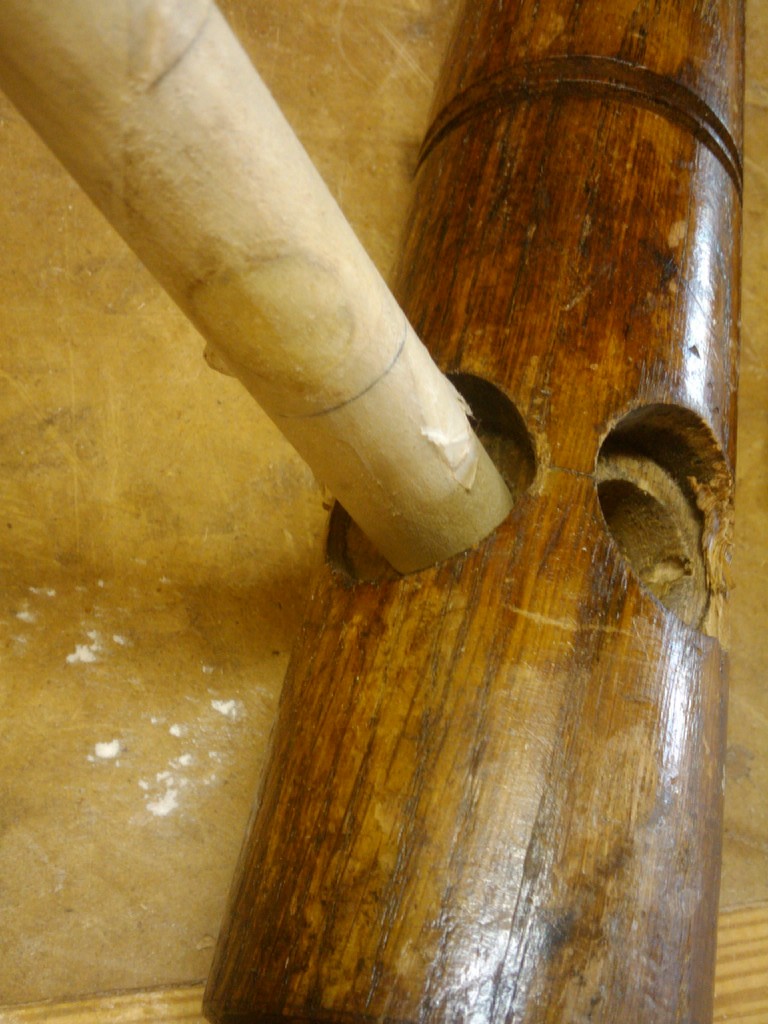
Steve is firmly in the KISS (Keep it simple, stupid) camp of woodworking. He recommended that I simply get a piece of 2 x lumber and bore a small hole all the way through from one side to the other. On the ‘bottom’ side, drill a hole the diameter of the spindle width. On the ‘top’ side, bore a 3/4″ hole through until it meets up with the one beneath. This means that the larger diameter will support the outer rim of the spindle, and the smaller hole will guide the bit.

As long as I do this carefully, using the small bore as a centering mark and keeping the bits perpendicular to the board’s faces, everything should come out fine. Of course, I blew it on the first attempt. But, that’s why I got me the longer board.

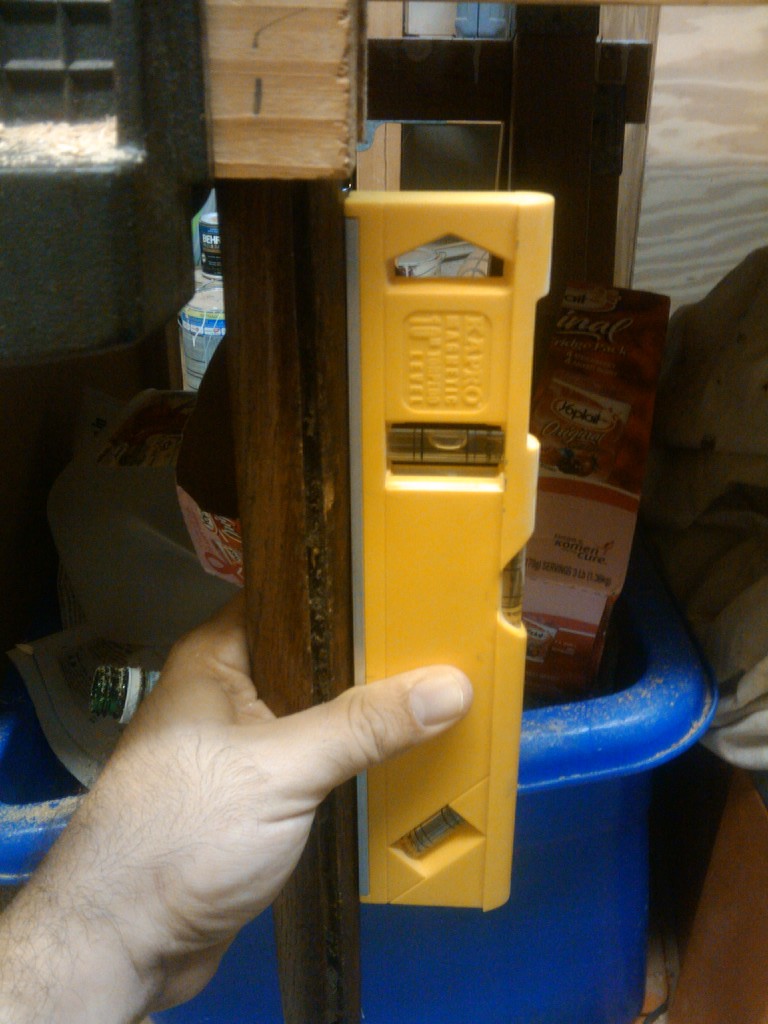
I put the spindle into my vise just high enough to ensure enough stuck up above to fit into the block. I also wanted to make sure the spindle was plumb, which greatly simplified my drilling. Just keep everything nice and plumb.. and we’re off to the races.

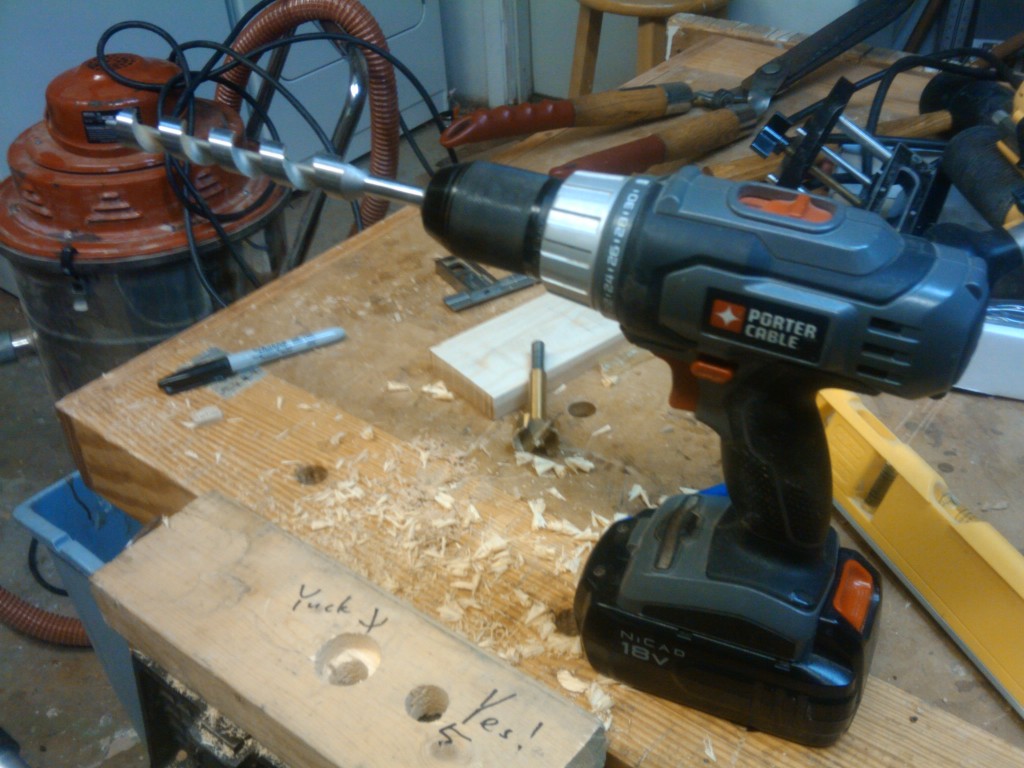
Next up, I chucked a 3/4″ auger bit into my cordless drill. I went cordless because I wanted to go on the slow setting used to drive screws… I just didn’t want to hit it with too much speed.

As Bob Ross used to say before he painted a huge tree, here was my bravery test. I put the auger bit into the guide hole, hit the trigger and let it roll. The bit at first brought up dust, but then it bit. And, boy, did it bite. It was bringing up nice slices of wood and spitting them out at the top of the hole. Since I hadn’t heard a crack or anything bad, I was hoping against all hope that things had gone well.

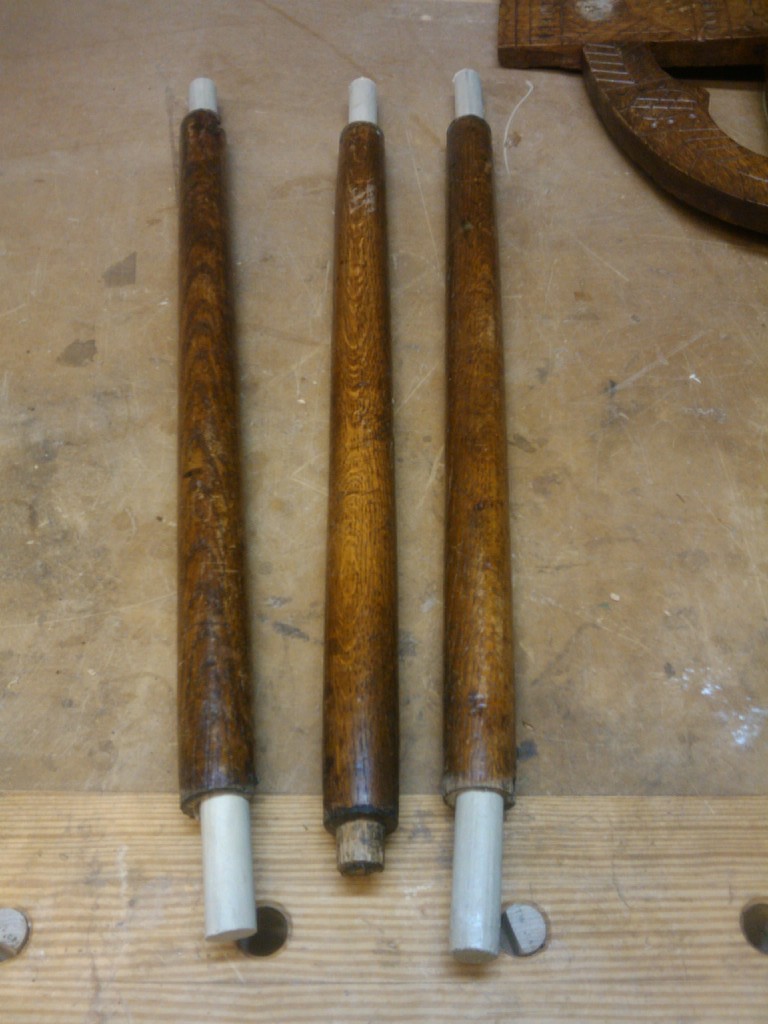
Heck, I don’t know if it was clean living (wait. We’re talking about me here. No way that’s in play) or what, but the dang thing actually WORKED!  I went to the band saw, cut some of my home improvement center dowels to size (they are long, I will trim them down to final size once the glue is dry) and glued them into place with hide glue.

Shoot… I’m already into a sweet bottle of red wine to reward myself… and – again – today’s success proves once again that Internet woodworking is very much alive and well…


The busted chair

I have this really good friend. She lives right down the street from us.  Our kids play together. Both families get together for picnics, dinners over and movie nights. Her husband is a Washington Redskins fan, but this New York Giants fan can still allow him into his house.

She also happens to be Swedish. Well, she used to be, but she became an American citizen a few years ago. Anyway, she still has family and friends over in the homeland, and she recently visited her brother to celebrate his 50th birthday. It was a total surprise.

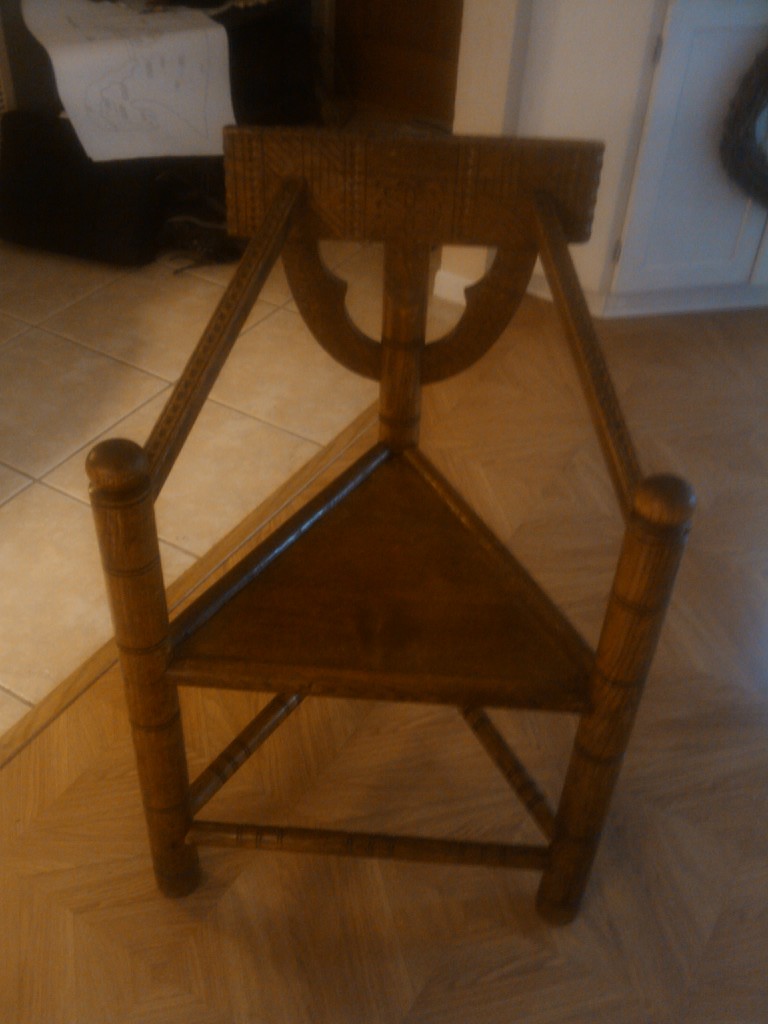
Before she made the return trip to Florida, her brother brought out a family heirloom. A piece of furniture she had always loved. It is a three-legged corner chair known as a Munkstol. What’s a Munkstol? Glad you asked. According to the Swedish Wikipedia and a bad translation from Google Translate:

A monk’s chair is a seating piece of furniture that was particularly popular during National Romanticism. Munk The chair is made of three straight, vertical poles, which constitutes both legs and holds up armrests. Between these there is a horizontal, triangle shaped seat with a tip pointing backwards. Munk chairs are often equipped with hand-woven, thin cushions of wool. They are quite uncomfortable to sit in.

And, as you can see, it’s a pretty sweet looking corner chair. My neighbor told me they were very popular after World War II. The three posts are turned beautifully, the crest rail is very ornately carved. The seat is an elegantly raised panel, with its edges held in a groove in each of the three turned seat stretchers. Quite the interesting looking project.

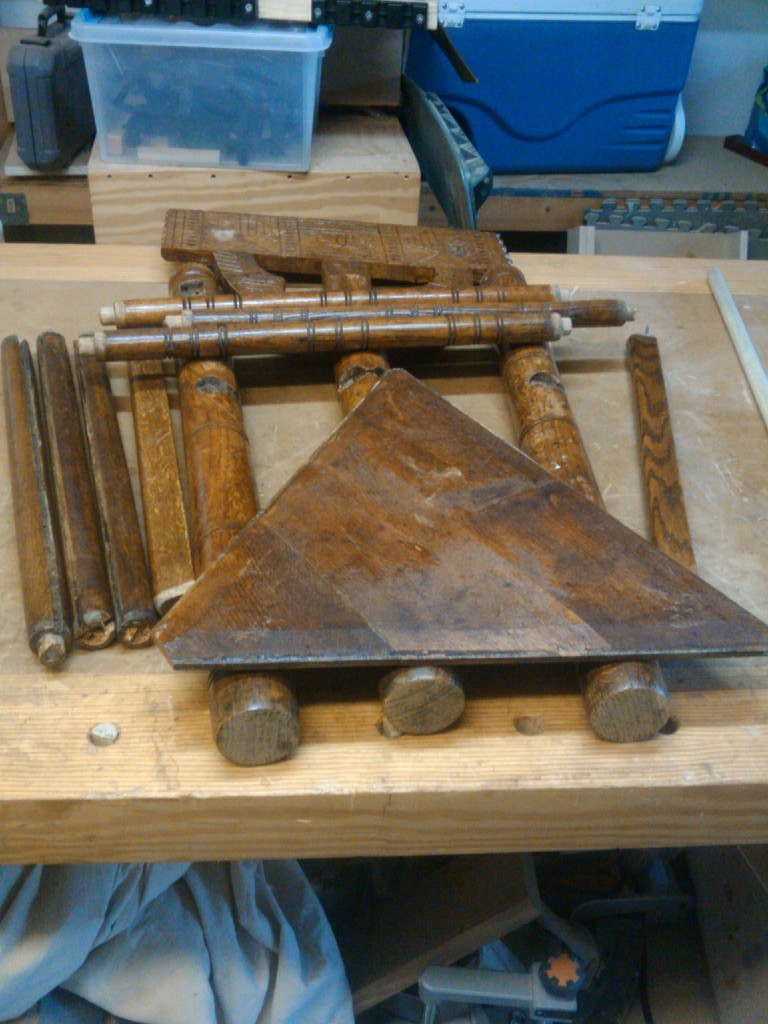
The only problem?  Well, her brother – in a totally kind effort to make it easier to carry back – basically beat the piece apart with a hammer.  So, these are the pieces…

Ehhh. This wouldn’t normally be an issue, but part of the plan when things were being busted apart was that my neighbor’s good woodworking friend – you know, the guy who likes to woodwork in the neighborhood – would be more than happy to put things back together…

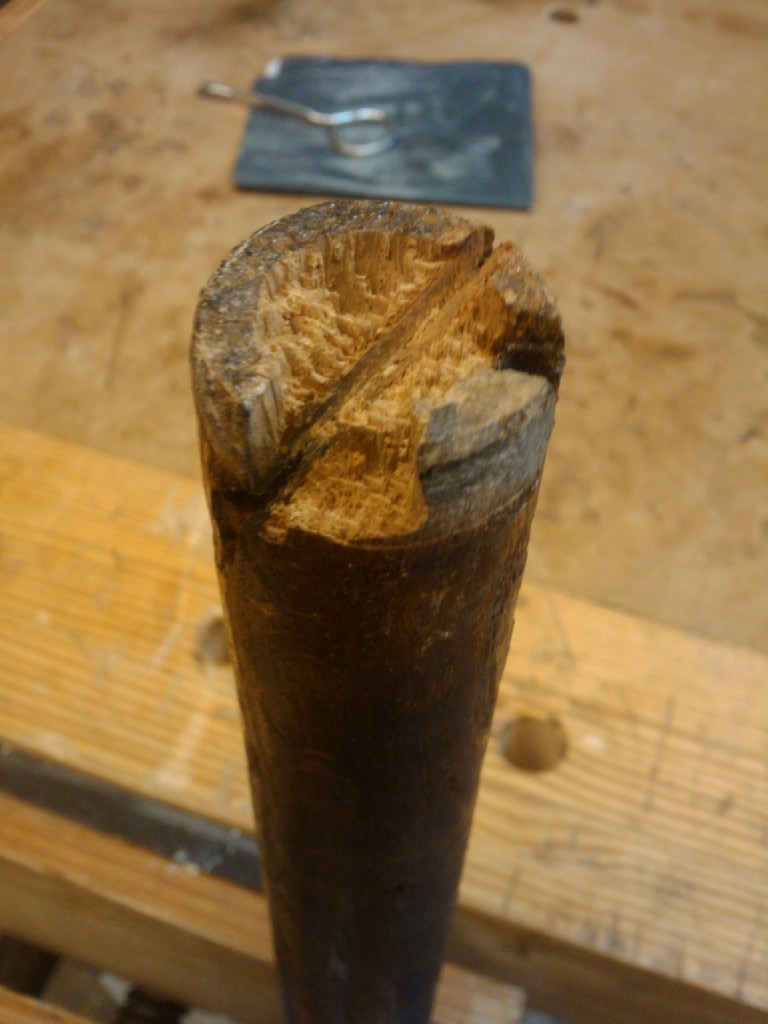
Gosh, it would have been easier had her brother – in his zeal to pack this baby up – not busted the piece up so roughly that he broke off the tenons on all of the turned seat spindles…

Fortunately, I was able to spend some time cleaning out the broken off tenons from the mortises (And pulling out the incredible number of cut nails that had been driven into the piece to keep the spindles from twisting), so they are ready to have new tenons prepared for them. And, I also discovered that a standard-issue 3/4″ hardwood dowel from the local home improvement center fits into the round mortises perfectly.

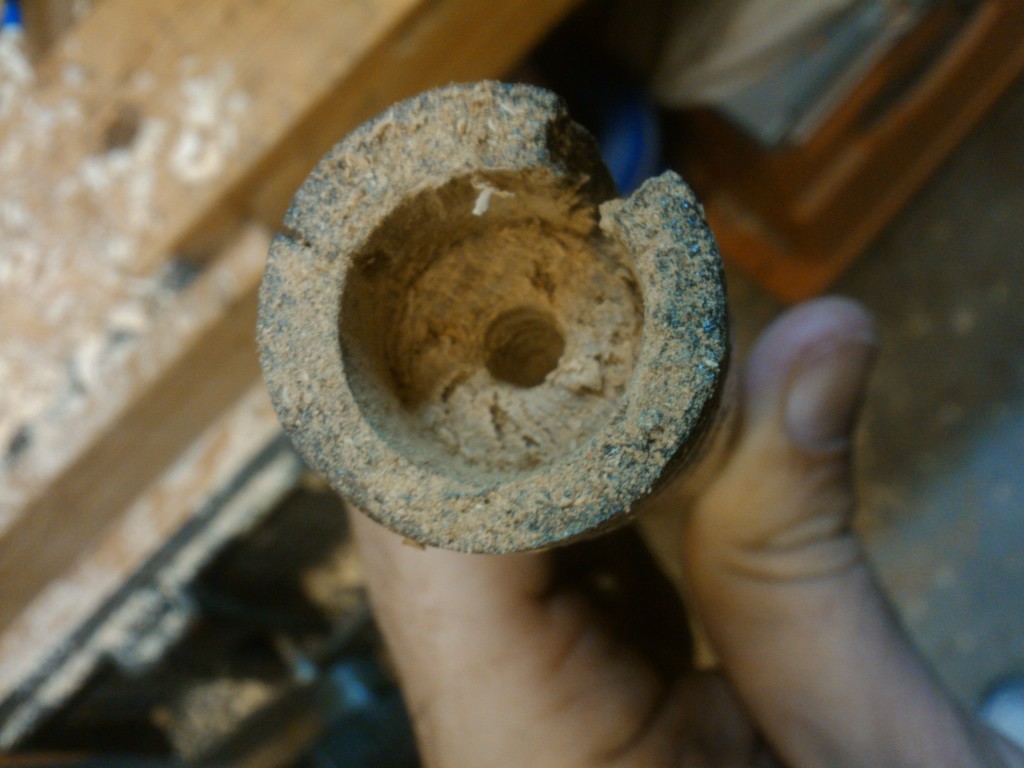
Now, I just need to figure out a way to bore a hole into the end grain of the  spindles, set the dowels into those spindles with some epoxy, and then epoxy them into the mortises without blowing out the sides of the spindles… This is going to be a real challenge.

The other one is to get the assembly put back together in the proper order. You can see from the finished piece that this is going to be one complicated build to get everything together….

Now, my neighbor’s husband is a professional sushi chef. So, I’m going to be plied with some prime Hawaiian tuna as a repayment for this job. So, with visions of some tasty Japanese treats dancing in my mind, I’m going to have to find the way to do this project soon… So I can enjoy  the sushi while admiring the completed, serviceable Monkstol.


Slow and steady…

I’m a big fan of turtles. The mascot at my Alma Mater, the University of Maryland? The terrapin (no, it’s not scientifically a turtle, but dude, I wasn’t a biology major). My favorite cold war era nuclear attack preparation video?  Duck and Cover, featuring Bert the Turtle. And, in the fable of the tortoise and the hare, the turtle beat the rabbit (I told you I wasn’t a biology major!) by sticking to the game plan.

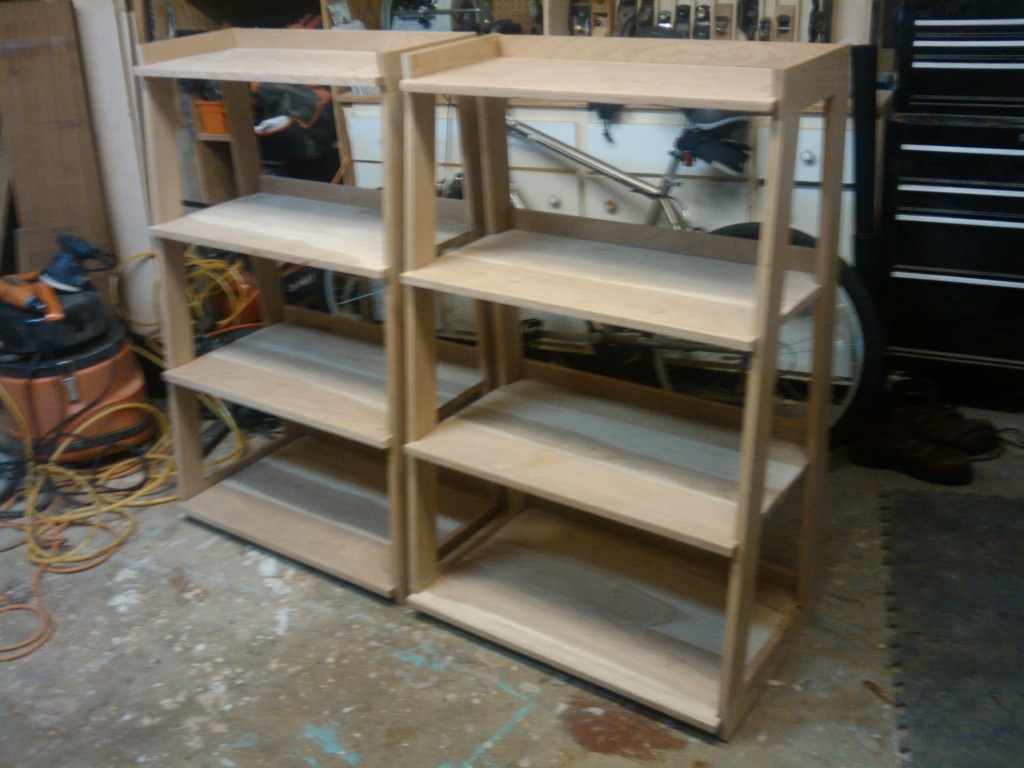
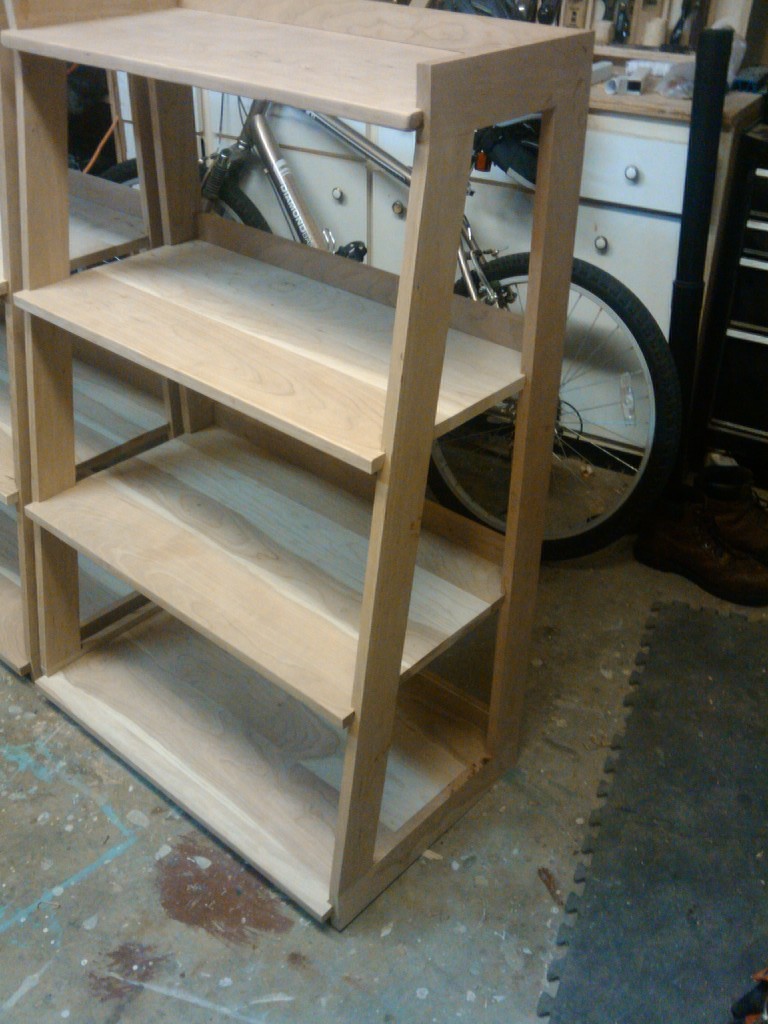
That’s why I’m so damned happy to be reporting that the construction of the ladder-step looking bookcase is complete.  Yes, this is the project that started going together in mid June. It’s the same project on which I discovered how important square assemblies are.What slowed me down? The summer heat. Hurricane season. Wild and crazy kids.  You get the picture, right?

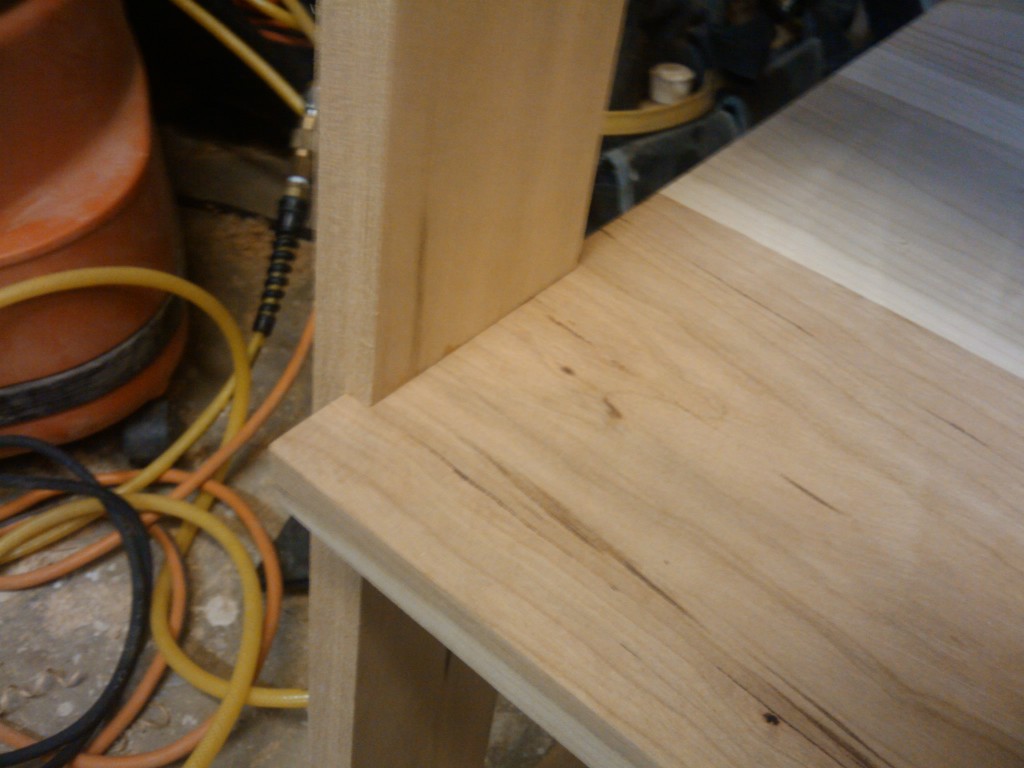
I think they came out looking pretty sweet. The top and bottom shelves fit into full length grooves in the upper and lower pieces. The middle shelves fit into custom cut notches.  Now, this is where things get exciting.  The notches in the back uprights is a nice and easy 90 degree cut. No sweat there.

The notches on the front legs are a tad more difficult. Those babies are slanted back, but the shelf sits parallel to the floor, meaning the notch on the shelf  has to be angled to accept the leg. This took a little bit of head scratching on my part, but I think the final product looks pretty darned sweet. For the assembly, I just glued the front notch, and let the back one float to avoid issues with wood movement distorting the frame.

I really dig the look at the side – the exposed shelves through the side frame really give the piece a lot of visual interest. It will be cool to look in there and see the stuff on the shelves.

Next step? Sand… sand… sand… sand… and sand some more. I have to ensure everything’s nice and smooth as well as breaking the corners on the pieces. Then, I’m gonna stain this one with some gel stain to unify the colors. Then, a bunch of coats of wipe-on varnish to ensure the piece is protected.

But, for now, I just wanna crash on the couch with a beer and sleep better, knowing that I have the tough stuff behind me on this big project.


Gotta start moving

So, last week, I was on the horns of a dilemma. Debating on a joinery method for a set of bookshelves I’m building for a client.

And, I found myself in an all-too-familiar situation.  Paralysis by analysis.

Your comments to me were great.  Insightful. Profound. I should choose the joinery method that challenges me the most… I should choose a method that could last a thousand years.  And, as I frequently do, my mind started to race.  How could I cut a great joint that I had never done before… one that could impress my woodworking friends and the client?

And, before I knew it, it was five days later, and I hadn’t done squat to get this project done. And, then the client asked,” So, how’s the project going?”

Gulp. OK, then! I broke free from my navel gazing and decided on dowels to join the corners of the frames.. Fortunately, I had already drawn the piece out in full scale on paper, so cutting milling the pieces out and cutting to size was a piece of cake.  Well, I did really take my time to ensure I had the angles down on the front rail.  That did take some time. But, hey, I want this piece to be right.

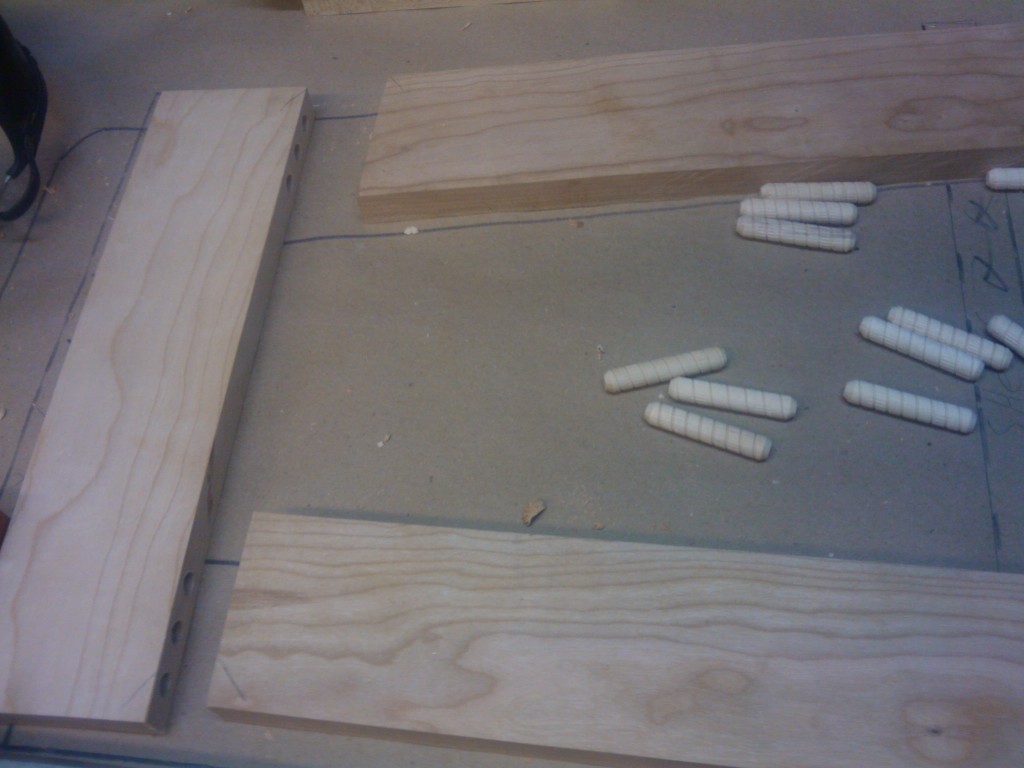
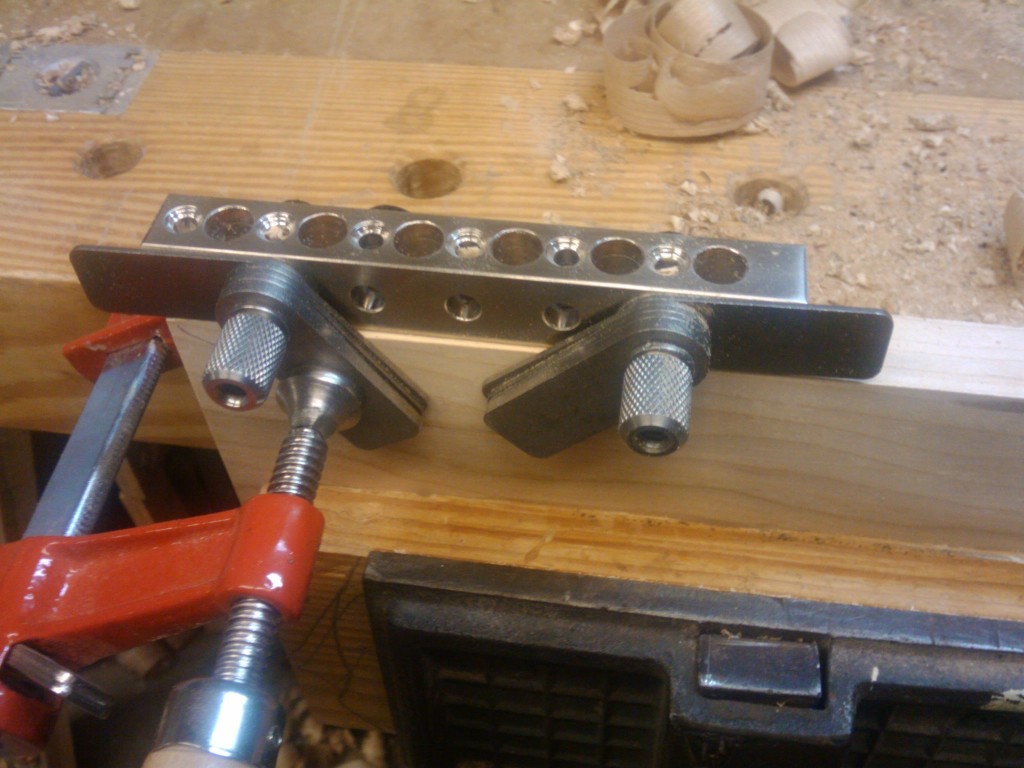
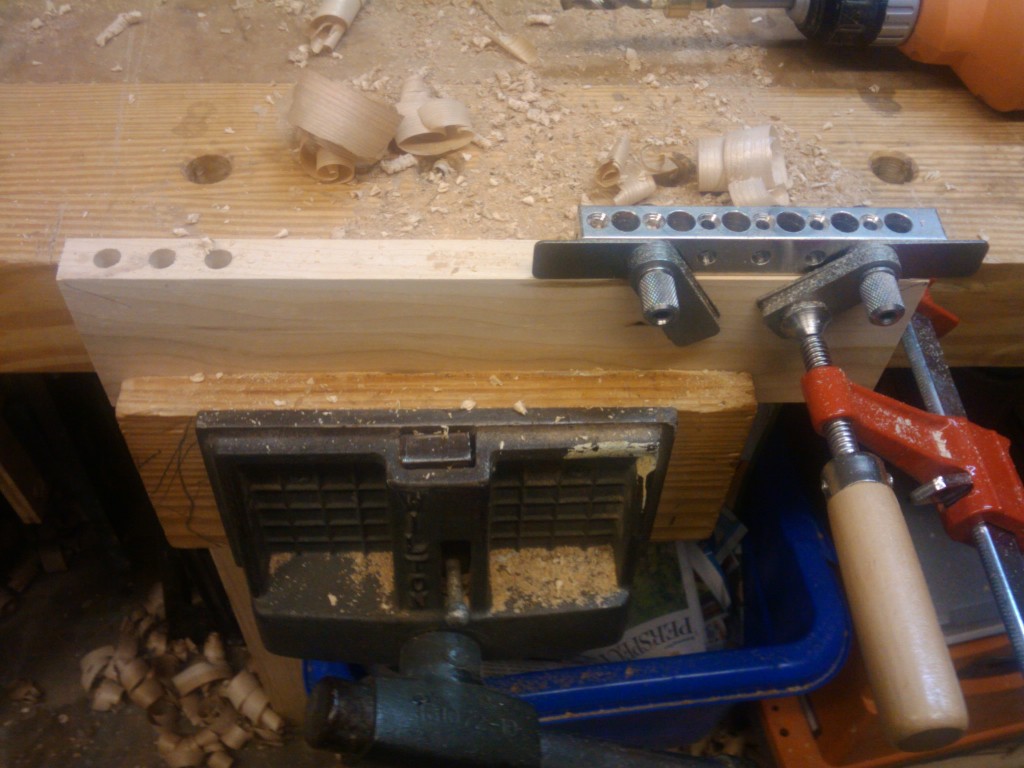
Doweling with my Joint Genie is just as easy as I remembered.  The jig is a solid steel block with accurately spaced holes where you can drill a series of dowel holes in the wood so everything matches up perfectly when you go to assemble. The jig has spacer leafs on it, which allowed me to adjust the location of the jig to get the piece roughly centered. No, this isn’t a self-centering jig, so you will have to reference from adjoining faces of a board.  Remember this, or you may not like the results.  At all.

Three holes, drilled just over an inch deep into each mating face, and I was ready to slide over to the next location to cut the next joint. Each three-dowel joint held the three spiral dowels snugly in place, ready for glue and the mating piece.

Now, when you are assembling any joints, it pays to not be a block head. If you have the top and bottom pieces ‘capturing’ the front and back uprights, you can’t glue the back one in place, clamp it up and then try to squeeze it in there after the fact…  Don’t ask me how I know this…  But, a little work with some glue,  a mallet and a clamp or three, each of the side pieces glued up nicely and will be drying overnight.

The funny thing is that after this, the rest of the work is very straightforward.  Sand down the sides, cut the shelf dadoes, assemble sand and finish. I’m definitely going to have to pick out a few nights after work this week to push this one along… and stop thinking about it!


On the horns of a dilemma

OK, so I’m getting ready to build this bookshelf project for a co-worker of mine, but I’m having a big time internal debate with myself. The design is fine, and the client is excited to get started on the project.

But, I am torn.  You see, I have been giving the joinery on the frames a lot of thought. You see, each side is going to be a four-sided frame that will be 18 inches wide at the bottom tapering to 12 inches at the top. There will be four pieces on each of the sides – a 90 degree back upright, two rails and an angled front stretcher. Each shelf unit will have two frames, and there are two bookshelf units in this build, making a total of 16 joints.

What I’m having trouble deciding is how to join these joints. I am trying to choose between a mortise and tenon joint and a dowel joint.

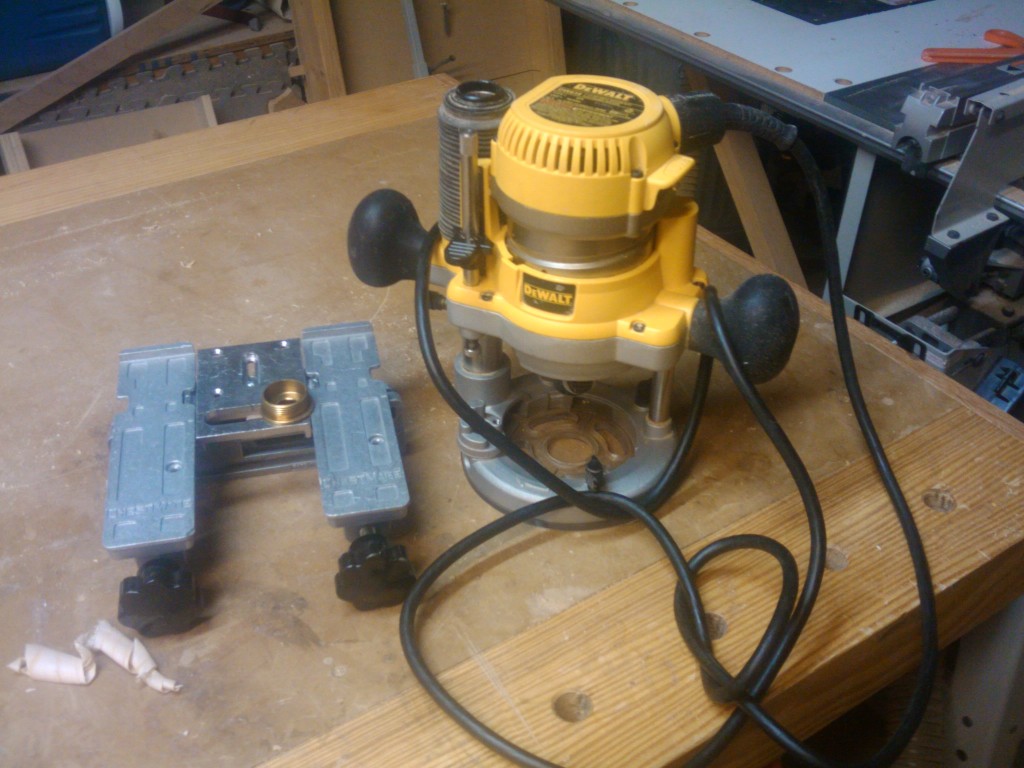
In this corner, there’s the mortise and tenon team. My plan – if I choose to go this route, is to cut mortises into the cross rails at the top and the bottom of the piece. I have a Prazi Chestmate jig with the special mortising template inserted, and I would need to use a plunge router with a 5/8″ guide bushing and a 3/8″ up spiral bit to plow the mortises. I would also need to cut tenons on both ends of the uprights – 90 degree tenons on both ends of the back rails and angled tenons on both ends of the front rails.  Probably using the nibbling technique on my table saw. I would cut them a little thick and plane them to final size with a shoulder plane to sneak up on the perfect fit.

Working in favor of the mortise and tenon is the tradition of the joint.  It’s a stout joint for this kind of application, giving lots of glue area. Against? Well, it’s a bit more complicated to do this kind of joint especially with the angled tenon to fit into the mortise. There’s also a bit of fussing to get the size of the tenon perfect – I have (on more occasions than I care to count) cut the tenon too thick to start, and then pushed it to too thin.  Grrr…..

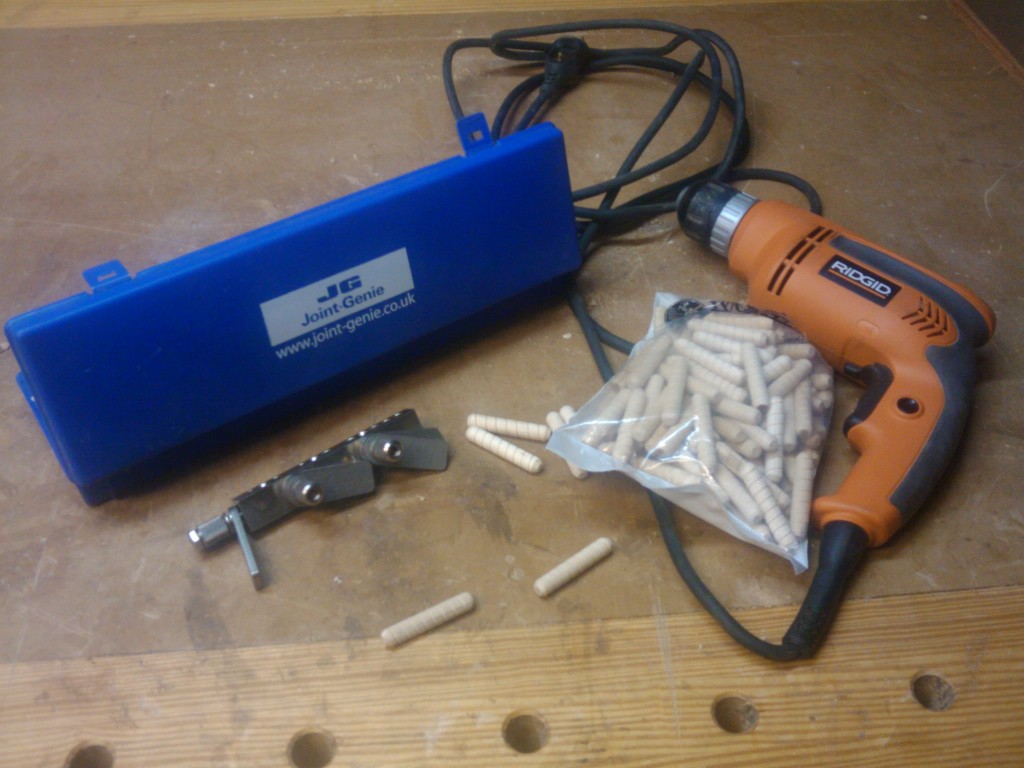
In this corner is the dowel team. Here I would use my corded drill and my Joint Genie doweling jig to precisely drill for three 3/8 inch, 2 inch long spiral dowels per joint.  Bippity, boppity boo, and I’m done with all 16 joints in probably less than an hour.  Using this method, I could ignore the angles – drilling at 90 degrees to the edge of the top and bottom rails and 90 degrees to the mating surface of the uprights. The 3/8″ dowels would be the same width of the tenon I was planning on cutting.  It’s another traditional joint that I have seen used for some heavy-duty joinery by Norm Abram and James Krenov.

The downside of dowels I have heard time and again is that they aren’t a heavy-duty kind of joint. There have been some Wile E. Coyote-type tests done to demonstrate the strength of dowel joints vs. that of mortise and tenon joints.  The testers used strain meters, bathroom scales and other high-end technical tools to measure the failure point of each joinery method.  And, their results  – expressed in foot-pounds, newton-meters or some other measurement scale – show results that are all over the place.  Heck, the earliest I have seen this debate was back in an October 1979 edition of Popular Science, where they basically claimed that the two joints are at a dead heat.

While I’m making up my mind, I’d be interested in hearing what your thoughts are on the topic…