Category Archives: Projects

Interred with honor

Here in the United States, we are commemorating Memorial Day, when we remember those who made the ultimate sacrifice for our country during wartime. Sunrise ceremonies are planned at cemeteries and veteran themed parks to honor those brave men and women who gave all.

While those service members who have fallen in battle are laid to rest with great ceremony, their brothers and sisters in arms who return from foreign fields come back home to resume their lives. Many achieve financial success and are blessed to be surrounded by loved ones for many years after their service is complete. When their time comes to pass, their funerals are well attended by family and friends, and they are laid to rest in dignified coffins or urns.

A military funeral

Unfortunately, many other veterans have difficulty when rejoining society back home, and – due to many factors – can find themselves destitute, alone and homeless in their last days. When these indigent veterans pass away, the Veterans Administration makes the final arrangements, which include cremation and interment. This interment usually involves housing the remains inside of a cardboard box.

This is why the Woodcrafters Club of Tampa began a project a few years ago. In order to help provide a more suitable final resting place for these indigent veterans. Working closely with the Veterans Administration and other allied agencies, the club began an ambitious project of building burial urns to contribute to the effort. The Tampa Bay Times newspaper did an article about the project shortly after it began last year.

A collection of burial urns

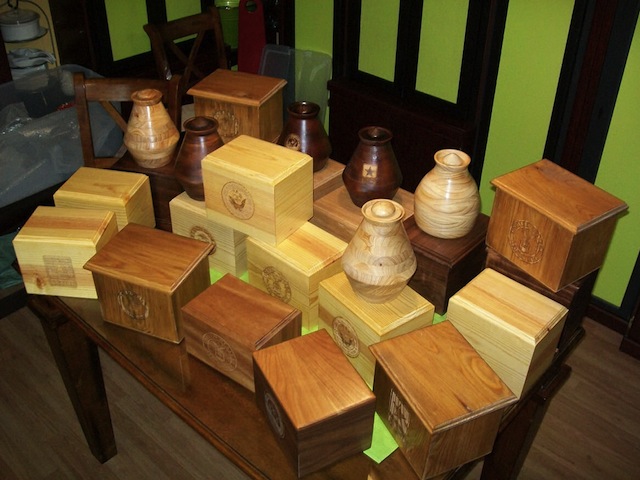
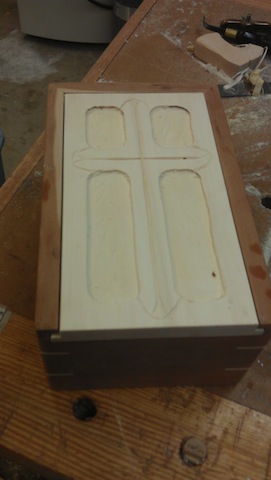
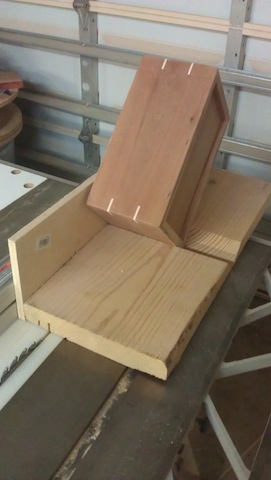
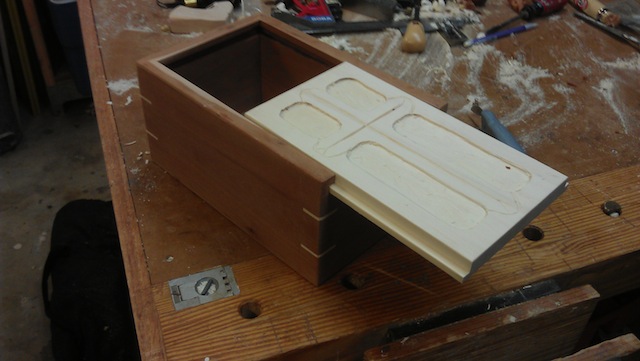
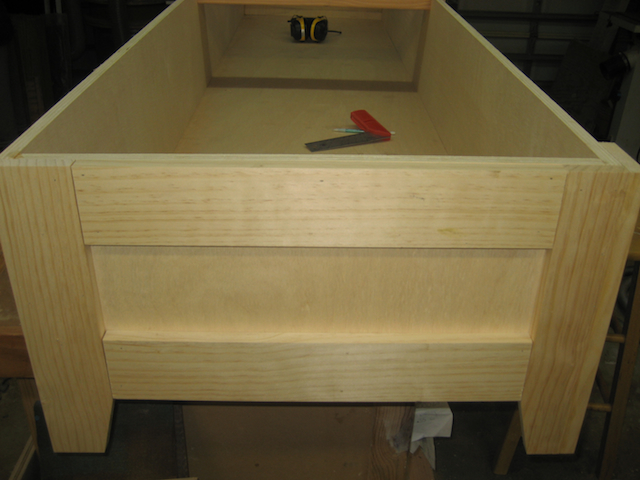
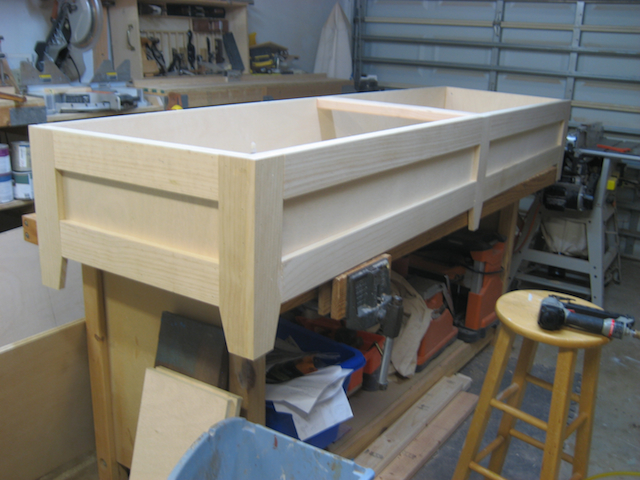
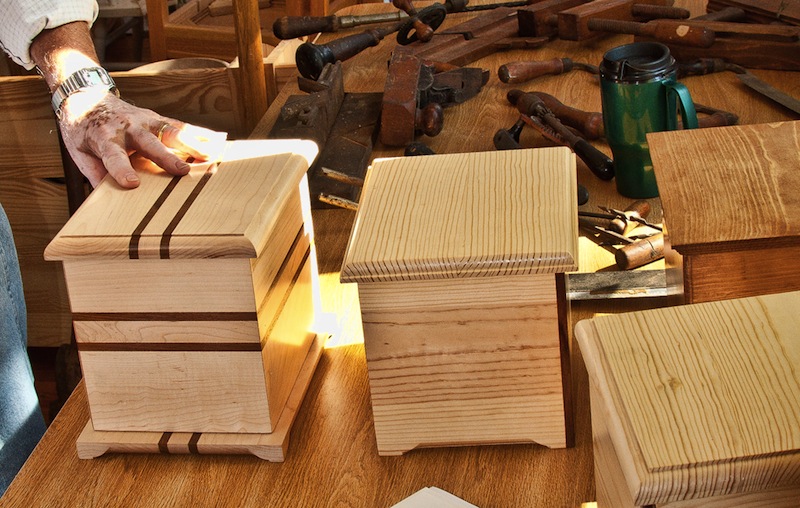
There are a number of specific requirements for these burial urns. They have to be about 9 inches wide by 7 inches tall by 7 inches deep, and the tops of the urns have to be affixed to the sides and the bottom is secured by screws once the remains are inside. Beyond these specific requirements, the design and material choice is completely up to the woodworkers to decide.

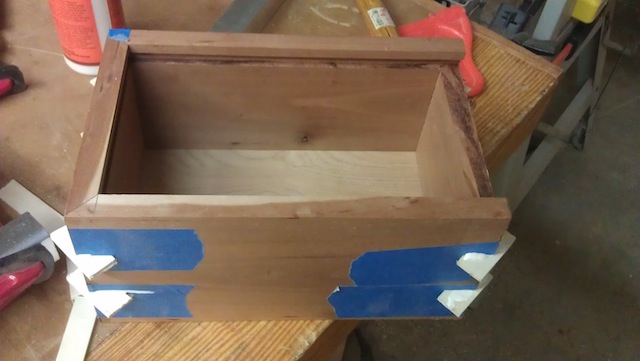
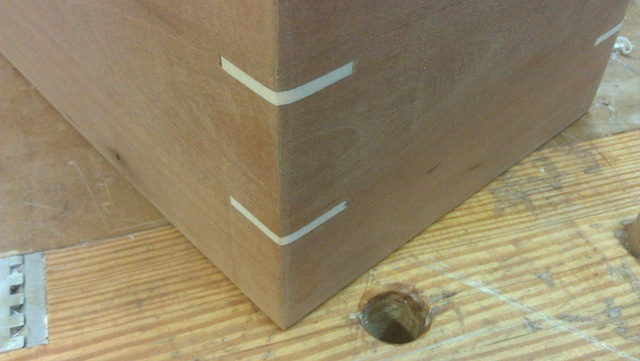
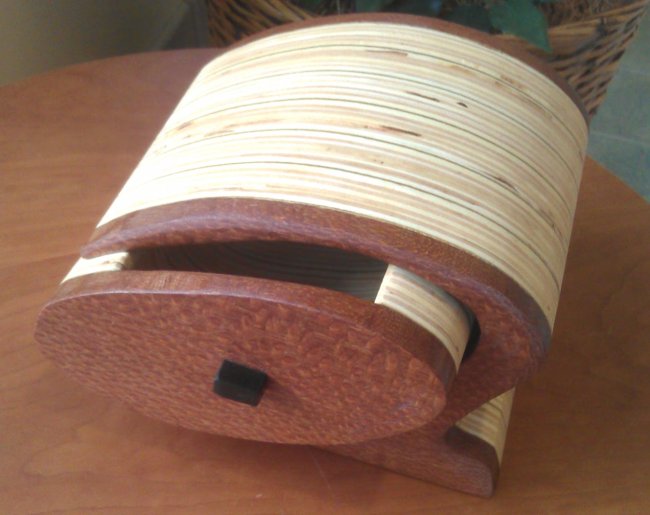
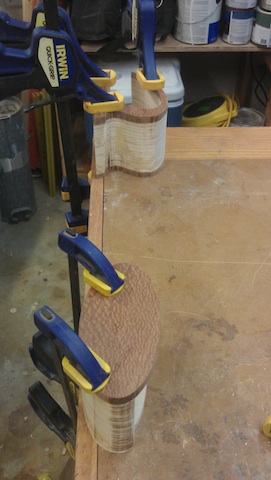
While most of the urns are built as boxes, an number of them are turned on lathes by talented turners. Most of the urns are build with pine or oak, but more exotic woods have been used as well, including special pieces taken from the builder’s own collection of prized woods. Many cabinet shops and other hardwood suppliers in the Tampa Bay area are more than happy to donate wood to the cause, helping to provide the raw materials so the woodworkers can concentrate on the craftsmanship that makes these so special.

Completed urns with the craftsman's touch

Many of these urns are sent to a local laser engraver who marks the urn with the seal of the branch of service the veteran served in, making each of these hand crafted urns that much more special.

Since the program’s inception, it has spread to many woodworking guilds in the Tampa Bay area and around the country. I have seen many of these urns built by the members of the St. Petersburg Woodcrafters Guild to be sent over to the Veterans Administration, each accompanied by its builder who beams with pride and the satisfaction of knowing that they are giving back to those who serve so selflessly.

While you may be out today celebrating Memorial Day with friends and family, be sure to take a moment to think about those who have served and be sure to give thanks in your own way for the sacrifices they made.  Happy Memorial Day.


A push-stick penthouse

Of course, there were many reasons why my recent kickback accident happened.  I was cutting without using the splitter. I had a temporary lack of focus while I was completing the cut. And, all of the featherboards and push blocks I should have been using were heaped in a pile at the end of my miter saw bench.  Groovy…

The jumble

Yeah, this was an area I had been meaning to get to since I built the miter bench last year. I simply tucked my hand planes in the till over there and kept looking at the void of space where I could have put my table saw organization station, and I swore I would get to it. Well, gosh darnit, now sure is the time!

Fortunately, I had some leftover plywood from the banquette project, and thought it would be a good material for the simple shelf system. And, hey, 3/4″ cabinet grade plywood looks cool in a shop. Makes you almost think you are going upscale on your shop furniture! But, before I made any cuts, I was sure to put the splitter and blade guard on the saw. You know, you can never be too careful about this kind of stuff.

Look!  A splitter!

The piece was insanely simple to build – an open cabinet 24 inches wide by 36 inches tall. I broke it into six storage cubbies, each holding different push blocks, hold downs, featherboards and the like. After I put in the last screws to hold the bottom shelves, I tacked in a few cleats for some top shelves to sit on.

It's in place

Yes, I know that I should cut a few shelves to sit up on those upper cleats to complete those babies, but it’s getting late, and I probably shouldn’t be working while I’m too tired… remember, that’s another important safety consideration! But, I think I can rest easier knowing that my table saw safety gear is someplace where I can get to it easily. There. No more excuses!


Stuff I’ve Built: Katie’s Carved Confirmation Container

OK, so I like to alliterate… what’s it to you?

Anyway, on Monday, I showed you a little bit about what I was working on for my niece Katie’s Confirmation.  It’s coming up this weekend.. so there’s no pressure to get anything done, right?

Looking for a  new lid to carve, I decided to head to the local home improvement center. It was the only place that was open that had any sort of cabinet grade woods, and I picked up a piece of aspen.  Interesting stuff, that aspen. The piece I got was super white, with a very subdued grain pattern. I also took some time to try carving it… and it worked well!  OK, that was going to be my new lid. So, I measured out the lid, cut it to size and marked my new design on it.

IMAG1050

Again, I went back to my trusty trim router to tackle the bulk of the material removal. The more I use that tiny router, the more I appreciate that I bought it. I also appreciate the help of David Venditto over at Infinity Cutting Tools for helping me select the right bit.  That was the winner.

IMAG1054

With the piece all routed out, I tried my hand at carving.  Not sure how well I did, but you know what, for a first real crack at it, I think I did fairly well.  Yes, I have to work on carving curves, but this is definitely a step in the right direction.

The spline jig set up on the saw

As for the box itself, it was a very simple design I built out of cherry for a nice contrast. A four-cornered mitered box with splines to help hold things together.  I really love my spline jig – it couldn’t be easier. It’s a 2 x 10 I fished out of the scrap barrel at the nearby home improvement place, crosscut it at a 45 degree bevel, and flipped the pieces so I ended up with a 90 degree cradle. I screwed both pieces to a piece of half inch plywood that runs against the rip fence.  I simply raised the blade until it cut as deeply as I wanted it to, then cut some aspen stock into the cherry box sides and glued the pieces into place.

The splines glued in, waiting for a trim

Once the glue dried, it was a simple matter to use a flush cut saw and some sandpaper to get everything where I wanted it to be.  I dunno, it’s a pretty sweet looking detail that makes the piece stronger. That’s good in my book!

Spline close up

From there, I still have to sand and finish the piece – no later than Thursday night – or it won’t dry in time for the big event.  But, judging on the progress I have made so far, I’d say I was well on my way to completion.

The box, lid opened

And, hopefully, another happy niece!


Stuff I’ve Built: The Banquette

So, this is a project that took me a few years to accomplish, but now that it’s done, I have to ask myself why it took so long.

The banquette

Yes, this is the banquette project Rhonda asked me for.  Oh, don’t believe for a moment that this is fine handcrafted woodworking, but as far as a useful cabinetry project that adds to the living area, it’s dyanmite.

As I had mentioned before, the seating area of the piece is basically a large plywood box that’s glued and screwed together.  I was using some nice birch plywood for it because it was smooth and it was also inexpesnive. Using my track saw, I was easily able to break down the sheet with minimal fuss, making smooth cuts right off the saw.

The seats are open

The lid was easy. I knew I wanted the back to be about 16 inches from the front of the seat, so it wouldn’t be too far back from the front. I doubled up the plywood for the seat and cut the back part of the seat free. This was attached to the top of the bench with screws and glue. I crosscut the front section in half, so you wouldn’t have lift one massive top to get into the goodies stored inside.  A pair of loose pin hinges holds each section in place. The loose pin makes it easy to remove the bench lid if I have to do work on it…

Since I wasn’t going to put a handle on the lid, I took the time to rout a cove on the front lip of the lid, allowing room for fingers to get a purchase to open.

The finger pull

The backrest is made from five fins of plywood cut witha  5 degree slope from the seat to the top. They formed a frame for the back of the seat, allowing a comfortable angle for seating.  Those fins were notched, glued and nailed to some scrap plywood strips to hold them steady and provide a place for me to screw the piece to the wall. I skinned the front with a sheet of 3/4″ plywood and capped the whole thing with a piece of 1 x 10 pine.

As far as a finish – I started with a coat of shellac based primer. Yes, I treated it exactly like the base of the Rude and Crude method I use.. .shellac, followed by a thorough sanding with 320 grit paper. The surface was like glass…  Perfect for two coats of a latex enamel paint.

Now, we need to repaint the wall (it was due) and clean up our laminate floor. Rhonda said she would also take care of getting a cushion for the seat, making it a little more comfortable for those sitting there.

Now, to fill it with all the stuff we have to store!


Screws and glue

There’s this project I’ve been asked to tackle. I think the first request came in 2007. “Tom,” Rhonda asked, “Can you build a banquette for our dining room?”

For those who don’t know what a banquette is, it’s a built in bench that people can sit at while dining at a table. It’s useful for two reasons …. 1) it takes the place of chairs at the dining table, and 2) it gives basementless Florida homes a place where you can store stuff.  While these are great reasons, I was reluctant to start. My objection? Well, bench sitting at a table kind of reminded me a little bit of dining in a McDonald’s.

What I didn't want to see

Of course, that line of thought didn’t go over well with the boss, so I eventually relented, and dedicated myself to making sure this project was not going to look as if it was from a fast food dining establishment.

Unlike some recent projects I have tackled, this one could hardly be called a carefully crafted, meticulously jointed gorgeous piece of hardwood. No, if I was going to build this, it was going to have to be built more like a piece of cabinetry, which means lots of plywood. Which is exceptionally cool with me!  Plywood projects are great because they go together quickly, yet look great. A little bit after noon this past Sunday, Rhonda and I headed to the local home improvement emporium to get the materials. Two sheets of 3/4″ plywood and  four 1 x 4 clear pine boards. That was all I was going to need to build the base of the piece and the seating area. I was going to build the backrest a little later, so this was all I needed for now.

Have someone else cut your plywood

I had the folks over at the home center cut the plywood down to size. One sheet was ripped into two 2 x 8 foot sheets, and the other was ripped down to a 2 x 8 and two 1 x 8 strips. Those, together with the pine boards, were mounted on top of the kayak rack on our jeep, and bingo, we were off to the races.

Working the miter saw

I used my track saw to break one of the 2 x 8 boards down to some end caps. They were 2 feet wide by 11 1/4 inches tall. These had the two sides screwed to it while lying back on my workbench. This way, the sides and top were even, which would form the top of the box for the bench. I laid the 2 x 8 strip in the middle to form the base, and with a little persuasion, I was able to get the diagonals all nice and even. Then, I flipped it over and screwed through the sides to capture the base.  I also took the time to find the dead center of the box lengthwise and screw a 2 x 4 scrap across the top opening, to give the planned split lid a place to rest and to provide a little resistance to spreading. Pretty easy so far.

Here's what I was looking for

The real fun began when I planned for the feet. I wanted them  to taper back a little to lighten the look. So, I cut the legs to length and clipped the corners so they would look a little more graceful. Then, I glued and bradded them on to the case, and put a pair of screws into each leg from the inside for good measure. Between the legs, I just cut lengths of 1 x 4 to fill in to make it look a little like a mock rail and stile. I’m pretty happy with the results.

Not bad for what I'm doing

Next, I’ll have to make and attach the lid. I may buy another sheet of 3/4″ plywood, rip it into two 2 x 8 strips, glue them together and make the lid double thickness for extra strength. I’ll also edge that with solid wood so it looks nice. From there, I will rip it to build a solid back piece to mount the back rest on, and have the front as a hinged panel to access the storage.

But, that’s another post for another day.

Noticing how quickly the piece was going together, Rhonda commented, “Wow, if I knew it was going to take such little time, I would have insisted you start this earlier!”  I guess maybe now is the time to slow down a little so I don’t finish too quickly…


Stuff I’ve Built: The plywood bandsawn box

It’s that time of the year again!  This past Monday was the deadline to turn in projects for Pinellas County’s art contest, and I was not about to be denied the opportunity to be in it again. I mean, there’s always a chance I may finish in the top ranks… right….

As you can remember, I was building a bandsawn box which featured edge grain plywood as a design element. The idea came from David Picciuto – a.k.a. the Drunken Woodworker – and boy, are his  designs real show stoppers. Building the box took a little longer than I expected (I had a few work commitments to tend to, and I am now coaching my youngest son’s basketball team), but I think the results were something pretty darned spectacular.

The plywood bandsawn box

As you can see, the edge grain of the stacked plywood box really provides an interesting effect. Sure, this stuff was cabinet grade ply, and it looked nice, but there were a few issues (voids, knots, discolorations) on the inside plies. At first, I was kind of put off by it, but the more I looked, the more it grew on me. The front  and back are that really sweet leopardwood that my friends at Bell Forest Products sent to me, and the pull is a tiny scrap of ebony I have been hoarding for about nine years.  This looked like the project for it!

The drawer inside

The drawer turned out really nice. The inside curve that forms the drawer ‘pocket’ had some pretty bad burning on it from me being a bonehead and trying to make too tight of a turn, but that quickly sanded out on my spindle sander, leaving a really cool drawer inside to work with.

Each year, the best part of the contest is the feeling I get when I walk across the street to where the art is being collected for the display. The folks working the event always look forward to what I bring over. In years past, I have even had offers to buy the piece outright when I walked through the door. This year, there were more than a few “oooooh!s) when I walked in with the piece. Everyone had to take a turn pulling out the drawer and asking how one goes about building such an intricate box.

The box front and center in the contest...

This year, the box impressed the staff so much, they placed it  in its own display case and positioned it right out in front of the other pieces, just as soon as you walk into the courthouse lobby. That’s pretty sweet!

Now, I just have to wait for the judges to come in and vote. Shortly after that, we will know the results.


Bandsawn box beginnings

Now that we are in 2013, it’s only fitting we leap into a new project for the new year.

At the last Woodworking in America Conference, I met up with David Picciuto – a.k.a. the Drunken Woodworker. (Relax, folks, that’s just his title. He assured us that he never drinks and goes into the shop, and he told us that he has already had several folks comment on the name). He was showing pictures of a few bandsawn boxes that he had made of a strange – yet ubiquitous – material – plywood. Highly intrigued, I asked David if I could go back to my shop and make one for my job’s annual art contest. He told me to go knock myself out. Thanks, dude!

David's box with Rosewood and plywood

Anyway, the process is pretty simple. First, get yourself a couple of pieces of leftover cabinet grade hardwood plywood you have in your shop…

“Oh, but Tom, I only use superior quality hardwoods in my work…”  Yeah, right. Poke around for a few minutes.. I’ll be waiting…

Anyway, you can draw up a design similar to the ones David uses, or you can go do your own thing. That’s cool with me. Get the size of the box you want to build, then cut and face glue appropriately sized pieces of plywood together. You can build it however large you would like.

The items for the band sawn box

As you can see from the contents of my benchtop, I have the makings for a box. The glued up stack, two pieces of decorative hardwood (leopardwood in this case), the plan, a can of spray adhesive to attach the plan to the top of the stack, and some double stick carpet tape. That’s the secret ingredient, because with it, you can temporarily attach the pieces so they can all be cut at the same time, yet get them apart to do other work.

Cutting the box at the band saw

I carpet-taped the pieces to the plywood stack, and spray adhered the pattern to the top of the sandwich. Once that was done, it was time to move on to the cuts. I put the 1/4″ blade on my Laguna and fired it up. While the lines in the plan weren’t that tight, I took my time and rough cut large chunks of the waste off first. This way, I could work with a smaller piece, making it easier to work with. I got close to the line, figuring I was going to sand to it later. The really careful cuts were going to come when I had to get inside the piece.

Once I took it off the band saw, I did give it a good once over at my combo belt/spindle sander. That thing works great!

Cut to the line carefully

When it came to the inside, I had to remove the drawer slug from the big stack. But, first things first, I had to pull the back side off the box. I wanted to use the leopardwood back as a stop for the drawer, and there’s only one way to do that… pull it off before you cut.  I threw the remainder of the box on the band saw, carefully lowering the guides to get them closer to the work. This time, I took great care to split the line with the blade, pushing ever so slowly to ensure a more accurate cut. Once I made it all away around the inside of the cut out, I pulled the slug from the middle.  Ta da!  Not bad for a trained shop monkey…

The drawer slug

From there, I had to cut out the inside of the box to make the drawer. After all, what good is a bandsawn box without a working drawer?  So, I took the leopardwood face off the drawer slug, and proceeded to cut out he middle of the drawer. Here’s where I ran into a little trouble… I had glued up the last piece of plywood, not realizing that I was going to have to keep that loose so it could be pulled off to become the back of the drawer. Meh, I found a small piece of the same plywood, scribed and cut it to fit the inside of the box, then glued it in place. If I’m not happy with it, I might just flock the inside and be done with it.IMAG0796

Now, before I could give this the final sanding, everything had to be glued back together in the right order. This way, I could ensure that everything was going to come together perfectly. So, I smeared glue on the meeting faces, and clamped everything down to my bench. That’s good enough for one day’s work. Next up, some sanding, maybe some flocking and a finish… pretty easy when you think about it!