OK, so I like to alliterate… what’s it to you?
Anyway, on Monday, I showed you a little bit about what I was working on for my niece Katie’s Confirmation. It’s coming up this weekend.. so there’s no pressure to get anything done, right?
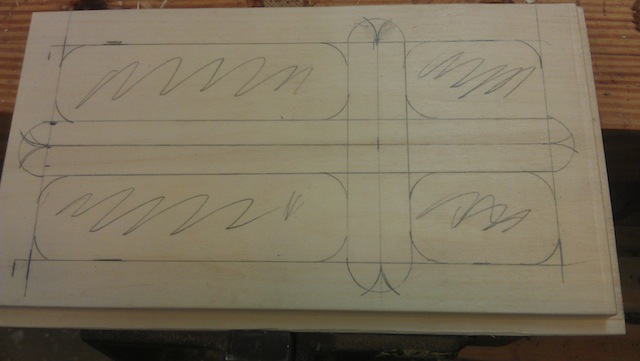
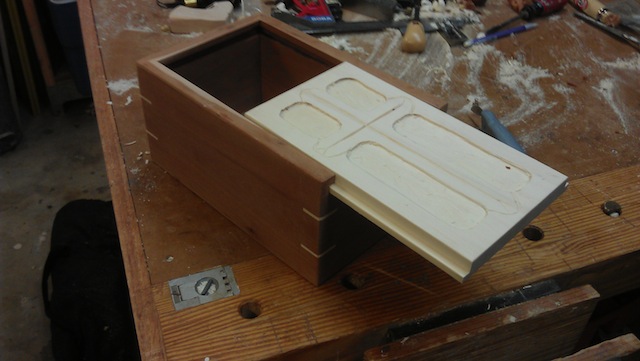
Looking for a new lid to carve, I decided to head to the local home improvement center. It was the only place that was open that had any sort of cabinet grade woods, and I picked up a piece of aspen. Interesting stuff, that aspen. The piece I got was super white, with a very subdued grain pattern. I also took some time to try carving it… and it worked well! OK, that was going to be my new lid. So, I measured out the lid, cut it to size and marked my new design on it.
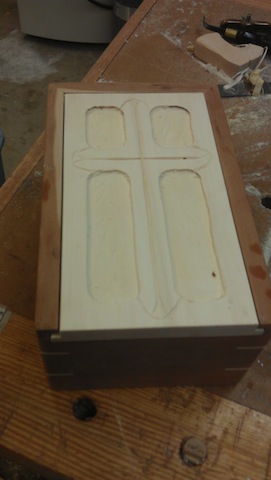
Again, I went back to my trusty trim router to tackle the bulk of the material removal. The more I use that tiny router, the more I appreciate that I bought it. I also appreciate the help of David Venditto over at Infinity Cutting Tools for helping me select the right bit. That was the winner.
With the piece all routed out, I tried my hand at carving. Not sure how well I did, but you know what, for a first real crack at it, I think I did fairly well. Yes, I have to work on carving curves, but this is definitely a step in the right direction.
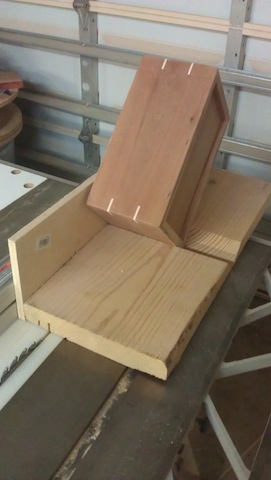
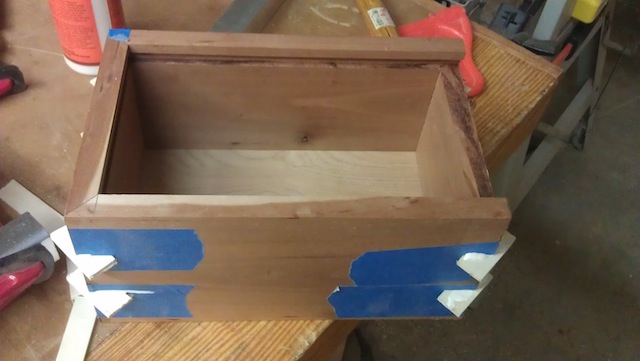
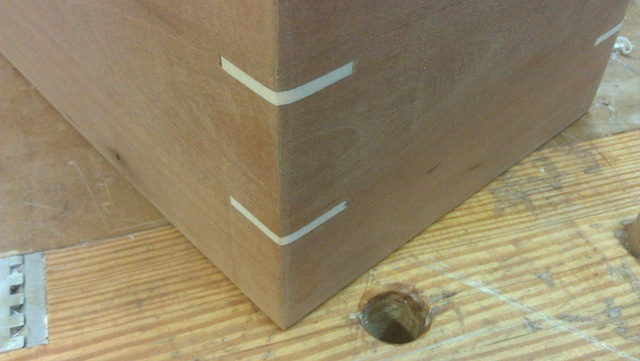
As for the box itself, it was a very simple design I built out of cherry for a nice contrast. A four-cornered mitered box with splines to help hold things together. I really love my spline jig – it couldn’t be easier. It’s a 2 x 10 I fished out of the scrap barrel at the nearby home improvement place, crosscut it at a 45 degree bevel, and flipped the pieces so I ended up with a 90 degree cradle. I screwed both pieces to a piece of half inch plywood that runs against the rip fence. I simply raised the blade until it cut as deeply as I wanted it to, then cut some aspen stock into the cherry box sides and glued the pieces into place.
Once the glue dried, it was a simple matter to use a flush cut saw and some sandpaper to get everything where I wanted it to be. I dunno, it’s a pretty sweet looking detail that makes the piece stronger. That’s good in my book!
From there, I still have to sand and finish the piece – no later than Thursday night – or it won’t dry in time for the big event. But, judging on the progress I have made so far, I’d say I was well on my way to completion.
And, hopefully, another happy niece!

Wow, that is coming out great.
I think your niece will just love it.
That carved lid really adds a special touch to it.
I really like the contrast between the two woods. I looks like the aspen carved easily, is soft and easily marred?
Looking good Tom! Now you need to make one from a 2X4 for the contest..
Tom,
Congratulations on your niece’s confirmation. I always enjoy reading your blog. It’s clear and reads well, perfect for a guy like me. I also find it motivating when it comes to trying something new. I hope to see the completed box. Thanks.
Great idea for a gift. I wish I would have thought of something like that for my son when he went through his confirmation many years ago. I’m sure she’ll love it.