Category Archives: How-to

Every Stick it Tells a Story, Don’t it?

Even though many people laugh when I say it, I really do like music from the 1970s.  For a kid coming of age during the 1980s, this is a huge leap, as many of my friends referred to the 1970s as an error instead of an era.

Sure, there were no Beatles, but the individual members were cranking out some good music. The Rolling Stones, the Who and Led Zeppelin had moved from their deep 1960’s music into a snappier sound. Funk was really coming into its own and – yes – I’ve discovered that disco revolves around frenetic bass grooves. Which I’m trying to learn.  But my blasted fingers are still too fat to hit all of the notes.

One of the acts from that era I have come to appreciate is Rod Stewart. Yes, at the time, he was Rod the Bod who made the ladies swoon, but, as time has passed, I’ve come to appreciate the way he composed his music and  soulful lyrics.  The album that put him on the map as an artist was his 1971 work Every Picture Tells a Story. The offerings ran the gamut from a re recording of Elvis Presley’s That’s Alright Mama to the lyrical Maggie May. My favorite song on the album is the rocking title track, Every Stick it Tells a Story, Don’t it?

You heard me right.  For the first dozen years or so after I first heard the song, this is how what I understood the lyrics to be. Hey, mistaking lyrics is an easy thing to do… in fact, there are plenty of songs that are misunderstood.

Now that I think about it, perhaps those misunderstood lyrics do mean something to me as a woodworker. I’ve discovered during this cabinet job with my friend Paul that relying on a tape measure to do all of your measuring can lead to inaccuracies that translate to miscut boards. It’s surprisingly easy to measure a piece at 9 7/16 inches and come back from the saw with a piece that measures 7 9/16 inches.  Or 8 7/16 inches.

When you really need to be precise, you can buy a more accurate tape measure or a stainless laser-engraved rule…

But, I bet you can find the most accurate measuring tool sitting right in your scrap bucket.

Yes, I’m talking about a story stick.

Just what the heck is this magical story stick, and how does it work?  Gosh, it’s the easiest thing to use.  When you look at any woodworking project, there are two kinds of measurements.  Nominal and actual. The nominal measurement is what the piece is supposed to measure.  If you are working from a plan, and the plans say a face frame rail should be 24 inches long, well, it should be, right?

Then, there’s the real world.  Maybe your saw was just a bit off.  Maybe you had to plane a little extra to get rid of some machining marks.  Maybe you accidentally cut with the kerf on the wrong side of the blade.  Hey, stuff happens.  Remember, it’s not a mistake, but a design feature…

So, if you have to fit a drawer box which has to be a very specific  into this less than perfect opening, how are you going to be sure you hit the exact mark to allow enough room for the drawer slides and face frame, if you are building with one?

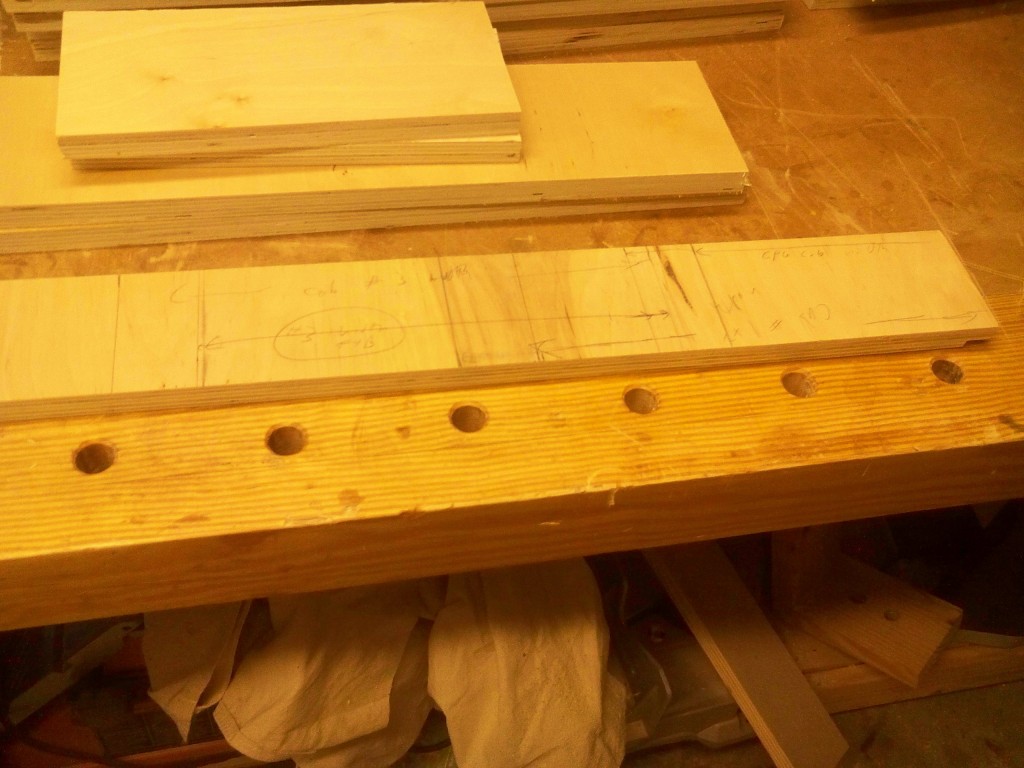
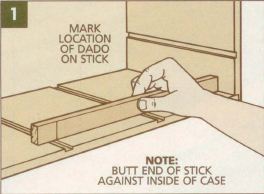
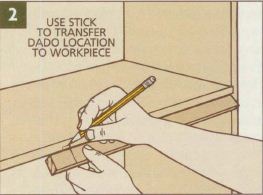
What you can do is get a piece of inexpensive wood or strip of plywood from the scrap pile.  I’ve found that lighter colored species make it easier to read your marks.  You just have to take this strip of wood, push it against the back of the cabinet and mark where the piece intersects the outside of the cabinet.  You just accurately measured the cabinet box’s depth.  Lay the stick across the front of the cabinet box, and mark the width.  That’s it.  No squinting to see where the cabinet’s width falls on the ruler. No deciding if you need to cut a piece strong a millimeter or 16th of an inch.  The measurement is what it is.

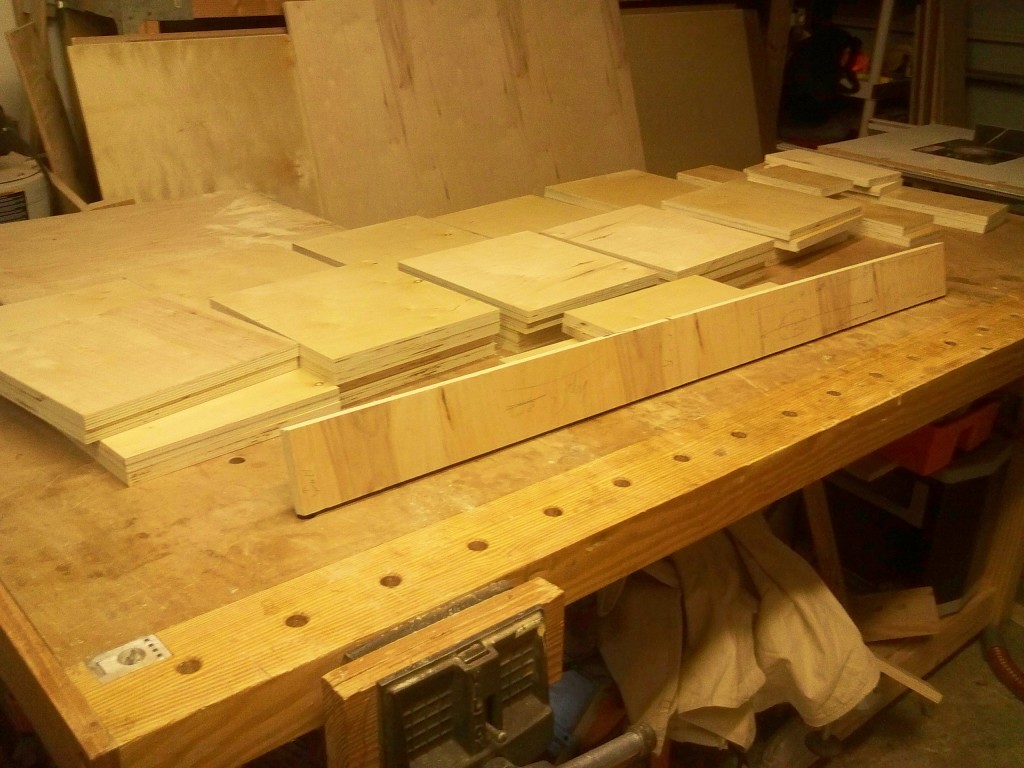
When you get back to the shop, building couldn’t be any easier. For this project, I built the drawer boxes to be 21 inches deep. I knew this would fit into the depth of the cabinet because, yes, I had measured the depth with the story stick and it fit in the marked space.

I was using a rabbet and dado joint for the fronts and backs of the drawers.  I knew I had to leave 1 inch of space free to fit the drawer into the space with the slides, and I was going to cut the depth of the rabbet at 3/8 of an inch, so by subtracting 1 3/4″ (1″ for the drawer space and 3/8″ x 2 for the length of the depth of the rabbet on both sides), I had my drawer width nailed. I subtracted this distance from the drawer opening width, set the stop on the miter gauge on my table saw and bingo, I was off to the races.

This system also works well for complex projects that would  require a notepad full of measurements and notations.  Instead of advanced calculus and an arcane measurement system, just a few sticks with the appropriate marks taken directly from the project’s dimensions would make your work so much easier.

Last December, when we had our kitchen counter tops replaced, the guy who came out to measure used only 20 or so strips of plywood, a hot glue gun and a pencil to get the dimensions he needed for fabrication.  Two weeks later, the installers moved the pieces in and laid them down perfectly on the first try.

That is the power of the story stick, and you’ll feel like a rock star once you learn all it can do for you!

Changing dovetail width with a fixed jig

I use a Keller dovetail jig for the majority of my dovetailing on projects. It’s easy to set up and makes cutting very quick.  However, the one knock on a fixed spacing jig like that is that it gives only one look to a project.

Not so.

There is a very easy way to change the spacing that doesn’t take much in the way of fiddling and gives very good results.

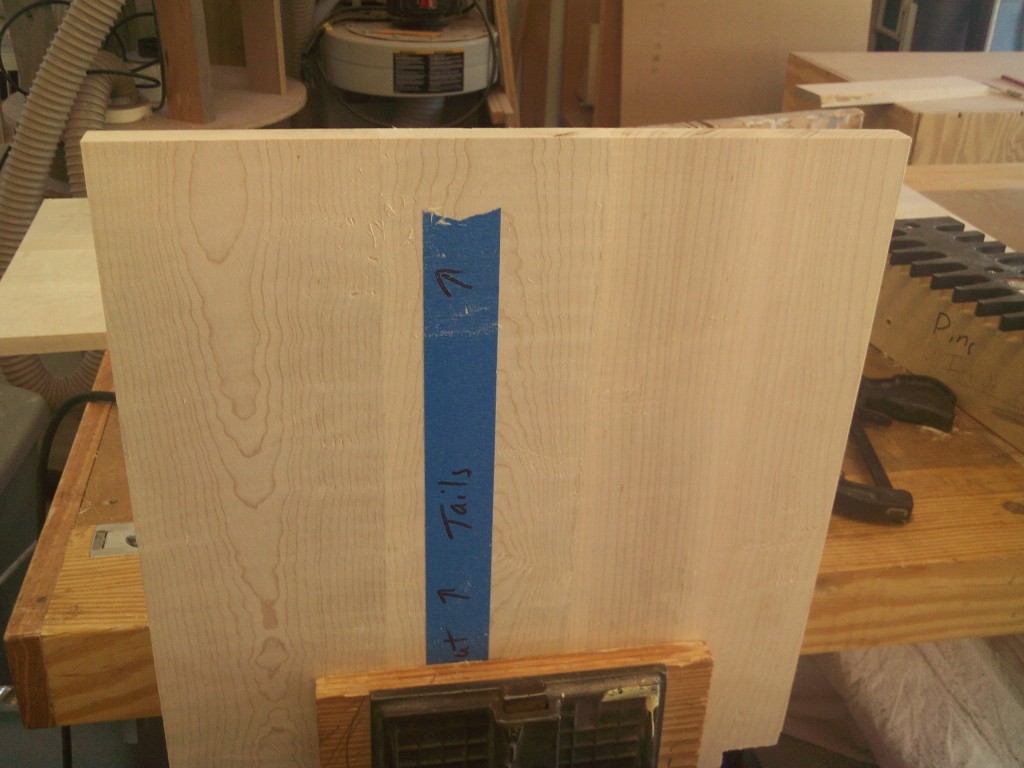
First, you have to make sure you have the piece clamped appropriately in a vise.  Determine which pieces will get the tails and which will get the pins.  In this case, you are looking at the outside of the tail board oriented face out  with the top facing left.

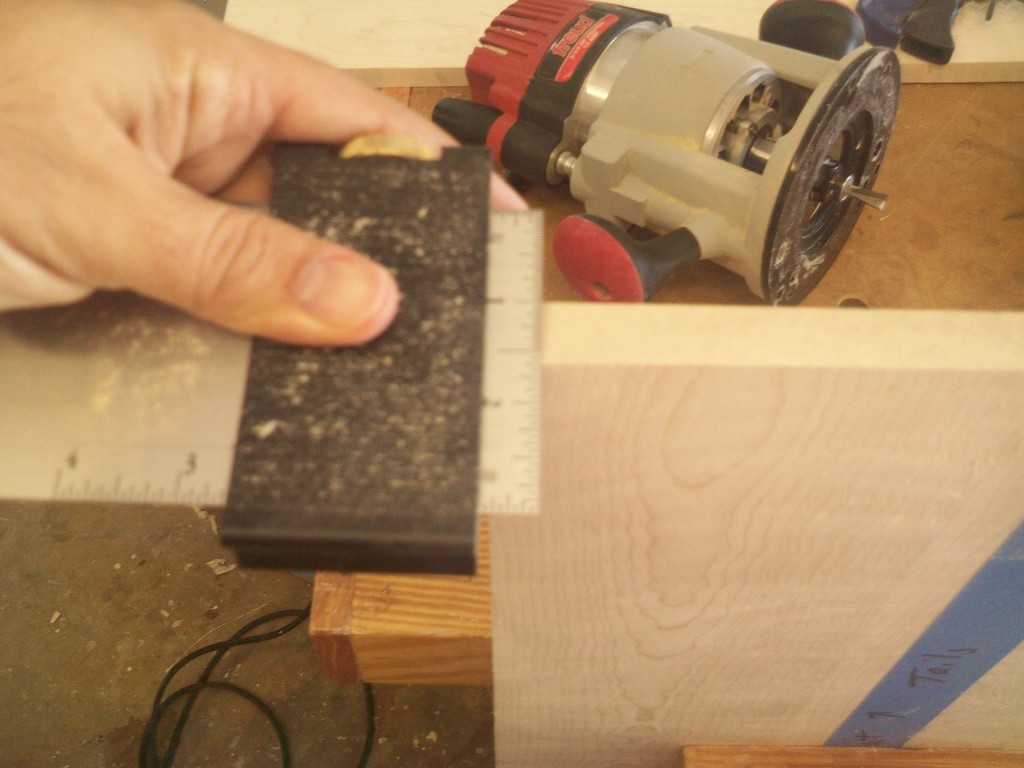
Here I am marking in 1/2″ from the edge of the board as a starting point for the guide.

With the jig in place, I use the dovetail bit to cut in every slot, creating an entire run of pins.

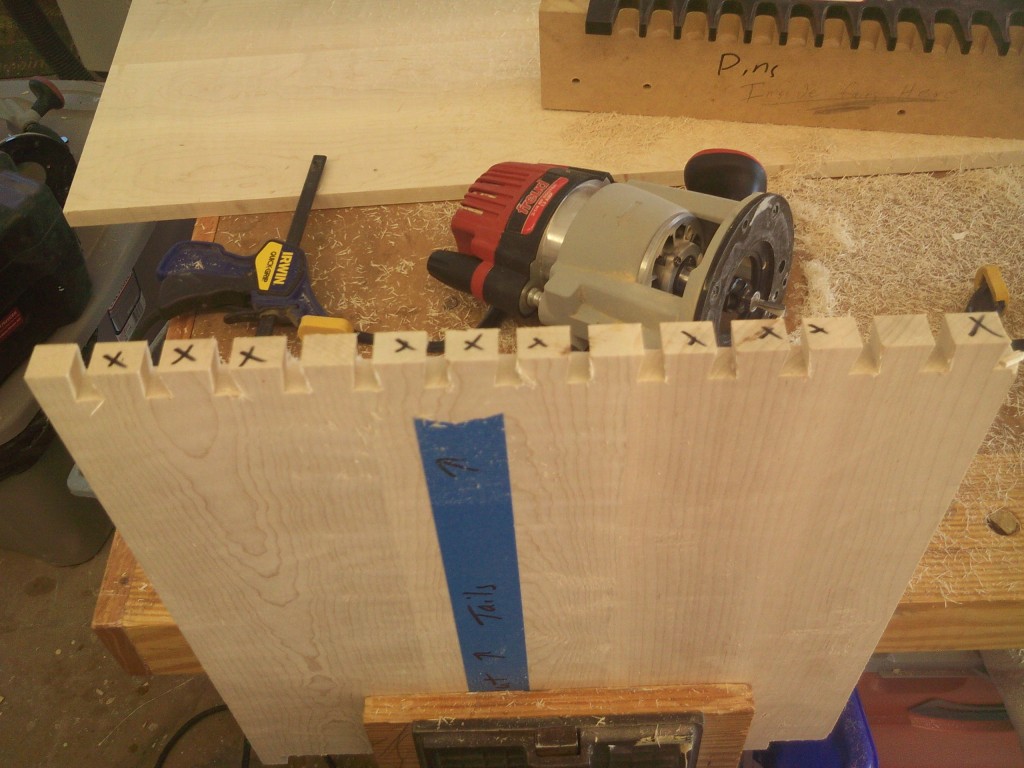
From there, I mark out the tails I want to remove. This is where I can set up my spacing and get a good idea of what the joint will look like.

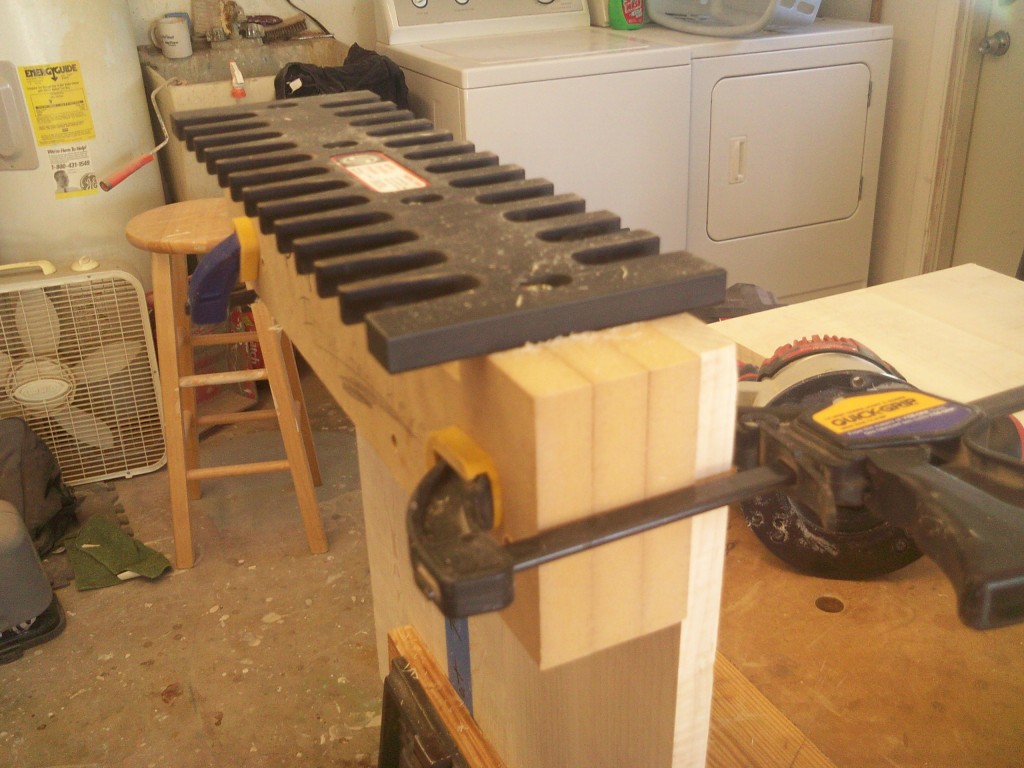
Next, I place the comb of the jig over the tails I want to remove and clamp it in place.  I then use the dovetail bit to remove the xed out tails to open the pattern.

The results are pretty sweet… nice, crisp tails ready to scribe onto the pin board.

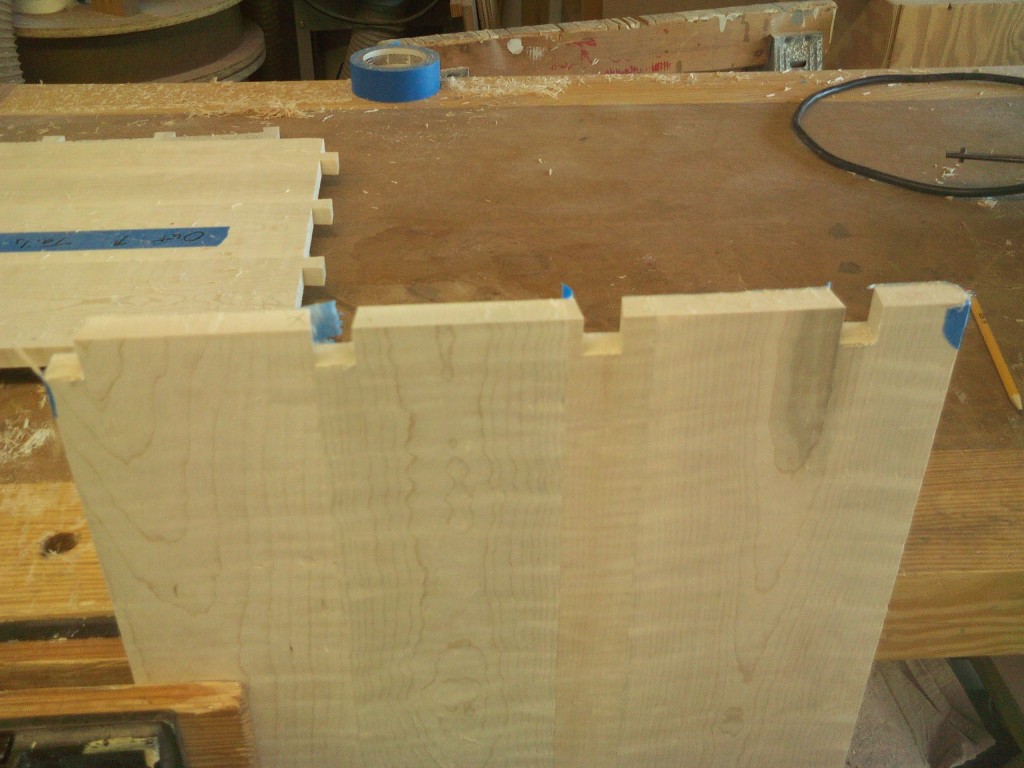
By carefully marking out which pins need to be routed, you can have them lined up accurately and just cut the pin sockets you need.  Here’s the pin board ready to go.

Now, what project is all of this stuff for?  Sorry… you’ll have to wait a little bit longer to see!

Monkey Business: panel glue ups

Hey, everyone, Iggy the Shop Monkey here, and I want to finally give you some useful information on this blog. Sure, it took two and a half years to get to this point, but, hey, there’s a first time for everything…

I have no idea what Tom is up to these days.  He’s having trouble gluing up panels and then he starts monkeying around with some red, sparkly new fangled instrument.  Is this guy committed to woodworking or isn’t he?  Shesh, no wonder his glue ups look like the stuff I throw at people who bother me…

OK, here’s how any primate worth his fur glues up a panel without any issues.  Tom, pay attention, please….

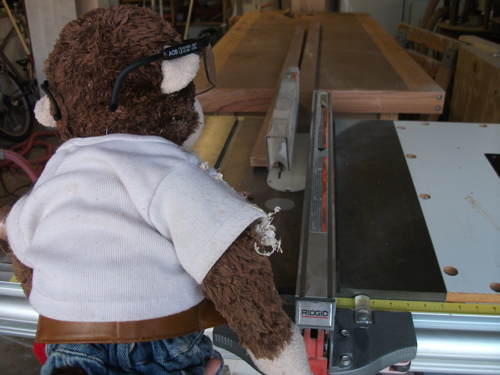
First thing first – the big guy did plane up some pieces of wood for another glue up.  He got one side pretty good, but the other one was terrible.  I mean, what was he thinking?  So, I got on his silly little table saw and ripped the other edge nice and straight.  At least he left the table saw tuned up.  Good human.

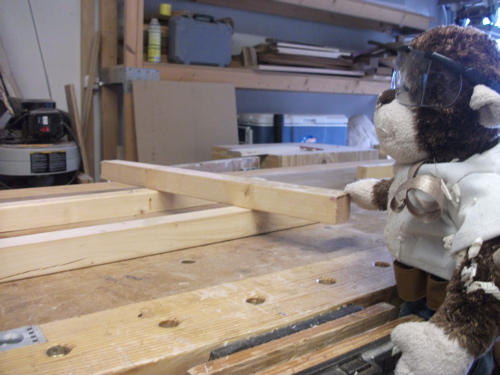
Next, I took out my secret weapon.  Clamping cauls. I had made these babies up a while ago and bring them out when I need a good glue up.  Why don’t I share them with Tom?  He’d probably think I was playing Jenga.

I clamped the cauls above and below the panel after I smeared glue on the edges.  Then, here’s the key point that Tom just keeps forgetting.  All of those fancy clamps he has – well he needs to use them.  He keeps them hanging on his special clamp rack just collecting dust and bragging about them… but, he really needs to put them to use and clamp the silly panel together while the glue dries.  With the clamps spread too far apart, the goof is enjoying his slip and grip clamping technique. My way… it’s gonna be a nice, flat panel when all is said and done…

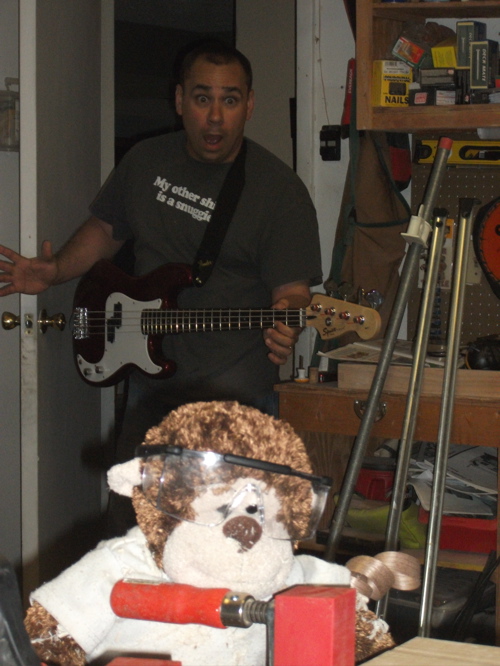
Oh, nice way to show up for the shop session, Tom.  Yes, tailless wonder, I glued the panels together for the special project you are building… now, be a good shop assistant and get me some bananas before you go and fool around with that bass guitar.

I can’t believe I share 99% of my DNA with this guy…

Coping – and sticking – with doors

Building doors for cabinets and other pieces of furniture can be more complicated that you think. Sure, you are talking about something simple that covers and opening… but, even the most basic door can take many shapes. From a painted piece of MDF on butt hinges to a hand-cut divided light masterpiece inlaid with antique reproduction glass – you can make them as fancy or as plain as you would like.

For the majority of woodworkers, the classic frame and panel door is what’s going to be seen most frequently. Even something as seemingly straightforward as this can involve many different decisions. Do you build the frame with mitered rails and stiles? Haunched through tenons? How about making it look like a frame and panel door by applying molding to a flat panel? The options freeze many beginning woodworkers in their tracks.

However, one of the best options is to build the doors using a cope and stick setup on a shaper or router table. The cutters are either a matched pair of bits (to cut the groove and molding on the inside of the panel and to cut the ‘coped’ joint on the end of the rails that fit into the side stiles). Others allow the woodworker to disassemble and reassemble the bit to cut both profiles. Still others have both profiles on one bit and can be raised or lowered to get the desired results.

The ‘sticking’ bit cuts the profile on the edges and the slot that holds the door’s panel in place. The ‘coping’ part cuts a profile on the ends of the cross members (rails) that perfectly match the stick. They are very easy to use, but they do take some care to get right.

Eagle America’s Retail Store Manager, Miki, pointed out some of the pitfalls woodworkers commonly encounter. “Getting nice 90 degree profiles on the edge of the rails is critical to getting a square door. If you are off by even a little bit, it’s going to be very difficult to get it right.”

That’s one of the reasons why Eagle America and other tool manufacturers offer coping sleds to help cut this critical part of the joint. The sleds slide across the top of the router table and register against a fence or have a runner that slides in a miter slot. Woodworkers can then place the board down and clamp it tight. “It’s critical that the board be secure before trying to rout,” said Miki. “If it moves, you could easily ruin the cut.”

These sleds offer an additional benefit. “Since the board is backed up by the stop, it reduces the likelihood of tear out where the bit exits the cut. Since the bit is cutting into the end grain of the rail, this is a very strong possibility.”

During any woodworking operation, safety is paramount. By using a clamp to hold the word down, woodworkers can keep their hands safely away form the bit and maintain firm control over the sled. “Anything that helps you make cuts more safely enhances the enjoyment of the hobby.”

Does it matter if you cut the cope or stick of the joint first? “Absolutely not,” said Miki. “It’s all a matter of personal preference. However, if you need to make many doors for a project like a set of kitchen cabinets, you might want to run the ‘stick’ part of the joint on the edges of the rails and stiles. You can run dozens of feet of stock this way, then cut what you need to length and cope the ends as you build.”

Eagle’s coping sleds are made with replaceable backing stops that can be replaced if they get dinged up or you use a different bit profile.

Eric, Eagle America’s Product Manager, mentions another important fact about building doors, “Make sure you do not glue the solid wood or plywood panel into place when assembling your doors. Even finished, the wood will want to expand and contract to equalize moisture content. Gluing the panel in place – even by inadvertently having the glue from the frame assembly getting onto the panel, can lead to broken joints in the future.” Eric advised using a product such as door tape or Space Balls to keep the unglued panel from rattling in the frame.

While cope and stick joints are very attractive and easy to cut, some woodworkers feel the joint may not be strong enough for larger, heavier doors. “In that case,” Miki said, “it’s possible to cut a floating tenon to further reinforce the joint. But, for the vast majority of cabinet doors, the cope and stick joint with today’s modern glues will be plenty strong to endure years of use and abuse.”

An attractive joint that makes door making easier? There’s no reason to put off door making now that you know the secrets of the cope and stick joint.

Laying up a matched veneer sheet

If you have been a long-time reader of Tom’s Workbench, you can remember about a year ago when I demonstrated my first hammer veneer project. Since then, I’ve dabbled in laying large sheets over smaller pieces of substrate, making easy yet eye-catching veneered projects.

Well, for my latest project, I wanted to veneer the top of a circular stand I’m building.  I went to veneersupplies.com and looked at the walnut burl sheets.  While I could have gone for a bigger sheet to cover the entire project in one fell swoop, a less expensive and smaller lot of walnut burl veneer caught my eye.  Never one to pass on a good deal, I placed my order and waited for delivery. I also bought some ash banding to wrap around the outside of the project and some veneer tape to help hold the sheets together while I laid them up. Yes, this was going to be my first attempt at joining veneer sheets to cover a larger area.

After I tore into the package to see the lovely veneer inside, I misted two of the pieces down with Super Soft 2 veneer softener I had purchased during my last veneering attempt.  This makes the veneer very supple and easy to apply. I put them under a corian platen and let them sit overnight.

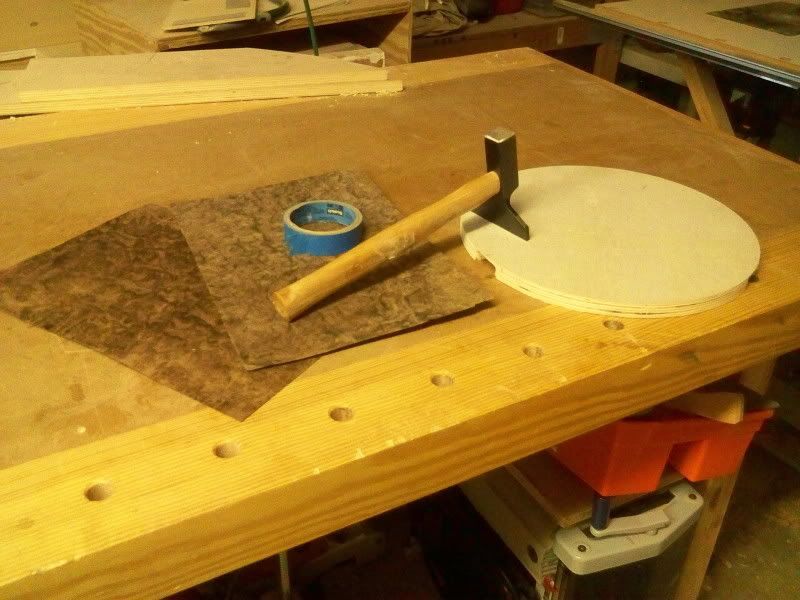
When I was ready to get to work, I discovered that the veneer edges look straight, but they aren’t really dead straight and need to be trimmed.  I stacked the two sheets on top of each other and used a very sharp Japanese carpenters knife to slice them cleanly.  Once I was satisfied, I turned the blanks 90 degrees and cut them in half, giving me four quarters. I arranged them until they looked pretty.

Then, I identified the ‘good’ side of the veneer (Both sides were gorgeous…), flipped it upside down and taped the ‘bad’ side together using some blue painter’s tape.  I had to make absolutely sure that the seams butt together tightly without overlapping – a very important step to take.

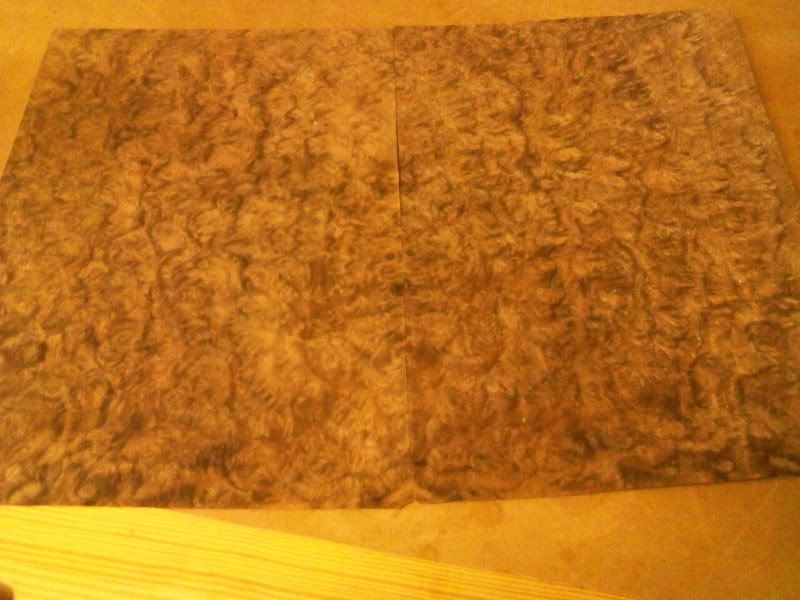
Once I got this all taped together, it was a simple matter to flip it up back to the ‘good’ side and get ready to work with veneer tape.  This is some very interesting stuff – it’s gummed just like a lick-and-stick postage stamp and it’s covered in holes.  While using it to tape up the seams, I discovered two very important things:

  1. The condensation on the outside of my cold glass of water was plenty to moisten the tape when the adhesive side is dragged against it, and
  2. The row of center holes allows you to see and ensure your seams don’t open up while gluing it down.

It took one long strip one way and one the other, and bingo, I was ready to glue the veneer down. I flipped the assembly back upside down and removed the blue painter’s tape, and all four pieces held together beautifully with the veneer tape.

I made up a batch of hide glue and laid it over the top of the 3/4″ plywood circle I had cut, making sure to spread it out evenly.  Then, I set the taped up piece ‘bad’ side down into the glue.  I used the veneer hammer to push from the center of the assembly outward, forcing air bubbles and excess glue off to the side.  After a while, the veneer gripped tenaciously, exactly where I wanted it.

After I had it pushed into the glue, I flipped the assembly over with the veneer face down on some craft paper on my bench and set a corian platen on top of that, and finally rested my thickness planer on top of that and let it set for two hours.

When I came back, I trimmed the excess veneer from the perimeter and proceeded to sand the edge of the assembly smooth.  I also wrapped some 180 grit sandpaper around a block of wood and sanded the surface. The burl has no grain direction, so I sanded in circles.The result is just stunning, needing a little extra sanding on the outside of the circle to finalize the round shape before I edge band it and to finish sanding the top.

Now that I know the basics of using veneer tape, I’m looking forward to laying up some more intricate designs.

Bow, Bow, Bow Your Wood…

Are you looking to add some flair to your next woodworking project?  Sure you are!  You are a woodworker, and after building lots of square things, you are ALWAYS looking to do something out of the ordinary to spice up the woodwork you are doing.

But, how can you do it?

Well, there is an easy way you can add graceful curves.  And, if yesterday’s link of the week is any indication, there are LOTS of people who want to give bending wood a go.

By no stretch of the imagination should you look to me as an ‘expert’ in wood bending.  In fact, I am building a table to hold a piece of custom pottery that a co-worker will be throwing, and this is the FIRST time that I have tried to bend wood.

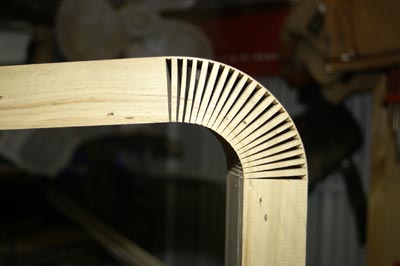
From all that I have read, there are three primary methods of bending wood.  The first is kerf bending, which involves cutting saw kerfs into the back side of a piece of wood in order to make it bendable.  It could work if I was building something where only one side was going to be visible, but that’s not what I am going for in this project.  So, that method is out.

The next method under consideration is steam bending. I went to school at the University of Maryland, so I have lots of experience with steaming – blue crabs – YUM!  The process is very similar – you have a container (a pot for crabs – a box for  wood) and you have a source of heat to boil water.  You place your lovelies into the container and put the spurs to the heat. After a set amount of time (20 minutes for crabs, a different calculation for wood), you can pull the lovelies out of the container and do what you have to with them (crabs = eat, wood= bend).  Some species of wood do exceptionally well with steam bending (Ash is the first that springs to mind), and it is a time-honored way to do this, but it was too involved for me.  Besides, the feels-like temperature in Florida right now is about 105 degrees F – definitely NOT steam bending weather.

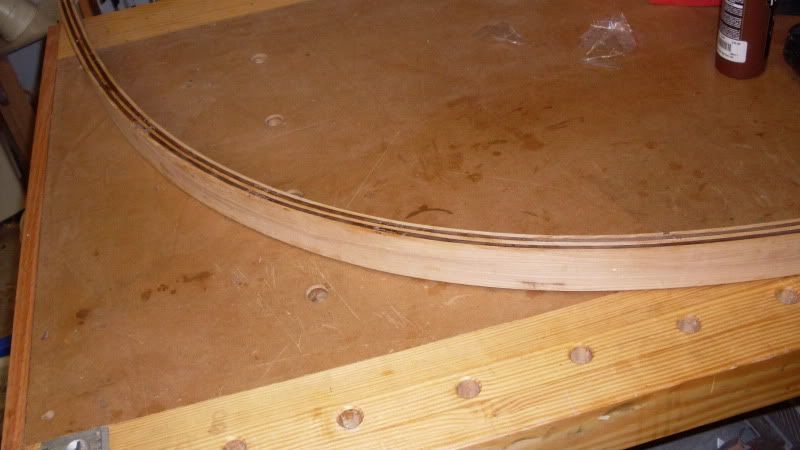
The method I settled on is making a bent lamination.  I have seen this done before at a woodworking school I attended, and it looked like a neat trick.  Basically, you take wood and rip it down to several flexible pieces. I was using ash, which has legendary bending ability, and walnut… which I wasn’t so sure of.  I was going to alternate strips of ash and walnut to give the piece it’s own set of racing stripes.

For the pottery stand legs I am building, I aimed to have the wood rough sawn to 3/16″ thick. I then used an auxiliary planing bed at my planer to get the wood down to 1/8″ thick.  I understand that you can make the slices thinner if you have a more radical bend, but all I needed was the arc of a circle to for the legs.

Now, I had 9 strips of ash and six strips of walnut, and I had to get them glued up into a coherent shape.  My first thought was to use a form to bend them over.  This is the way it should be done.  I bought a sheet of particleboard and cut it into six 15″ wide by 48″ long blanks.  Then, I tried my best to make a fair curve nice and smooth in the stuff.

Perhaps I was a bit hasty or careless, but that form I built was terrible.  I couldn’t bend the wood to meet the form, and I wasn’t about to start cutting tissue-thin slats to showcase my bad cutting job.

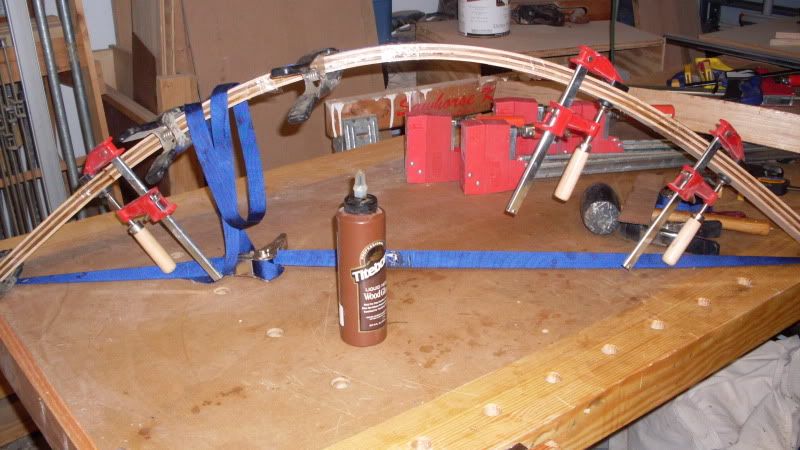
So, I struck on an interesting idea.  Grabbing my band clamps which see very little action, I made my stack of boards and slipped them into a loop.  From there, I pulled the strap tight while guiding the wood to flex in one direction.

The result kind of looked like a bow under tension.  I had a perfect arc for the pieces with little effort.  If you are planning on doing this, some ratcheting tie-down straps might be cheaper than buying outright band clamps.

I took the pressure off the stack, then I started to glue them up.  I have heard several times that yellow glue will ‘creep’ over time when tension is applied.  Since these legs will be under a considerable amount of tension, I decided to go with a traditional, less-toxic glue, bottled hide glue.  Hide glue gives a more rigid bond, and is very creep resistant.

This stuff is just like hot hide glue except it stays fluid at room temperature.  I spread a generous amount on both sides of each slat to be glued and made myself a sandwich of ash and walnut.  Then, I looped the band clamp around the stack again and tightened up the group until I had the amount of bend that looked good to me.  I took strips of packing tape and wrapped them around the stack at several places to serve as clamps, and – for good measure – I added more small clamps to the assembly to ensure everything held together well.

I gave the piece 48 hours in the clamp setup, then pulled them out.  They came out looking decent, with only a few separations of the plies on the edges.

Hmm….

I guess maybe next time, I’ll have to work more carefully to build better forms and try a different method or try a different glue.  But, with a little more glue and a few clamps, the big issues have been taken care of and the legs look as if they are ready to work with.

Will I ever bend wood again?  You bet I will.  Taking that first step of just doing it has gotten me off the straight and narrow path.

Mortising Magic

Step right up, ladies and gentleman.  I, The Great Trained Shop Monkey,will amaze and astound you with the paranormal mortising abilities taught to me by the mystic woodworkers of Exotic Imperial China and the Indian Subcontinent.  Using no more than a common table saw, I will cut a crisp-shouldered through mortise with absolutely no tear out which can accent any piece of work you want to add it to.  That’s right, folks.  No mortising machines.  No fancy chisels. No router jigs.  No new expensive tooling of any kind. Notice… nothing up my sleeve, nothing between my ears…

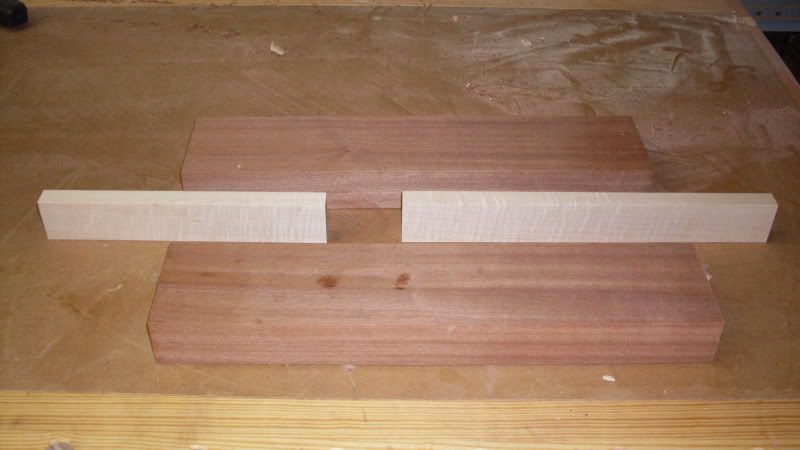
First thing I’m gonna do is cut some pieces of mahogany and maple.  That’s right, the mahogany will serve as the bulk of the leg stand for a bench, and the maple strip will serve as an accent piece to show some interesting contrast.  I also cut a length of tenon stock the exact dimensions I need the mortise to be.

From there, I set up the two side pieces of mahogany on the clamps, giving some room for the maple accent strips to be glued…

Then, I glue up the first maple strip, set it to the magic line of measuring, and clamp it in place, keeping the faces flush.

Without further ado, I wedge the tenon stock in and glue up the second maple strip, insert the tenon stock in the gap and glue the top maple strip into place, again keeping it flush with the faces.

Now, I say the magic works – Abra cadabra, hokus pokus, alakazam –  and blammo – I knock the tenon stock out of the hole leaving a perfect nothingness surrounded by a square-shouldered mortise with absolutely no tear out.  No mirrors, no tricks, no sleights of hand…

Now, all I have to do is work a little magic on shaping the legs of this bench….