
For all you children of the 1990’s – STOP! It’s hammer time!
Hammer veneering is actually not all that tough. This was my first time trying it, and I was pretty impressed with the results. In fact, for an initial investment in a veneer hammer and some hide glue, I feel I am well on your way to making some pretty sweet veneer layups!
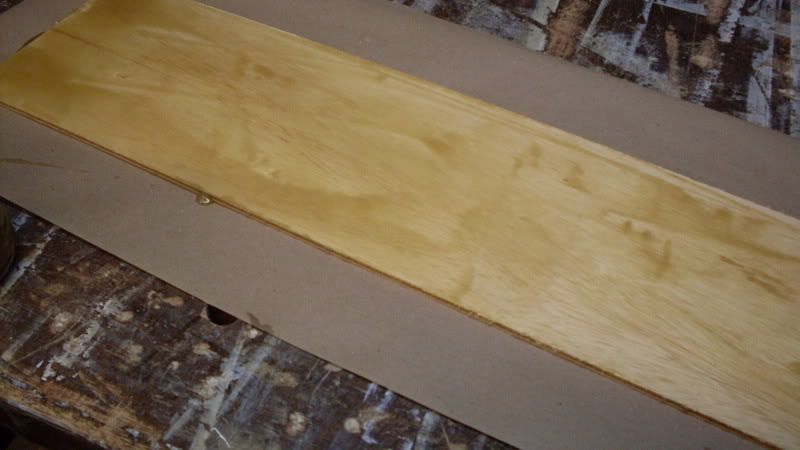
Here’s what I needed to start – A veneer hammer, hide glue and a way to mix it up, some veneer, substrate (which can be MDF, particle board, plywood or the like) and veneer softener.
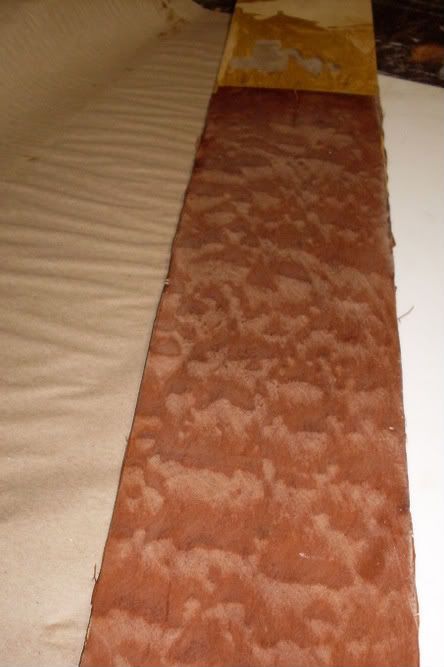
 I picked up my veneer and some Super Soft 2 veneer softener from Joe Gorleski over at Veneer Supplies. The veneer is some flat sapele pomelle… some cool stuff. Since the veneer is already flat, it’s easy to just spray on the Super Soft, let the surface dry and stack the sheets overnight between some brown building paper under a piece of Corian as a platen.
Meanwhile, I whipped up a batch of hide glue, letting the granules soak in water overnight and later heating them in a hot pot to 145 degrees F.
 When I was ready to start the process, I brushed off the piece of 1/4″ plywood to get any dust off of it, and slathered a liberal amount of hide glue on the piece, making sure I got a nice, even coverage on the substrate’s surface. You shouldn’t have to race from here, but hide glue’s legendary quick setting time means now is not the time to make a sandwich, call your bookie or ‘answer the call of nature.’
I retrieved the sheet of veneer and simply laid it down on top of the glued surface. I tried to keep it roughly centered, but I knew I could still shift it around.
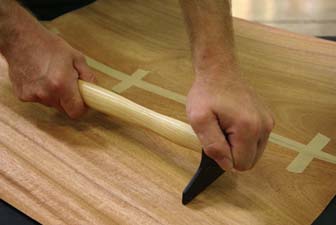 Now comes the fun part – I took the hammer and used the broad ‘blade’ end like a squeegee (Don’t beat on the piece with the ‘hammer’ – that’s not what it’s used for!), pressing the veneer down to the surface.
Sure, there were gushes of glue coming from under the veneer. Seemed normal. I got some glue on the surface of the veneer. Not only did it seem normal, but the glue helped the hammer’s blade glide over the surface. The piece did slide initially. Again, it seemed totally normal. After a while, I could start to feel the veneer ‘grabbing’ the substrate.
I kept working from the middle to the outside. Remember, I was pushing air bubbles and extra glue out from under the veneer so the bond would become even stronger.
Here’s a hint – push gently when going across the grain of the veneer. The piece may split of you push too aggressively. I saved the final firm pushes for along the grain.
 When I was done, I had a gloppy mess and a veneer that had a few ‘bubbles’ under the surface. Seemed normal to me. What I did was get a wet cloth and started mopping up the mess, rinsing frequently. Then, I started wiping off the veneer surface, getting the majority of the glue off. Sure, it looked like I was making a mess, but that wiping will help make finishing easier and it made the veneer just a little more supple so it wouldn’t split the drying process.
After I cleaned up, I repeated the process and veneered the other side (the piece is going to be a lid and a bottom for a box I’m making – I wanted both sides covered).
After the last clean up, I wrapped the piece in more brown building paper and put it under the platen until it dried.
In the morning, I had a perfectly veneered piece of plywood, ready to be gently sanded, cut to size and put into the project.
Did I make mistakes? Heck yeah. I still have a lot to learn. For a first attempt, it was faster than I expected and the results were pretty cool. No doubt I’ll have to improve my technique, but I’m liking this new skill a lot.
And, I didn’t have to wear those throwback baggy pants…
Hello….Veneering sounds like fun.I’ve only tried it once on a drawer front that needed a new look. My question is what is brown building paper? Great website Tom. Thanks, Tom……….
About the brown building paper – I was in Lowes and near the building supplies, they had a roll of ‘Building Paper’ – it kinda looks like the paper brown paper bags are made of. A roll 36″ wide and God knows how long – it cost about $10. It’s been great as a cover for my bench when I paint or finish, an absorbent paper for the veneering, something for the kids to draw on…
Hey Tom,
Man, what a galoot! Haven’t you ever heard of vacuum bagging? 😉
While I usually vacuum bag these days, my first veneer project was hammer and glue. The satisfaction you get from hammer veneering is sort of like that which you get from hand planning.
The reward is in the process.
Tom
Tom – it’s kinda funny – I found it to be so enjoyable, there was really nothing else I wanted to do that day. You are right, the process was fun, and the results were actually better than I found using the heat lock glue….
Hi Tom:
About 18 months ago on Woodnet I believe, there was a question about adhesives and I remember answering that one of my weaknesses in woodworking is not having exposure to using hide glue. Over the past six, seven, months I’ve been investigating heavily the silhouette of the Bombe. The Dutch have some magnificent pieces in there history, but for some reason I’m drawn to the Italian form, or the Venetian bombe. The veneering in these pieces cannot be done in a vacuum press, but instead require some of your “hammer time”.
This Christmas hopefully we fill some tool holes.
Did you make your own glue pot or did you purchase a commercial one???? If commercial which one???? I’m also thinking that the hide glue will address that 60 to 65 degree gray area of elmers glue in the winter.
Thanks!
Neil – I do what a lot of hide glue users do. Mosey your way down to a local WalMart or other discounter and get your hands on a hotpot. You know, the ones that allow you to heat water for instant coffee or tea. That’s the one. The cheaper, the better.
Then, when you are ready to whip up your glue, put the soaked granules and water into a glass jar (a mason jar is ideal – it’s designed to be heated) and place the jar into the hotpot with the water temperature zeroed in at 140 degrees F. You can get an instant read thermometer for very cheap where you get the hotpot.
From there, it’s a matter of heating and stirring the glue in this water bath until everything is dissolved and the glue flows kind of like a heavy cream. Then, you are good to go.
The beauty of that system over a glue pot is that you can bring the jar of glue over to your workbench and work with it there, then return the jar back to the hotpot somewhere other than on your workbench. With the glue pot, either you run it on the workbench or have to unplug it and walk it over.
The veneer hammer was a steal. A Kunz I picked up at Woodcraft for $30. Nice tool for a fun project…
Tom……You said:
The beauty of that system over a glue pot is that you can bring the jar of glue over to your workbench and work with it there, then return the jar back to the hotpot somewhere other than on your workbench. With the glue pot, either you run it on the workbench or have to unplug it and walk it over.
AaaHhh!!!!….. that was an issue in using, now I see it.
Thanks….Neil
I am not having good results with hammer veneering , Use a glue Pot , spread glue on both surfaces and begin pressing down with hammer, but I do not get full adhesion especially around perimeter, Do you have any suggestions to overcome problem?