Category Archives: Joinery

Drawer choices

OK, so the bed is progressing well (if it wasn’t for that whole return-to-work thing I had to do this week, I might be done!) and I now turn my attention to the under-bed storage drawers. These babies are going to have to hold a lot of stuff. Wrapping paper. Cold weather gear (yes, we do travel north sometimes during the colder months, wise guys), Electronics boxes with all the parts and pieces we don’t need.

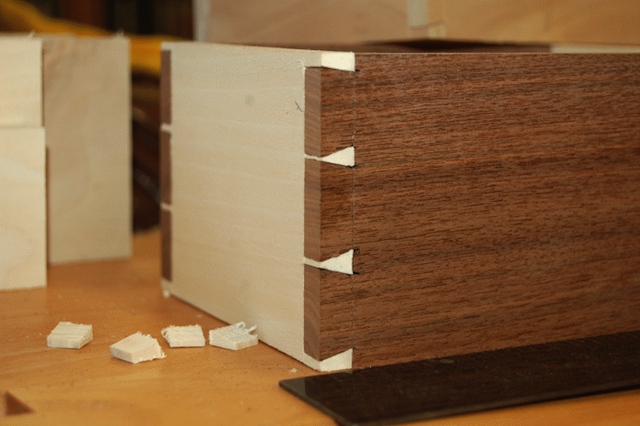
So, I am going to need to build six drawers that will be pretty sizable and will have to stash quite a bit of gear. Since this bed is not an heirloom piece of furniture (believe me, it’s plenty durable and nice to look at, but I don’t expect to see it in a museum any time in the next century), the whole idea of hand cut dovetails in carefully selected figured maple is right out.

Dovetails are pretty

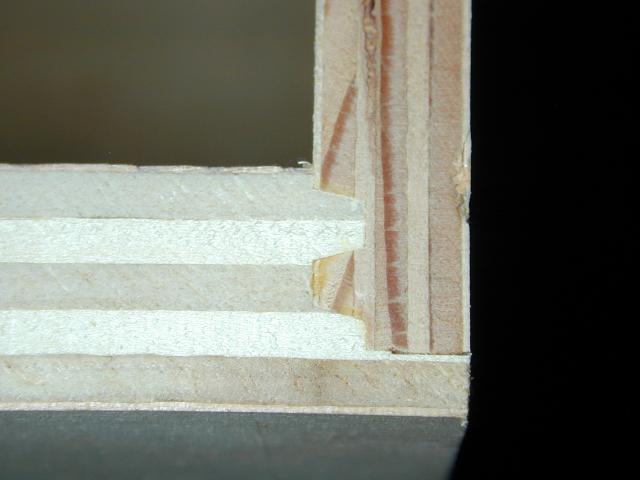
So, what then? I could turn to a specialty router bit with a drawer-lock type joint. You know, the type that cut mating profiles that nest together to create a tight joint. Meh, I don’t think I want to wait for a bit to be delivered.

Drawer Lock Bit

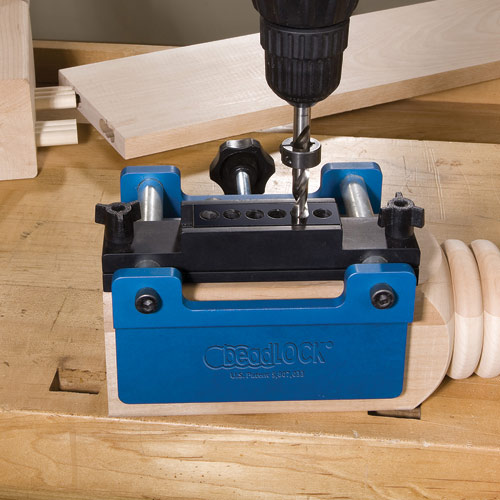
How about a drawer that uses dowels to lock the sides to the box?  You know, that could work, but there’s the whole alignment thing to deal with…

A doweled drawer

Of course, I could turn to the old table saw trick I used on my friend Paul’s home office center… Just using the table saw with a dado blade.  Nah, too many blade changes make my head hurt…

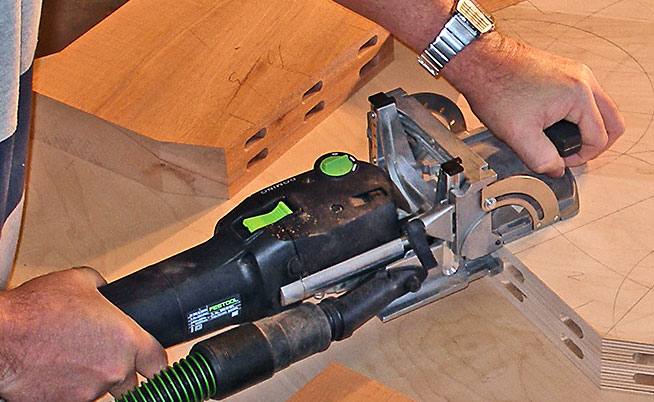
Biscuits? Splines? Machine cut dovetails? Finger joints? Aaaaargh… too many choices!

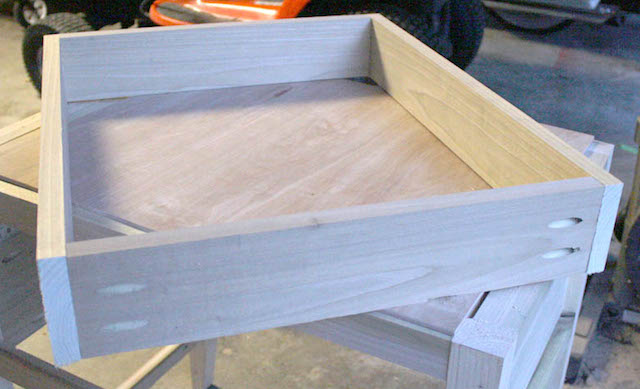
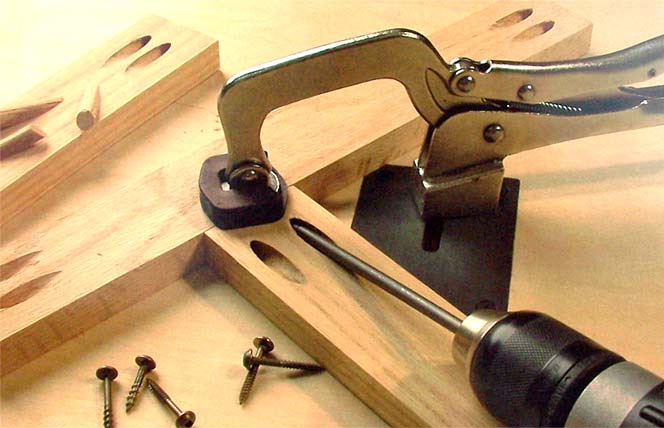
You know what? That’s it. This is utility cabinetry that we sleep on. I’m thinking now why not just go for pocket screws and be done with it? The sides of the boxes are going to be made with plywood anyway, so no need to get all fancy with them.

A pocket hole built drawer

Plus, I plan on attaching some false fronts to the drawers to match the rest of the bed cabinetry, so you know what, I’m thinking that’s the way to go.

There. Decision made. Now, back to the shop!

Drawn in…

I have come to an important realization in the process of building this prototype dresser top valet. It’s really just a project in three steps.  The body, the top and the drawer.

Had I thought this out a while back, I might have completed this job – I dunno – four months ago. Instead, it all seemed so amorphous back then, but, now it’s so simple, even a trained shop monkey could do it.

Iggy doing his research

Sorry, Iggy. I didn’t intend to disparage you.

Where were we … ah, yes, the drawer. The plan in Wood Magazine called for a very simple drawer design with all of the joinery done on the router table. First, I cut the two sides, front and back to size. That was easy on the table saw.

Some routing on the sides

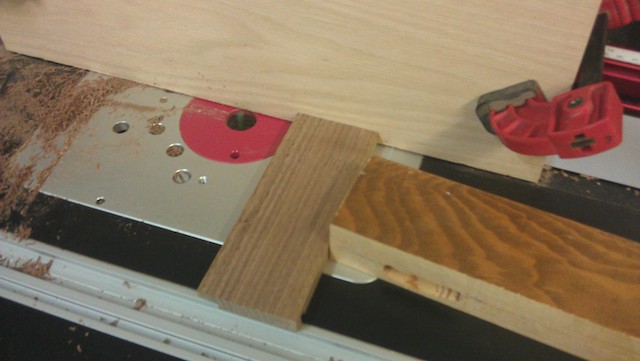
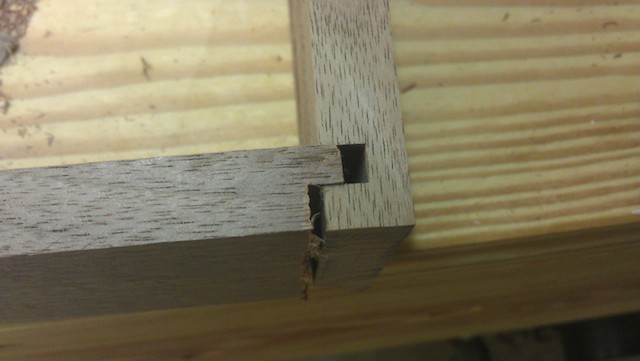
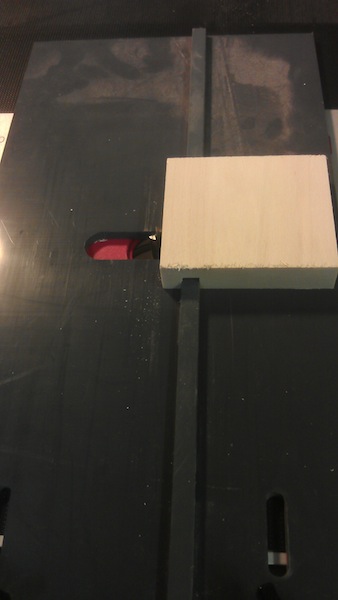
Using a large board as a backer, I cross dadoed the ends of the drawer sides to accept some stub tennons cut on the ends of the front and back.

Corner joinery

As you can see, the joinery is insanely simple and took only a few minutes to set up on the router table.  Easy peasey.

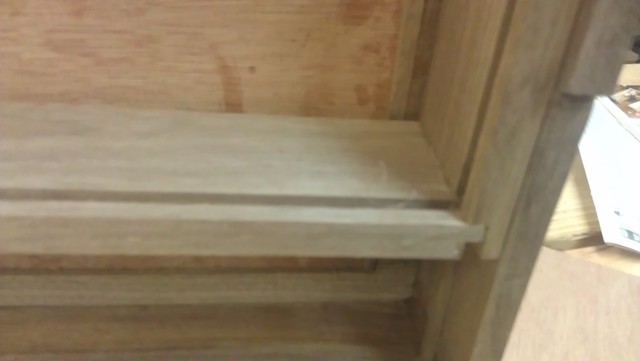
Drawer on the runner

I also used the same setup to cut a groove to capture the drawer bottom and some grooves on the outside of the drawer, which would allow the drawer to ride on a set of runners I had glued to the side of the case. This photo doesn’t do it justice, but you can see the drawer runner peeking out at the bottom right of the photo. The drawer grooves ride on that.

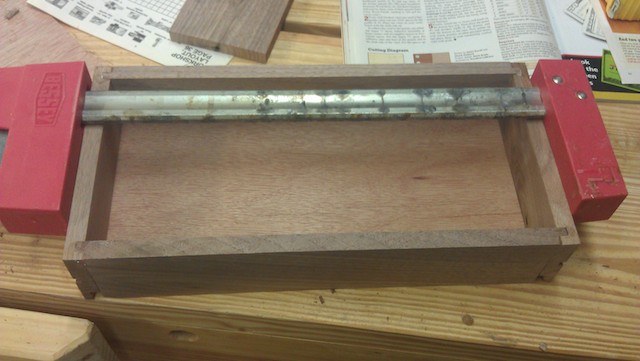
Glue it up

With a little bit of glue in the grooves and a plywood panel cut to size, I clamped the drawer assembly together, ensuring that the assembly stayed square through the process. This took all of maybe half an hour worth of work, and most of that was ensuring that the set ups were spot on.

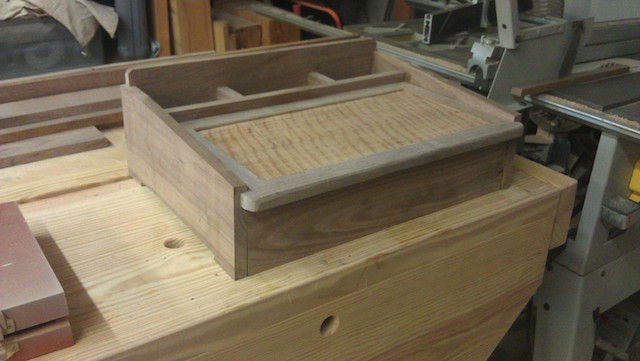
Nearly there

The next step was to attach a false front to the drawer to hide the grooves that peeked out from the sides. That was an easy task with a little glue and some clamps once I had everything centered. I have also drilled the 3″ centered holes for the drawer pull, and now I have to start sanding the piece to get it ready for finishing.

I’m hoping that once this is done, I will be able to make a few templates to speed up the building process, and when the temperature drops a bit, to get out into the shop and batch a few of these babies out …

Good joints: The sliding dovetail

So, on this project I’m building, I have a shelf that will hold a special memento But, the shelf isn’t only to hold this item, I also need it to help hold the final piece – together with the breadboard ends – flat in an area of the building where it goes that is right by an exterior door. My concern is that with the opening and closing, there will be tremendous fluctuations in humidity, possibly making this piece warp without support.

The project is coming along nicely

Plus, since this is a cross-grain situation, I didn’t want to lock the shelf in place, possibly leading to cracks.

The best option I can see is to use is a sliding dovetail joint.

The sliding dovetail. It’s a member of the dovetail family that often gets overlooked. And, that’s a shame, because it’s a great joint, giving lots of flexibility. The only problem is that it can be very fussy to cut.

The dovetail bit in the table

This is the method I used, and it worked well for me. The whole joint revolves around a standard dovetail bit. The total angle of the sides really isn’t important. I am using one with a 14 degree slope. This method requires a router table to make it work well,.

Once I put the bit into the collet, I lowered it into place – about one third to one half the thickness of the board I was working on.

My Osborne miter gauge

To ensure the piece wouldn’t move on me when I routed it, I used my Osborne EB-3 miter gauge from my table saw. It has a nice wide fence, covered in sandpaper to ensure a great grip.

Before you just go and push the work through willy-nilly, do yourself a favor. Cut some kind of relief groove where you plan on plowing this dovetail shaped dado. This will remove a chunk of the waste, helping your dovetail but cut more effectively. Some people will swap router bits to do this; I just ran to the table saw and cut a pair of saw kerfs.

A real choke job

OK, back to the router table. with a careful push through the bit – ensuring that the work is held tightly against the fence. Believe me, the spinning bit will want to make your work move.

After you push the work through the bit, flip the board over and take a look. Odds are pretty good that the dado will be packed with sawdust. That’s normal. Remember, the bit cuts wider at the bottom of the cut than at the surface of the board. Once you vacuum the chips out of the dado, it’s all good.

Now, if you would like to waste shop time and pull most of your hair out, feel free to mess with the height of the bit at this point. If this is how you have fun in your shop, be sure to seek professional help. If you would rather just build, then don’t touch the bit height. At all. You have it set perfectly.

The bit is ready to cut

Now, you have to get your fence ready. WITHOUT TOUCHING THE HEIGHT OF THE BIT (did I mention this before?), put the fence on your router table and bury most of the bit behind the face of the fence. This part of the joint is trial and error, and it’s very easy to make errors. Believe me.

With the majority of the bit behind the face of the fence, put the mating piece edge down, riding along the face of the fence. Now is also a great time to break out your featherboard to ensure that the piece is pressed tightly to the fence as you push it past.

Light as a feather

Now, push the board through, then flip it over and rout the second side. This will give you the proper profile for the joint. It’s during this time that I subscribe to the mantra that it’s easier to take more wood off the joint than to add it back. Your first pass will probably leave your mating piece too wide to fit. Adjust our fence backwards by very small increments and test fit. Remember, since you are removing material from both sides of the joint, you are doubling the corrections you make.

Slippity de do da

You will know when the joint fits perfectly when the mating piece slides into the groove and goes about 2/3 the way into the groove before it binds up. There is a lot of friction working on this joint, so you will probably need to tap it into place with a mallet to get it to seat all the way in.

The fun thing about this joint is what you can do with it. If you want to affix it permanently into place, put a dab of glue at the outside edge of the joint. This way, that section will stick fast, while the rest of the joint can slide freely as the board expands and contracts with changes in humidity.

Or, if you are feeling froggy and you want your joint to be able to be disassembled, try a little wax on the joint. This way, when you are ready to knock the piece down, it will take just a few taps with a mallet to free the joint. I have seen this on bookshelves, and it’s the handiest portable design.

Sure, it takes a little it of practice, but once you try the joint, I think you will be happy with the results, and you will want to use it more often than you think you will.
It’s good to have options

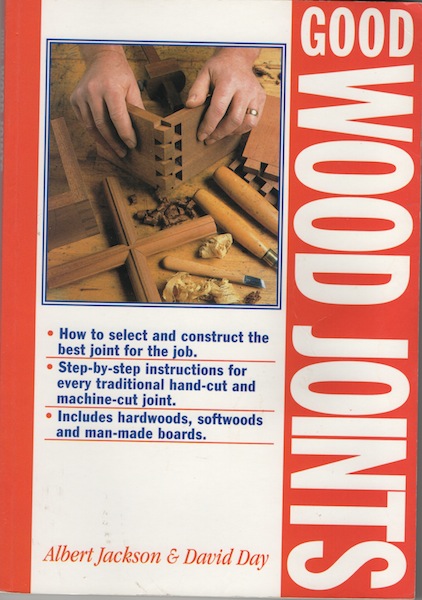
If I have said it once, I have said it a thousand times – the most fun thing about woodworking is how there are many different ways to get something done. And, when it comes to joinery,the options are nearly limitless.   That’s why one of my favorite books in my woodworking collection is this one – Good Wood Joints by Albert Jackson and David Day.

Joints CoverThis book is a little older, released in 1995, and the two authors were from the UK, meaning that they used funny (for me) terms to describe different things – such as calling C Clamps G Cramps – but, I think I can interpret.

matrixThe fun thing about this book is the wide variety of joints you can use. How many? Well, there is a matrix spread across four pages offering the book’s entire array of joints with such information on how difficult the joints are to produce, how effective they are in different materials (solid wood vs. plywood vs. particle board) and if they are easier to cut with machines or by hand.

Even better, across the top of the matrix, there are drawings of different places where joints could be used, and which joints could be appropriate for the application.

Joint

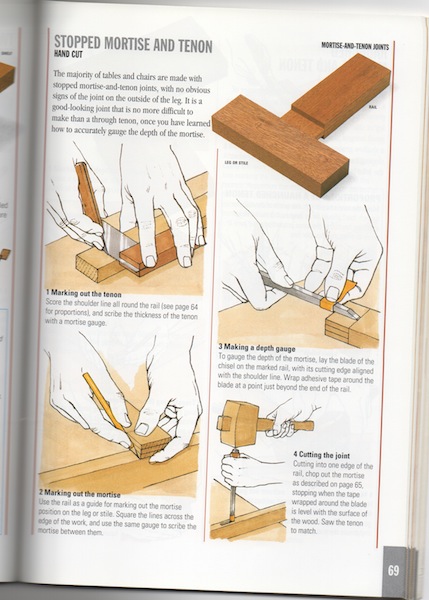
Of course, each page goes into nice detail about how to cut these joints, most of them with instructions on how to cut them by hand and by machine.

Sure, you may not use all of the options in the book, but it’s good to have the options.


Fast Fingers Iggy

Hey, everyone. Iggy here. Try as I might, I always have a hard time trying to get that big galoot Tom to learn new tricks. He must be an old dog, because it’s very difficult to do that, but I’m not deterred.

For instance, this coming Thursday, the Tampa Woodworkers Guild has asked me to cross Tampa Bay to come out to their meeting to show them how to cut some corner joints. I know they are pretty talented woodworkers, so I’m going to have my hands full trying to wow the crowd while keeping my interesting partner from embarrassing me. In fact, the only reason that Tom is coming along is because his legs are long enough to reach the pedals on his car. Otherwise, I’d give him a gift card to the movies and tell him to keep out of my hair.

One of the corner joints I want to cut is the box joint. Now, I know that Tom likes to cut his on the table saw using a dado blade and a jig he clamps to his miter fence.

Me, I’m just a little different. I like to do mine on the router table.  Now, when it comes to router tables, I have to thank my good friend David Venditto over at Infinity Cutting Tools. The one he gave Tom last year is a real joy to use… It has lots of track on it, allows for some precision work and the Triton router is totally kicking. Having a great router table makes work so much easier.

The New Router Table

My preference for a box joint jig would be something that attaches to a miter fence or even a router bit that cuts the comb for finer finger joints, but I’m stuck with this model that Tom bought years ago at a woodworking show.  But, hey, you gotta work with what you gotta work with. It’s serviceable for sure, and I’m going to make it work.  It’s set for a 3/8″ finger, so I obviously need to get a 3/8″ bit to work on this setup.

Tom's box joint jig...

The first thing you have to set up is a spacer to get an exact 3/8″ space between the bit and the rail. So, I broke out the set up blocks Tom has hidden in a drawer, and I set the distance by feel. Right on the monkey… ooops, I mean money.   From there, I took a scrap of wood, set it against the strip that is on the jig, and ran it through. This piece will work as my spacer.

The spacer ready to go

Just throw it over the strip and bingo, bango, you are there.

The spacer in place

Simply run the first piece through the router bit to cut the first notch, and then remove the spacer. Butt that piece and it’s mating piece against the strip, and start making your cuts. It makes it easier to hold everything vertical if you build a little jig out of scrap wood… Really easy to do.

Scrap wood jig

Take those boards all the way to the end, and what are you left with? A sweet set of notches that mate together beautifully, creating a very tight, sturdy joint.

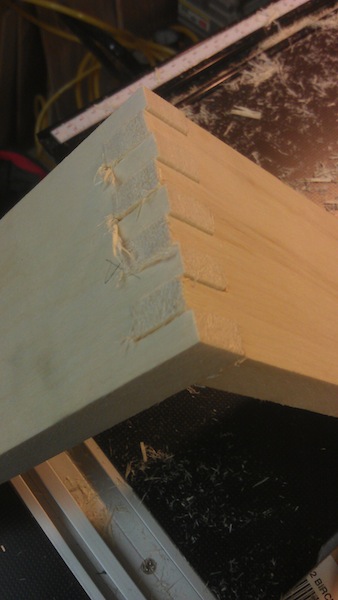
The finished joint

This alder is a little splintery, but a little sanding on this baby, and we’re ready for the finish.

Now, maybe I can have Tom carry my tools and sit – quietly – in the corner.


So many tests…

OK, so I really need to figure something out in 2012. I mean, I’ve been woodworking since 1998, and I still have yet to get a straight answer on this.

Just how strong are certain woodworking joints?

I ask this because I am now on the last day of my winter break. Yes, I took my first week off since the holiday season of 2010-2011. And, this week, I had a little bit of time to kick my feet up and go through a box of back editions of woodworking magazines that a neighbor was looking to get rid of. I mean, a collection that stretched back to about 1997. Awesome old articles like the one I found in the July 2007 edition of Wood Magazine which was written shortly after the release of the Festool Domino.

Bob Hunter and Jeff Mertz compared the strength of four common ‘loose dowel’ type joints – The Beadlock, dowels, biscuits and the Domino – versus a classic mortise with a 1″ tenon. No surprise, the traditional joint totally kicked the competition’s butt in the shear and pull apart tests. But, here’s where things get a little whacky.

You see, Bob and Jeff found that – ta da – dowels did better than the Beadlock or the Dominos.

Intriguing, because the folks at Fine Woodworking in the January/February 2009 edition said that the Beadlock finished first, ahead of the dowels and the Domino. The also found a tremendous difference between a floating tenon and the Domino – finding a shop-made floating tenon to be two and a half times stronger than the competition. But, I’ve seen so many people point to the Domino and tell me that they would be more than happy to replace the traditional mortise and tenon joints in a chair with a Domino… but never with dowels…

Which  makes you wonder how the folks at Popular Science found that dowels are equal to mortise and tenon joints in their October 1979 edition. Unless you consider the folks over at Woodgear, who definitively proved that mortise and tenon joints are stronger than dowel joints.

Of course, you could just believe the claims being made that pocket hole joinery is 35% stronger than a mortise and tenon when it comes to shear strength.

I mean, come on. I know wood is a natural material, so there will be some variation in strength. And, I’m sure that most of these tests are conducted in shop – not laboratory – conditions. But, I watch Mythbusters, and I think I know something about scientific method. Or, at least how five TV savvy geeks use it.  But, to get some of these out-there results… I’m not sure.

So, you know what I’m gonna do? I’m going to learn how to use my new Mortise Pal jig. And, I’m going to break out my Joint Genie doweling jig. And, I may even use a biscuit or two and a handful of pocket screws.. and I’m just gonna build this year.

There. My first executive decision of 2012.


Great Jigs: the box or finger joint jig

So, you want to build some sweet looking interlocking joints, but you aren’t sure about your saw and chisel work? Maybe you are too cheap to lay out bucks for a dovetail jig? Perhaps you don’t want to go the whole dovetail route?

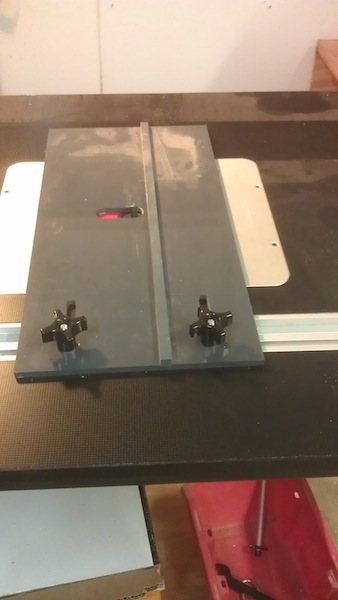
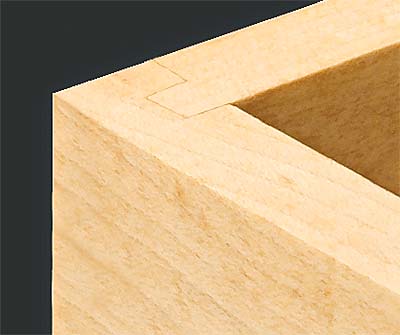
Fortunately for you, it’s easy as pie to make sweet fitting box or finger joints right on your table saw. And, the best part, is that you don’t need a fancy jig to make it happen. In fact, with a piece of plywood, a scrap piece of hardwood and a few pan head screws, you can be on your way.

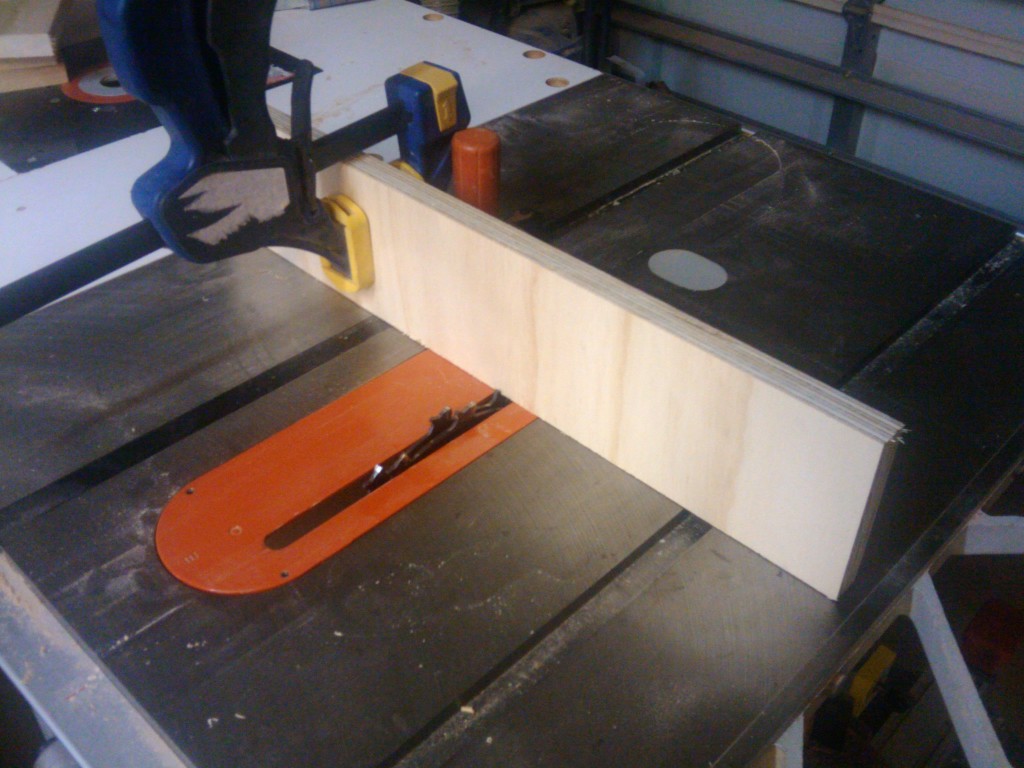
The first thing you need to do is to decide how wide you want your fingers to be. For most applications, 1/4 or 3/8 inch will be great… of course, you can go to any measurement you want.  For this one, I’m going 3/8″.  So, I set my rip fence to 3/8″ rip width (verified by my 1/8 and 1/4 inch spacer bars) and my zero clearance insert to prevent the thin piece from falling into the saw’s body.

I found a piece of maple in my scrap bucket and ripped a piece 3/8″ wide about 12″ long. I also noted how thick it was – just shy of 1/2″.  This way, as long as my project boards are thicker than 1/2″, this jig’s gonna work. I cut this length into 3 inch long pieces to serve as inserts.

Next, I found a piece of 3/4″ plywood (STILL from the home office project) and cut it to a strip 4 inches tall by 14 inches wide. This is going to be the main body of the jig, and I had to make sure it was going to be wide enough to span across the blade while giving a good bearing surface for the project board.

I switched the regular combination blade off of my saw and replaced it with my dado stack set for 3/8″ width. Now, I know there are those dedicated box joint cutting blades… and, maybe I might go for one of those setups. But, for now, the dado works well. I set it as high as the thickness of the insert.

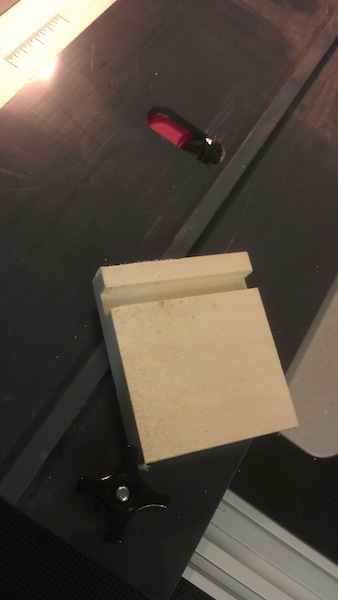
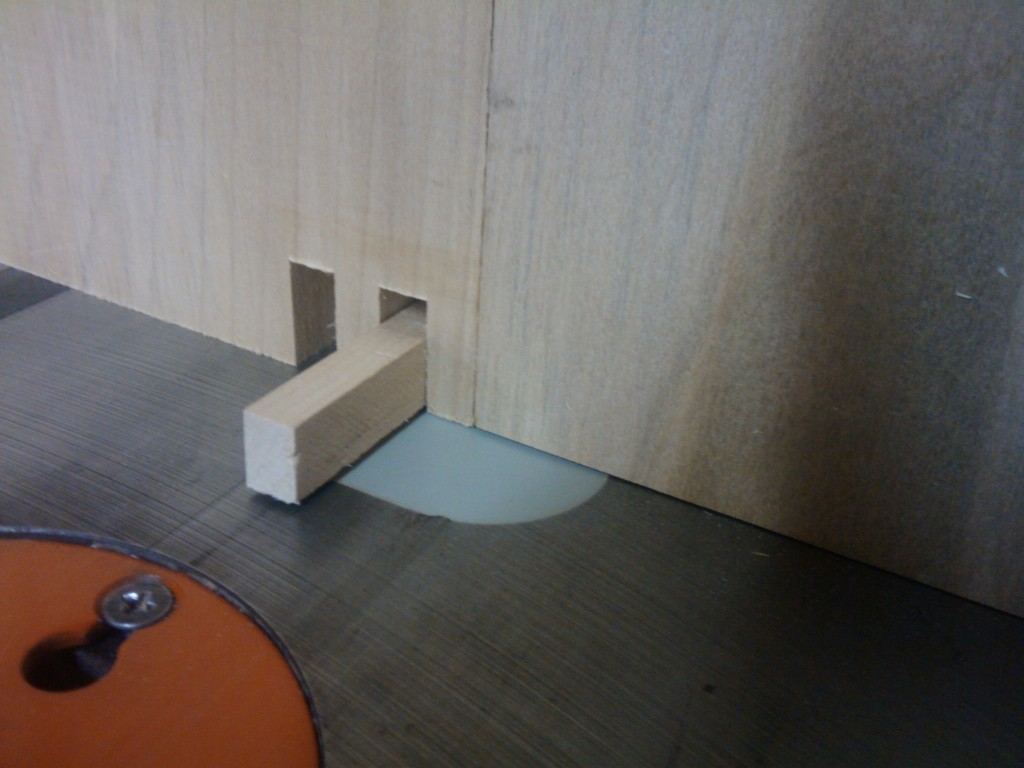
Once that was set up, the next step was to clamp the plywood to the miter gauge so it straddled the dado head. The clamp has to hold the board perfectly still. There can’t be any shifting. I turned the saw on and pushed the plywood through the dado stack. Now, I had a plywood board with a notch that measured exactly 3/8″ wide. I unclamped the plywood, stuck one insert stub into the notch and tacked it into place with my brad nailer.
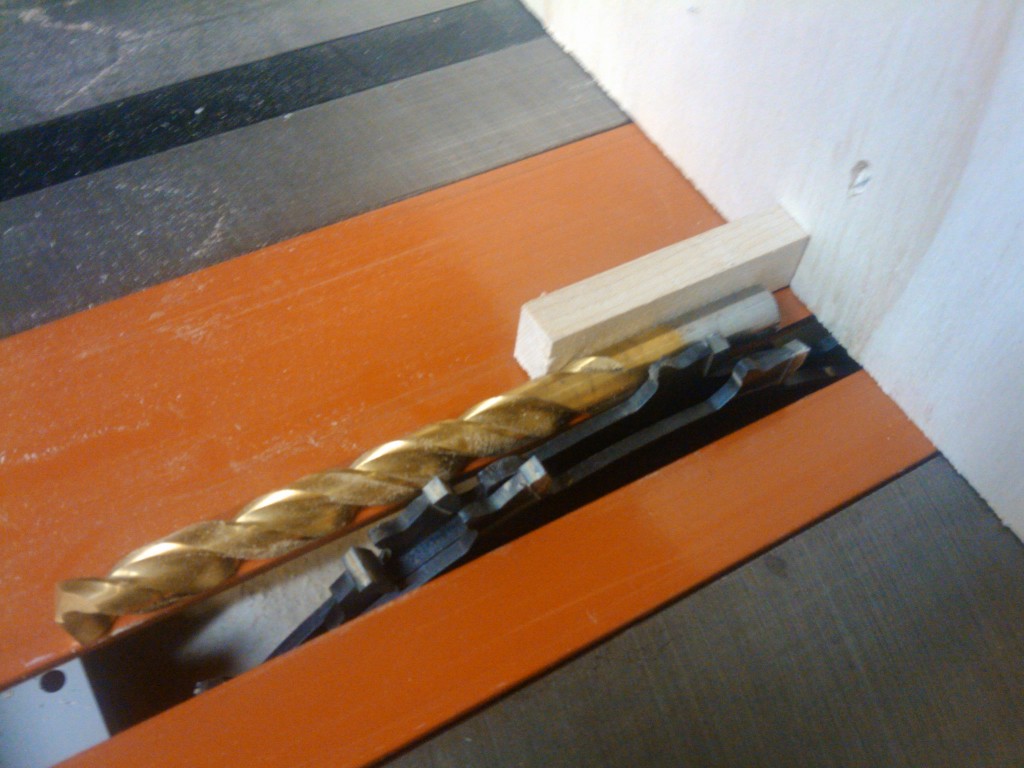
The next step is critical. I put the jig back in front of the miter gauge and shifted it over to my left (as I faced the saw). This shift has to be exactly the width of the dado blade thickness. If you don’t get this right, the jig’s not gonna work. To help ensure I get this right, I reached for a 3/8″ drill bit. The diameter of the bit comes out to the exact measurement. I wedged the bit between the insert and the teeth of the dado stack. Be careful doing this – the hardened steel bit can do a number on the blade’s carbide tips.

I firmly clamped the jig to the miter gauge and drove two screws through the gauge into the jig’s body. This fixed the jig into place at the right distance from the blade.  Then, a quick push through the dado, and bingo, it’s notched and ready to cut.

Now, when you go to cut your workpieces, just like you would do with a dovetail, you want to mark which edge is top and which face is out on your boards. Start by pushing your first board’s top edge against the key and make your first pass. This gives you a full finger at the top.Then, move the last notch over the insert and cut again. Repeat until you are all the way down the board.

To cut the mating board, take the first board you cut and put the top notch over the key. This offset provides the perfect spacing for the mating cut with its staggered fingers. Push through to notch the top of the board, then move the first piece and repeat the cuts on the mating board as you did with the first.

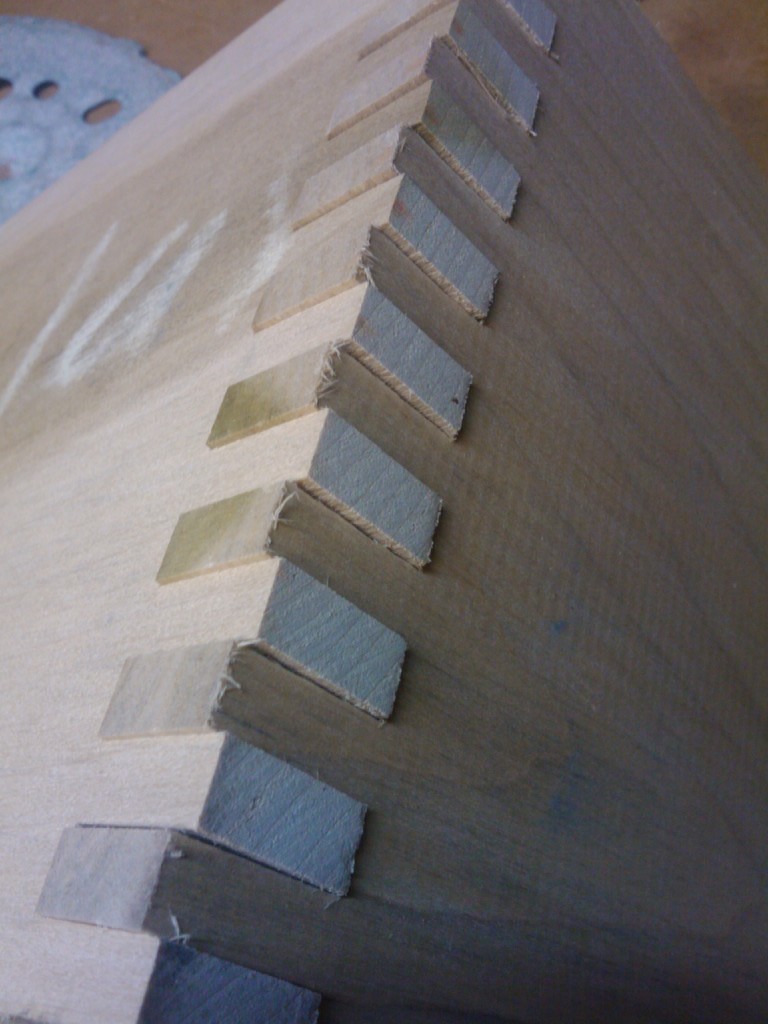
The moment of truth comes when you snug the pieces together. My sample joints cut in this 7 inch wide piece of poplar needed just the lightest of mallet taps to get it to seat perfectly. I had cut the notched a little deeper than the board was thick, so some work with a sander or plane is in order to get them flush. I would recommend a sander over a plane for the initial work. Just rub a little fresh glue over the joints, sand and that slurry will fill any imperfections in the joints.

Another note – when I pick my project pieces, I always mill them a little wider than I need them. This way, I can trim the final joined pieces to width to eliminate any partial fingers on the box. This way, you will always have a full finger at the top and bottom every time.

Now, this was a pretty simple version of the box or finger joint jig. There are designs that adjust side to side to tighten or loosen the fit, plus other jigs offer more safety features and other adjustments. A quick search for box or finger joint jigs will give you plenty to work from, and you’ll also discover a number of commercial jigs for sale that give you great results.

Give this jig a try – you might be surprised how frequently you find yourself going for box or finger joints in your projects.