Quick Poll

Hobby woodworking has undergone a tremendous change over the past fifteen years, and much is thanks to the Internet.

Once the only way to learn about woodworking was to take a lesson from a school or a knowledgeable neighbor, relative or friend,  read books and magazines or watch the New Yankee Workshop.

Today, woodworkers have access to a vast array of resources right from the comfort of their own living rooms.  Websites featuring new techniques, tool reviews and video build alongs have sprung up and can provide immediate access to what woodworkers want to know.

Of course, the Internet could be a huge time waster, taking away valuable time actually doing something in the shop.

This week, how important of a woodworking tool do you believe the Internet is for you?

[poll id=”131″]

Link of the Week

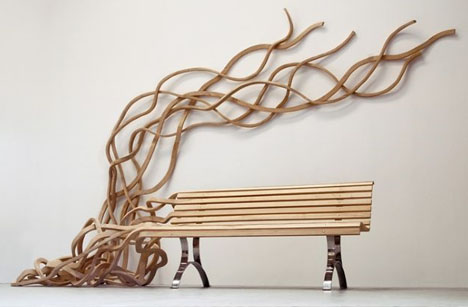
Dornob.com’s Creative Custom Wood Benches and Chairs

A chair is a chair… A bench is a bench…  right?

Right…

This site, Dornob.com, features a wild selection of designs from up and coming artists.  Architecture, interiors, kitchen wares and other important  elements of the home are considered and designed with flair. And, the furniture.  Well… Wow…

The piece featured here comes from the bench and seating collection. Woodworker Pablo Reinoso is well known for taking functional pieces – like this bench – and moving from the expected to the wildly out of control. This bench gives the illusion of a comfortable place to sit near an ivy-covered wall.

Take a look at some of the other stunning work featured on this site.  I guarantee you will be inspired…

To the Barricades, Mes Amis!

Bonjour!

Why is Tom writing en Francais today?

Well, if your calendar mentions it, you will notice that today is Bastille Day – the day the French commemorate the storming of the notorious prison named the Bastille – which also happened to contain quite a large stash of gunpowder.  It was this day when the three estates unified and the French citizens started down that long road to today’s republic.

But, that’s not what I want to write about.  I actually want to let you  know about a large project I just started.  It’s actually a big bank of cabinets that I’m building together with a friend from the Woodworker’s Website Association.

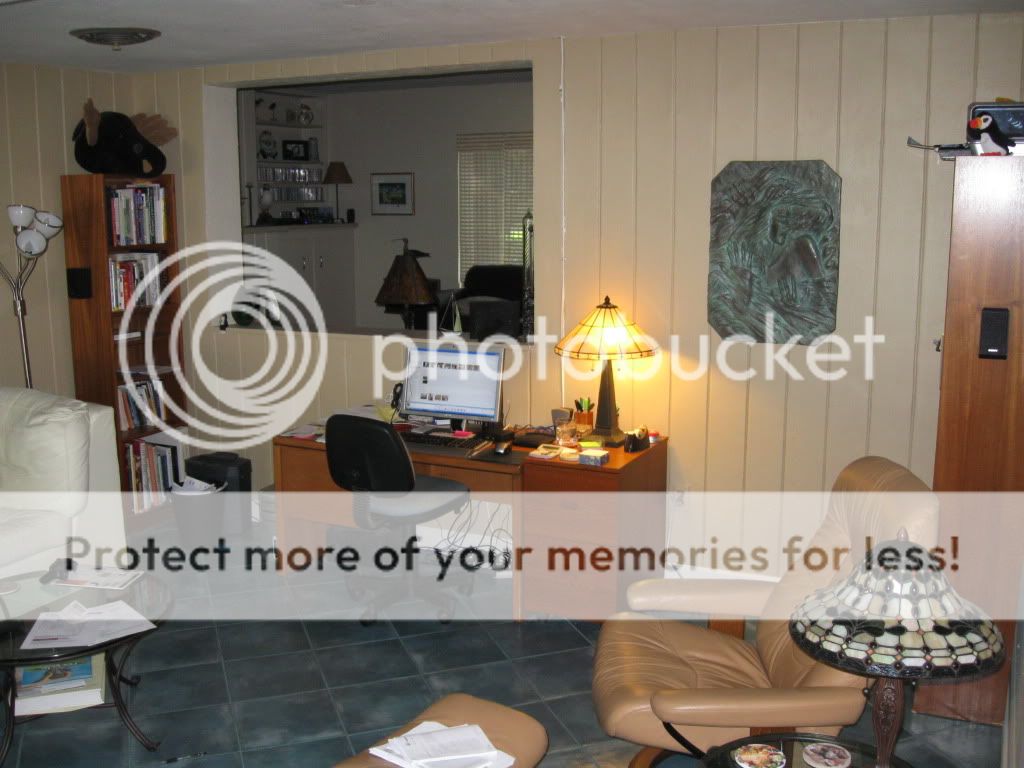
You see, Paul lives in a really sweet house built in the 1940s  just a few miles from where I live.  Over the years, as with many homes in Florida, the home was added to.  One of the largest parts of the addition was the enclosure of a large outdoor patio. In this room, he and his wife have created a lovely living room with a comfortable seating area and a bit of a home office.

But, Paul wants more.  So, he asked if I could help him build a home office area in this room.  A number of cabinets with drawers and doors for the lowers and a pair of uppers to serve as bookshelves.  He sketched out the design, and I figured out how many of which parts we needed for the cabinets.  We were building the cabinets just as Norm Abram did in his nine-part opus on building kitchen cabinets.

And then he ordered the materials. Last week, the stuff arrived.  A dozen sheets of prefinished and cherry ply.  A box of hardware he ordered online.  A few boxes of screws.  And one of these…

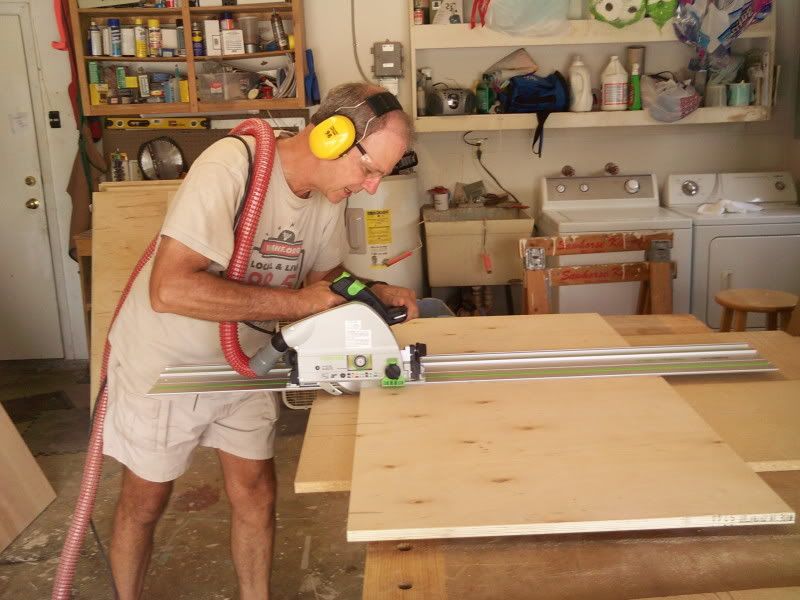
Yes, he brought over a Festool track saw.  Perhaps you have heard about these saws and the hype that goes along with them.  Every word of it is true.  The saw cuts beautifully, leaving a very smooth cut edge in its path that rivals what I can get on my table saw.  What I liked most about the saw was that we could flip those large sheets of plywood up onto the workbench resting on a few sacrificial strips of particleboard, mark and cut away. No need to hoist and balance large full sheets on the table saw or cut and then recut rough edges…

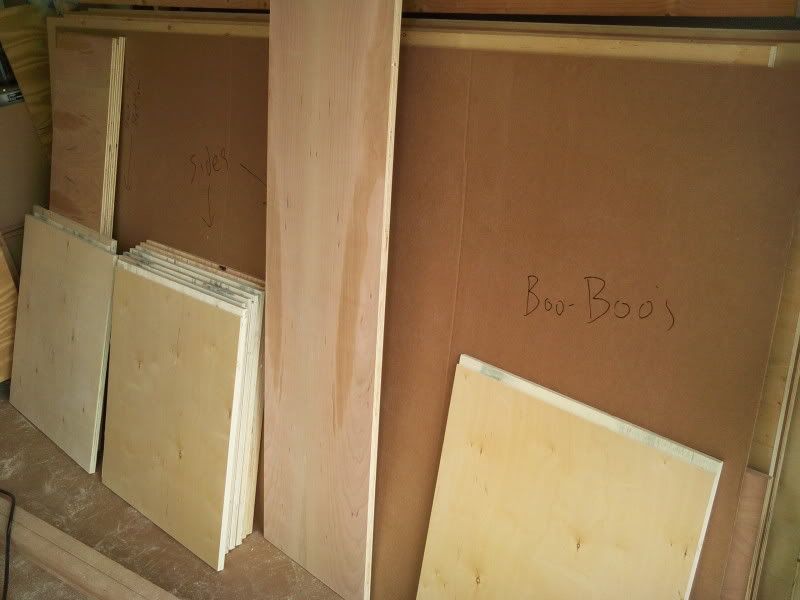
It took two five-hour days, but we ended up making all of the cuts for the boxes.  We even had a few miscuts that ended in the boo boo pile. It was hot work in my Florida workshop, but we got all  of the cuts done and dadoes and rabbets milled.  Now, I am spending a few hours every night after work putting the boxes together with screws and glue, and things seem to be progressing quite nicely.

Once the boxes are complete, we will take them up the road to Paul’s house where we will build a base frame, install and face frame the cabinets in place.

Believe me, I will keep you updated on this very ambitious project as we progress.

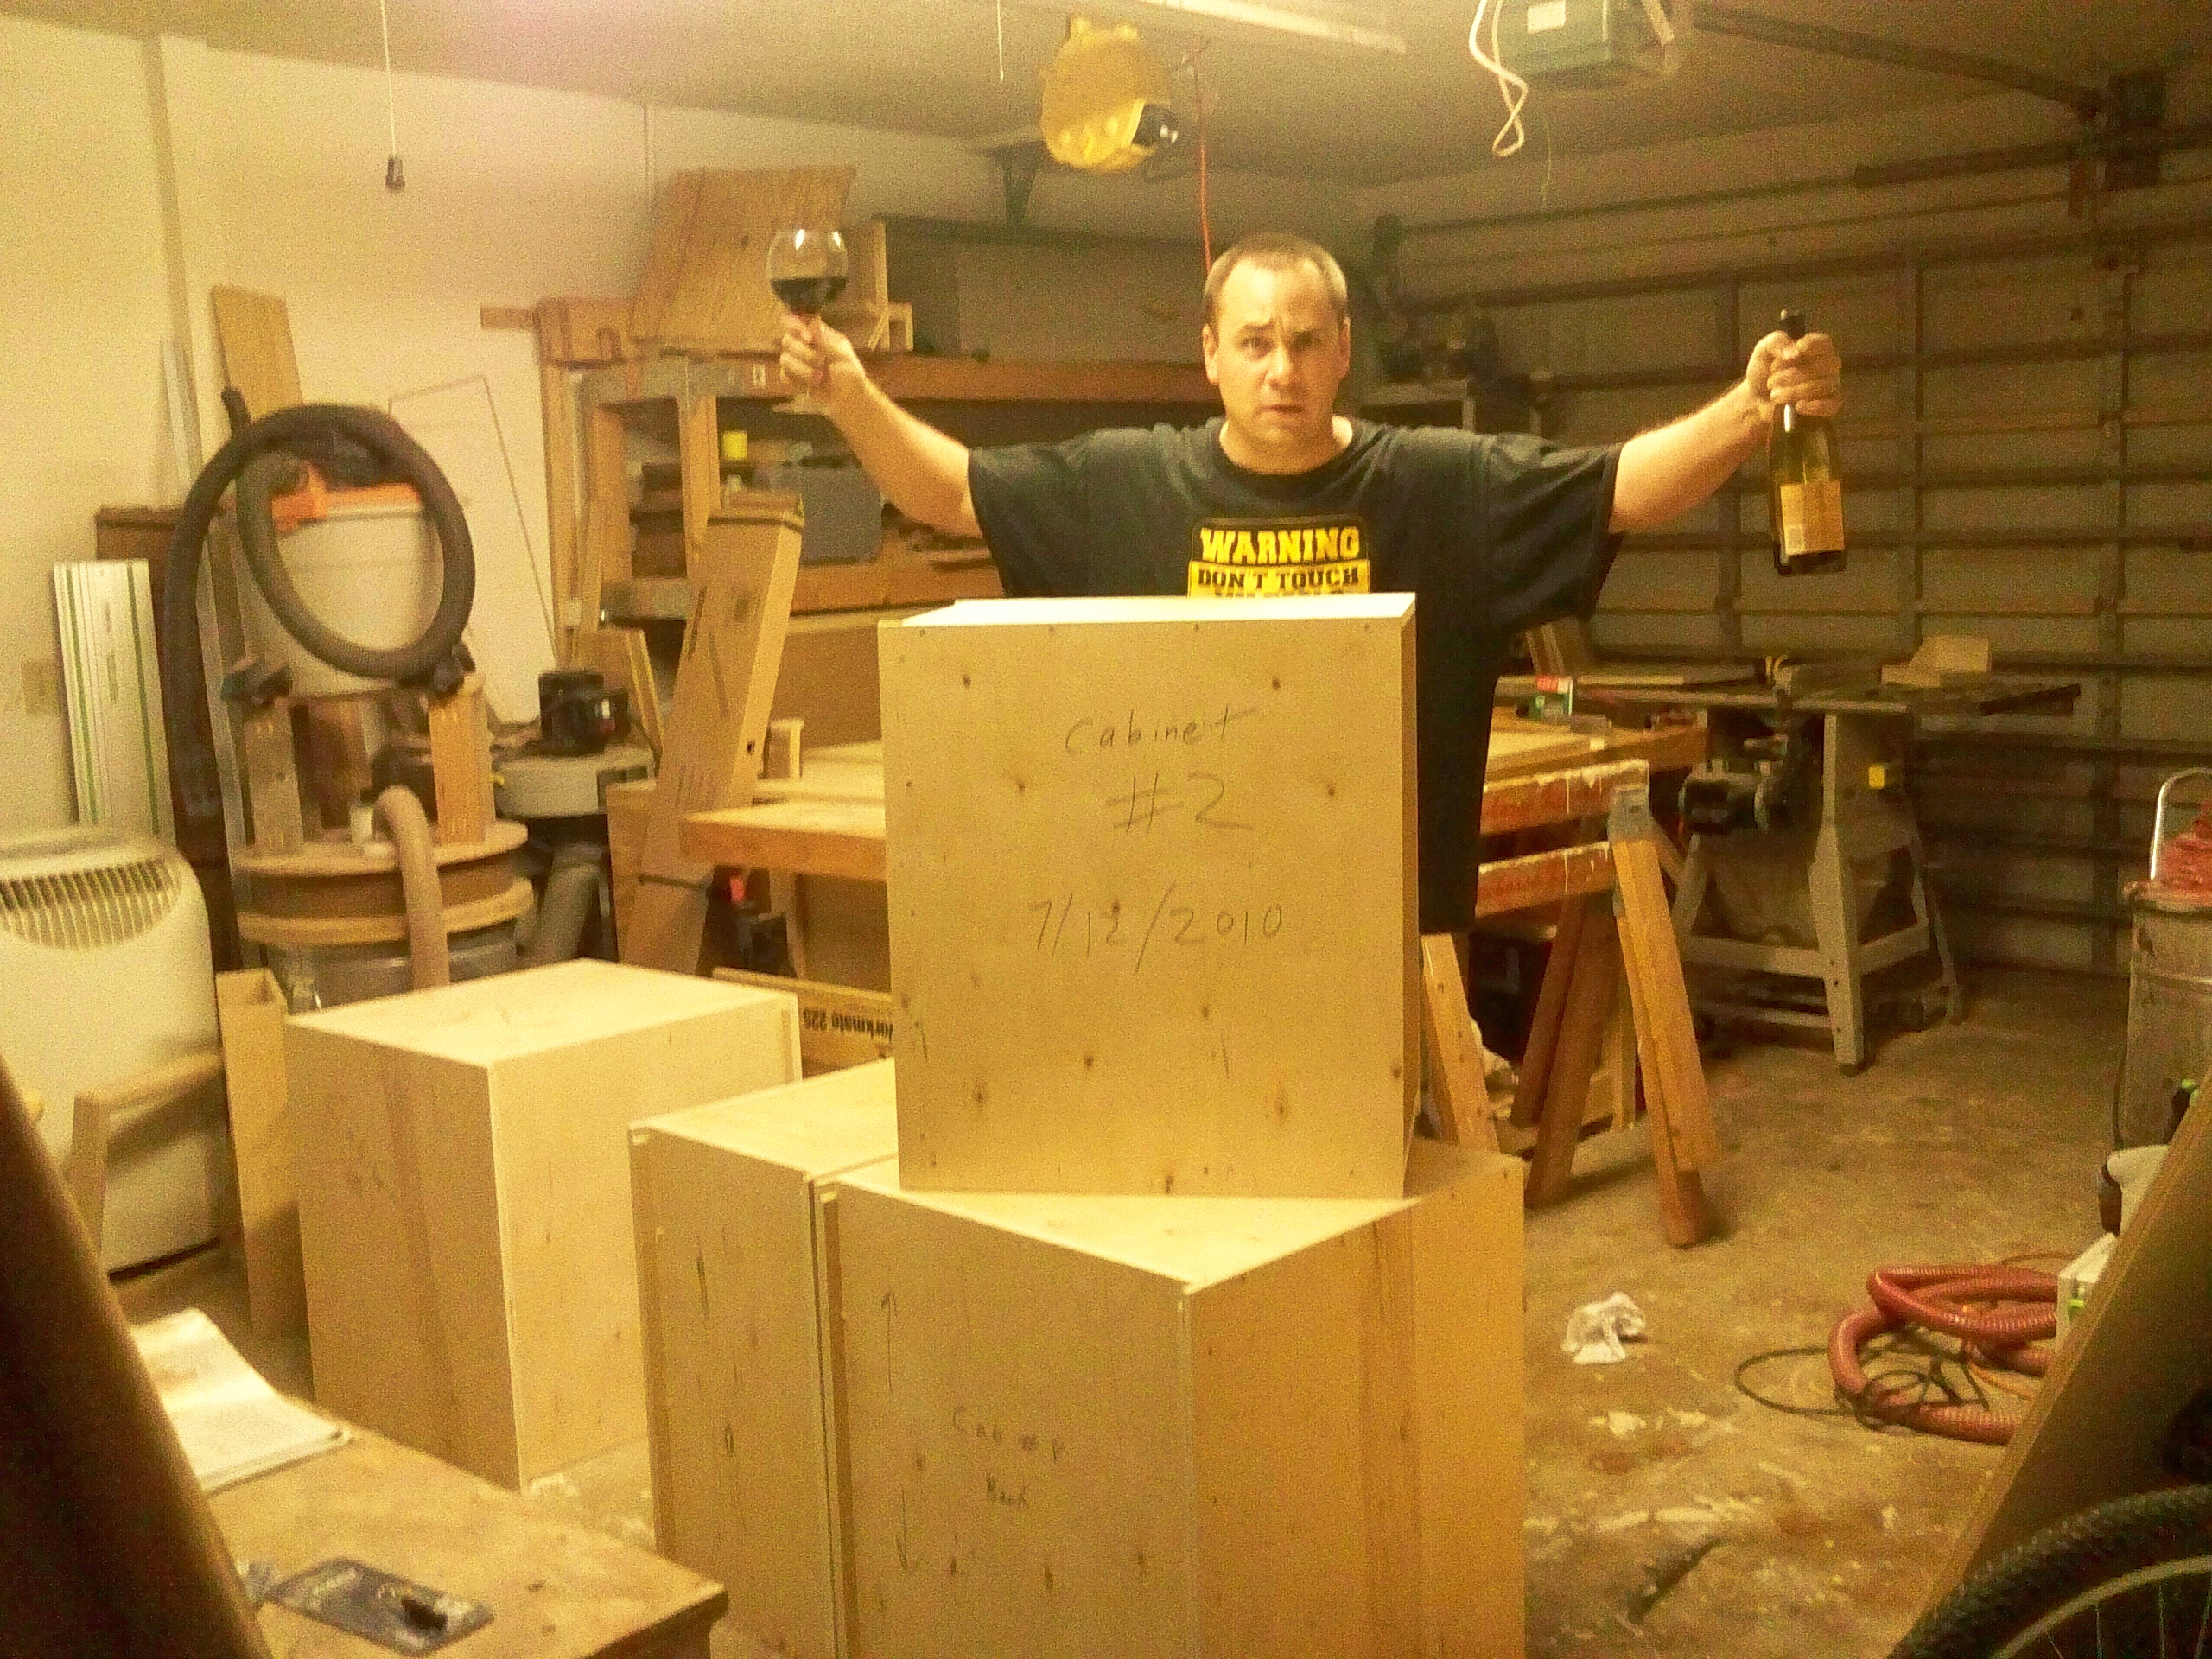
Now, what about the French lesson at the start of the article?  Well, I decided that today would be a great day to reenact the scenes of the French citizens emerging from behind their barricades to storm the Bastille.  Standing in for the barricades are the cabinet boxes.  Look, I know it’s a reach, but sometimes ya gotta do what you gotta do to keep it topical.

No, I’m not wearing the tricolor cockade or flying the banner of the French Republic, but I am hoisting a glass of Pinot Noir as my salute to the viniferous contributions of la République Française.

The Slicker Way

So, my buddy Lou finally picked up the CD/DVD rack I had built for him. He was supposed to come over during the Independence Day  weekend to retrieve it, but we had some incredible amounts of rain. Seriously. I guess we are now in our rainy season, because my rain gauge with a six inch capacity was overflowing during those heavy rains.

Since I posted  shots of Lou’s project, I had gotten some input from other folks out on the web as to how I could have maybe done a little better. “Those raw plywood edges look cheap, Tom. We expect better than this from you!” Hey, that’s how the client wanted it!

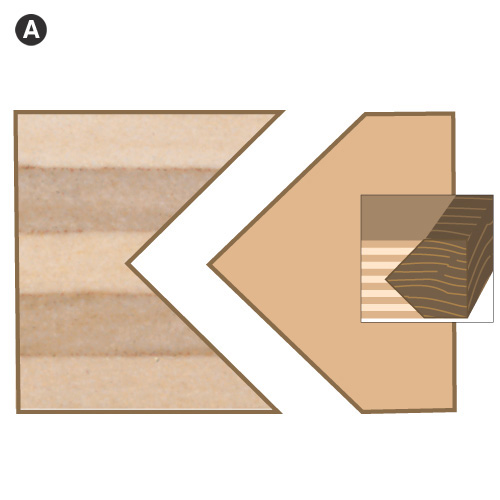
Many of the suggestions offered focused on how to apply wood edging with brads and glue, dowels and glue, biscuits and glue, stepped rabbets and the works. I’ve seen suggestions to iron on an edge tape or cut my own edge tape from the plywood’s veneer itself. While these suggestions are all time tested and work fine, the one that Tim Walter over at Eagle America offered was something that I had never even considered. “Tom… get with the times! We’ve offered two styles of edge banding bit sets for years, and I have a feeling they may have given you a better option.”

Instead of attaching these facing elements with some kind of fastening system, Tim was referring to cutting a continuous interlocking joint that integrates the pieces. “You don’t have to cut biscuit slots or drill dowel holes. And, you don’t need to use screws or brads. Can you imagine your friend staring at brads when he selects a CD? Can you, Tom?”

OK, Tim, I get it! But, why not just use glue and clamps alone to attach the hardwood edging? “You really want to be careful about the edging getting out of alignment during the glue up. Sure, you could try to sand it flush if the glue up comes out all out of whack, but the possibility of sanding through a thin plywood veneer face is just too great.”

Good point. Tim also brought up another point- if I wanted to put a fancy profile on the edge band, the hardwood edge allows for routing a wide variety of profiles. “With this system, you won’t run the risk of hitting a fastener, which would spoil the look. And, hey, it’s the little details that mean so much.”

Of course, using these router bit systems does require some additional care when you use them. “You really want to make sure that the work is held flat to the table. Featherboards are great accessories to provide that downward force when pushing the work past the bit.”

Plywood is a very useful material when building casework. Bits such as these provide an interesting way to help make plywood an even better choice for projects I’m planning on building in the future.

Quick Poll

It’s happened to all of us.  You are working from commercial plans or a cut list of your own devising.  You follow the plans closely and make all of the cuts.

But, when you move on to the assembly process, you accidentally glue a piece in the wrong place.  For me, I usually discover this accident when I get farther down the road on the assembly process and have to break the pieces apart or cut new ones.  Drats!

Fortunately, most woodworkers make this mistake once, then turn to a method of carefully marking the pieces to ensure it never happens again.

This week, let us know how you keep track of the pieces in a complex project.  Do you use the tried and true cabinetmaker’s triangle or something else?

[poll id=”130″]

Link of the Week

Swingplans.com

If you live in the northern hemisphere, you know it’s summertime.  Besides retreating indoors into the air conditioning or taking a dip in a lake or pool, one of the best ways to beat the heat is to recline a comfortable shady seat, grab yourself a cold beverage and relax on an old style porch swing.

Yes, there are plenty of porch swings out there to buy, but we’re woodworkers!  Swingplans.com offers a number of sweet looking plans and patterns for a wide variety of handsome looking models. The site also offers plans for stands and links to hardware to make building your swing as enjoyable as sitting in one.

A place for everything…

Organization is not my strong suit.

Navigating my desk at work is an adventure.  I’m getting better, but I routinely  find some important note from a few months ago  – say – about a task I had to do back in March.  Not a good thing, especially when my boss was really counting on that task being accomplished by – say – the second week of July.

The shop?  It’s not much better.  I am really having trouble finding a good home for everything I have amassed over the past dozen years.

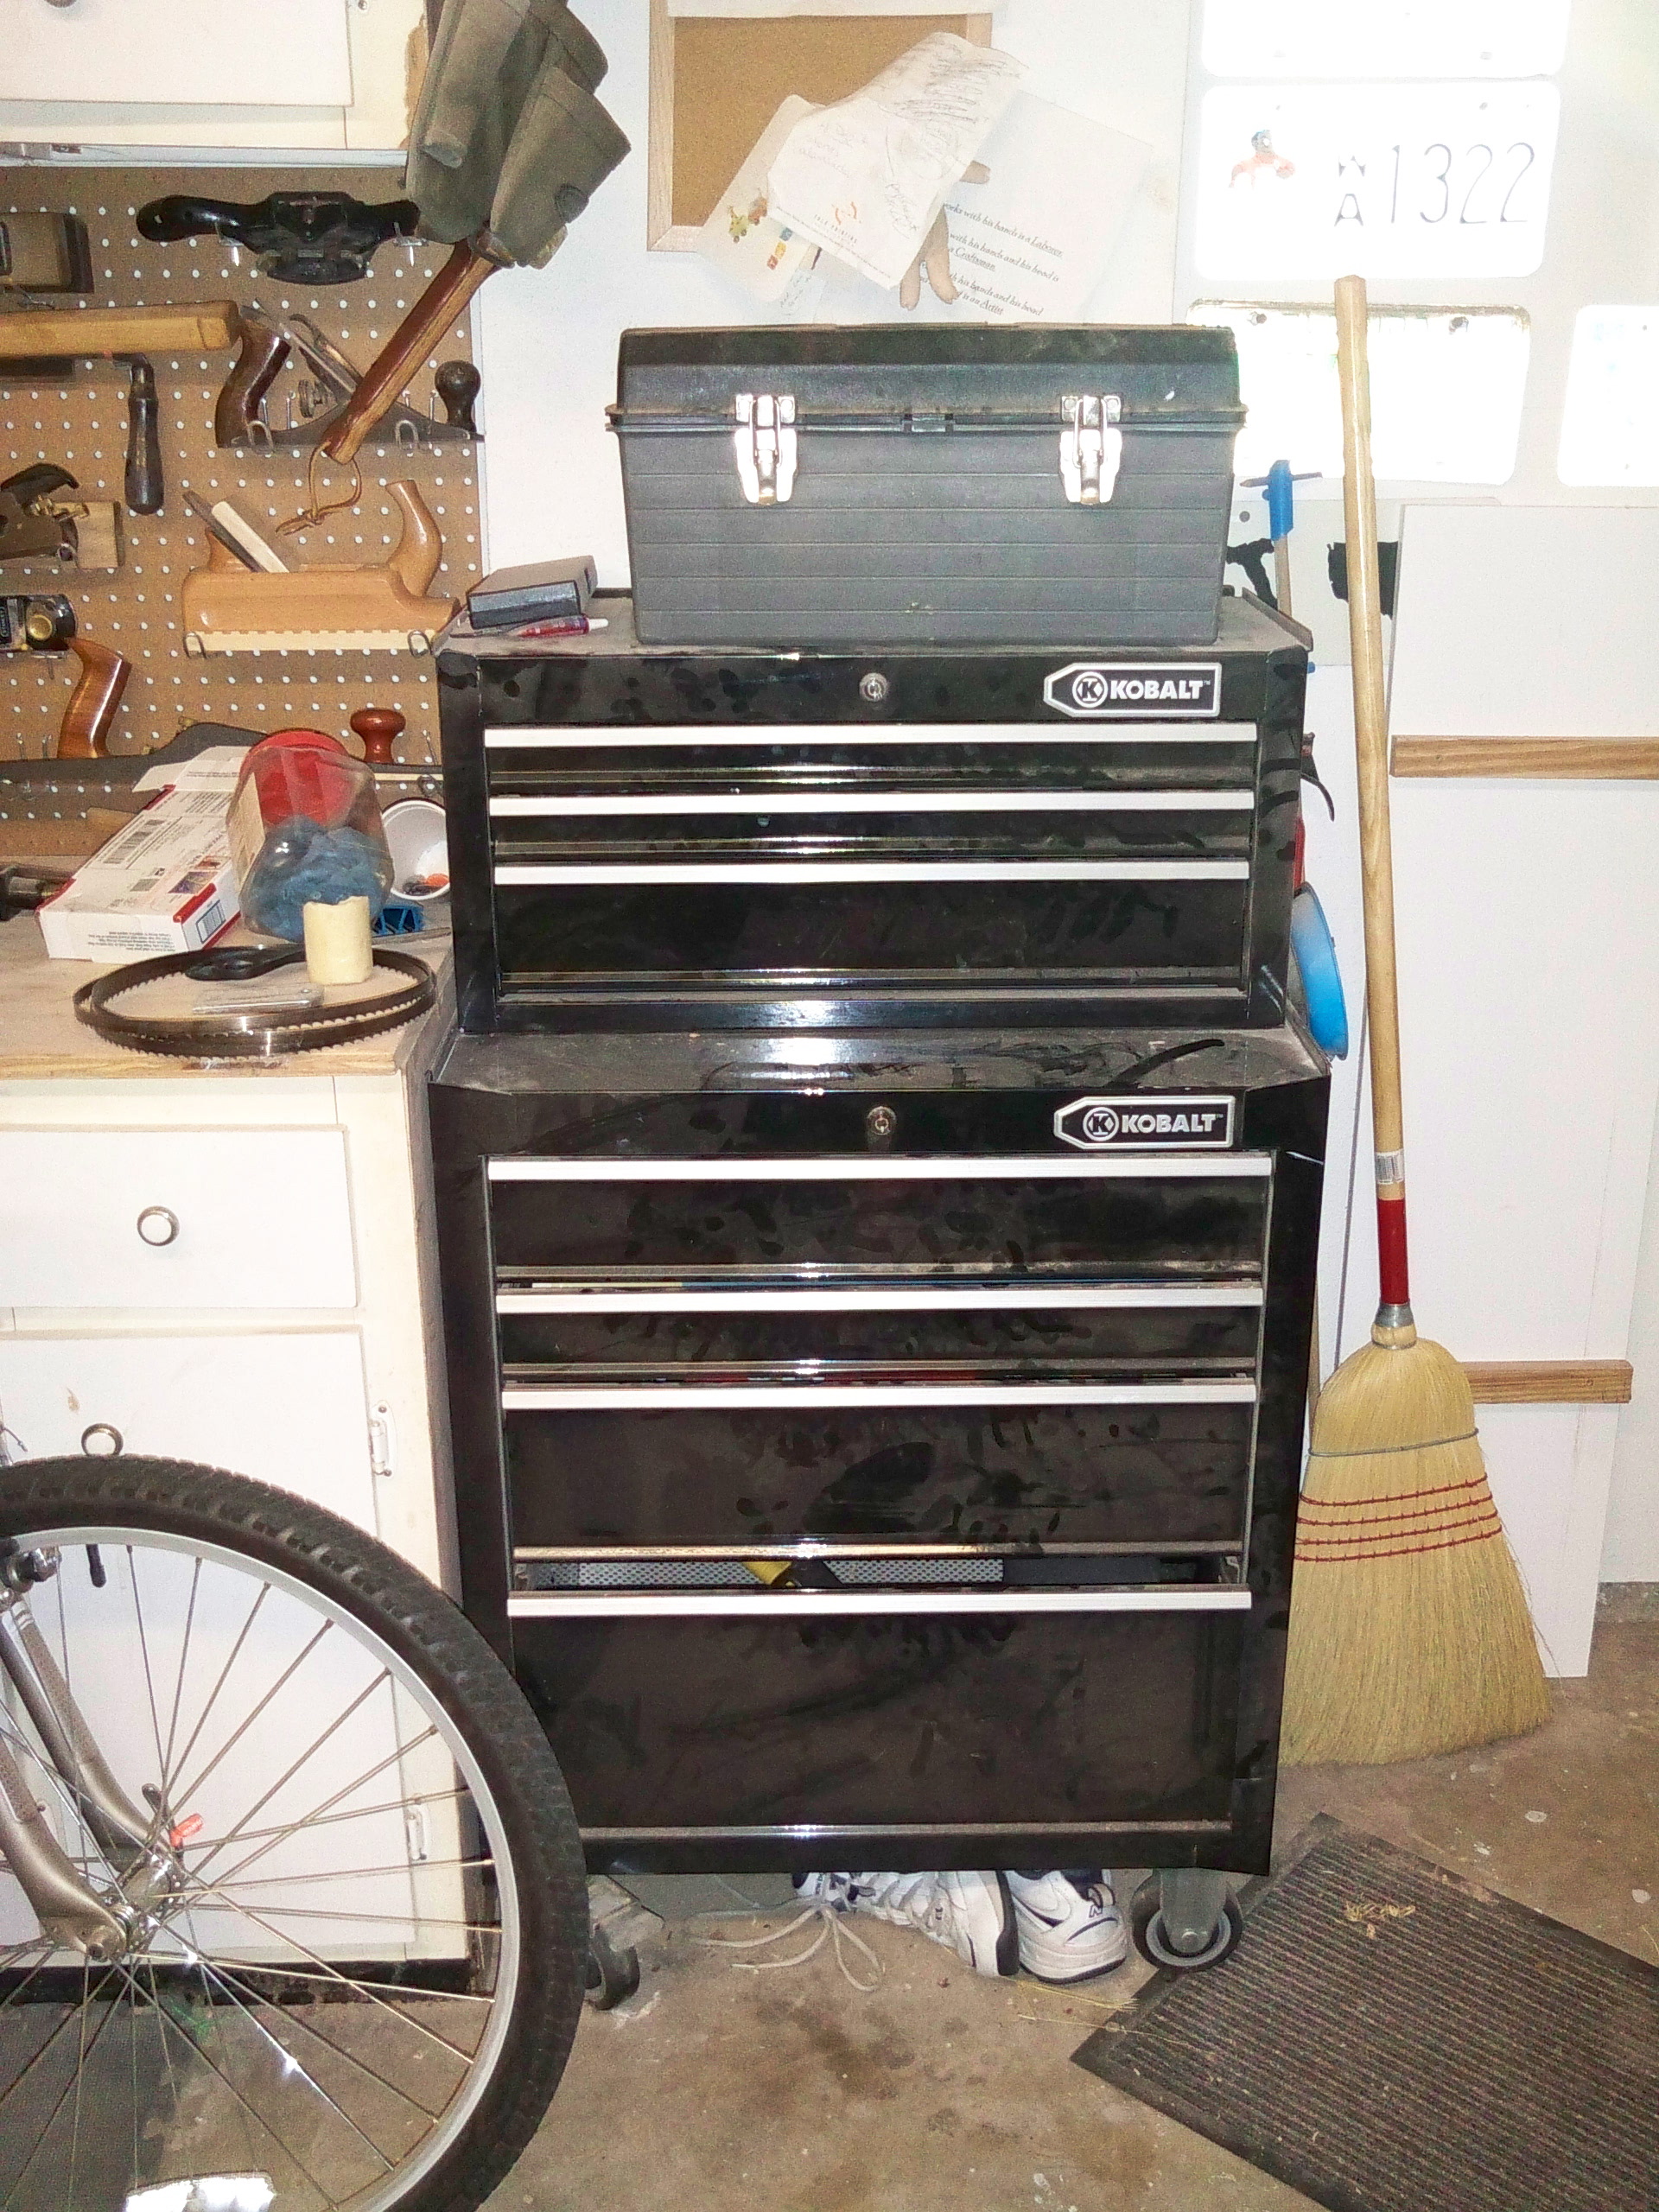
At least in my shop I have one area that stays pretty well organized – my rolling tool chest.  I picked it up during a sweet holiday deal at Lowe’s and call it black beauty. Actually, it’s two stackable units – a four drawer base and a three drawer mid section – topped by my old tool box.
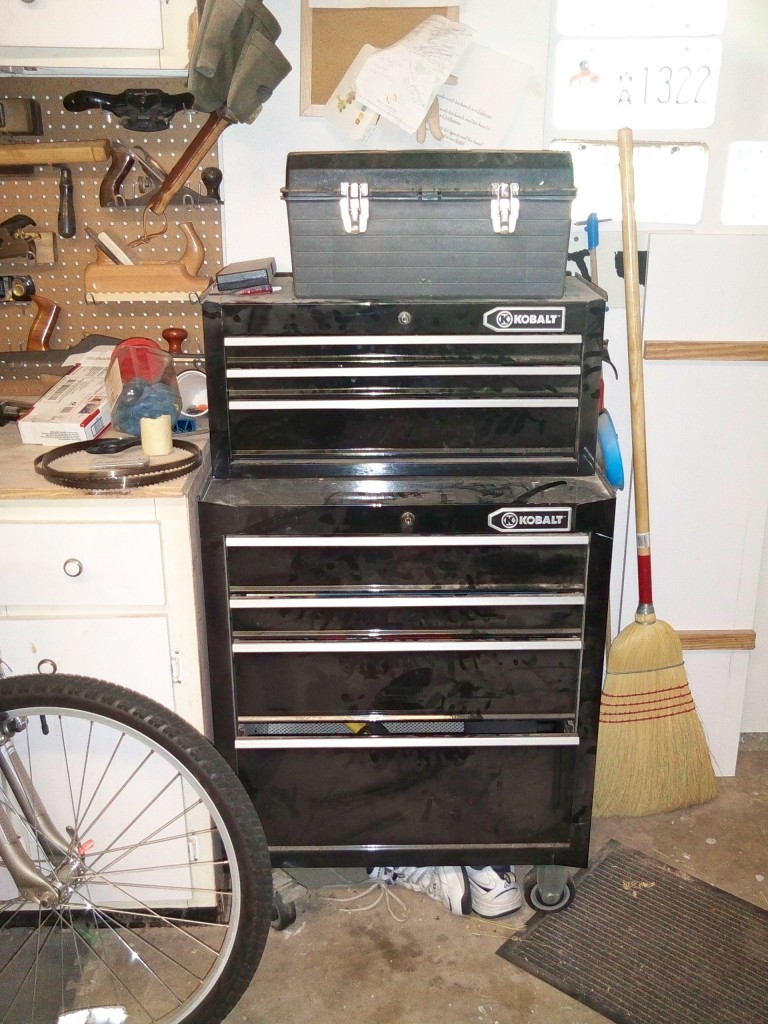
I know what you are thinking… and, yes, you are right.  A glossy black surface in a wood shop?  You betcha. My wife and I used to wipe it down every so often when the dust would accumulate, but now, we just let it get covered and clean it when the layer of sawdust is thick enough to support agriculture.
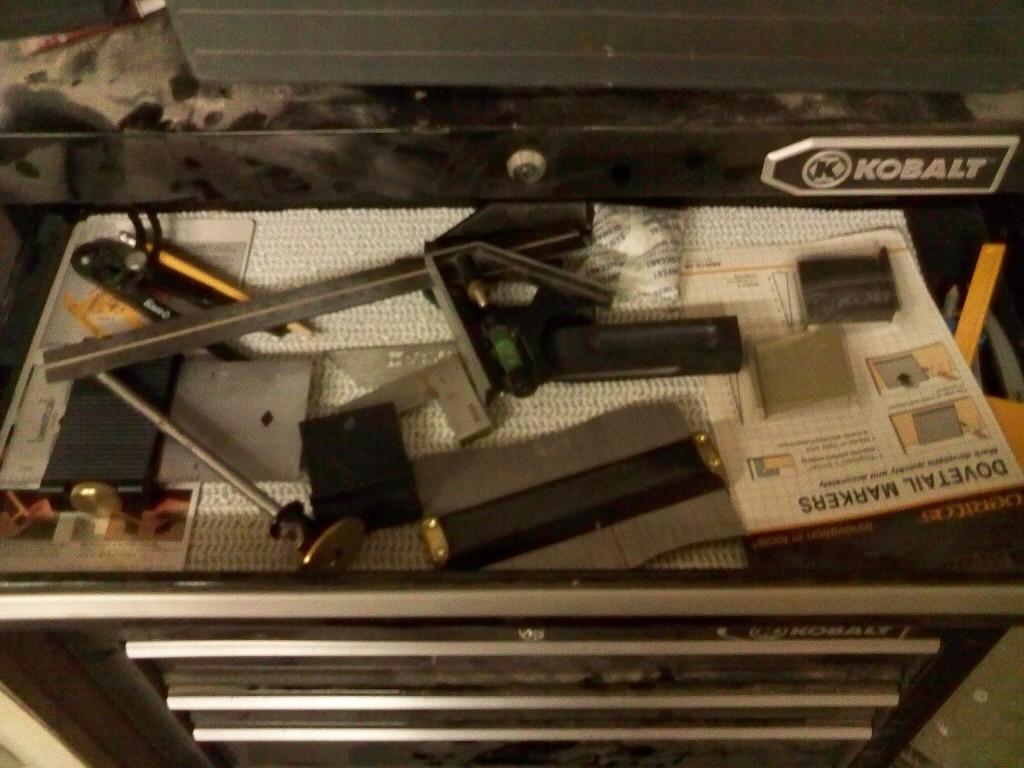
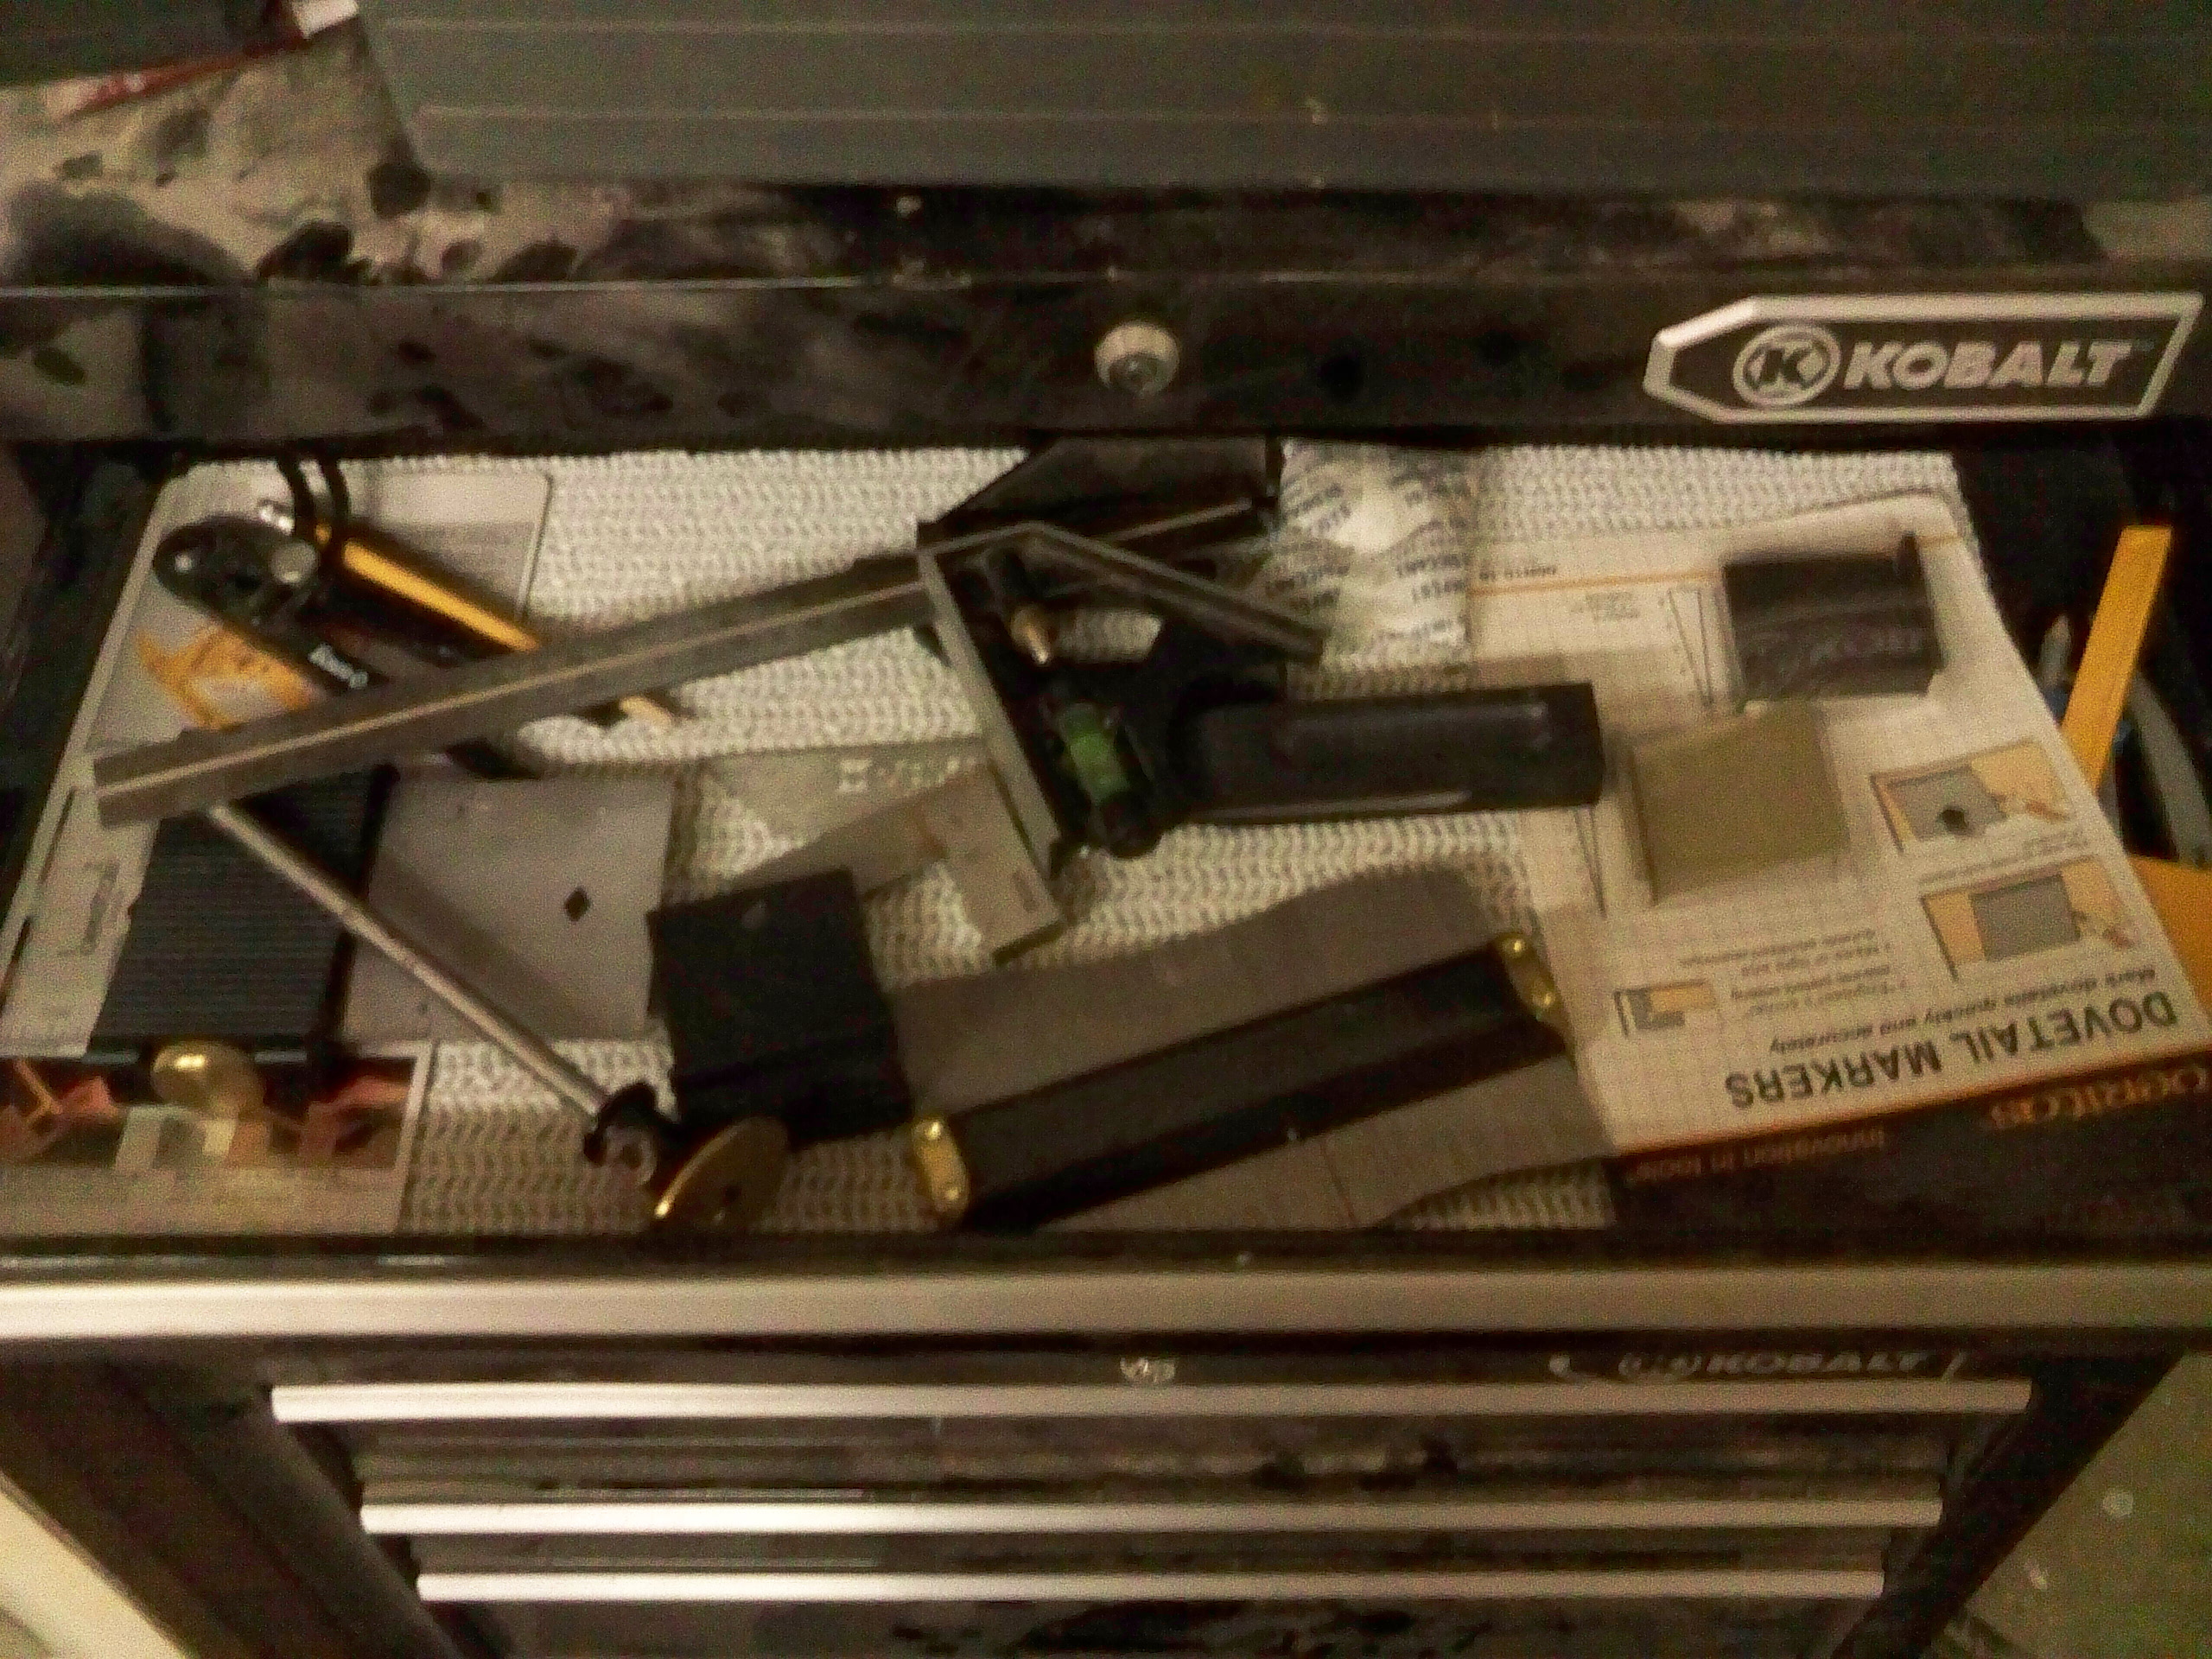
This rolling chest has been a godsend when it comes to holding on to easy to misplace items.  The top two drawers hold all of my fine measuring tools.  Squares, striking knives, calipers… the works.  It’s nice to know that when I have to measure something precisely, I just have to look into two drawers instead of through boxes of other items to find what I need.
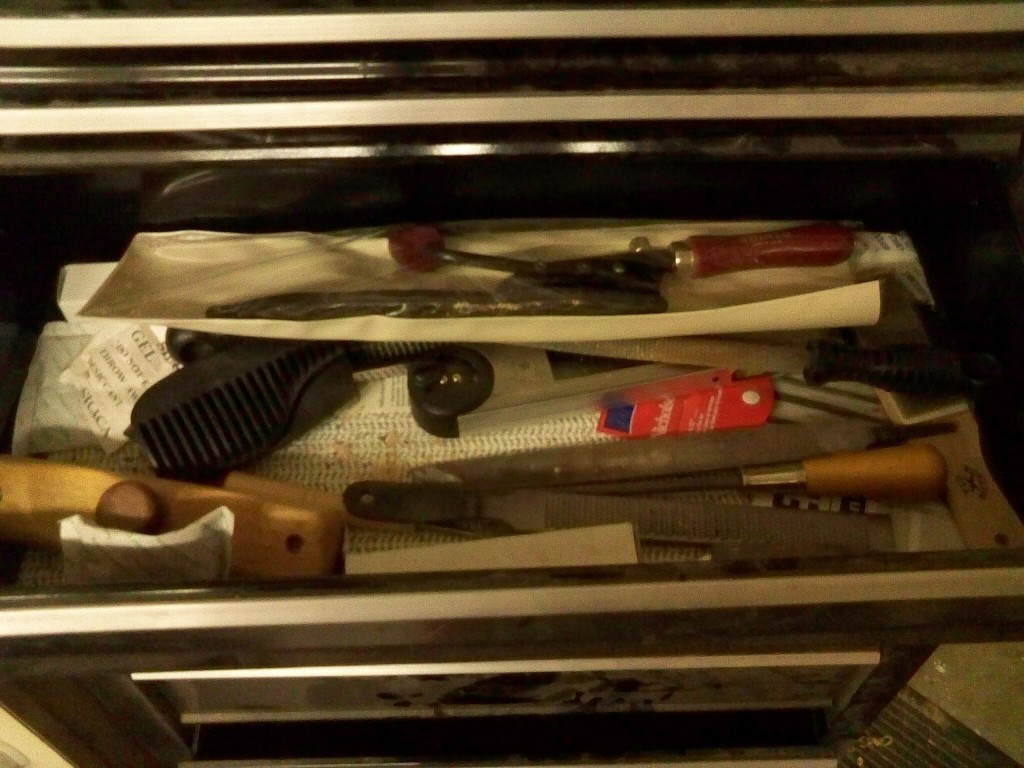
The bottom drawer of the mid section holds my scraping and shaping supplies.  Rasps, files, scrapers and all of the items that go along with them are stored here in one place.  So, when my scrapers no longer do what they are supposed to do, all of the items I need to sharpen are in one place.
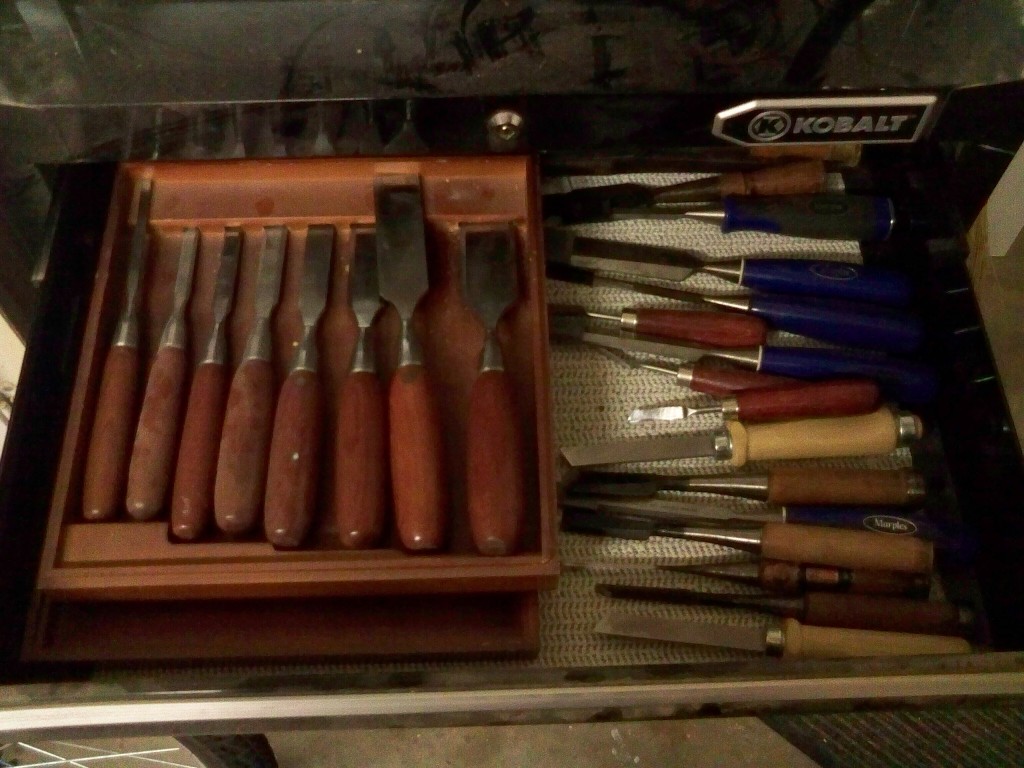
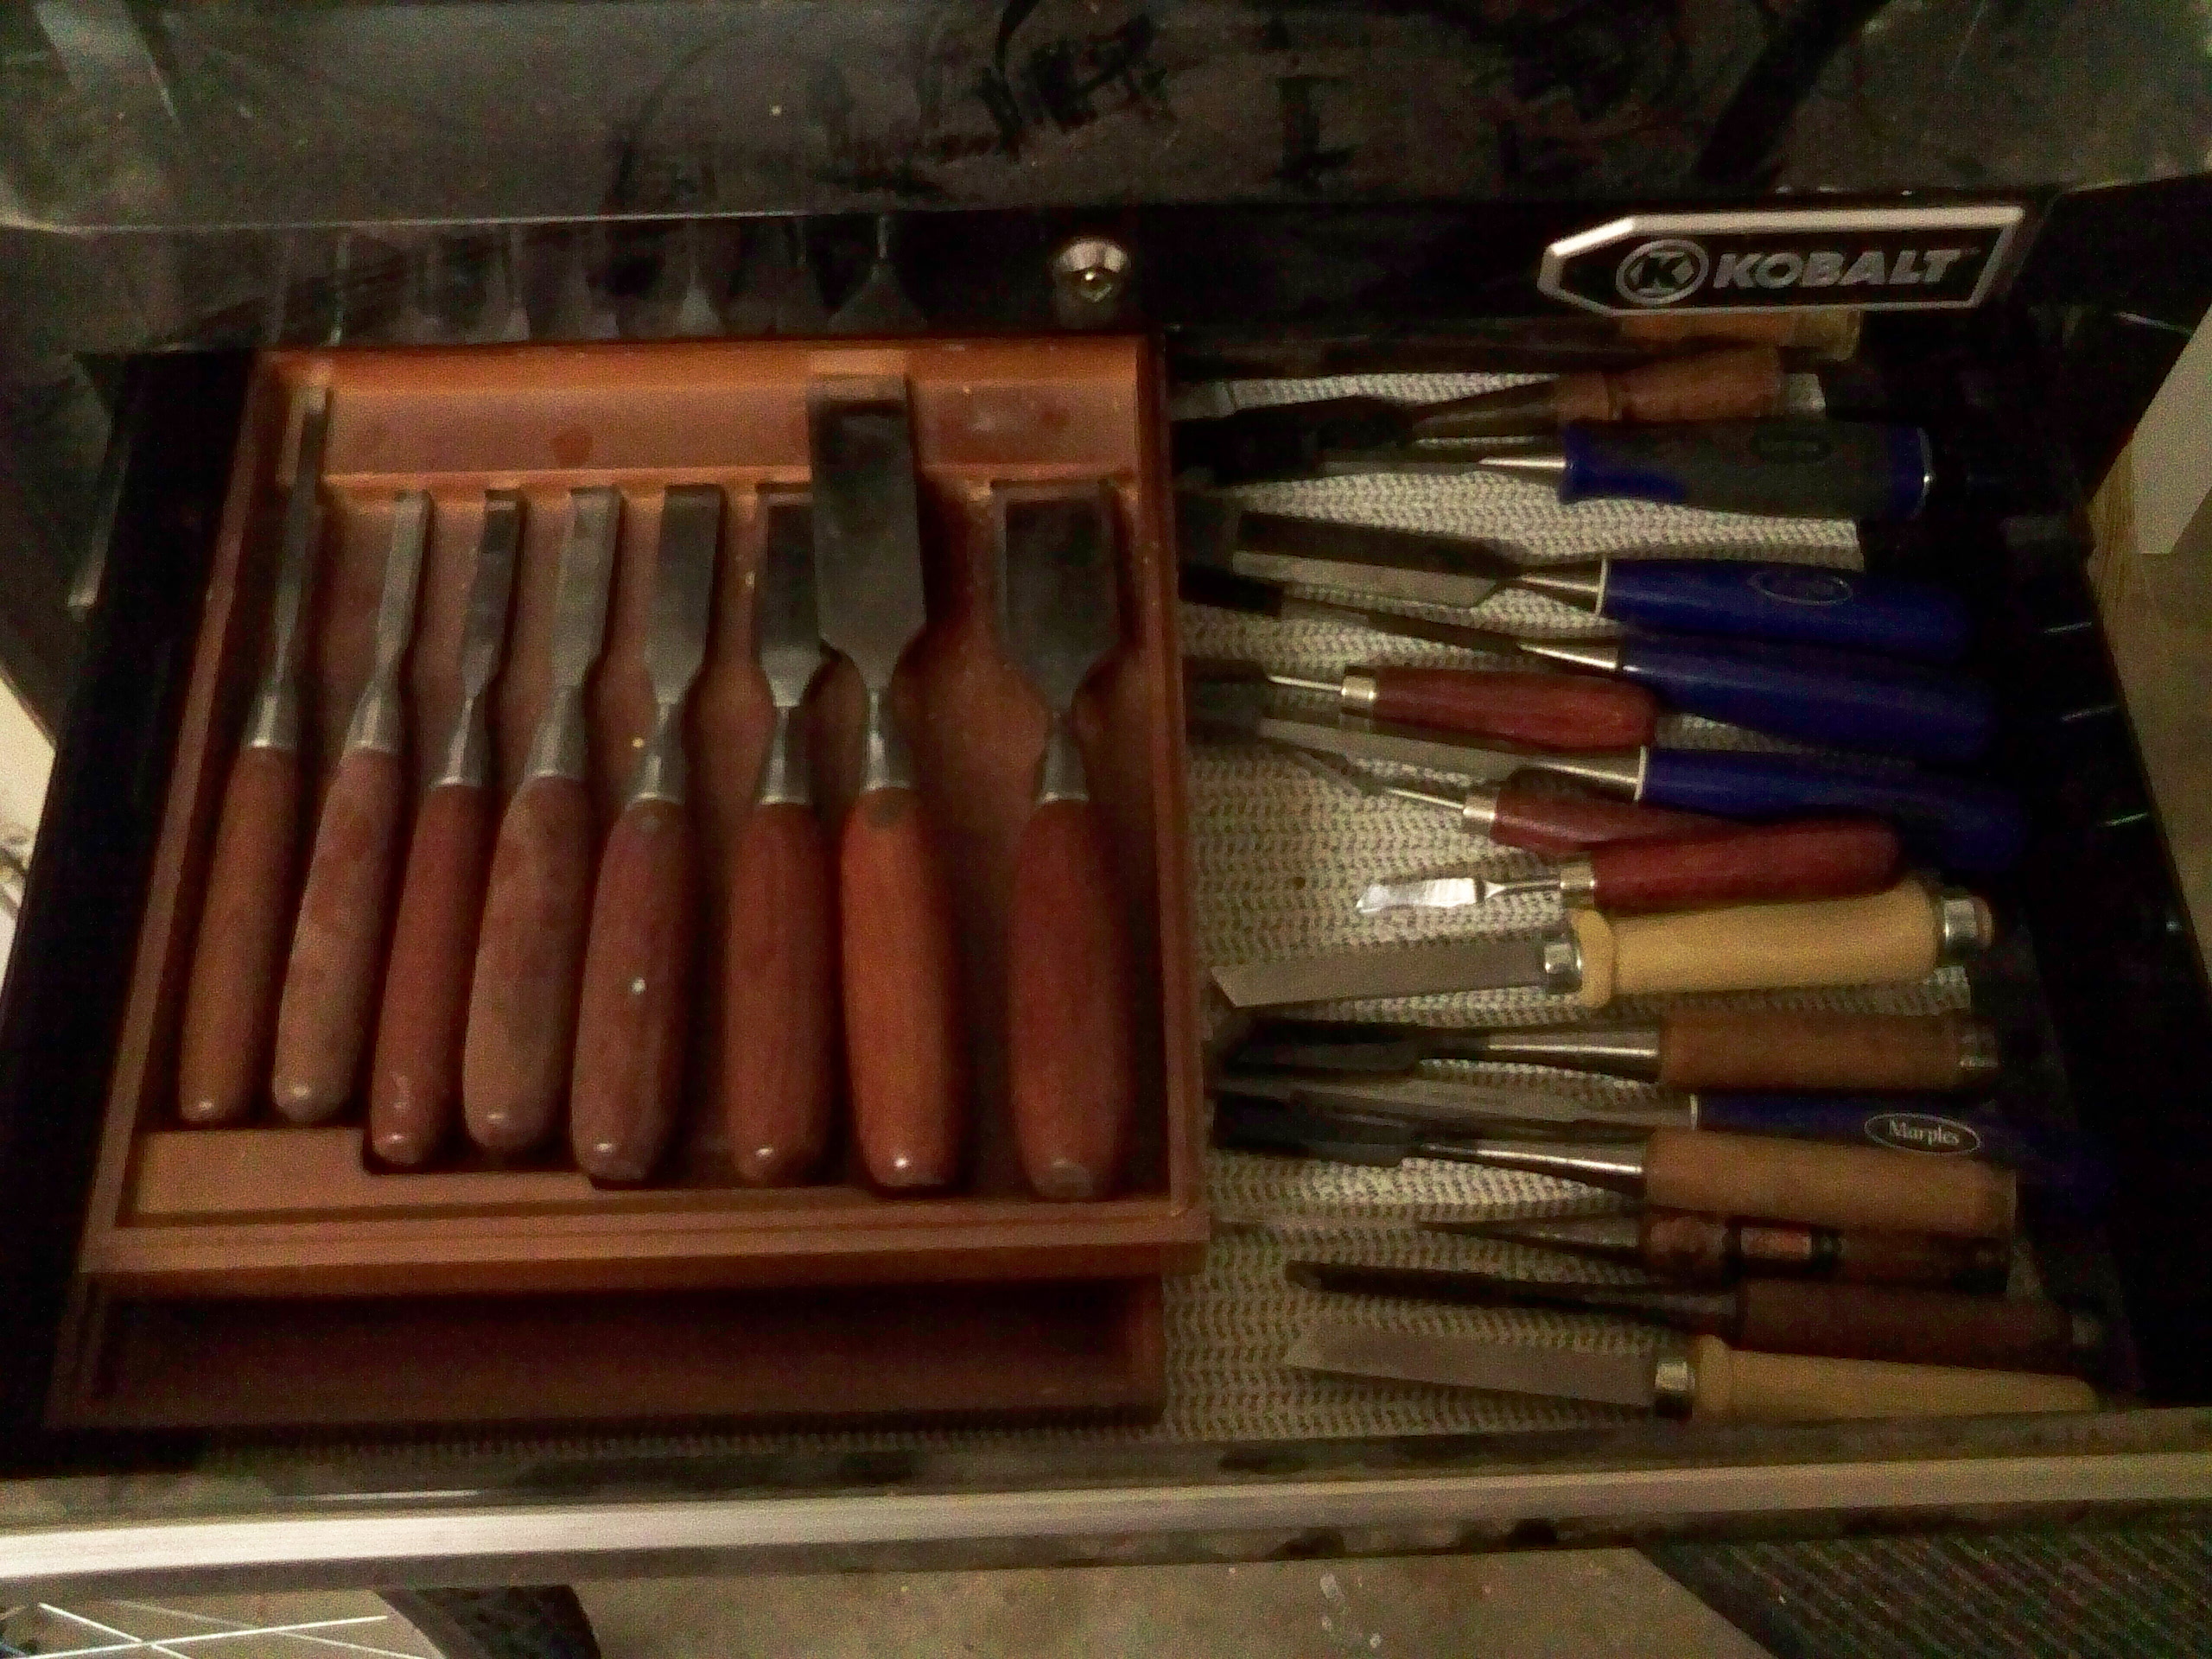
Below that in the top of the base cabinet are my chisels.  Yes, I have recently become a collector of chisels.  I have to admit it as part of my 12-step program.  From the Marples Blue Chips I started with to the set of WoodRiver beauties I traded a drill press mortiser for to the ultra sweet Japanese chisels used by my neighbor’s father, they’re in there.  Keeping them in the drawer protects the tips and makes a handy place to find them.
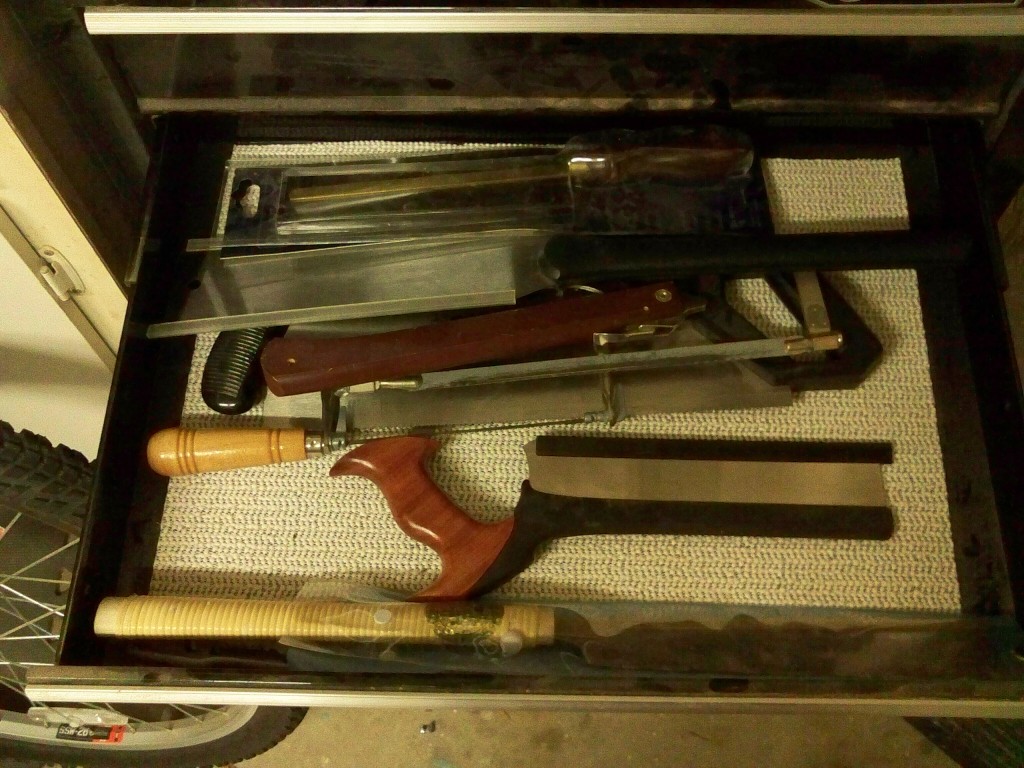
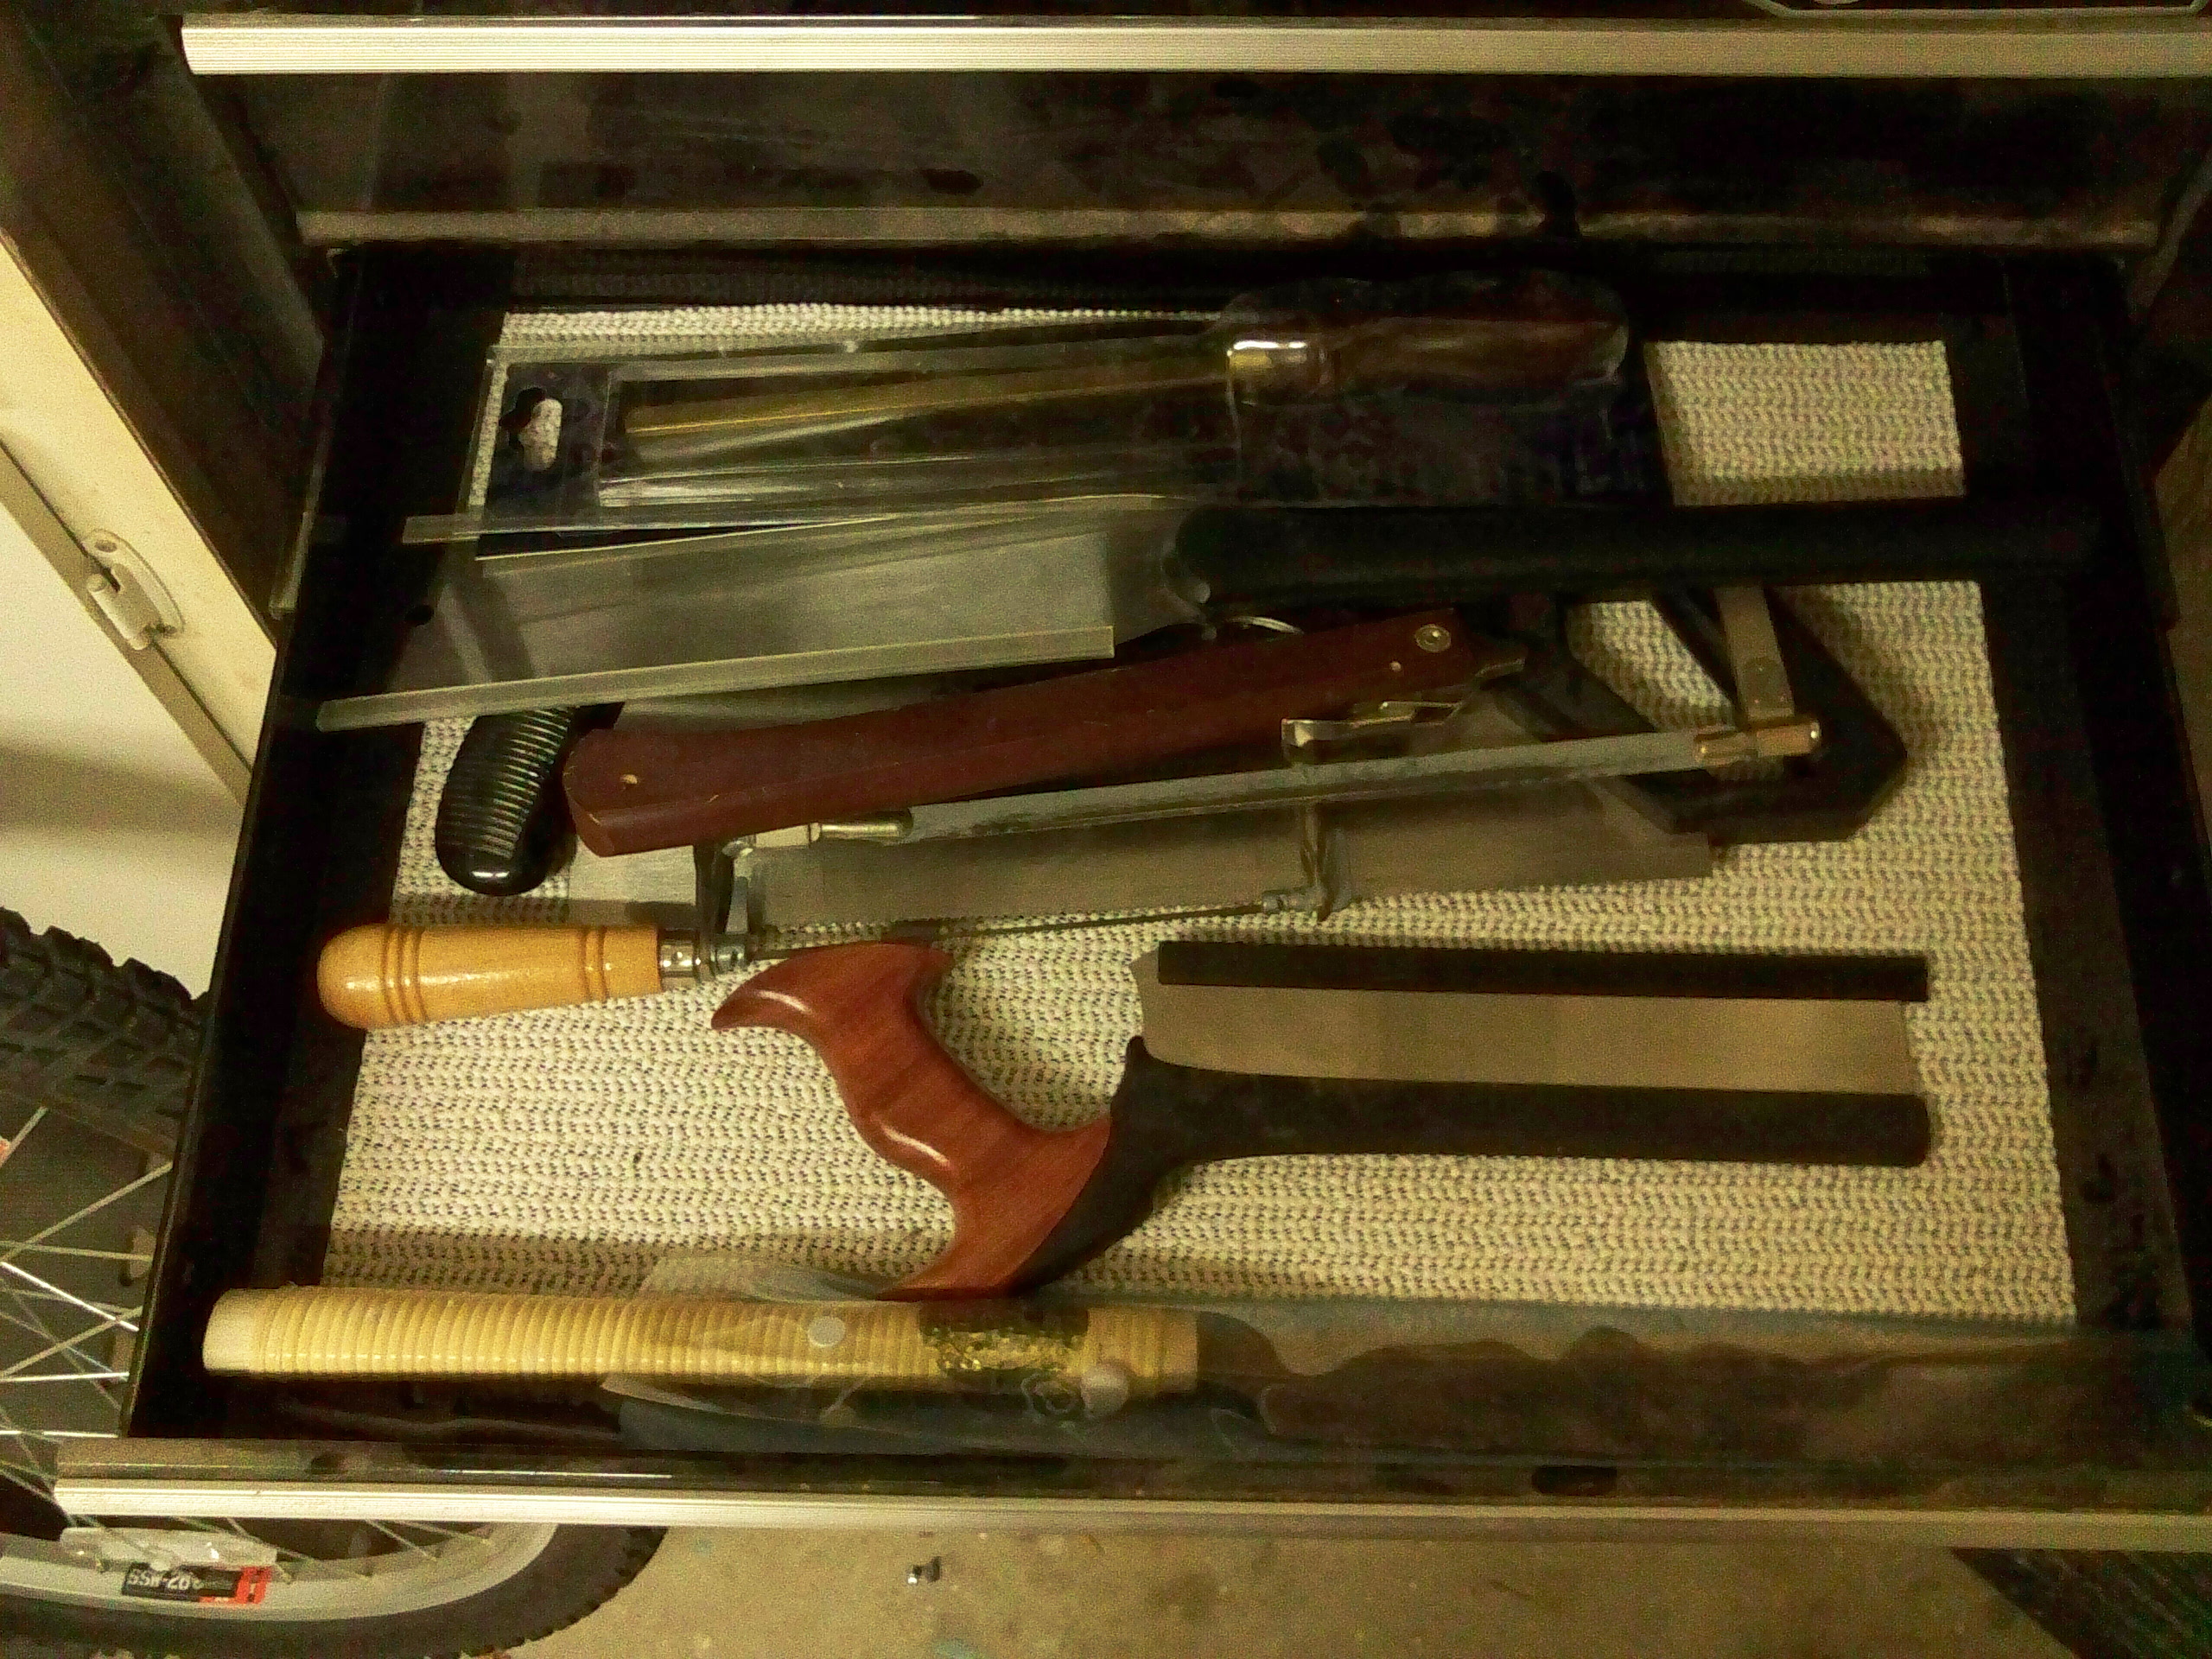
Below that is where I store my fine cutting saws.  One day, I’ll build a proper saw till to display these babies and keep them closer to the bench, but, for now, they are protected from bumps and broken teeth in this drawer.  It does take a little digging around here to find them when I do need them, but I’m good with that.  For now.
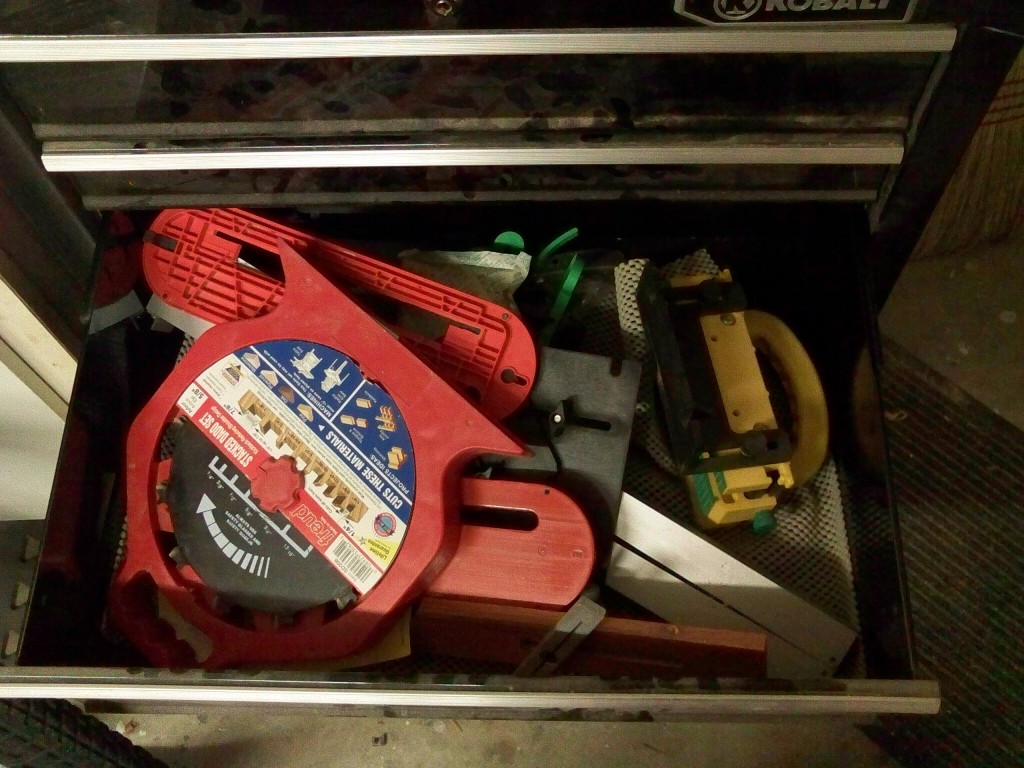
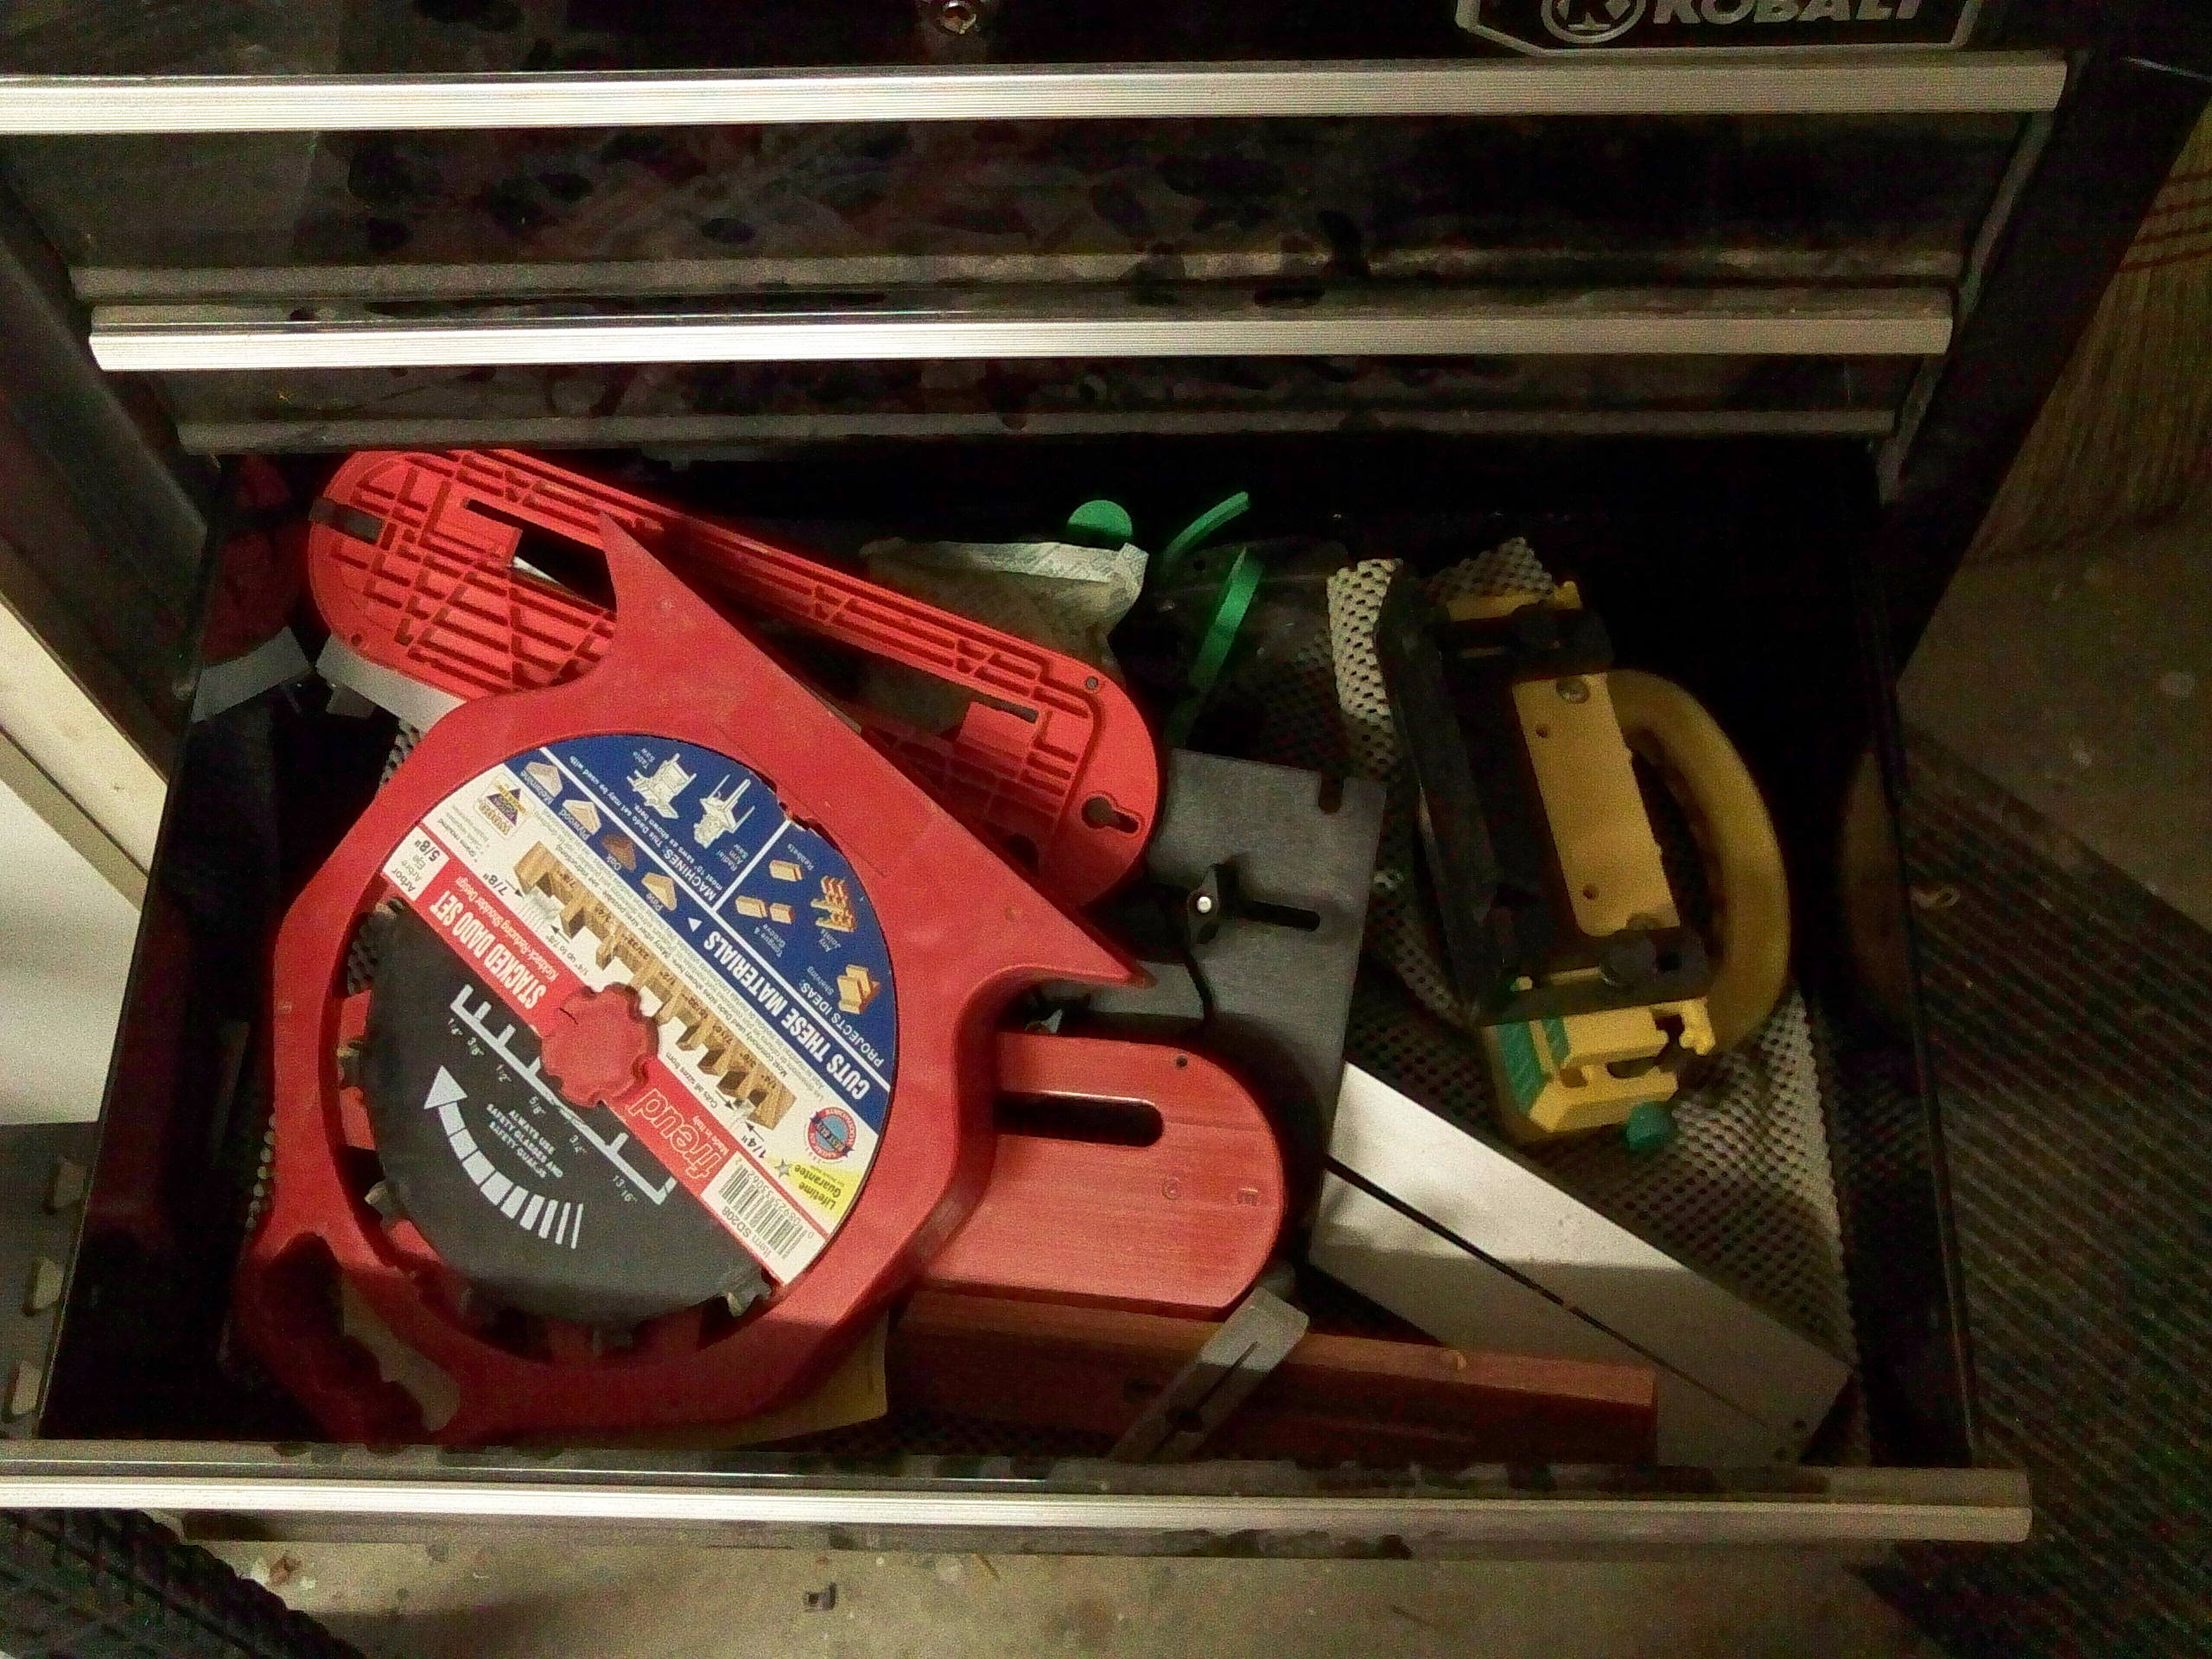
One level down, and we’re in the realm of the table saw.  No, this storage drawer is nowhere near the saw itself, but I have discovered that table saws require more accessories than my children did when they were very young and it took us half an hour to collect everything for a trip to the supermarket.  Dado blades, push sticks, featherboards … again, this is a great place to stash the stuff when I don’t need it.
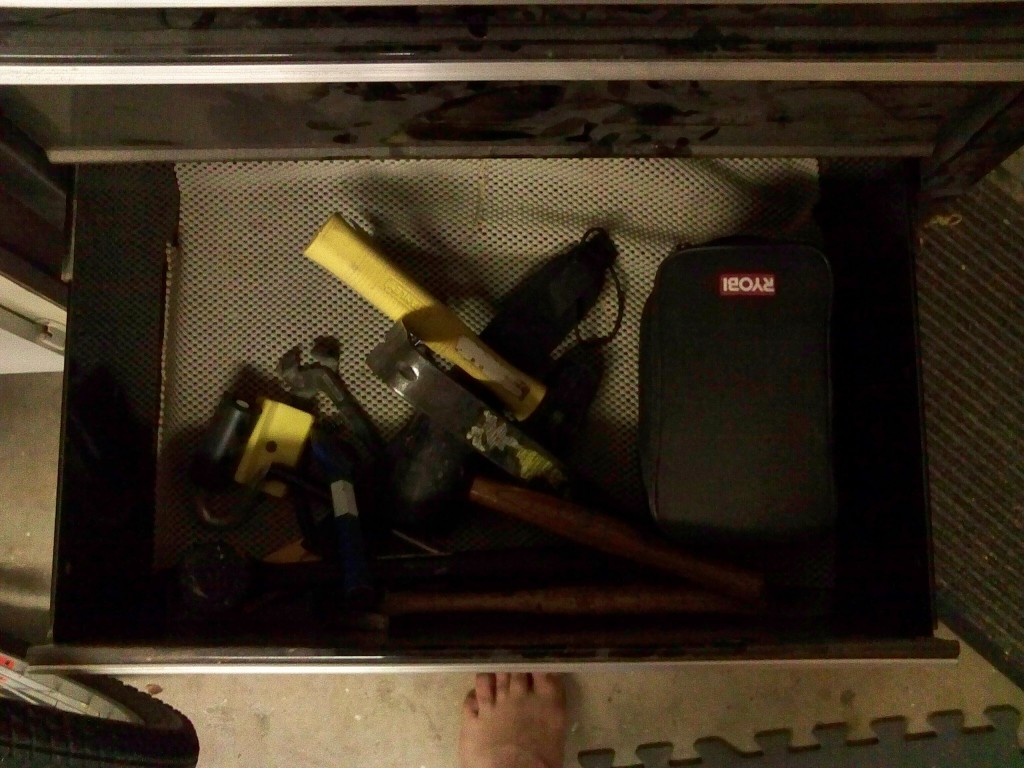
And, finally, there’s the – uhhh – miscellaneous drawer.  My hammers and mallets are there along with my laser level, cold chisel, pry bar… well, everything I chuck in there.  OK, it’s not so organized.  There, I can’t give up all of my bad habits.

Some folks have told me that by storing my tools in enclosed drawers is a waste of time.  That perhaps I would be better off keeping them out where I can see them and find them easier would be a better idea.

Uhhh, no.  This way, at least, I keep my searching down to a minimum – for me.  That allows me more time to do what I really enjoy… building.