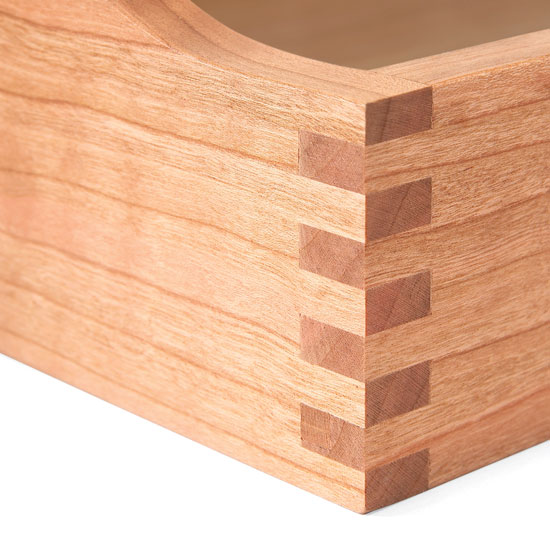
Dovetail joints are a classic way to join the corners of a project. They look timeless and offer great strength.
As mass production of wooden pieces came into play, manufacturers found it easy to lose the slope on the pins and tails and modify the joint into a box joint. This was used on utilitarian projects as well as finer furniture and still remains an option for woodworker today.
Just as with the dovetail, there are many ways to make a box joint. Table saws, routers and even hand tools can form the interlocking fingers and make a strong and attractive joint.
This week, let us know what is your preferred method of cutting box joints.
Up in Harvard, Massachusetts (no the university is up in Cambridge – this Harvard is west of Concord) is a woodworker with incredible vision. Scott Morton has one heck of an eye for modern design, traditional techniques and spreading the word about the craft.
Scott has been running his shop for more than ten years, and he has been cranking out some seriously sweet furniture featuring hand cut dovetails, graceful lines and a flair or the modern.. where it fits!
I also want to thank Scott for asking one of the best questions I have ever gotten about this blog – what do you want to do with it? Ya know, one day I want to build stuff half as good as Scott does, and be able to show that off on my site. Thanks for setting the bar so high, Scott!
Route I-4 is one of the shortest interstate highways in the country. It stretches roughly southwest to northeast from Tampa through Orlando all the way to Daytona.
And, all along its length you will find the lightning capital of North America. There is something with the combination of geography, proximity to the Gulf of Mexico and the Atlantic Ocean and the heating of the day that pops the daily fireworks during the summer.
So, it is only appropriate that after the recent visit to Tampa by the Woodworking Show that some sparks would fly. These ones were a little less deadly, but were caused by a blog post written by Paul Sellers, one of the instructors who was teaching at the show. A great presentation, by the way, about hand tools.
Paul observed, rightly, that there were not that many women or young woodworkers at the show. One of the reasons he gave for this was that the majority of the vendors on the floor were promoting their power tools. Paul’s theory is that power tools create a barrier for new woodwokers, and anyone who claims that a machine is a tool can never understand the art or craft of woodworking.
As you may have expected, once this post hit the Internet, it sparked a tremendous brouhaha. There were people who made claims that power tool woodworking is indeed a craft, and that Paul was full of bunk. Others countered, saying that OK, power tools are great for the dull truing and thicknessing of boards, but doing any of the joinery or forming by a machine eliminates the art of the craft. Lots of folks weighed in on this at Paul’s blog and on the social media outlets.
When I first read the post, I got angry. Yes, I blend power tools and hand tools in my shop. People tell me that my work is a true craft, and it annoys me to think that someone could perceive the quality of my work as lesser because some of my tools have tails. And, had I written my response post on Monday, it probably would have been full of righteous indignation and written self defense.
But, what on Earth would that have accomplished? Besides, after two years of doing Get Woodworking Week, I agree with part of what Paul wrote… that there aren’t enough women or younger woodworkers in the craft. Sure, I saw lots of people at the show who weren’t well-experienced gentlemen, but I guess they stood out because they weren’t…
I believe, though, that we have to all start following the old bit of wisdom of fixing the problem, not the blame if we are going to address this issue. Blaming power tool manufacturers for the lack of woodworking involvement may – or may not – be the case. But, how many woodworkers got into woodworking because they watched Norm Abram build projects with one of the most well equipped power tool shop the world has ever seen? And, how many of those woodworkers eventually moved into hand tool woodworking because of what they saw with Roy Underhill – or Paul Sellers? Ultimately, it doesn’t matter what the entry point… as long as the craft lives and thrives, that’s what we care about.
And, who am I to criticize Paul when he was in a booth running educational seminars while I simply wandered the floor, documenting what was going on? Paul was working it!
Was it built with hand tools? Power tools? Does it matter?
Whenever we draw our illusory boundaries such as hand tool vs. power tool, or we bristle when we believe that our methods are under attack, how are we fixing the problem of getting new woodworkers into the fold? I’m not sure we are accomplishing anything by pointing the finger at others and telling them they are the problem.
After all, it wasn’t a power tool manufacturer that asked for shop classes to be removed from schools. It wasn’t a hand tool woodworker who demanded that schools teach to standardized tests instead of giving the kids a chance to explore different learning options. And, it wasn’t a blended tool workshop that pushed the idea of the vocational arts being some sort of academic consolation prize reserved for students who don’t get it.
We need, instead, to respect that woodworking is a big tent, and there is plenty of room for differences in opinion and approaches. I think I would like to see less finger pointing and more pulling together to realize that it absolutely doesn’t matter how people get into woodworking… all of us have a responsibility to offer our woodworking opinions and philosophies without casting aspersions on the work methods of others.
If we can do that, I think we’ll see sparks of inspiration flying in lots of new shops around the world…
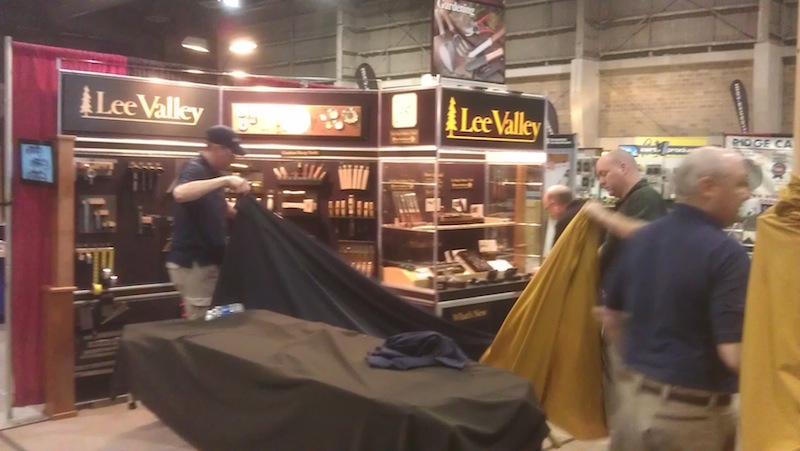
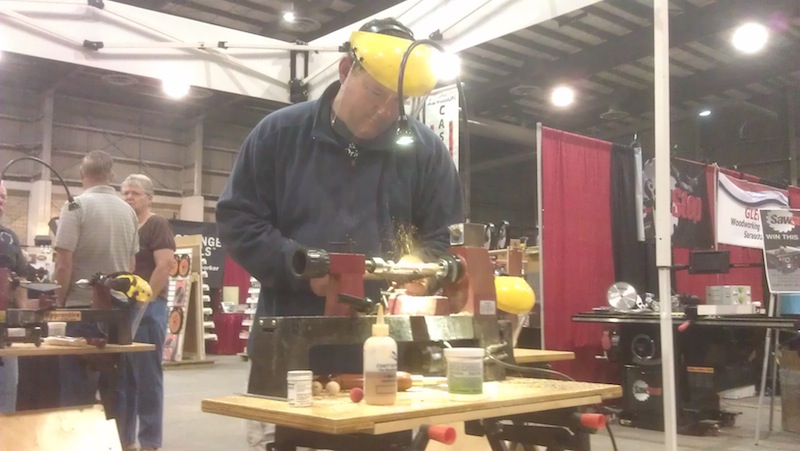
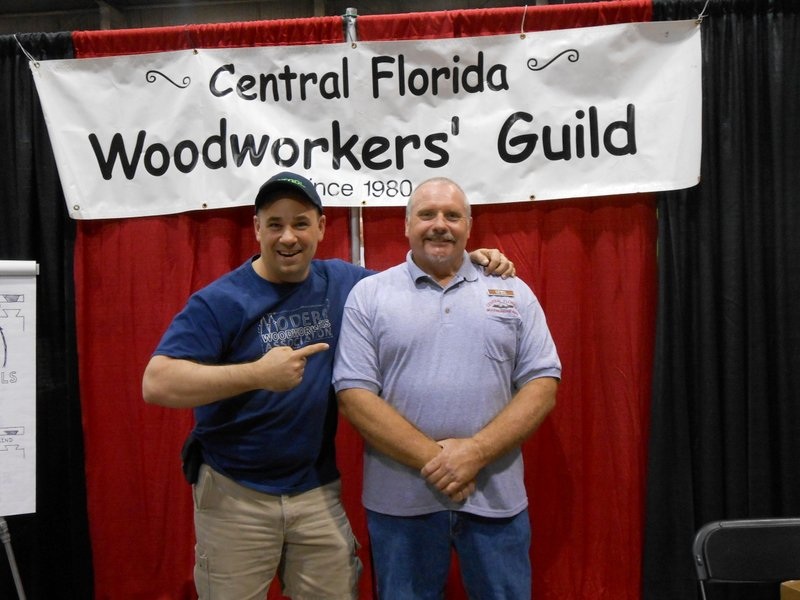
This past weekend, the Woodworking Show came to the Florida State Fairgrounds in Tampa. As if you had to ask… yes, I was there all day Saturday. I was on the floor before the show began, Tweeting like a madman. While I was there, I didn’t buy anything, but I did get a look at some great products and educational programs. Here’s just a little peek at some scenes from the floor…
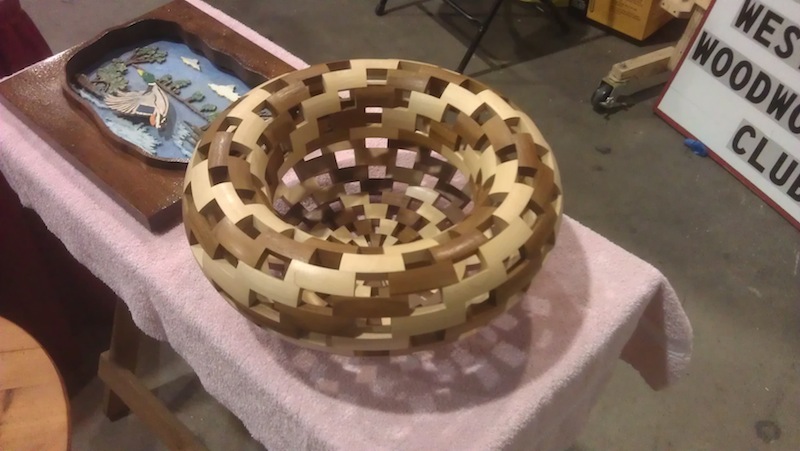
The incomparable Andy Chidwick goofing aroundOf course, when you can cut joints like this, you can goof all you wantJim Heavey wowing the crowdThose Central Florida woodwturners can do some SWEET work!Arrrr…..It’s not a party until the folks at Lee Valley take the covers offThat pen is TURNING out pretty good!The best part is meeting friends like Eric Rusch!
It never fails. You get through the final assembly of your project and it looks absolutely gorgeous. Then, it hits you like a ton of bricks – how are you supposed to get your hand holding a piece of sandpaper inside those tiny and intricate openings to get a good smooth surface, and how are you expected to get a smooth finish in those nooks and crannies?
The ideal situation would be to have finish the pieces before you got to this point in the project, but how were you expected to quell your excitement during the assembly process?
And, then there’s the concern of getting finish on areas you need to glue up… will the glue stick to that kind of finish, or will the project fall apart?
This week, I want to know your thoughts on prefinishing project pieces before you get to the point of final assembly. Is this a routine practice or not for you?
Did you ever run into someone in your life and know you were going to be good friends? That’s what happened to me at the 2009 Woodworking in America conference held in Valley Forge, Pennsylvania. That’s when I ran into this guy from Lawn Gisland, and we hit it off immediately.
His name, as you may already know, is Dyami Plotke. He’s a blogger nearly as prolific as me, and he’s one of the most generous folks I have ever met. Yes, he has stepped to the plate to help me with Get Woodworking Week, has split the cost of a room at Woodworking in America and he is one part of the triumvirate of podcasters at the Modern Woodworkers Association. Not only is he published online, he’s also a frequent contributor to Fine Homebuilding Magazine. The dude keeps busy.
But, the reason I will always be thankful to him is the time he rescued me from the Hurricane Sandy relief effort in New York City this past November for a meal with him and his family. Thanks, man.
I am a hobby woodworker who – after more than fourteen years of building – still has all of the fingers and eyes I was born with. That’s a pretty impressive track record, considering that I learned on my own, I made some stupid mistakes and I have done some tremendously risky things on my saw.
The one thing that scared the heck out of me was cutting a taper on the table saw. You would think that it would be an easy task… They make commercial tapering jigs that are relatively easy to set up, or you can bang out one in your shop with a few scraps of plywood and a butt hinge.
Sure, it was simple, until I had to use one. While trying to push this board over the table saw with this jig against my fence, I never felt so afraid. There was no real way to hold the work securely against the jig. It seemed either was going to have to risk a bad hand injury to get this cut to work well, or I was going to have to take my chances and try to let it ride.
So, I found other ways to cut tapers. On the bandsaw, with a quick touch up with a plane. That worked OK, but I was never able to duplicate the crisp, accurate cut I got straight off the table saw. So, I never used tapers.
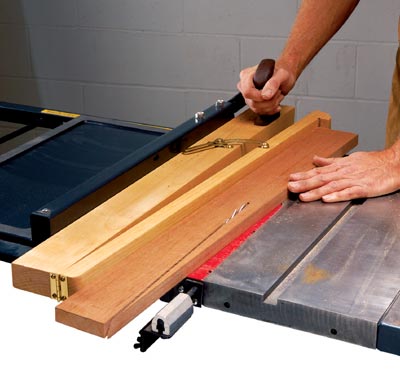
What a shame. Tapers on a project can lend some grace and elegance to a piece. I was recently bemoaning my in ability to cut tapers when I got an offer from Bruce Wang at Micro Jigto try out a new tapering jig. I love the folks at Micro Jig. They make products like the GRR-Ripper push block that gives you positive and safe control over your workpiece. When the new product – the Microdial Taper jig arrived, I decided to put it to the test.
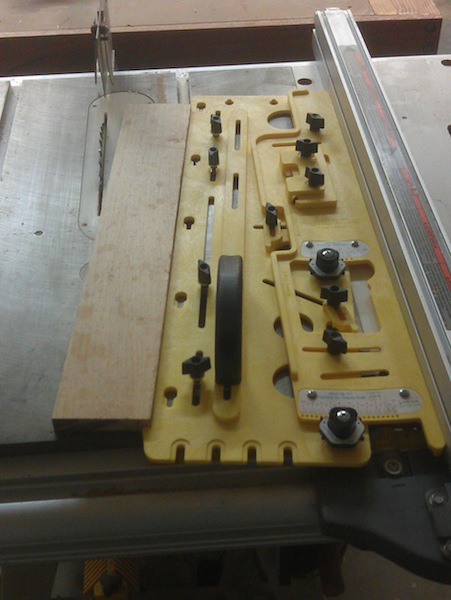
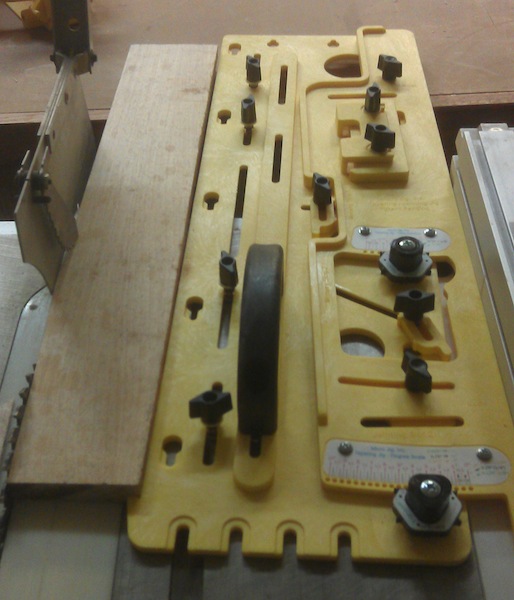
It’s a robust looking jig in the company’s famous yellow. It comes complete with a fixed leg which runs against the rip fence, and a swinging leg with a hook to control the workpiece, mounting points for a GRR-ripper push block to help hold the work down and a handle to keep positive control over the workpiece.
The two adjustment dials allow users to dial in some specific taper angles, either by identifying the angle or the rise and run of the taper. These are set by an interesting stop that allows the jig to be locked at a specific setting. Or, if you are trying to match an existing taper, you can ignore the settings and do it freehand. A nice option.
To use the jig, you set it at the specific angle, and lock it down both at the pivot point and on a slot that allows the legs to follow an arc. Once that is done, it’s a simple matter to set the jig against your rip fence and then set the board into the jig. Because my test jig allowed for a lot of space on the board, I used my GRR-Ripper block freehand on the board as a hold down.
I started the saw and pushed the board through. Boy, was that a lot more comfortable. There was a lot more jig between my hand and the blade, and the integral handle made pushing the jig a real breeze. The results were impressive.
The instruction manual gives directions on how to cut one, two, four and even eight sided tapers, allowing woodworkers the flexibility to cut many different designs. It is also a multi-tasker, even providing the ability to use it to joint boards for those of us who are jointer poor..
This jig will make my taper cutting safer, helping me to keep all ten fingers attached permanently. The fact that it helps cut those tapers more accurately is just the icing on the cake. Look for the Mircodial tapering jig in stores soon.