Check this out.
I am a hobby woodworker who – after more than fourteen years of building – still has all of the fingers and eyes I was born with. That’s a pretty impressive track record, considering that I learned on my own, I made some stupid mistakes and I have done some tremendously risky things on my saw.
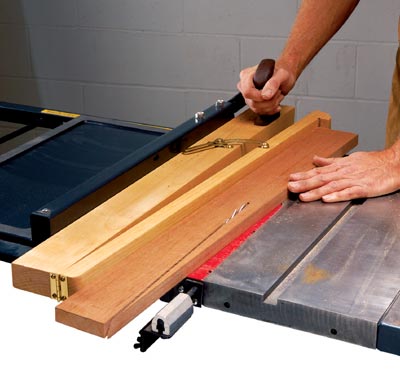
The one thing that scared the heck out of me was cutting a taper on the table saw. You would think that it would be an easy task… They make commercial tapering jigs that are relatively easy to set up, or you can bang out one in your shop with a few scraps of plywood and a butt hinge.
Sure, it was simple, until I had to use one. While trying to push this board over the table saw with this jig against my fence, I never felt so afraid. There was no real way to hold the work securely against the jig. It seemed either was going to have to risk a bad hand injury to get this cut to work well, or I was going to have to take my chances and try to let it ride.
So, I found other ways to cut tapers. On the bandsaw, with a quick touch up with a plane. That worked OK, but I was never able to duplicate the crisp, accurate cut I got straight off the table saw. So, I never used tapers.
What a shame. Tapers on a project can lend some grace and elegance to a piece. I was recently bemoaning my in ability to cut tapers when I got an offer from Bruce Wang at Micro Jig to try out a new tapering jig. I love the folks at Micro Jig. They make products like the GRR-Ripper push block that gives you positive and safe control over your workpiece. When the new product – the Microdial Taper jig arrived, I decided to put it to the test.
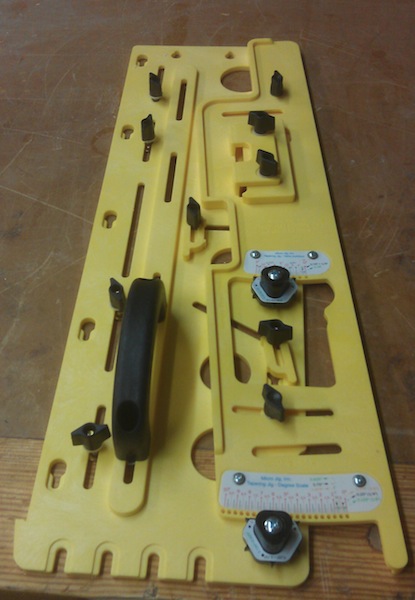
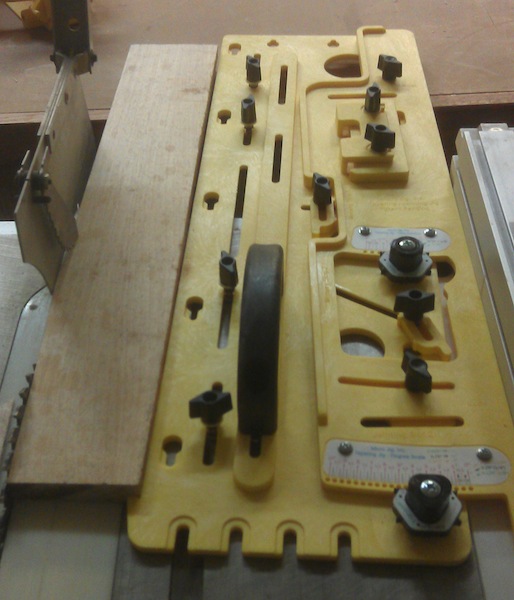
It’s a robust looking jig in the company’s famous yellow. It comes complete with a fixed leg which runs against the rip fence, and a swinging leg with a hook to control the workpiece, mounting points for a GRR-ripper push block to help hold the work down and a handle to keep positive control over the workpiece.
The two adjustment dials allow users to dial in some specific taper angles, either by identifying the angle or the rise and run of the taper. These are set by an interesting stop that allows the jig to be locked at a specific setting. Or, if you are trying to match an existing taper, you can ignore the settings and do it freehand. A nice option.
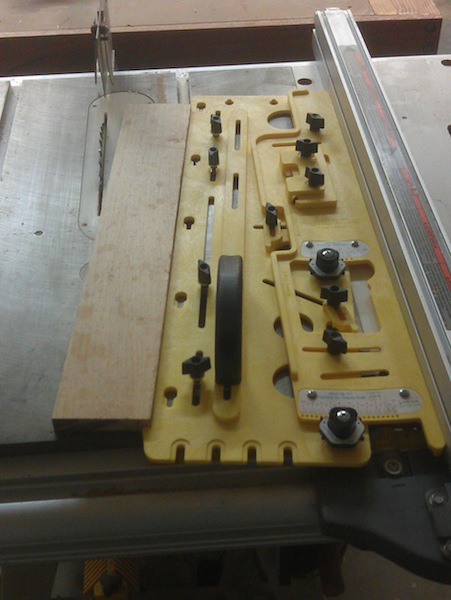
To use the jig, you set it at the specific angle, and lock it down both at the pivot point and on a slot that allows the legs to follow an arc. Once that is done, it’s a simple matter to set the jig against your rip fence and then set the board into the jig. Because my test jig allowed for a lot of space on the board, I used my GRR-Ripper block freehand on the board as a hold down.
I started the saw and pushed the board through. Boy, was that a lot more comfortable. There was a lot more jig between my hand and the blade, and the integral handle made pushing the jig a real breeze. The results were impressive.
The instruction manual gives directions on how to cut one, two, four and even eight sided tapers, allowing woodworkers the flexibility to cut many different designs. It is also a multi-tasker, even providing the ability to use it to joint boards for those of us who are jointer poor..
This jig will make my taper cutting safer, helping me to keep all ten fingers attached permanently. The fact that it helps cut those tapers more accurately is just the icing on the cake. Look for the Mircodial tapering jig in stores soon.

This is a nice jig. I want one that holds the wood in place while you cut the taper like the Rocker Taper jig or Charles Neil plan for a Taper jig. I feel much safer with some kind of clamp holding the wood while I cut the taper.
That looks like a pretty cool unit.
The only problem I see so far is the $140.00 price tag.
That Grr-Ripper is mighty nice too, with the same exception.
They make really nice stuff though.
I built the tapering jig by Steve Latta that was in the Nov/Dec 2012 Fine Woodworking. It is the safest and most accurate tapering jig that I have ever used, and probably the best one I have ever seen. I had the wood that I needed. I bought two knobs and a self-adjusting Bessey clamp. So the whole project cost less than $30.
I have used the jig for legs on a dining table so far. It made cutting the tapers a piece of cake. I did find that if the legs are too thick, my 10″ saw will not cut completely through. A band saw or hand saw followed by a hand plane fixes that.
Monte, I created the video manual for the MJ MicroDial Tapering Jig as well as the demo video on Rockler’s website for their taper jig. While you can certainly use the jig with larger parts holding them with your hand, it is specifically configured to use one or two GRR-Rippers to securely hold the part as you make your taper cuts. This actually increases the height capacity since you do not loose the thickness of the sled in the overall blade height.