Category Archives: Safety

Monkey Business: Dumb de Dumb Dumb

Iggy the Trained Shop Monkey here, and, boy, do I have a howler for you today.

But, first, I wanted to share with you a quick definition that I found online:

i·ro·ny

/ˈaɪrəni, ˈaɪər-/ [ahy-ruh-nee, ahy-er-]

noun,plural-nies.

1.the use of words to convey a meaning that is the opposite of its literal meaning: the irony of her reply, “How nice!” when I said I had to work all weekend.

2.Literature.

a.a technique of indicating, as through character or plot development, an intention or attitude opposite to that which is actually or ostensibly stated.

b.(esp. in contemporary writing) a manner of organizing a work so as to give full expression to contradictory or complementary impulses, attitudes, etc., esp. as a means of indicating detachment from a subject, theme, or emotion.

3.Socratic irony.

4.dramatic irony.

5.an outcome of events contrary to what was, or might have been, expected.

6.the incongruity of this.

7.an objectively sardonic style of speech or writing.

8.an objectively or humorously sardonic utterance, disposition, quality, etc.

Now that we have that out of the way, I want to share with you something that Tom, the supposedly more ‘advanced’ member of this pair, did over the weekend.

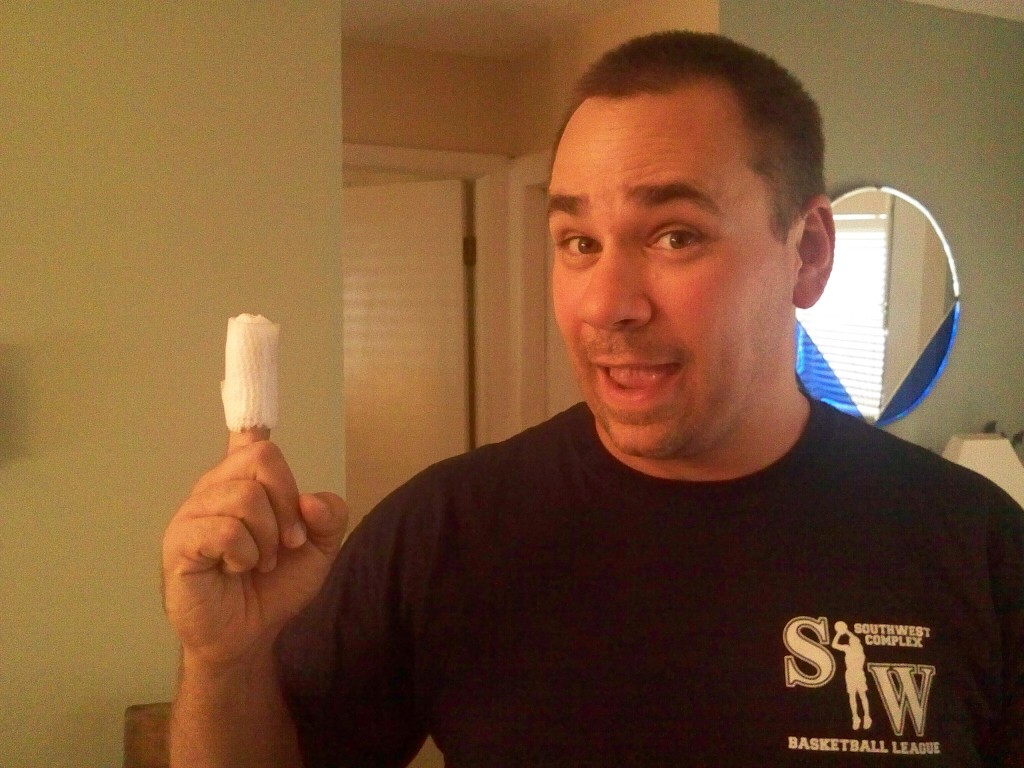
About 30 hours after posting his link of the week this past Friday – you remember, the one about what to put in your first aid kit – he was out playing around in the yard with his brand new spiffy hedge cutters.  This  was taking place after a busy morning of using a pole pruner (chainsaw on a stick, basically) to trim back some trees.  With that long and arduous task behind him and the pole pruner returned to the rental center, he moved  on to other  yard work.  While shearing back the suriname cherry hedge in front of the house with his new hedge trimmer, he proceeded to use his right hand to sweep some cuttings out of the way.

While his left finger was on the trigger.
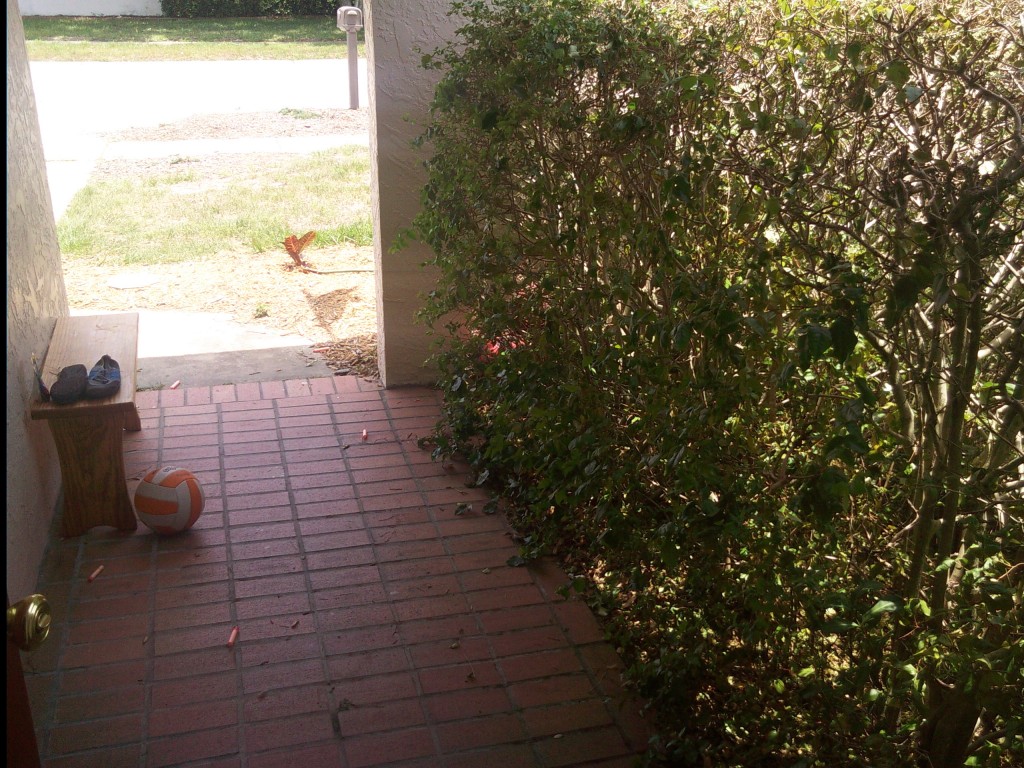
The quote SCENE OF THE CRIME unquote...
An 8" x 10" glossy color photograph of the quote SCENE OF THE CRIME unquote...

Let’s see if you can fill in the blanks…

Since I was watching from the shop, I saw it all.  He dropped the trimmer and began the ‘Ouch this hurts’ dance universally performed by people across the globe when bad stuff happens.  With blood flowing freely from his finger, he pounded on the door for his poor, long suffering wife while I raced outside with the first aid kit from the shop.

No, we didn’t have to go looking in the shrubs for his missing digit.  It was – fortunately – still firmly attached to the rest of his hand. He said he had feeling in his fingertip and could still bend the joint.  Good boy.  So, with direct pressure on the injury and his two kids safely at the neighbor’s place, we took off for the immediate care clinic.

The doctor was a nice fellow and took some pity on poor Tom with a quick lidocane injection to dull the pain.  If I was the doc, I would have given him a stick to chew on, but that’s just me…  Six stitches and half a mile of gauze later, and the boy was on his way home.

All this at the end of Woodworker’s Safety Week, to boot.

How ironic, don’t you think?

This got me thinking.  After questioning the lovable galoot for a few minutes, I found a disturbing pattern developing.  All morning, he was hyper-vigilant about safety while using the pole saw.  A spinning chainsaw above your head dropping huge laurel oak limbs to the ground has this way of waking you up and paying attention.

But, later on in the day, this happened.  He said since this tool was a light-duty $40 model trimming a bush, he let his guard down.  If the trimmer had a little more oomph, it may have taken the whole finger with it.  He thought the worst he could get was a nip.

And, that’s exactly what he got.  A six-stitch nip.

Now, he’s been put on light duty for the rest of the week.  No woodworking.

I just hope that the big guy uses this time to think things over before he does any more work.  Even the tools that can’t hurt ‘too badly’ can really do a number on you.

Link of the week

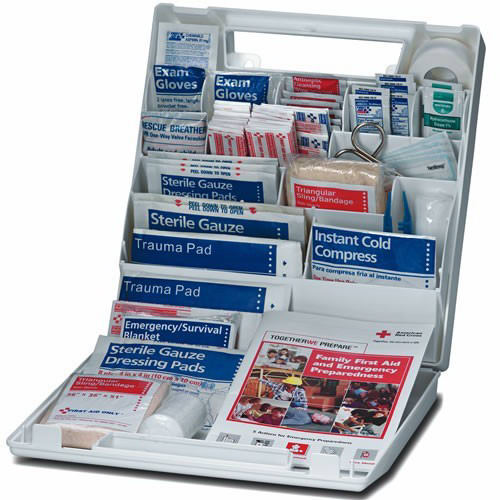
What should my woodworking first aid kit contain?

It’s a piece of equipment we need to keep in our shops, but we hope we never have the opportunity to use it.  A well-stocked first aid kit is a necessity, and most woodworkers will dutifully go to the largest big box store and pick something up off the shelf.

But, do these pre-packed kits have everything you might need?

Accidents in the shop can be very severe, requiring more than a few band aids and an instant cold compress.  How about a bottle of Betadine wash, so you can sterilize deep cuts?  A bottle of sterilized water should you get something in your eye?  And, for the very worst case scenario, a one gallon zip top bag should you have to bring a severed body part with you to the hospital.

This comprehensive list goes into some incredible detail, but, hey, when you need it, you need it!

Shoulder the load

I guess I knew I was in trouble when I found myself on the emergency room gurney with the EKG sensors stuck to my chest.
After a hard day of planing in the shop a few years ago, my left shoulder was feeling a little uncomfortable. Through the night it went from uncomfortable to painful to downright unbearable.  My wife suggested that perhaps we pay a visit to the hospital.  So, she helped me pack my shoulder in ice and off we went.

When I got there, the triage nurse noted my situation – 38 year old male with a family history of heart disease presenting with pain in his left shoulder… well, they had to rule out a heart attack.  And, that’s what they did and later discovered that my great pain was due to bursitis caused by repetitive stress from the day of woodworking.  I was given pain killers, a shot  of cortisone and a prescription to see a physical therapist.

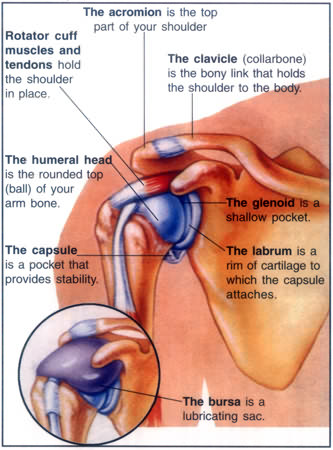
That’s where I learned a lot about one of the most vulnerable joints in the body.  The shoulder is an amazing structure.  Unlike a hip – a true ball in socket joint – the shoulder is kind of like a ball on a golf tee joint.  The cup of the shoulder is very shallow and relies on a very complex system of muscles, tendons and ligaments to hold everything together.  All of these parts are cushioned by little structures called bursa sacs.  This arrangement gives you tremendous flexibility, but makes the shoulder prone to all kinds of problems not seen in other joints.

To help build strength and flexibility in my shoulders, the physical therapist gave me a few exercises that have helped me avoid another visit to the hospital.

Now, I’m no doctor.  I don’t play one on TV. So, before you even consider doing anything, please consult with a doctor just to make sure you don’t do something terribly wrong and end up coming after me with an attorney.  Seriously…

However, I do own a Richard Simmons-esque sweatband, so I can look totally boss while showing my awesome skills.

To begin, you have to stretch the muscles, ligaments and tendons in the shoulder before you can do anything.  I do this quick exercise every time I head into the shop for a session.

First, you have to find something to hold on to that won’t move on you.  For me, I grab the handle on my bench’s vise.  The first thing I do is gently lean away from the bench until I feel a slight stretch in my shoulder and hold this for a count of ten.  The next thing I do is turn my body away from the bench while holding the handle counting to ten.  This stretches the front part of the joint.  I then turn my body toward the bench, which moves the stretch to the back part of the joint and hold this for a count of ten. I do all three moves a few times on each shoulder, which really feels good and gets me loose for a day in the shop.

The next two exercises help strengthen my shoulders and are very easy to do.

The first one involves a common bungee cord.  I hold it in my hands with my thumbs pointed out and my arms extended in front of me.  Keep them about shoulder’s width.  Then, I slowly stretch the band by moving both arms out, making the cord taut.  Hold that for ten seconds, then bring your arms back to the starting position.  I do this five times, but have since moved up to ten.

The next exercise involves a hand plane.  If you are doing this for the first time, you might want to start with a No. 4.  You can move up to a No. 7 jointer when you get a little more advanced.  Hold the plane at your side by the tote, then extend your arm until it is parallel to the floor.  Hold it there for ten seconds and then let the plane come back down to your side.  Again, do this five times for each arm to start, but move up from there.

No, I’m not trying to get you to build a beach body, but by doing some simple exercises, you may not have to make that trip I had to a few years ago to the emergency room.

Extinguishing characteristics…

There are three things most woodworkers never want to see happen in their shop.

One would be an accident where someone got seriously hurt.

Another would be a theft of tools.

And, probably the worst of all would be a shop fire. In most shops, you will find plenty of combustibles.  Wood, sawdust, planer shavings, finishes… the works.  Add to that the fact that many shops house a serious investment in tools and are also attached to the living area of a home, and, well, let’s just say that’s something no one wants to deal with.

To help prevent such a catastrophe, many woodworkers consider investing in a fire extinguisher… something to keep handy to extinguish a fire should the worst happen.  But, which ones are best on which fires?  When should you use one and when should you run to call for the fire department?  Where’s the best place to mount one?

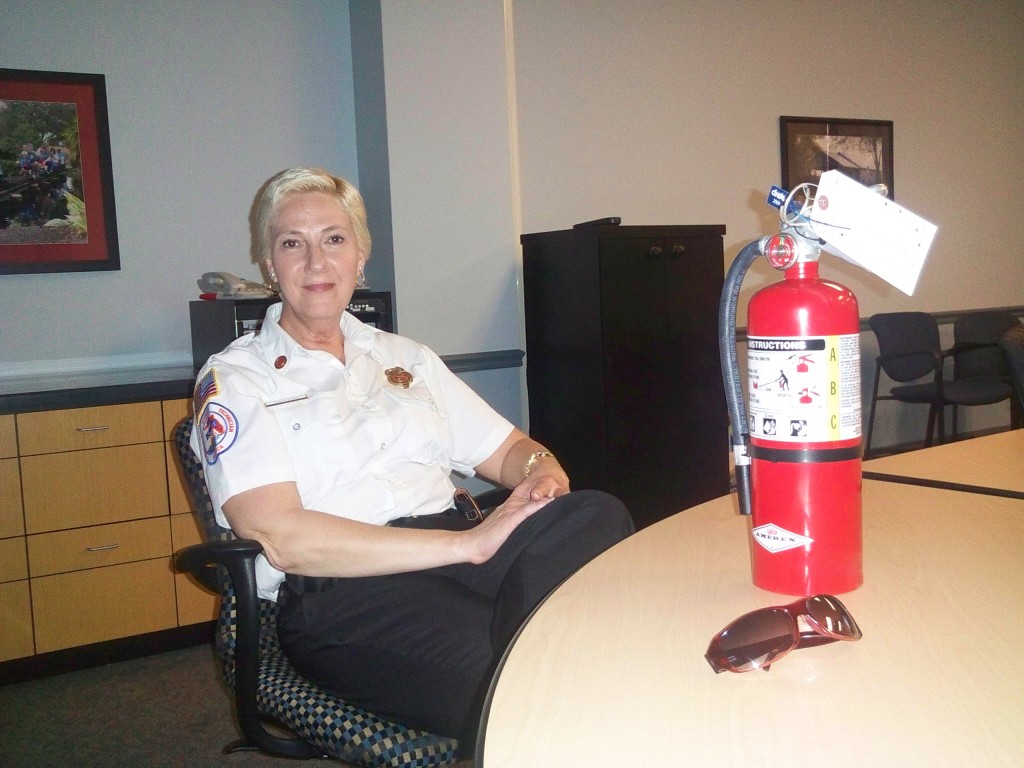
To help make sense of fire extinguishers, I went to the best local source I could find – my local fire department.  The City of Largo, Florida’s fire department provides fire suppression, inspection and education services to the more than 75,000 residents who call my town home. I met with Deputy Chief James Warman, a fellow woodworker himself, who gave me the rundown on fires and their causes.

First, you have to know a little bit about fire.  It takes three things to get one going.  Heat, fuel and air – oxygen, to be specific.  If you cut one of these legs out from under any fire, it will be extinguished.

When it comes to what’s fueling the fire, you have to brush up on your ABC’s.  There are three main ‘classes’ of fires that can be faced in a typical workshop.

Class A fires are fueled by any combustible source that leaves an ash when burned. (Yes, think A for ash to remember this one)  This could include wood  (sawdust, planer shavings, etc), cardboard, cloth.. your basic fire that you think of most frequently.

Class B fires are fueled by flammable liquids.  (Think B for the barrels you might carry these liquids in) Finishes, thinners, oils and paints fall into this category.  Putting water on a class B fire is about the worst thing you could possibly do, as the water aresolizes the liquid, expanding the fire.  Don’t believe me? Watch as the Mythbusters show how it works.

Class C fires involve electricity, and have their own concerns…  you don’t want to use anything conductive (like water) to fight them.  So, if that overloaded circuit decides to ignite a fire, you have to use something that won’t hurt you to put it out. (Remember that C also stands for current…)

There are also class D fires which involve burning metals.  Since the average home workshop won’t have a ready supply of something like elemental sodium lying around in quantity, we’ll leave that for the industrial users.

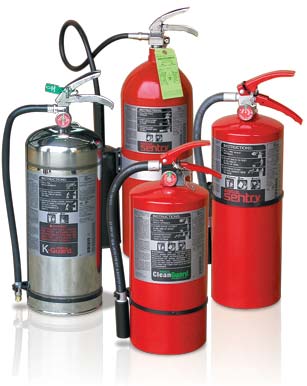
Since you want to react quickly in the event of a fire, there’s no time to waste trying to determine what’s burning.  To make your decision easier, it’s best to select an ABC fire extinguisher for the shop.  One of the most effective is filled with dry chemicals.  Besides working on all commonly-seen fires, these are also some of the most economical choices out there on the market.

“An average 10 pound dry chemical ABC extinguisher is a great choice for a home workshop. It’s going to do a good job on the smaller fires you could see in a shop,” said Chief Warman.  Some of the other rules of thumb to keep in mind are to mount the extinguisher to a wall (if you just set it on a shelf, you will push it to the back and not be able to find it when you need it), mount it near a doorway leading out of your shop (this way, the fire can’t get behind you if you need to make a very hasty exit) and use the extinguisher on fires about as large as you would expect to find in a small wastepaper basket.  “Any larger, and you could be in a lot of trouble.  At that point, get everyone out of the structure and call for the fire department.”

And, no matter how large the fire, even if you are able to put it out with your extinguisher, you should still call the fire department just to make sure nothing is still smoldering. “We get called out to a lot of fires where the person thought they had put the fire out with an extinguisher, but it flares up again hours later.”

Learning how to properly use an extinguisher is a simple yet critical step in the process.  I met with Jeanine Green, the department’s public education specialist. She showed me the sophisticated Bullex laser based fire extinguisher training system and explained the process using a simple to remember word… PASS.

Pull the pin. Almost all fire extinguishers use a safety pin to prevent accidental discharge.  And, you would be surprised how many people – in a stressful moment – forget this first simple step.

Aim the extinguisher. Either your extinguisher will have some kind of hose or just a small nozzle right by the handle.  Be sure to point this at the base of the fire, not the flames.  “Remember,” Jeanine said, “the fuel for the fire is at the base.  You want to cool that down and cut off the air. Shooting at the flames isn’t going to do much.”

Squeeze the handles. Once you squeeze the handles, the canister of compressed air inside the extinguisher is punctured, and that pushes the dry chemical out of the extinguisher.  If you release the handle, the flow will be interrupted.

Sweep the base of the fire. Play the chemical across the base of the fire to ensure it is covered.  Use the extinguisher until it is empty, then go and call the fire department.  Preferably from a cell phone outside the building or from another building.

While this information is helpful, both Jeanine and Chief Warman were very clear about the most important point of all.  When it comes to fighting fires, the easiest ones are those that never burn.  Take the time to clean your shop, unplug tools when not in use and store your finishes and other chemicals securely. “We love when people come to visit us to learn about what we do,” said Jeanine, “but we don’t want to have to come to your home during an emergency if it can be prevented in the first place.”

Sledding to safety

Yes, it’s true.  I had a kickback on my table saw last week.

Even after all of the safety posts I have written, it still happened. It wasn’t serious enough to require me to go to the hospital or seek other emergency medical help.  Thank goodness.

I got a bad bruise to the tip of my left index finger and a gash on the inside of my forearm about four inches down from my elbow.  I’m nearly recovered from this mishap.

However, it did serve as a gigantic wake-up call for me to review my attitude about safely operating the table saw. Here’s a list of what contributed to the accident.

  • It was the proverbial ‘last cut of the night’
  • I was feeling tired
  • I was frustrated because I was following a plan that gave incorrect dimensions for a part… I had to saw, edge and thickness another piece of wood to work with a larger blank – and it was curly maple…  not something I want to waste.
  • I thought the thin material (1/4″ thick) wouldn’t hurt if it did kick back
  • I was crosscutting a board about 3″ wide by 12″ long using the rip fence to gauge the distance… believing it would be more ‘ accurate’ and ‘easier’ to deploy.
  • My wife had just walked in to talk to me, so I took my eyes off the work.

As you can see, there were quite a few contributing factors to this accident.  For me to ensure my safety, I am going to have to help set the tone in my shop.

Of course, I’m going to have to start to recognize when I do get feeling tired, frustrated or distracted and learn to walk away from the power tool.  It’s better to do something mundane like sharpening a plane iron than packing my fingers in an ice-filled Ziplock bag for a trip to the hospital.

But, I have to also use the proper jig to help ensure my safety. Crosscutting using the rip fence is dumb.  It’s stupid.  It’s something I know better than to do.  However, I did it anyway, even though I have a $159 Osborne EB-3 miter gauge and a large panel cutting jig maybe a dozen steps away from the saw.

Why didn’t I use them?

The sled is just too heavy.  It’s a monster jig I built to crosscut up to 18″ wide panels.  Great for that application, too much to heft to the saw for small cuts.

The Osborne is sweet, but for small work, it gets kind of awkward, trying to balance a small piece against it. Besides, it doesn’t allow me the option of clamping the work down to the table so I can move my hands out of the way.

So, I set my mind to build a small, maneuverable crosscutting sled that is lightweight, accurate and allows for clamping.  The problem I ran into when looking for one on the Internet is that the plans fall into one of two camps.

There are those that are just too darned simple.  A runner for the miter slot, a back or front fence and a sheet of plywood.  These, like the famous one found in Norm Abram’s shop, are great for cutting square edges on larger panels, but fall down on the job when cutting smaller stock. Besides, these typically just ride on one side of the blade, leaving the ‘offcut’ side unsupported.  I needed something that will bridge the saw blade, keeping the workpiece securely supported on both sides.

Others  look like wooden Swiss Army Knives.  They can miter, tenon, crosscut, slice, dice, julienne and make mountains of cole slaw based on how they are set up.  Crisscrossed with feet of T-Track, hold down knobs and other devices, they are only slightly more complicated than the entire Apollo Moon Landing program, and can take several nights of detailed construction to become reality.  This, of course, brings us back to the weight problem.  If they are too heavy, I can see myself at a later date wondering if I really need to get the sled off the shelf…

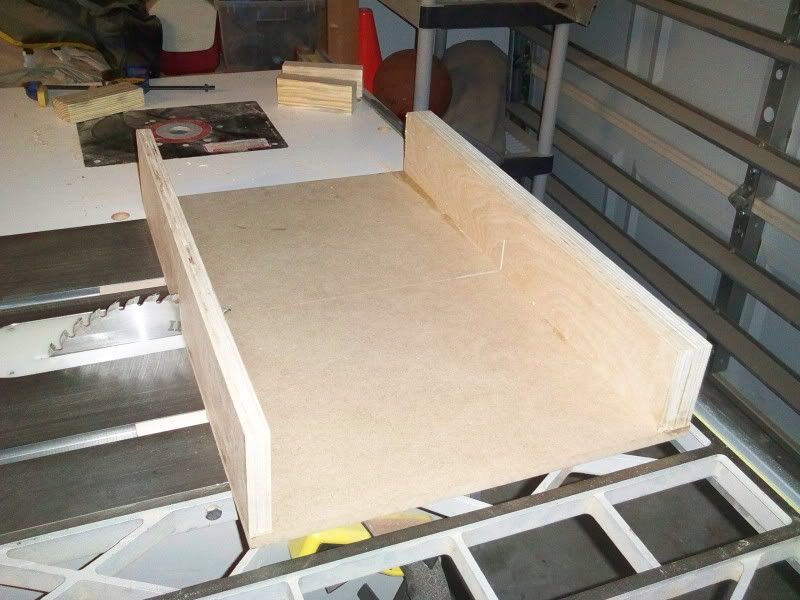
This is what I came up with. It’s rather simple to build and it offers me a lightweight jig with excellent accuracy. As with most crosscut sleds, the heart of the system rests with the miter slot runners.  I milled these out of a straight clear piece of maple.  One in each slot, and they fit perfectly.

The base of the sled is a piece of 1/2″ MDF 16″ wide by 24″ long.  No, may not suffice for large workpieces, but that’s not the purpose – this baby is set up to handle small work.   I cut it square on the table saw, butted it against the rip fence and laid it on top of the glued runners.  A few brads held it the assembly in place until I could flip the board over to mount screws.

The front fence is a 3 1/2″ tall piece of 3/4″ cabinet grade ply.  It’s that high so the blade won’t cut through it, leaving me with two sleds.. something I’m not looking for.  It was glued and screwed to the piece from underneath.  Once I did that, I pushed the sled through the blade until it was close to the back of the MDF sheet – not all the way through.

The back fence is two pieces of 3 1/2″ tall cabinet grade ply glued and bradded together to give me a piece 1 1/2″ thick.  My initial plans were to install a T-Track to serve as a base for a hold-down clamp, but I held off for now. That will be a later edition if I want the convenience.  Once I got the back fence squared to the blade, I glued and screwed  it into place and pushed the sled through the blade.

I also dug through the scrap bucket and came up with a few scraps of southern yellow pine to serve as hold downs. Now, when I want to cut a small piece, I can set it in place, using the saw kerf to accurately mark where the blade will cut.  I can then clamp one of these scrap SYP pieces directly down on the board to be cut right at the kerf line.  This way, I can ensure the wood won’t move, and I can keep my hands safely away from the blade.

My first couple of cuts with the sled were dead-on at 90 degrees.  The pieces didn’t move, and I was very happy to have my fingers safely out of the way.

Improved accuracy AND safety?  For the handful of scraps and screws I used, it was well  worth the cost.

Link of the Week

About.com’s Top 12 Table Saw Safety Tips

Well, it happened to me Wednesday night.  I was trying to make the proverbial ‘last cut’ of the night, was feeling tired, using the saw incorrectly and I got distracted when WHAM… I had a kickback.

I’m OK, just a few cuts up my arm where the board flew up and a bruised left index finger… but it could have been much worse.

That’s why it’s a great time to review the basic table saw safety tips.  Read through this list and honestly assess what you do when you work at the saw.  It just might save a finger or two…

One tough sucker

I have this friend on the Woodworker’s Website Association named Jim.  He’s a now-retired grizzled veteran of the competitive northeast construction and cabinet trades.  He’s seen it all, heard it all, tried it all and shoots straight from the hip. Ask a question, you get an honest answer with Jim. He’s that kinda guy.

But, that’s not who this article is about.  It’s actually about something he dropped off for me this past March when he was down for a visit.

Now that Jim is retired, he has time on his hands to travel and to tinker.  Before his trip this spring, he called me and asked if I was interested in looking at something he had built.  One Saturday morning, I drove to the travel trailer park Jim was staying at, and after our greetings and some shop talk, he showed me something that looked like Rube Goldberg himself had created. Old plumbing fittings, waferboard, 2 x 4’s and weatherstripping had been cobbled together.  It looked as if it had been picked over in a rubble heap.  MacGyver would be proud of this…

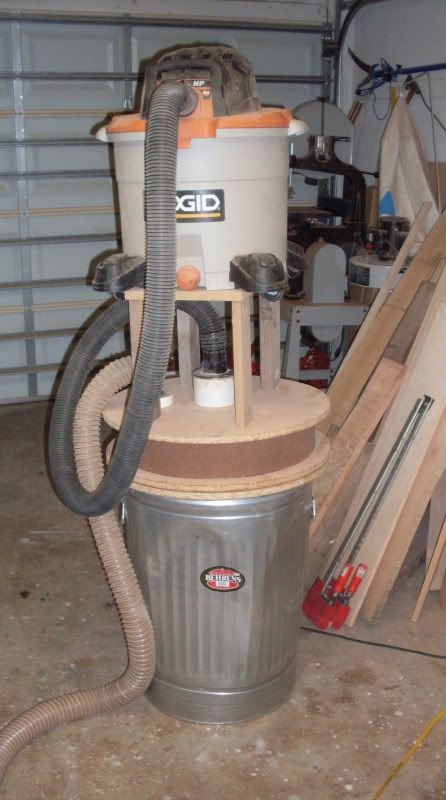
The total stackWhile it did look nasty at first, it may prove to be something that will change how I work in my shop.
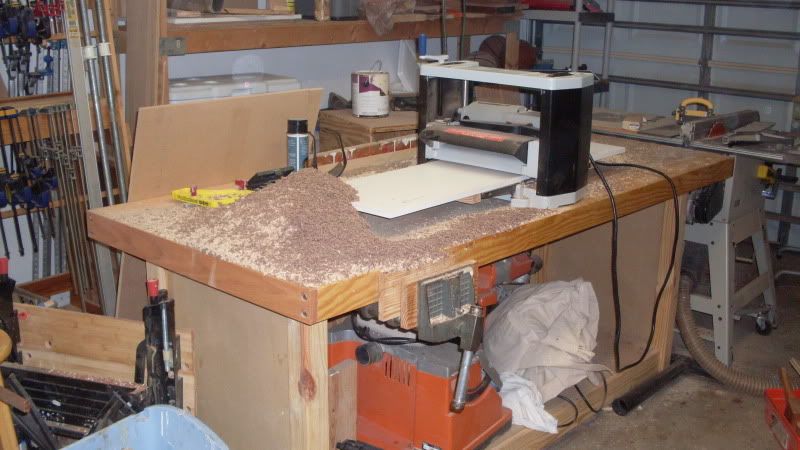
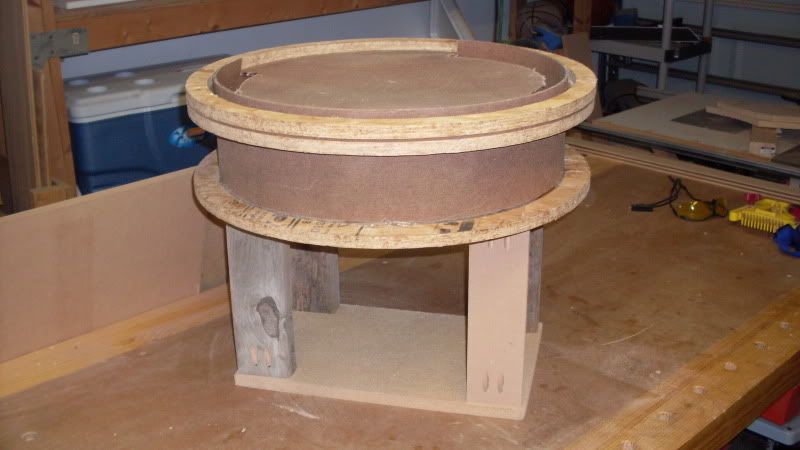
Jim had created a modified cyclonic dust collector. He started with the plans drafted by Phil Thien.  Phil’s plans show how to create an inexpensive dust collector which fits onto the top of a metal garbage can.  A shop vac and an intake hose to suck up the dust is everything needed to create your own dust collection system.

Jim’s improvements include extending the cyclone separator in a compartment above the trash can, which Jim says improves the airflow by removing any potential debris interference.

Since it was nearing the start of hurricane season, I had left the collector in the corner of my shop to – err – collect dust.  Finally, this past weekend, I was able to run to Home Depot and pick up an old-fashioned metal trash can to affix the collector to.

Jim had routed a groove to fit over the rim of the can and had sealed the bottom of it to get an airtight fit.  I hooked it up as described, and I was initially thoroughly unimpressed.  The collector didn’t seem to generate enough suction to lift even the finest of dust.  I fiddled with the collector for a while, and then I discovered my problem.  I hadn’t fit the lid deep enough into the groove.

A quick shove down on the offending side,  I got that sealed up and WOW…

The suction generated by my standard issue shop vac was impressive. Planer shavings, sawdust, small animals – what couldn’t this thing pick up?  Jim had also warned me that if I drew a vacuum by sealing off the intake hose, the trash can could collapse due to the air pressure.  Well… sure enough, the silly thing’s sides did buckle when I put my hand over the intake hose!  I’ll also have to follow his advice and cut a brace for the inside of the can to give it extra support.

To put this unit to the test, I set up a field experiment.  I had been planing strips of ash and walnut for a project, and I had a good pile of shavings there ready to be cleaned up.  The shop was a mess.

I took my shop vac outside and emptied it.  I banged out the filter – the works.  It was as squeaky clean as I dared make it.  I stacked the empty shop vac on top of the unit and hooked up the hoses.  That’s when I went to work, sucking up everything.

The suction worked as I had expected it to for a dust collector.  There was a large rush of air headed into the hose, and everything was sucked through into the can.  I love clear hoses on my collector…

After working the hose for a while, cleaning up the mess of a long day in the shop, I stopped the shop vac and took a peek inside.  There was some fine dust in the vacuum’s tank, but that was it.  None of the larger shavings made it to the vacuum.

A peek into the trash can showed me why… there’s where I found all of the planer shavings, silently resting in the can.  A quick trip outside, and the can was clean once again.

The collector was extremely effective.  I have a 1 hp 500 cfm Delta model in my shop, and I rarely use it.  The system gets clogged up frequently and it doesn’t have the ‘oomph’ to get the planer shavings.  Then, there are the bag changings… something I never look forward to.  That metal ‘belt’ I have to snap in place rarely goes on the first – or second – try.

This system exceeded all my expectations. In fact, I will be looking into getting a dedicated shop vac to mount on top of the collector on a semi-permanent basis.

Hey, Jim, I gotta hand it to you.  You are one tough sucker after all!

P.S. – If you are interested in seeing Jim’s plans, I can forward the messages to him