Hey, everyone. It’s me, the little voice that whispers in Tom’s head.
No, I’m not the type of voice that will tell Tom to go out and become the supreme leader of some third world country or anything like that. I’m really a force for good. In honor of Woodworkers Safety Day, I thought it was a great time to make my introduction.

Speaking of introductions, I also happen to have lots of friends. In fact, many of you reading this post probably have one of my associates taking up some room between your ears. Why not take a moment to introduce yourself properly?
There, that wasn’t so bad, was it?
Tom and I have been together ever since the very early days of life, and during many important times. I was there telling Tom that it wasn’t a good idea to shoplift that candy bar, even though some of his friends were doing that and telling him it was OK. I was there telling him that he should stop playing his video games and study for that math test back in eighth grade. That he should probably stop drinking at that New Year’s Eve party before he got behind the wheel and regretted his decision. I was even there the day he took my advice and realized that Rhonda was the girl for him.
Sometimes, he listens. Sometimes, he doesn’t. I find that surprising, since I have nearly a perfect track record. Whenever Tom does something stupid, I would remind him that I was looking out for him BEFORE the incident took place, and if he had just stopped for a second to listen to me, he would have stayed out of trouble.

My problem? Unlike Tom, I am not boisterous. I do a lot of my communication with Tom through subtle whispers that he can hear only when he stops and thinks…
Sometimes he does, sometimes he doesn’t…
This past weekend, Tom was working on another project – a gift for his nephew who is getting his first communion this coming weekend. It’s the simple cross project he has built probably 30 times. Really easy to build. So, when he went out to the table saw to rip out the strips for the body and contrasting outside of the piece, he didn’t really notice that the splitter and blade guard was off the saw. It had to come off to use the spline cutter for Katie’s box. There it was, laying on the outside of the rip fence, mere inches away from where it had to be installed.
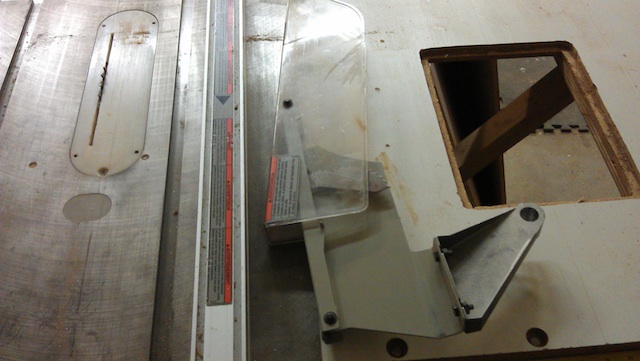
I said something to Tom to the effect of, “Hey, you gonna put that on the saw?” To which, the brash, ‘experienced’ woodworker part of his personality said, “No way. These are simple cuts that aren’t going to need the splitter. Besides, the two final cuts are going to be 1/8″ strips, and I’m afraid that they will get hung up somehow.”
I hate the brash voice. It tells Tom stuff that isn’t really true (when was the last time a thin strip really got hung up on the splitter and pawls?) and tells him to bypass many safety precautions that I dutifully remind him to follow.
So, there he was, ripping a piece of mahogany for the main body of the cross project. No problem with that. He then brought out a piece of holly to make the contrasting side pieces. The first cut went without a problem. The second one? Well, Tom watched as the thin strip nosed down and fell off the saw’s table to the floor. For a split second, his mind told him what a pain in the butt it was going to be to reach down to pick that up, when something very bad happened. He lost focus on the board next to the spinning blade, and allowed the workpiece to twist away from the fence.
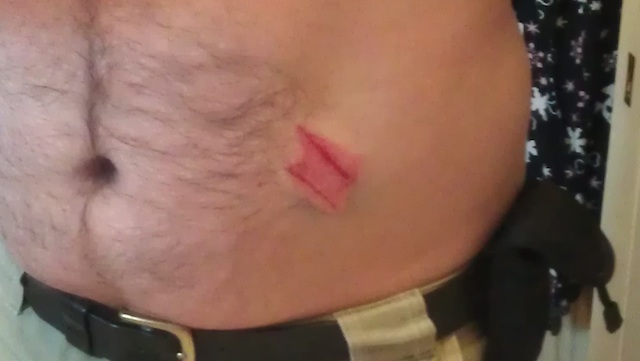
Quick as lighting, the board, propelled by the uncontrolled back teeth of the blade, forcefully shot the piece straight into Tom’s right side. Below the ribs, above the pelvis. Right in the gut. Felt kind of like a shot from a boxer to an unprotected part of the body.
As Tom slapped the off switch and threw off his hearing and eye protection, he bellowed loudly enough for the neighbors to come running.
The injury was pretty bad.. the edges of the board tore into the skin to create a perfect image of the size and shape of the piece of wood he was cutting, and it created a large bruise that spread from the location.
And, as Rhonda helped him back into the house to have him lay down and put ice on the injury, he kept repeating, “Why didn’t I put the splitter back on the saw?”
It’s not a loud warning, but it’s plain as day… take the time to consult with me now on before you do any work in the shop. I promise I’ll be there to help you out.