Category Archives: Projects

We interrupt this project…

I have a confession to make. This past weekend, I made no progress on the projects for my nephews. I did, however, have a very important project I had to start.

But, I can’t tell you what it is or who it’s for, because it’s going to be a surprise.

For this one, my choice of woods was already made for me. It has to be oak, and it’s final finish is going to be that golden oak color you see on kitchen cabinets. Hey, it’s not my first choice, but it will certainly work for this project.

The layout

The first thing I had to do was sort through the racks of hardwood at my local home improvement center. No, I don’t relish the idea of buying expensive oak from there, but for this project, I have a very hard deadline, and I can’t quibble with the cost.

After selecting the board – a 1 x 8 flat sawn red oak board – I chose the best looking grain arrangement and matched a pair of boards. These will do the trick for what I need to do.

The file folder template

From there, I had to cut a hole in the middle of the piece. To make this happen, I first cut out a template in an old file folder to match the size that I needed. After carefully marking the size of the cutout, I stacked the two pieces together with some template tape, so I could cut both pieces at once.

Laguna makes the cut

From there, it was a short hop over to the Laguna bandsaw for the cutting. This was a simple notch that had to be made, and the blade just sliced cleanly through the two boards, making a perfectly centered hole once I pulled them apart and matched them.

I wanted some breadboard ends for the top and bottom, because this piece is going to be in a place where the humidity could be an issue. So, onto the router table with the tongue and groove bit sets, where I grooved the ends and ran a tongue on the top and bottom of the main piece. They fit together beautifully.

DSC_0066

I cut a nice sweeping arc on the outsides of the breadboard ends, and once I had them all faired up, I attached them to the top and bottom tongues with a dab of glue smack in the middle of the piece. I like that look.

The next step was to cut a sliding dovetail for a shelf. That was a simple joint to cut, and I promise I will be showing how to cut that in a later post. Now, once I get the committee reviewing the piece, I will also shape the shelf and attach it with just a dab of glue at the end, further allowing the piece to expand and contract.
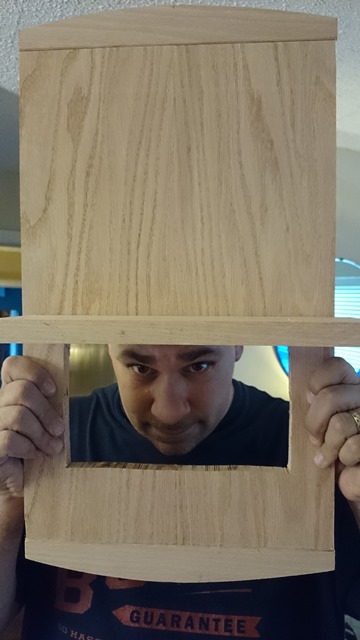
 

Peek a booNow, I have to bring the piece to where it will eventually end up to ensure it fits where it needs to, check out how it will work with the final accessories, and to design the final engraving.

I hope when it is unveiled, that it looks as good as possible and impresses the final recipient…

Making his mark

My friend Lawrence Wroten is a real up and coming woodworker, but his blog, Midnight Woodworking, doesn’t get much traffic.

That’s a real bummer.

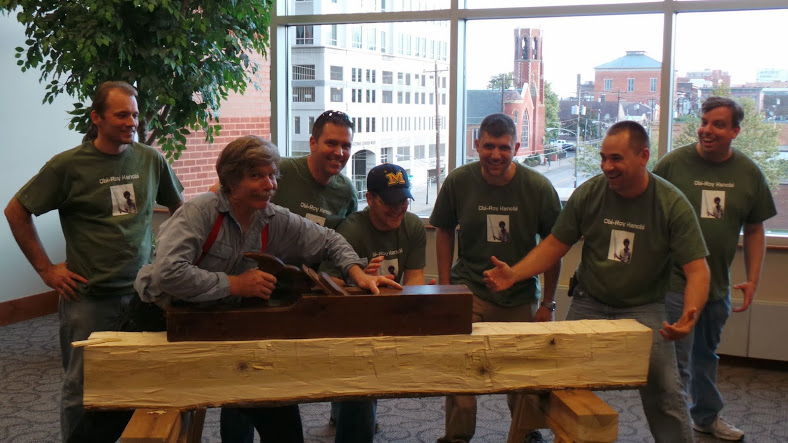
Lawrence, on the left, taking in what appaers to be a woodworking rendition of the last supper
Lawrence, on the left, taking in what appears to be a woodworking rendition of the last supper

It’s a real shame, because the content he has is just so darned good. For instance, he recently told me about a little experiment he conducted on how to sign his work, and the idea was nothing short of genius.

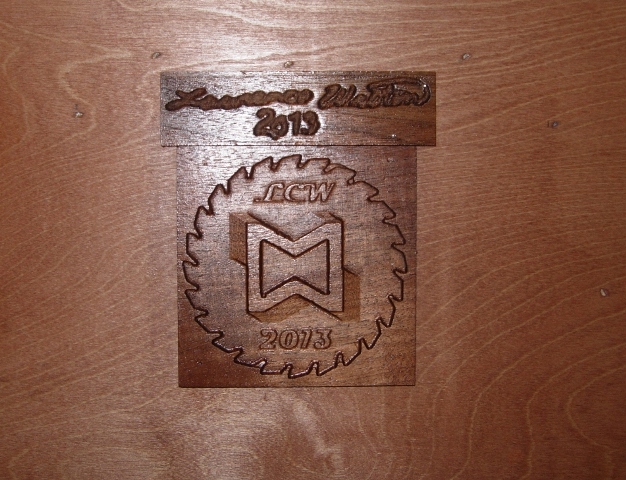
First, the background: Lawrence is out of his mind. Seriously. Instead of signing, branding or inlaying something into his work to identify it as his, he carved – yes CARVED – his logo into the project at the end. With such an intricate logo, this carving was adding about four hours to each project.

I can understand being proud of your work and wanting it identified for years to come, but, come on… FOUR extra hours? Wow… Lawrence's carving

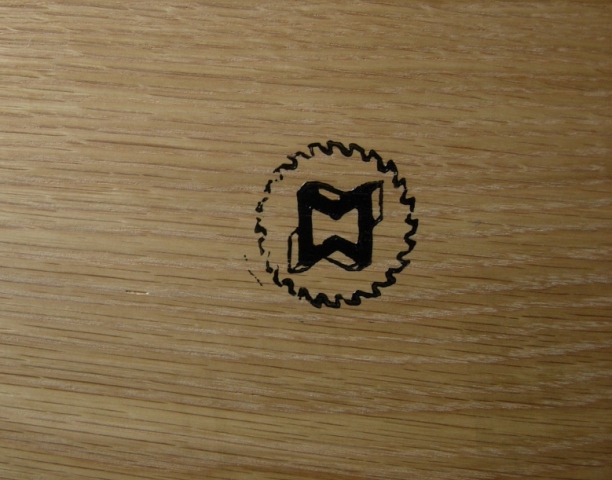
So, he got to thinking, why not create a stamp that he could use to apply an inked image onto the projects?

I don’t want to give away the method he went for, but I can tell you, it was inspired, and the maker’s mark came out looking good.

The Stamp! The Stamp!

Want to find out how he did it? Click here to see how well it worked out, and I guarantee you will be impressed.


And, for the nephews…

OK, I will admit, I am a sucker for my nieces. As they have been turning 16 years old, I have been building hope chests for them. So far, two down, and two to go. (Plus, a couple of friends of ours asked if they could have one for their daughter… who am I to turn down an offer like that?)

Lauren, her hope chest, and a relieved woodworker..

That has been pretty cool so far, but Rhonda has been asking me, “What about the nephews?” I mean, how could I leave them out of the action?

But, what do you build for young fellas? I mean, they can’t really use a hope chest… And something like a keepsake box isn’t really something I think they would like. Plus, I have more nephews (7) than nieces (4)… and three of them are already way past their 16th birthdays!

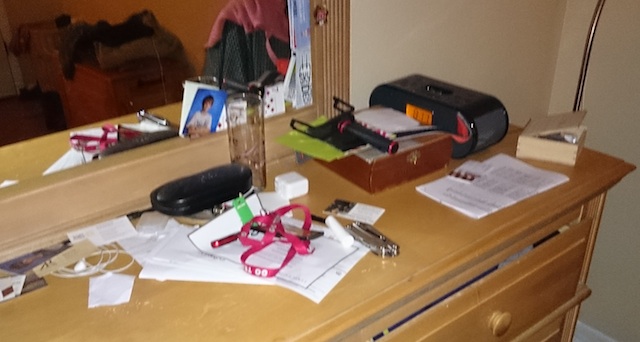
Inspiration came to me one night while looking at my messy side of the dresser top in my bedroom…

My dresser top

As with most males, I carry quite a bit of stuff on me in my pants pockets. A wallet. Keys. A multi-tool, My work ID. Pocket change. There are also papers on that dirty sucker, so I will need to clean those items up. But, how can I get control of the sprawl? I mean, there has to be a solution…

Wait a minute….

What about a dresser top valet? You know those things… they are a catch-all for all of the crap I carry on me during the day.

Oooh, my model of cell phone

And, you know what else? Why not a valet that also has a place for me to stash my smart phone and connect it to a power supply to charge it?  That way, I can keep the whole kit and caboodle in one location, and give it a glance over before I hit the hay for the night.

Fortunately, I’m not the first person to think of an idea this crazy. There are TONS of dresser top valets out there… with many of them made out of pleather-covered cardboard or some el-cheapo laminate that just won’t work. Others are highly-lacqured, overcomplicated behemoths that just won’t work.

What I needed was a set of plans.

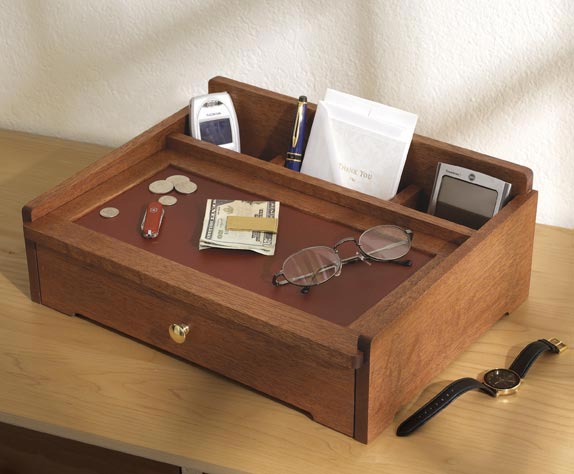
Wood Magazine's Valet
Photo courtesy of Wood Magazine

Boom. My friends over at Wood Magazine were thinking the same thing back in 2005. And, they came up with this plan for a sweet looking dresser top valet that would suit my needs.

Even back in 2005 (Check out the awesome looking cell phone in that back area!), the plan designers thought about including a corralled in area for electronics, and an area on top for loose change, keys and the like.

The plan also includes a drawer under the top part for stuff you might not use all that much – maybe a dressier watch or something else.

This looks pretty darned good for my nephews. There are some things I might change. For instance, the top calls for a padded vinyl panel, but I’m afraid that might look a little cheap. So, I might go for a leather insert, or maybe a rich green felt.

Also I have to pick the right kind of wood for this. Masculine, but still striking. Maybe walnut or cherry.. not sure yet. Fortunately, the plans look fairly easy to execute.

I think I may go with one for myself first, just to make all of the mistakes on one that won’t see the light of day and perfect my technique once I start pumping them out.


Stuff I’ve built: The front entertainment credenza

OK, let me think here for a minute… I bought the plywood to build this thing on a rainy, slightly exhausted New Years Day at the local home improvement center. And, last night, I finished up the last details on the new front entertainment center. So, I have been moving slowly, haven’t I?

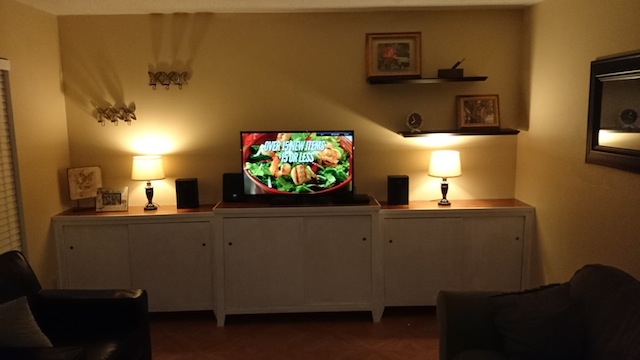
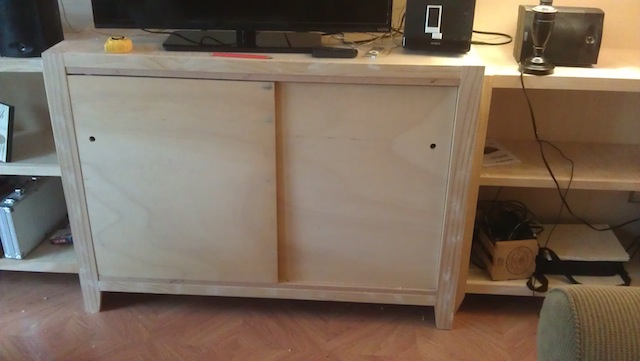
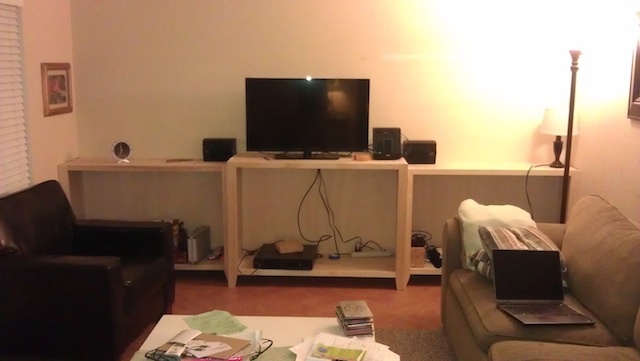
The front entertainment center. in its glory.Well, anyway, here are the results. I’m pretty happy… It’s a very atmospheric shot, no?

As you have seen in the previous posts, This piece was build from three separate cabinets enclosed by plywood sliding doors. Here’s the piece with the doors open.

Open seasmie The sliding doors are just the best. They open wide, and don’t take up a lot of room in front of the piece, which means we can maximize the area in our living room. The new TV looks great up on top of the unit, and I have even stashed the stereo and Blu-Ray player on the top of the unit, so the doors won’t ever need to be open to use the equipment.

Underneath, the piece can store a ton of DVDs, board games, our older laptops that we still sometimes pull out, my wife’s watercolor supplies… and there is still plenty of room left over.

Cables clippedI also took the opportunity to go into the electrical department and grab some wire ties and cable clips to help manage the inevitable spaghetti farm that grows wherever electronics dwell.

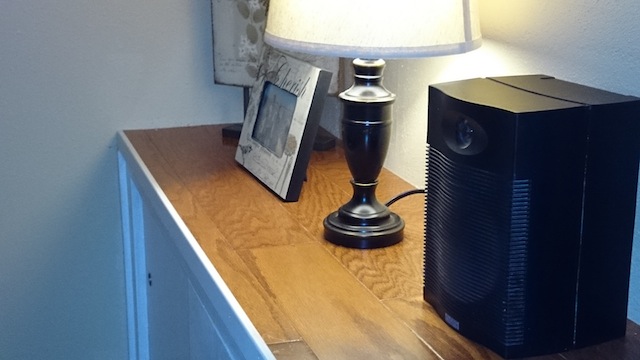
The top worked out pretty well with the flooring attached to the piece. Not sure I would ever do that again, but I can tell you it came out looking pretty darned good.

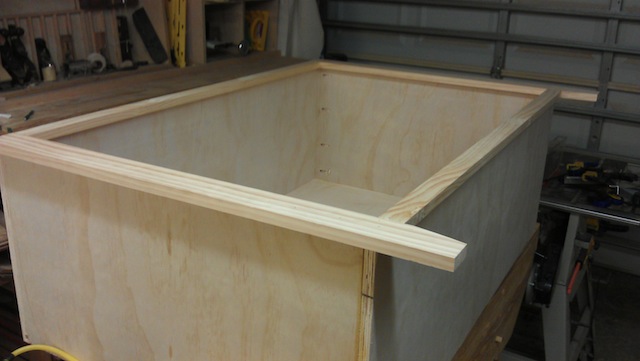
The top trimmed outWith everything pretty much in its place, I can FINALLY cross that project off my to-do list.

Now, what to start on next?

Slip and slide

One of the things I love about the new front entertainment center I am building is that I convinced Rhonda to keep the stereo on top of the cabinets. Instead of having it tucked away, this little bookshelf sized unit will be out in the open, easy for me to attach my iPod, play a CD or add some extra oomph to the movies we are showing on the new TV set.

My stereo, dude...The other thing I am liking is the idea of sliding doors. Because each of the three cabinets are four feet wide, that would mean two foot wide doors that would have to swing out into the room. That would take up a lot of room that – quite frankly – I don’t want to give up in the living room.

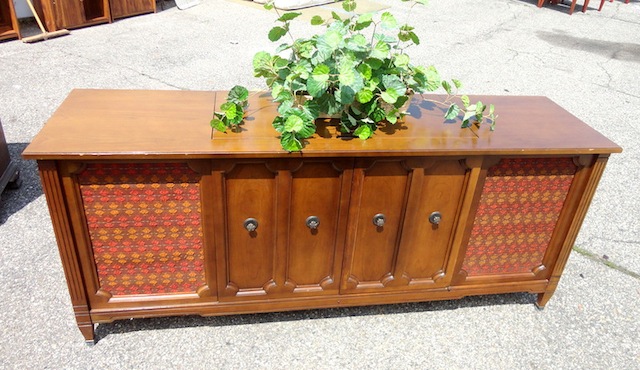
An old console TV/Hi-Fi cabinetThe sliding door idea is hardly a new one. At one point, my parents owned a console-style TV. It came with a record player and tuner, built in speakers and a pair of sliding doors that covered the color TV that took forever to warm up.  Those doors helped to make the piece furniture, able to be totally hidden when you wanted to make everything disappear. What a clever idea…

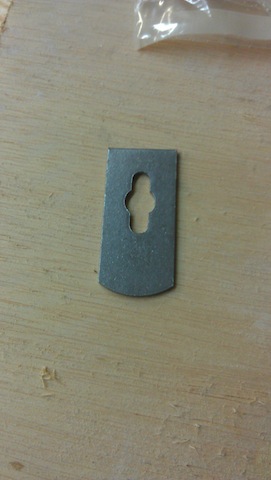
Rockler's sliding door hardwareNot wanting to invest in an expensive track system, I needed an easy way to make a set of sliding doors, and wouldn’t you know it, Rockler had the answer.  They have some sliding door hardware that are simply small rectangular pieces of steel with a set of screws. These pieces are simply screwed to the back of the doors – mine are simple pieces of 1/2″ plywood cut 1/4″ less than the top to bottom measurement and each cut with 2 inches wider than half the overall measurement to allow for some overlap – and ride in saw kerfs in a piece of wood. Because you can loosen them and slide them out of the way, you don’t have to remove the entire track to get the doors out. Very handy.

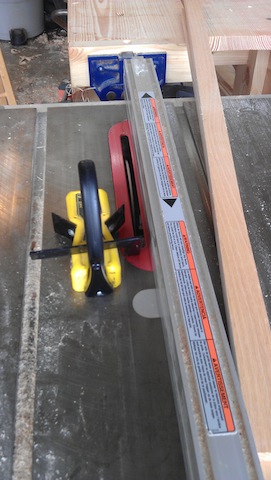
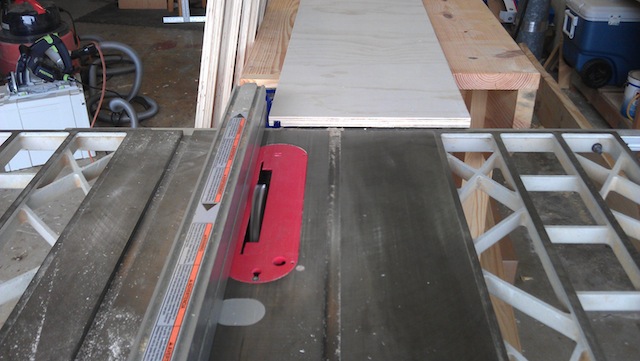
Kerfing setupI made those kerfs in a piece of oak (it’s a hard-wearing hard wood) using my table saw blade. I had to remove the splitter and guard because it wasn’t a through cut, and I used my Grip Tite 2000 to hold the wood down to the table and in to the fence. I spaced the first kerf the thickness of the plywood door back from the blade, and put the second back a little further than two thicknesses to allow for some space for the hardware.

Track screwed in

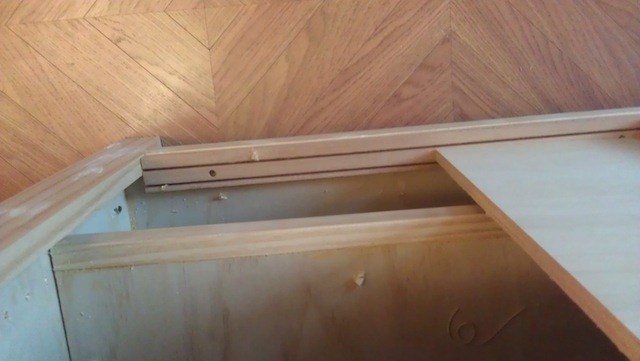
As you can see, looking down at the bottom rack, you can see the two kerfs with the inside door mounted in the rear-most kerf. I just screwed the track to the cabinet, in case I do have to remove it. Installing the doors is easy – just set the fully-extended hardware into the bottom kerf, then tip the door in and extend the upper hardware into the upper track, and bingo, you have a sliding door.

The center doors in place

To make it easier to move the doors, I drilled some 3/4″ holes into the doors, and will later insert cup handles into the holes to dress it up. Believe me, you need the handles – trying to open these suckers without being able to get a finger hold is a pain in the butt…

Once I build the other two sets of doors, I will have to sand and paint them, and put some low-friction tape on the bottoms of the doors to help ensure some good sliding. Then some oak tops for each of the three cabinets.

We’re definitely making some progress.

A chain reaction

It all started in an electronics store. Yes, that’s right, not a single woodworking tool in sight.

For Christmas, my mom and Rhonda’s parents sent us some cash – as they do every year – to buy something nice for ourselves. The TV we had in the front room was a circa 1999 purchase, and it served us well for such a long time. But, as with all other electronics, it’s lifespan was limited, and the picture left something to be desired.

The TV

So, Rhonda and I bought a new TV. Really nice one with and HD tuner, built in wi-fi, and a gorgeous picture. A 42 inch model. Which created an unforseen problem – and an opportunity for a certain woodworker to strut his stuff.

So, over the recent holiday break – when I wasn’t aching with a terrible sinus headache – I started working on a new set of cabinets for the front of our living room. Basically, I wanted to build a low console cabinet for the TV to sit on, the stereo and other entertainment equipment to hide in and storage. That’s a critical component of living in a basementless Florida ranch house.

Cutting Grooves

I discovered that my new workbench – even though it was designed in the early 1800s – was awesome for modern plywood cabinetmaking. I was able to balance the sheets of plywood on it and use my track saw to break down the components. From there, I was able to cut a groove to hold the 1/2 inch backs.

The Kreg jig

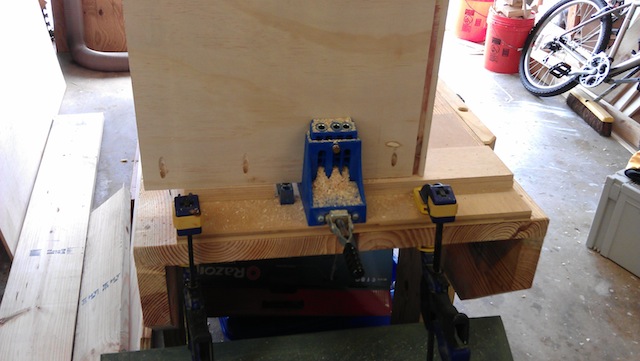
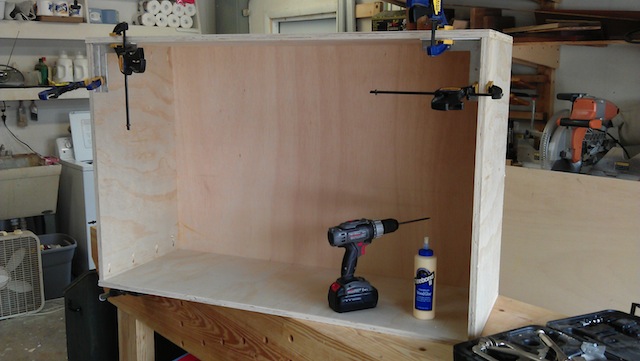
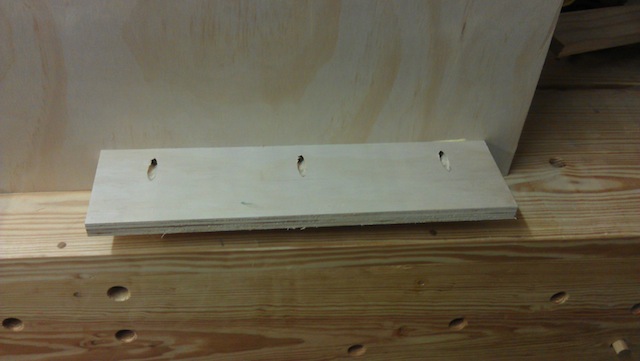
On the tail end of the bench, I clamped my Kreg pocket hole jig and drilled the holes onto the sides. After that, I used some glue and pocket screws to assemble the boxes. I can remember from several cabinet projects that building the boxes is so easy, and gives you a false sense of nearly being done with the project. In reality, there are a lot more steps to go after you have three big boxes.

Assembly

For legs, I went with the design I had used on my banquette project from last year – the stiles of the cabinet sides extend four inches below the bottom of the boxes to serve as feet. I tapered those feet to give a little more grace to the project.

Extended stiles

I made the back feet just simple pieces of plywood pocket screwed to the bottom of the boxes, in a little bit from the back of the cabinet (so I didn’t have to remove the baseboards).

Back Feet

I will pass on a piece of hard-earned wisdom – do with it as you will. When planning a cabinet job that will go from wall-to-wall in a space, don’t build the boxes to be the exact dimensions of the room. You need about an inch of play total to allow the boxes to fit comfortably. You can hide the spaces between the boxes with trim, and you won’t have to cut your completed boxes apart to gain that space.  Trust me.

With everything attached to the studs and each other, I added some filler strips to ensure that everything looked clean and gap free. I bored some holes in the boxes to allow for passage of the cable and power cords, and even had my son Dominic drill the shelf pin holes using a jig to ensure proper spacing.

The temporary stopping point

While I got most of the work done, I have to build and add some shelves, paint the piece in place (and the wall behind it), build some tops (maybe oak to match the laminate floor) and build some sliding bypass doors. That will be a first for me.

As for the old corner TV cabinet where the old set lived, it’s not going anywhere. I will have to build a pair of doors to convert that open area into some closed storage.

For now, well, hey, we have a comfortable place to sit and watch some ultra-clear HD TV…

Stuff I’ve Built: My Nicholson Workbench

Wow, was my timing ever bad. There I was, ready to leap into the Last Minute Elf week just as I was finishing the new workbench. And, all through last week, I was dying to show you how it worked, but my patience was rewarded.

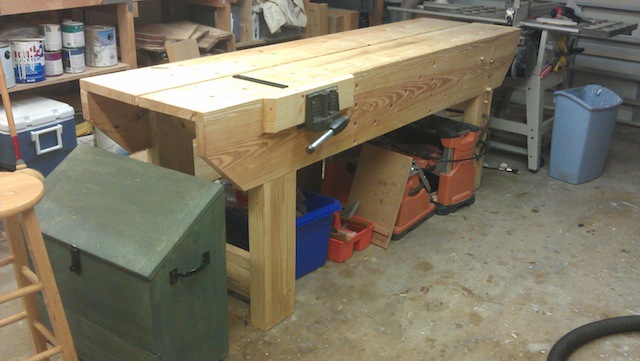
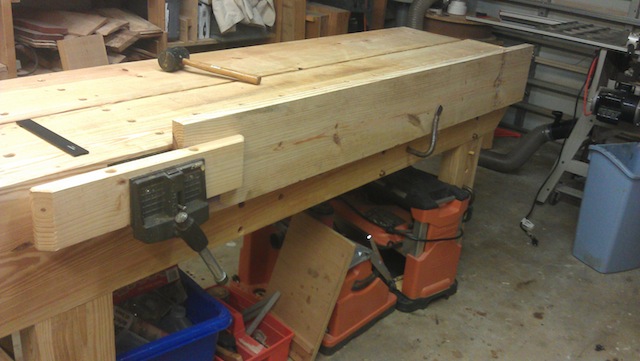
The bench in its resting placeYes, this is a Nicholson bench, styled after the one drawn up by Peter Nicholson in his 1831 book Mechanic’s Companion. It’s a traditional English carpenter design, and it has some pretty cool features that my old bench never could have dreamed up.

Yes, this was all built with dimensional 2 x lumber, all southern yellow pine. It did take some time in the local home center, picking out the flattest boards that didn’t contain the pith (center) of the log. I have cut a few boards with the pith in them, and they seem to warp and pinch on blades, making sawing them a pain in the patootie. I also had to make sure they were as flat as possible. Surprisingly, you can pick up a warped board very easily.

As you have seen in the previous posts, the construction is very straightforward. Mostly screws and glue, the bench went together easily, and I took my old Wilton vise off the old bench and put in on the face of the new one where it went to work immediately.

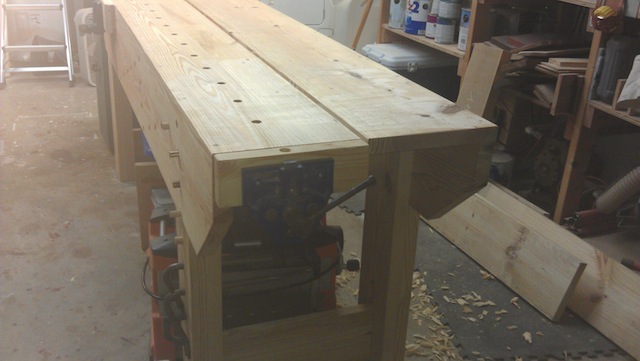
The tail endI also took an old Record quick-release vise off the front bench in my shop and bolted it to the tail end of the bench.  I also attached a chop to this vise, and it’s ready to work as a tail vise for planing on those long boards. I also lined up the dog holes so I could use those in concert with the dog hole on the vise.

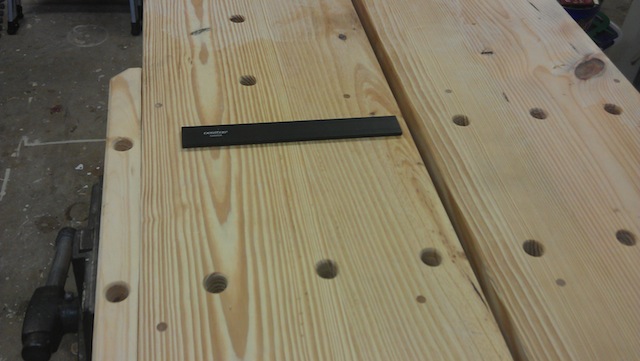
Veritas plane stopDown closer to the face vise, I threw my recently purchased Veritas planing stop. It is one handy little tool, securing into a pair of dog holes so I can plane against it. As you can also see, I built the top as a split top, meaning I can insert a 1/2 inch board into the crack to serve as an additional stop to plane across boards.

Large BoardThe real magic about this bench is the choice of clamping arrangements. The front aprons are drilled with a pattern of holes where I can use a series of bench dogs and holdfasts to secure long and heavy boards to the bench so I can work on them. As you can see above, a leftover 2 x 10 is clamped into the vise chop, balanced on a pair of bench dogs in holes and held in place tightly against the bench with a holdfast. Believe me, that board is NOT going anywhere.

The best part about this bench? It cost me a grand total of $70 in lumber (I already had the vises, glue and screws around the shop) and took – brace yourself – about 15 hours for me to turn the stock into the bench.

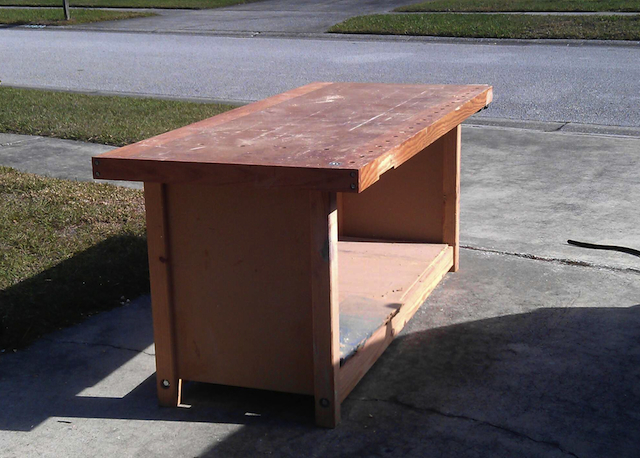
Thank you, old benchAnd, what happened to the old bench, you may be asking? Well, my neighbor saw me working on the new one and asked me what I was going to do with the old one. I told him that it was his (if he wanted it), and later that morning, we carted it down the street to his house, to become the heart of his workshop. I hear I may have visitation rights…