
I have a confession to make. This past weekend, I made no progress on the projects for my nephews. I did, however, have a very important project I had to start.
But, I can’t tell you what it is or who it’s for, because it’s going to be a surprise.
For this one, my choice of woods was already made for me. It has to be oak, and it’s final finish is going to be that golden oak color you see on kitchen cabinets. Hey, it’s not my first choice, but it will certainly work for this project.
The first thing I had to do was sort through the racks of hardwood at my local home improvement center. No, I don’t relish the idea of buying expensive oak from there, but for this project, I have a very hard deadline, and I can’t quibble with the cost.
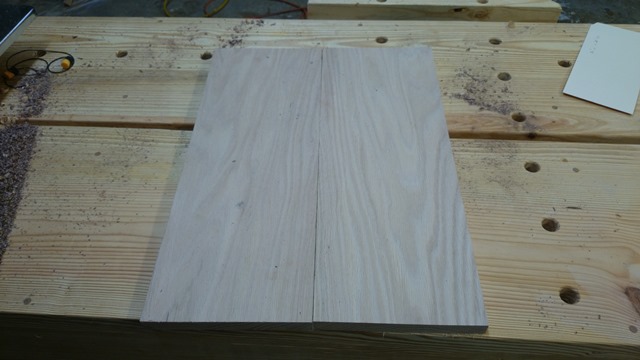
After selecting the board – a 1 x 8 flat sawn red oak board – I chose the best looking grain arrangement and matched a pair of boards. These will do the trick for what I need to do.
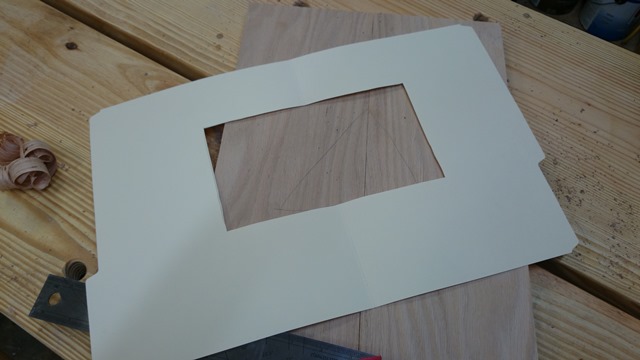
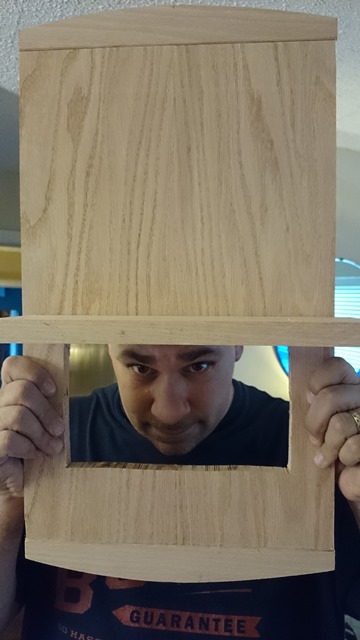
From there, I had to cut a hole in the middle of the piece. To make this happen, I first cut out a template in an old file folder to match the size that I needed. After carefully marking the size of the cutout, I stacked the two pieces together with some template tape, so I could cut both pieces at once.
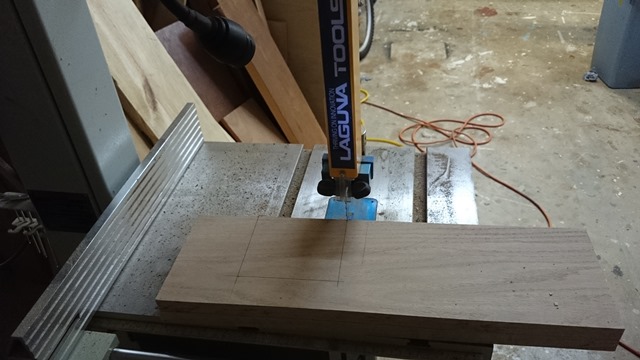
From there, it was a short hop over to the Laguna bandsaw for the cutting. This was a simple notch that had to be made, and the blade just sliced cleanly through the two boards, making a perfectly centered hole once I pulled them apart and matched them.
I wanted some breadboard ends for the top and bottom, because this piece is going to be in a place where the humidity could be an issue. So, onto the router table with the tongue and groove bit sets, where I grooved the ends and ran a tongue on the top and bottom of the main piece. They fit together beautifully.
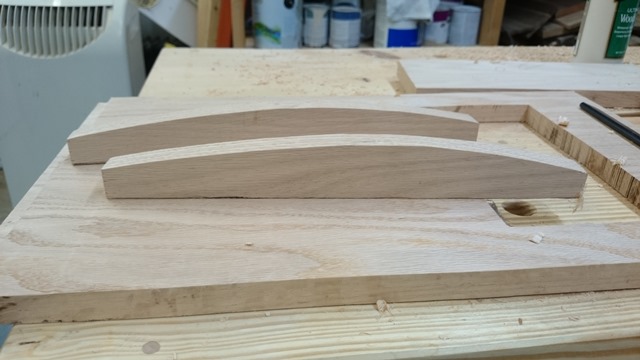
I cut a nice sweeping arc on the outsides of the breadboard ends, and once I had them all faired up, I attached them to the top and bottom tongues with a dab of glue smack in the middle of the piece. I like that look.
The next step was to cut a sliding dovetail for a shelf. That was a simple joint to cut, and I promise I will be showing how to cut that in a later post. Now, once I get the committee reviewing the piece, I will also shape the shelf and attach it with just a dab of glue at the end, further allowing the piece to expand and contract.
 Now, I have to bring the piece to where it will eventually end up to ensure it fits where it needs to, check out how it will work with the final accessories, and to design the final engraving.
I hope when it is unveiled, that it looks as good as possible and impresses the final recipient…