Category Archives: Projects

Stuff I’ve Built: Lauren’s hope chest

As I had done for my oldest niece Carolina, my niece Lauren turned 16 last month, and I built her a hope chest for her birthday.

Well, here it is, stood up for viewing by the happy recipient. And, yes, I’m pretty darned happy with how it came out.

The hope chest assembled on the bench

The frame is made of Mayan walnut (I told Lauren that it was entirely appropriate to use Mayan walnut the year of the supposed end of the world based on the Mayan calendar) and the panels are made of maple. The lid has breadboard edges with through tongues to help keep the lid flat.

Since she lives in Maryland, and I’m in Florida, I had to build this hope chest so it could be shipped flat and assembled at her house. To make this easier for my brother-in-law, I decided to go with a frame and panel construction. The corners are assembled with a tongue and dado joint, requiring just a pair of short clamps to pull the front and back together for the assembly.

The corner joint

In order to make things easier for my brother-in-law, I took the time to label each of the corners with blue painters tape so he won’t get confused when the chest pieces arrive at his house. I also loaned him my assembly squares so he could ensure the assembly wouldn’t get all kittywumpus on him.

The panels are labeled for ease of assembly.

Now, for the most important part – did the client enjoy the final piece?  Hmmm… Let’s check with her and see what she thinks?

The happy client and the trained shop monkey

I dunno, that looks promising!

Now, just to get this broken down and off to the pack and ship store to make sure it gets there safely.

Whew, the bench is now clear and ready for 2013.


The holidays are rushing up fast!

Wow. I just mean wow. With my deployment to New York, a bunch of things to do around the house, the Modern Woodworkers Association, the Wooodworkers guild, gosh, it seems like the holidays are racing up behind me, ready to capture both me and Iggy…

That’s why we are both working like crazy to get some stuff done. The manger for the nativity sets are done, so they are off the list.

Next up, I have to finish the hope chest for my niece. To refresh your memory, I have four nieces, and I am building a hope chest for each of them for their 16th birthday. My eldest niece, Carolina, got hers a few years back, and now it’s time for my niece Lauren’s. Her birthday was in mid-November, so – as you can imagine – this one is already late.

The main part of the chest, with some work left to do.

I needed it to be able to be packed flat for shipping up to where she lives, so I opted for frame and panel construction. Basically, this baby will pack into a top, two sides, a front, a back and a bottom. My brother-in-law is a pretty handy dude, so he can glue them together when he receives it. The piece is looking good so far, made of maple and Mayan walnut.

Loves me this lid

I’m particularly proud of how well the lid is coming out. I made the main part of it maple, and made the breadboard ends out of Mayan Walnut. I attached them by cutting a groove in the edges and a tongue on each end of the lid, boring some pins for dowels, enlarging the outside two dowel holes in the tongue and then gluing the middle into place before driving the dowels home. I like the look of the exposed tongue on the edges, and the contrasting dowels.

I will leave clear instructions for how the piece goes together.. she should like it!

The two veneered panels for the next project

I also have some pieces for a project I wanted to build for someone special in my family. I veneered a few beautiful pieces onto an MDF substrate using hot hide glue, but haven’t really gotten into production yet. I don’t want to tell you who it’s for or what it’s going to be, but I can tell you, I’m excited about this piece.

And, I know that at some time during the next few weeks, I’m going to have to start thinking about building something for the upcoming art show held at the county courthouse. I’m thinking of a safe project I can bang out in a few hours, and a more advanced piece that may take longer…  I’m still sketching out a few ideas.

But, there are only so many hours in a day, and so many days before Christmas. I guess I had also better plan in some time to spend with my family to just relax and enjoy the season…

I wish for each of you to find some peace and quiet with the ones you love during this hectic season. Oh, and some enjoyable shop time!

Stuff I’ve built (with some help!): The Nativity Sets

Last weekend, I was able to get those mangers finally done… and that was a good thing, because last night was the big holiday party for the St. Petersburg Woodcrafters Guild. Again, the mangers were part of the nativity sets that we were putting on some of the tables as centerpieces and door prizes for our guests.  And, boy, did they look great!

The manger set up on my bench Centered... with all of the pieces

Again, the plans came from Steve Good, and since I didn’t have a scroll saw, I was put in charge of building the mangers and the bases. After everything was glued together, I sanded the mangers down to 150 grit paper, brushed them off and sprayed three coats of dewaxed shellac. You didn’t know I has a sprayer, did you?  Well, that’s grist for another post. After spraying and drying, I sanded them down with some 320 grit and hit them with a little paste wax.

The figures and the icicles were cut by fellow guild members Ted Bateman and Bill Murhpy, who are both talented scroll saw woodworkers.  And, boy howdy, did the both do a great job!  I’m not sure of the finish they used, but they looked great. Bill used a grab-bag of wood scraps (I’m not sure of the species) and Ted did the roof decorations out of 1/4″ Baltic birch plywood.

A cute little maple and walnut snowman

When Rhonda and I got to the party, we quickly grabbed our seat. I was staring straight at a gorgeous little snowmen one of the group’s turners had made. It was fun to see such a well made piece joining the party.

After we ate, we got down to some quick guild business. It was at that point… well… OK, I have to admit it now… a new slate of board members was officially sworn in for 2013.  And, yes, yours truly was sworn in as Vice President for the guild. Incoming President Dale Neff gave me a quick wink when we got the news. It was grand!

President Dale Neff gives me a wink

As Rhonda and I drove home, we were happy with the outcome of the night. We had a chance to pal around with some local woodworkers, I was able to get two of the mangers to our visitors (we held one, and Ted and Bill got the other two) who were thrilled to have them, and we are just that much closer to Christmas, my annual break from work and some quality shop time for some upcoming projects.

A little less than two weeks now!


Stuff I’ve Built: My miter bench

Just a few short weeks ago, I was bemoaning my lack of shop space – or at least, the lack of organization in my shop space. After a few years of just throwing items over the bench and not worrying about them until I dropped something I had to actually find again, I began to lament my lack of organization.

Well, this past week and a half, I got off my butt, into the shop and did something about it. First, I sketched out a design that had to 1) Serve as a miter saw workbench, 2) have ample storage for tools, coolers, beach accoutrements, recycling bins, paint cans and the like and 3) Give me someplace to park the shop vac and roll around drill press table totally out of the way.  Armed with the drawing and a list of the materials I already had on hand – after all, I was cannibalizing the shelving system I had built – I headed off to Home Depot to make magic.

There, I had to pick up a new sheet of 3/4 inch plywood ripped into two two-foot strips, six 2×4 studs, a hand full of Simpson Strong Tie connectors and a Snickers bar. Remember, Snickers satisfies you, right?  Once the shopping trip was done, the fine folks at big orange wrapped the heck out of the lumber on the sport rack on our Jeep Compass. Yeah, that’s normally where my wife’s kayak resides, but I had to make some exceptions.

Back at the shop, I took the old shelving system down, saving every screw, every 2×4 and every sheet of old plywood to reuse in my new set up. Yes, it was the green thing for me to do, and it saved a fortune on buying extra materials. I think I may have used 200 plus screws putting the old one together… wow… that was a lot of steel!

With the old shelving unit removed, I was able to finally sweep up all of the sawdust, cobwebs and other nastiness that had accumulated in the area over the years. And paint cans. My goodness, where did all of those old paint cans come from?  There were paint cans bought by the former owner of the house back in 1996 hiding out. Amazing… Who knew we also had a shallow well pump to irrigate our yard?  Wow, the things you find while digging around under there.

Starting fresh, I built the first module of the system. The strong-ties make assembling utility benches a piece of cake. Before long, I had the skeleton of my new bench system together.  On the far right end, closest to the garage door, there is my dust collection unit, the ‘garage’ to park the shop vac and drill press and a set of shelves for stashing less-frequently used tools.  All the way over to the left, closest to my side entry door, is the air conditioner and heater, my long tools, and the ‘family’ shelf tower that holds coolers, recycling bins and the like.

Over the pump, I wanted to put the miter saw station.  I put a shelf about four inches above the top of the pump unit. This is for offcuts I make at the miter saw. For the top deck that the saw was going to sit on, I measured the height of the base and found it – surprisingly – the same height as the width of a 2×4. That was convenient, Ridgid!  I temporarily screwed a pair of 2×4 spacers even with the work surface, and mounted the cleat and 3/4 inch plywood deck to that. Once I removed the spacers, the saw went right down on top, easy peasey lemon sqeezy.

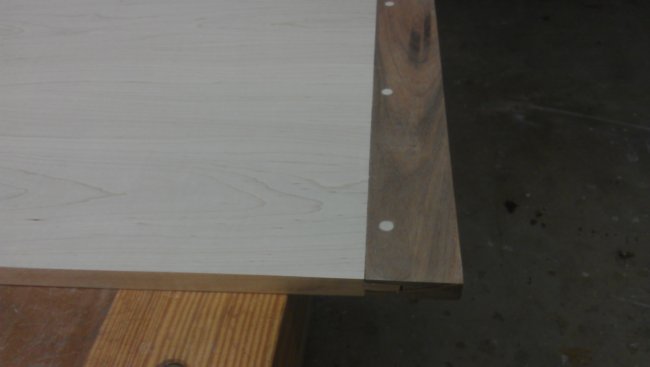
On the top of the work station, I wanted to have a fence and stop so I could cut pieces to identical lengths. I simply ripped some strips of 1/2 inch plywood left over from some other projects, glued and tacked them and then pocket screwed them to the work surface, carefully aligning them with the saw’s surface. I sanded this down to make sure there were no splinter makers on there, and I’m now using my old self-centering doweling jig as a stop. Talk about convenient!

Above the work surface, I built a short lumber rack. I mounted 2×4 uprights to my masonry wall with Tapcon screws, and then build some standards out of 2x4s and 3/4 inch plywood gussets. Those babies are STRONG!  On top, I put my Halloween coffin and other yard decorations, and the next level down has some choice small offcuts.

What’s left to do? Well, since the stop rail for the miter saw is forward on the table, I have a full 14 inches of space behind the rail to put in more shelves for more storage. I’ll put those in on the far right side – maybe that would be a good place for some table saw accessories, since it’s not far from the saw itself.  Now, to check out some large plywood offcuts to see which might be appropriate. Hey, that’s going to make more room in my wood storage area that way …

I also have my Delta air cleaner a neighbor gave me. I’ll have to hang a few hooks for that above the saw so it can filter the air and throw some light on the bench.

All in all, I’d say the are behind the bench went from a zero to a hero in about a week’s worth of work.


Stuff I’ve Built: The Valentine’s serving tray

Yesterday was Valentine’s Day… Which meant that I had better come up with a gift or face the wrath of my sweet beloved…

Just kidding, Dear.

Actually, my long-suffering wife had once mentioned something about our living room.  There, we have our couches, a few side tables, the TV, a built in entertainment center and an ottoman. A nice big one that two people can sit on, or you can throw your feet up on after a hard day of work. The only problem? No coffee table. No place to put a drink down, especially when you are sitting at the end of the love seat farthest from the end table.  “Wouldn’t it be great if we had some kind of serving tray to put on there?”

Of course, she said this about three years ago… but, who’s counting?  With the hanging wall cabinet done, my shop was kinda quiet, so I put my mind to building a serving tray.  Which plans to use?

It turns out that the folks who published Tommy Mac’s Rough Cut Season One companion book had sent me a copy to evaluate. And, there was a plan in there for a serving tray.

Digging around in my wood pile, I found a 8/4 chunk of walnut. Rhonda had mentioned that she liked the way the wood looked during the wall cabinet build, so I figured that would be the piece to grab. With my band saw now able to forgive me after the years of abuse I had heaped upon it, I rigged it with my 5/8″ resaw blade and proceeded to resaw the piece into three separate pieces. Working with my new thickness planer, I was able to get the pieces looking sweet in very short order.

In fact, I think I fell in love with resawing… I may need to do a whole lot more of that!

Following the instructions in the book, I was able to glue up the bottom and cut the sides and ends out of the plans I cut from the board. The tip in there about building a ‘magic block’ to help set the compound miter cuts was killer, and I got everything right on the first try. I cut rabbets on the ends pieces to accept the sides, and my boys came out into the shop to help with glue up and assembly.

Unlike Tommy Mac’s version, I used brad nails, filling them with some dark wood putty. I had the boys sand the piece, and finish it with a coat of shellac.  After smoothing the finish with some 320 grit paper, I rubbed in three coats of Johnson’s paste wax to get a soft, touchable feel to it.

After Rhonda left for work, the boys and I staged the tray on the ottoman with some special chocolates and cards from each of us. And, it was my youngest son Steven who got to surprise Rhonda with the piece when they returned from school yesterday afternoon.  How sweet…

So, you wanna hear a review about the book?  Funny you should ask… The Modern Woodworkers Association – more specifically, myself, Dyami Plotke, Chris Adkins and  Michael Lingenfelter – got together to do a review of it.  Here’s the audio review for your listening pleasure…

Be on the lookout for more stuff from the Modern Woodworkers Association coming soon!


Stuff I’ve built: The hanging wall cabinet

Can it be that time of the year again? The National Art Program show is back at the Pinellas County courthouse, and I had to get back into the competition. Sure, there were other project ideas I was going to build. A chair with bent laminated legs and a carved seat. Didn’t have the time to get that one built. Dominic wanted to enter a bench. Nope. Too many things going on with him.

Ahh, but I did have one trick up my sleeve. I wanted to build a hanging wall cabinet, and I had a really good model to work from over at the Wood Whisperer’s Guild. Gauging my design off of that, I built one of these…

This is my version of the case made of walnut and tiger maple. The case stands about 26 inches tall by 16 inches wide by 7 inches deep. It’s a very straightforward design, with a drawer and a taller part of the case covered by a pair of doors.

The corners were joined by a through dovetails. And, no, I did not hand cut them. They are WAAAAAYYYY too tight for that.

The doors are the ones I wrote about last week – mitered.  The drawer is box-jointed walnut and maple.

The real design question was with the handles. I couldn’t just go buy handles at some hardware store, I needed to do something a little more fancier and shop made. I toyed with a few designs and was going to go with a pair of shell-type pulls I would cut out of tiger maple and cove out over at the router table. While pondering how I would make this cut, I was struck by how thick and chunky the blanks were that I had roughed out on the band saw. That’s when inspiration hit me – why not split them in half and use the bookmatched grain to do something interesting… kinda like this on the door.

Or these babies as the drawer pulls.

I finished the piece by sanding it to 220 grit, then wiping it down with a coat of 1# cut dewaxed shellac. Once dried, I sanded it down with 220 grit paper to get it baby’s behind smooth. From there, I applied two coats of my hand mixed oil/varnish blend, sanding with 400 grit paper between coats. Finally, I buffed it down with some paste wax to give it a nice soft luster.

It goes into the display cases today, and next Monday, we’ll see how well is places in this year’s contest.  Wish me luck!


Making the cut

Check your calendars. We are now halfway through November. With the holiday season quickly gaining on us, now is a pretty good time to start thinking about what you are going to build for those special folks on your gift list.

What are you considering? Sure, big impressive projects make a splash when they are opened, but they take a lot of time and planning to pull off. What you need is an easy to build piece that only looks like you spent a long time on it.

“Everyone loves to spend time in the kitchen. It’s a room that gets used just about every day. Something for there could be a big winner,” said Eric Poirier of Bell Forest Products. “What family chef wouldn’t love a hand crafted cutting board?”

I’m gonna come right out and say that I have built end grain cutting boards before. While they are very pretty, they do take some time to build and can present problems when working the end grain. Not insurmountable, but not something you want to try to figure out with shipping deadlines looming.

There is another option… Bell Forest Products also offers an easier to build face grain model. And, with a kit like this and a few nights in the shop, you will be the holiday hero.

The kit includes two pieces of maple and a contrasting strip of either walnut our purpleheart. “We chose some very hard species which can stand up to years of slicing and chopping.”  The pieces I got were milled to the same thickness. The center strip of walnut in the kit had very smooth, straight edges on both sides, and the two birdseye maple pieces had one jointed edge.  Some glue on the edges, a night in the clamps and bingo…the blank was ready to roll.

After gluing these pieces up with a waterproof glue, it’s a simple matter of cutting the board to shape with a jigsaw, band saw or scroll saw, sanding and finishing. The kit includes a template for a classic design, “or, you can go free form and make a one of a kind piece. Heck, we even include a blank rectangle of MDF for you to free form your own template.”

While mineral oil is the tried and true finish for such a piece, finishes such as salad bowl finish or walnut oil can do a good job as well. Just be sure to allow plenty of time for the finish to cure before someone starts cutting on it.   And, when it gets knife scarred after years of use, a quick sanding and refinish is all it takes to restore the piece back to its original luster.

With the clock ticking toward the holiday season, one of these cutting board kits can give you the gift of more relaxed, enjoyable shop time.