Category Archives: Finishing

Wax on, wax off

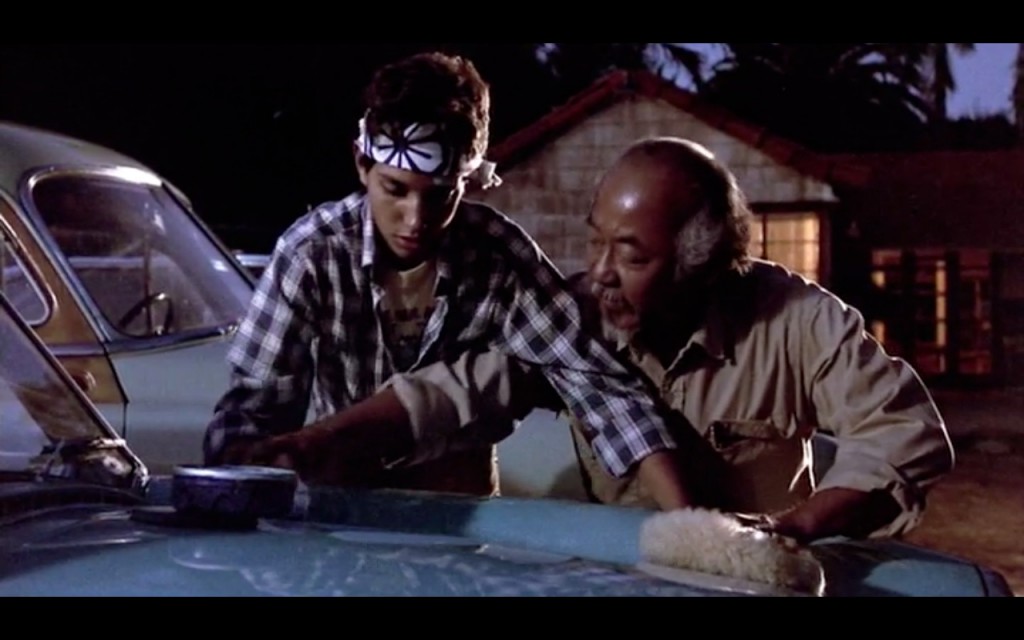
Who could ever forget the memorable scene in the classic 1980’s movie the Karate Kid when Pat Morita was trying to teach Ralph Macchio the basics of karate. Rather than bring Daniel-san (Macchio’s character) to a dojo to learn the skills, Mr. Miyagi (Morita) brought Daniel-san to his home to do menial tasks. Painting the house and fences, sanding a deck and waxing cars. Not only did Daniel-san have to do these basic tasks, he had to do them a particular way in order to learn the basics of the martial art.

In much the same way, many woodworkers envision themselves building these awesome projects, but few envision the thrill of finishing that awaits them at the end of the build. For some woodworkers (this one included), they would rather have a root canal performed on their teeth than finish their pieces.  Why? Is it the tedious task of sanding and scraping the saw marks off of the pieces?  Sure.  Is it that applying a smooth finish can be a real challenge?  You betcha.

Much of this frustration may stem from the fact that these woodworkers see limited options when it comes to finishing.  If the only finishing material you rely on is brushed on polyurethane, the fear of runs and sags is a reality. If you rely on oil finishes, how can you be sure that the finish won’t weep out of open-pored woods (Or  worry that  the oil soaked rags might catch fire in your shop)? Maybe it springs from the dreaded task of cleaning out spray equipment?

For those of you who worry, set your minds at ease. There is a finish that you may not have thought of that is simple to use, easy to apply and doesn’t change the appearance of your wooden projects.  It’s wax.

Waxes have had a long and storied tradition in woodworking. From lubricating drawer runners and the soles of planes, their slippery nature is well known. But, waxes have also been used as finishes and topcoats for centuries on wooden projects, and they are just as useful as today as they were all of those years ago.

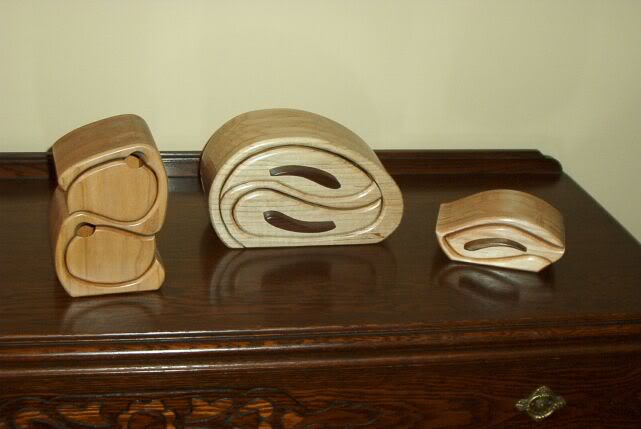
Wax is a great finish for items that are primarily put on display, but don’t get a lot of use. Turned candlesticks, sculptures and small boxes are excellent candidates for wax.

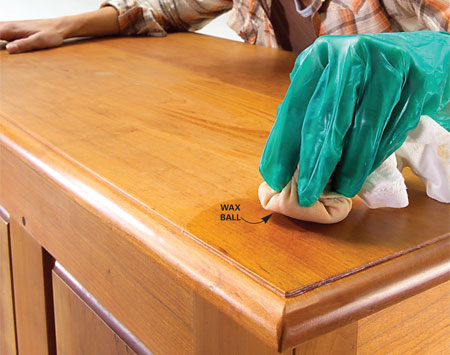
To use wax as a finish, just apply a decent sized amount – something about the size of a golf ball – into the middle of some soft cloth. Old t-shirts are great for this. Wrap the wad of wax up in the cloth and form it into a pad, kneading it into the cloth. As you rub this cloth-covered glob of wax over the furniture, it will melt with the warmth from your hands and work through the fabric’s weave, applying a fine coat on the surface of the project. Keep working the wax into the piece, and you’ll notice a haze building on the surface. Once you get the piece good and covered, take a clean cloth and buff the surface up to a soft luster.

I have had a lot of success first applying a coat of shellac to the piece and buffing that down with some 320 grit sandpaper before buffing the wax on. That helps build some additional protection into the finish while making for a much smoother surface.

Most paste furniture waxes are made from petroleum-based waxes such as parafin, but higher-quality furniture waxes will contain a good portion of beeswax or – even better – carnauba wax in the mix. Carnauba wax is a very hard wax harvested from palm trees and offers a more durable surface.   Additionally, high-end waxes such as Liberon or Briwax also offer tinted waxes, which can subtly change the color of the wood they are applied to.

The downsides? Wax does not form a hard surface on your project, so it will offer only limited protection. So, it’s probably not a good idea to use just wax on the surface of a table. Also, it offers nearly no protection from water.

While it may not be the perfect wood finish, wax provides a finish that’s both pleasing to the eye and the hands, and it’s very easy to apply to your project.   And, with a new finishing option in your repertoire, you are well on your way to mastering finishing.

 

Stain on my brain

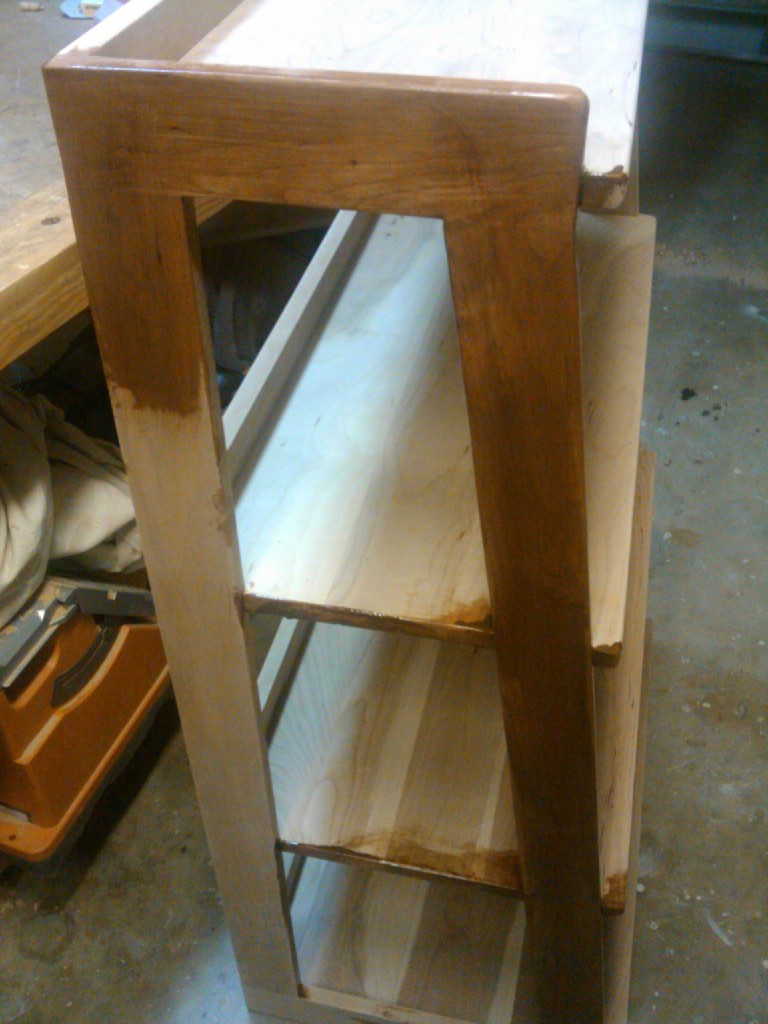
So, the end of the line is coming for the step ladder bookshelf project. Finishing. The part of the project that scares me. Because, well, I usually mess things up in this phase.

Deep breath, Tom. Take it easy and relax. It can’t be all that bad.

Wait a second. I’m going to use stain.

Aaaaaaaaaaaaaaaaaaaaaaaaaagh!

Yup, this is the first time in a long time (like perhaps a decade) that I’ve used stain in a project. The cherry I was using was such a mix of sapwood and heartwood, I just had to go and use some stain to – as Norm says – unify the look of the piece.

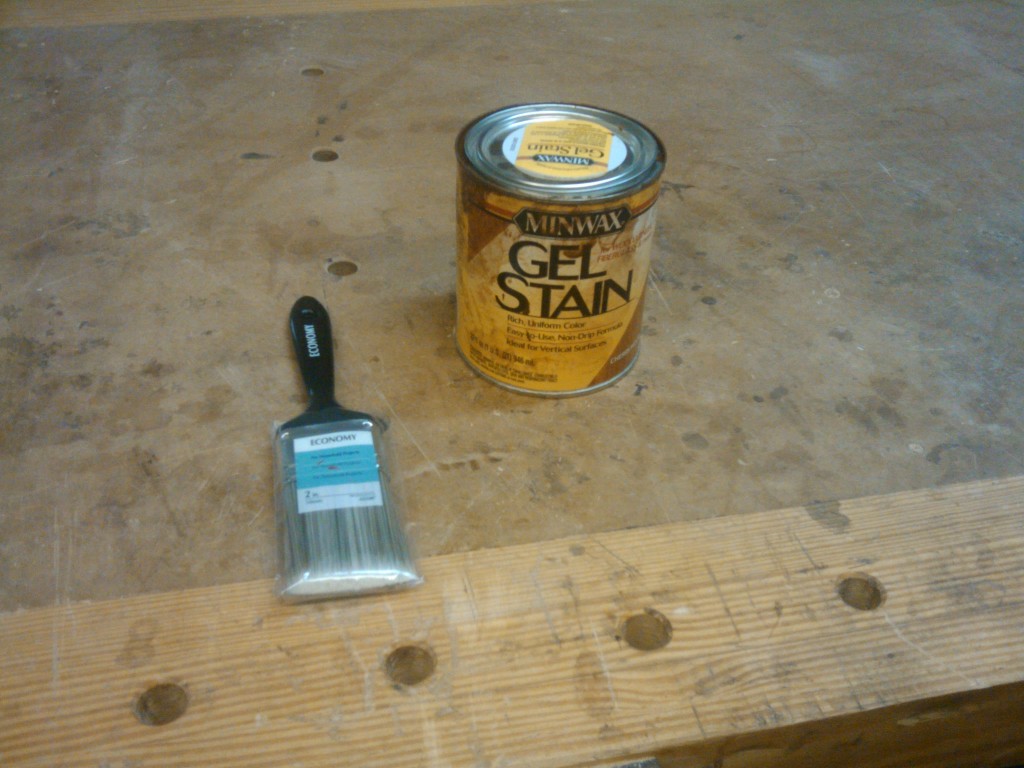
The only choice for cherry that made sense was to use a gel stain. Minwax’s cherrywood, to be exact. Since cherry is so blotch prone, gel stain absorbs slowly, preventing the inevitable nasty stain job. That is, of course, if the user applies it right. Gulp.

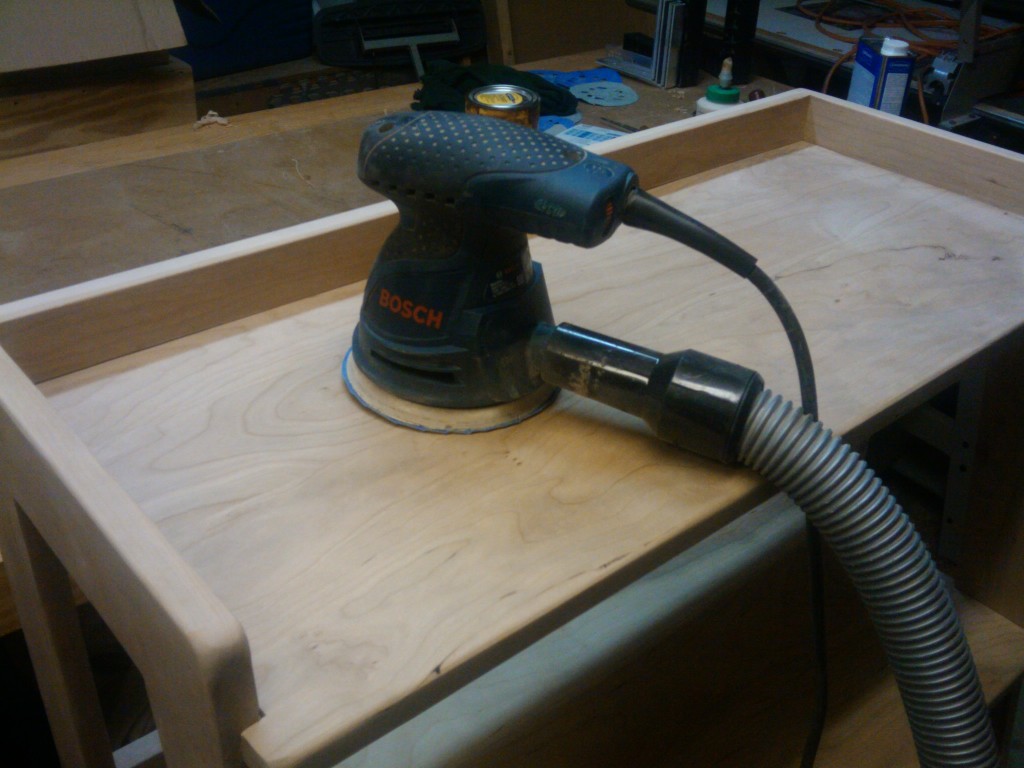
So, I had to sand. And, with my random orbit sander, I was able to sand through 180 grit with relative ease. I’m still amazed how quickly an thorough sanding can take a project with imperfections and really perfect it. Of course it takes time, but hey, that’s the way stuff goes.

Next up, I brushed off the dust and cracked the can of stain. It was some wild looking stuff.. kinda clotty. I stirred it up, dipped a cheap brush into the mix and started applying it to the project. Unlike the thin stuff you normally use,  you really have to move the stain around with your brush. I worked it into the corners and across the flats, keeping it as best I could to one plane at a time. This way, I hoped to prevent issues with lap marks.

Now, since gel stain is thicker than the thin stains, it also presents a challenge when wiping off the excess. Even when I followed the can directions to wipe off the excess within three minutes, the stuff on the board was already tacky and tough to wipe off. To help get around this, I dampened the wiping cloth with some mineral spirits, which took off the gummy surface residue without affecting the nice color I had gotten on the surface of the boards.

The results – not too bad. Remember that stain accentuates whatever sanding scratches you leave on the surface, so there were some areas that I had to resand. Oh, well. That’s the way it goes.

Now, I’m going to have to let it dry at least 24 hours before I can start applying a wipe-on poly to get a protective surface for the project.

And, I’m going to have to build that surface over the next few days, because I’m headed to Cincinnati for Woodworking in America 2011 this coming Thursday. More on that in Wednesday’s post…


Get the Lead Out

Helping others, especially needy children is a wonderful thing to do.  The Northwest Indiana Woodworkers Association has been doing this for 19 years.  However, due to a new law concerning protecting children from finishes containing lead, we will not be able to continue giving toys after February, 2010 unless we have them tested.  This applies to everyone according to the Consumer Products Safety Commission.

You will be breaking the law if you distribute items to children age 12 and under unless they have been tested for lead.

It does not make sense because the the problem of finish containing lead comes from imported products, not items made by you and I.

We have told our congressman and senators about this situation, but they do not seem to be concerned.

— Robert Roach

When I get e-mails like this one, my first reaction is to think that it is some kind of Internet chain letter hoax.  I mean, it sounds too crazy to be true.  With all of the problems in the country today, to think that the government would concern itself with the products coming out of my  – or anyone else’s – workshop just seems too unreal.

But, Robert and the rest of the woodworkers in the Northwest Indiana Woodworker’s Association are indeed telling the truth. As of February 10, 2010, it will now be considered against the law to give a finished wood project intended for a child under the age of 12 – or a piece of furniture to be used for a child under the age of three – without having it tested in an independent laboratory for lead content.

For real.  You can read about it here.

Crazy, ain’t it?

Now, it’s not the wood that’s the problem.  In fact, wood is specifically listed as a non-lead containing material.  Make a thousand unfinished wooden projects and give them away freely. It’s  the finish that is what’s at issue.

To understand what’s going on with this, let’s go back a few decades.  For centuries, lead was an important part of the paint and finish industry.  Lead was an excellent pigment for white and bright yellows, and also sped drying, increased durability, retained a fresh appearance and resisted moisture that causes corrosion.  It was everywhere…

Until lead paint was linked to severe health issues.  It is especially damaging to children under age six whose bodies are still developing. Lead causes nervous system damage, hearing loss, stunted growth, ADD, ADHD and delayed development. It can cause kidney damage and affects every organ system of the body. It also is dangerous to adults, and can cause reproductive problems for both men and women.

So, in 1978, lead was banned in paints for residential applications.  However, there are some finishes where lead can still be found.  And, when products are imported from overseas manufacturers, it seems as if there are new reported cases of elevated lead levels in toys nearly every year.

This regulation is now in place to help prevent possible future lead poisoning cases.

But, doesn’t it seem to cast a net too widely?

To help get to the bottom of this issue, I made a call to the Consumer Products Safety Commission.  I identified myself as a woodworking blogger and asked to speak to someone knowledgeable about the topic.  I was connected to a nice gentleman named Joe Tsai, who was able to answer my questions.

First, I asked Joe the question that’s on the minds of just about all woodworkers.  If you are building a cradle for a grandchild or a rocking horse for a niece or nephew, do you need to have in tested?  “No… you really aren’t distributing the items if you are building one at a time for an individual child.  We’re counting on woodworkers to use their common sense and seek out  lead-free products for finishing on their own.”

What about Robert’s situation, where a number of woodworkers are building projects to donate to a charity? “Well, in that case, we would advise you to get one of the items you are building tested.  This way, you protect yourself and the group should someone later have it tested and want to sue.”  Yes, that’s right, Joe said that as long as the same finish product is being used on the projects, just one of the batch will need to be tested, not the entire lot.

Joe said that the CPSC offers a list of independent laboratories that can do the testing for a fee.

That’s all well and good, but something still didn’t make sense for me.  Hear me out.  Say the Amalgamated Weasel Spit Finish Factory makes a finishing product that imparts a hard-wearing, hand-rubbed finish to your wood project.  Why not test the big parent batches of finish while they are being made at the factory instead of asking the 20,000 woodworkers to get their projects tested for lead?

It’s thinkin’ like that that gets me into trouble.  But, not this time.

This time, instead, I put a call in to the folks at Minwax, arguably one of the largest wood finish manufacturers in the world.  I was connected to a really nice guy named Kyle Holtz.  I asked him what the industry is doing to help address this issue.

It turns out, quite a bit.

Back in 2007, Sherwin Williams/Minwax was working with the government and their own product safety people to determine which of their products were compliant with the upcoming regulations.  A memo was recently circulated to their consumer information techs and  reads:

We received Regulatory approval in March of 2007 to recommend Minwax Fast-Drying Polyurethane, Minwax Wipe-On Oil-based Polyurethane Finish and Helmsman Spar Urethane as coatings used on (baby or child) furniture and toys. Originally Polycrylic was on that list but was taken off back in April of 2009. If a customer wants to know what products are safe to use if they can be chewed /ingested we should make no recommendation.

OK, so the folks at Minwax can’t tell you that their products can be eaten safely, but they can indeed be used for furniture and toys that won’t be ingested or chewed on.  For Minwax, they understand that the build – and – do-it-yourself community is their main audience, and anything they can do to help woodworkers adjust to these new regulations is only going to help their bottom line.

What does this ultimately mean for the home woodworker?  Well, if you are building for your family or a friend, you have the green light.  If you are concerned about lead, call the finish manufacturer to ensure you get the safest product possible.

If you are going in on a group charity build, it would be worth it to get the Material Data Safety Sheet and any other documentation from the manufacturer and look strongly into  getting an item of the lot tested… just to ensure you are walking the straight and narrow and to head off any possible lawsuits.

And, build away!  The kids who are getting these gems are the ultimate winners.

For your reference, here are a few contacts for some of the larger finish manufacturers:

Editor’s Note:  Yes, this article deals only with toy donations… not the sale of toys.  If you build and sell toys, consult the CPCS for regulations that affect you.

I Was Dyeing To Try This…

When my brothers and I were very young, our family lived upstairs in a two-family house in Ridgefield Park, New Jersey. And, if you were to check our baby albums out, you would notice that all of the upholstered furniture in the house was covered in plastic slip covers.

They were insanely uncomfortable in our un-air conditioned home during the warm summers, but they served their purpose – they kept stains off the furniture.  Remember, kids like to spill stuff.  And, the more brightly colored the substance, the more likely it is to be spilled and leave permanent stains.

This got me to thinking… on those occasions where I do want to change the color of a board, why do I reach for either a wood stain or aniline dye?  Why not try some of those things that will stain carpets, clothing or furniture?

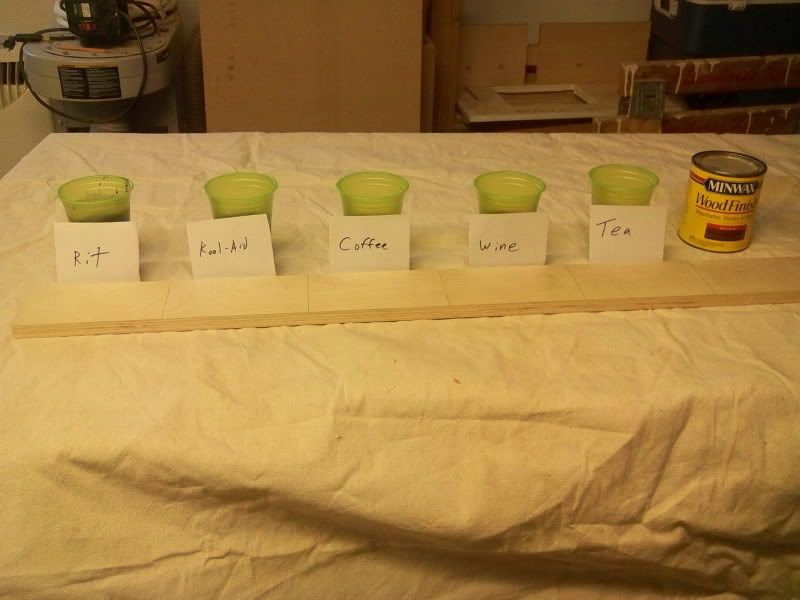
To see how well some of these alternate dyes work, I set up a little experiment.  What stains badly if it comes into contact with household fabrics?  I set up a sample board – a length of birch plywood – and lined up my candidates…

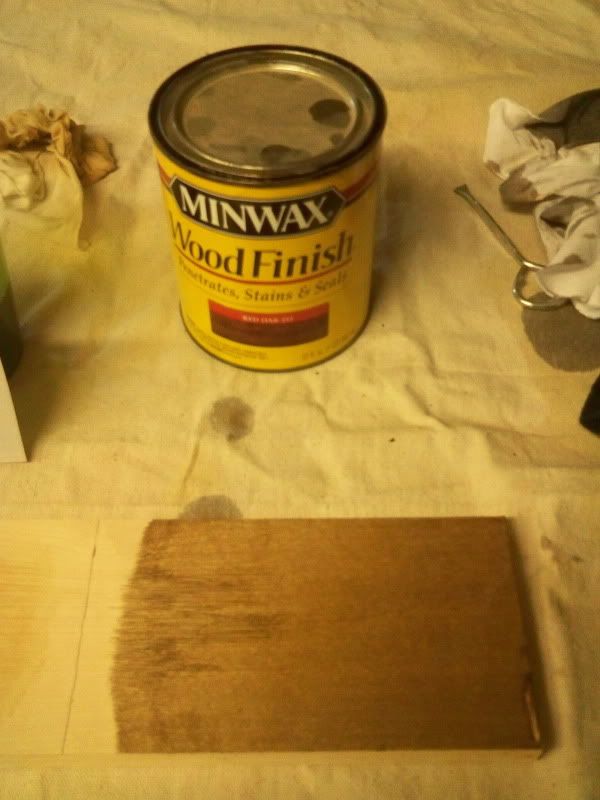
From left to right, I have Rit fabric dye – dark forest green, sugarless Kool-Aid drink mix, strong coffee my wife and I didn’t drink, an ultra cheap-yet-cheerful cabernet sauvignon and a strongly brewed batch of tea. I also used some Minwax red oak oil stain as a control.. showing just what a wood stain is supposed to look at.

What were the results?  Well, here’s what I came up with (Click on the images to see larger photos):

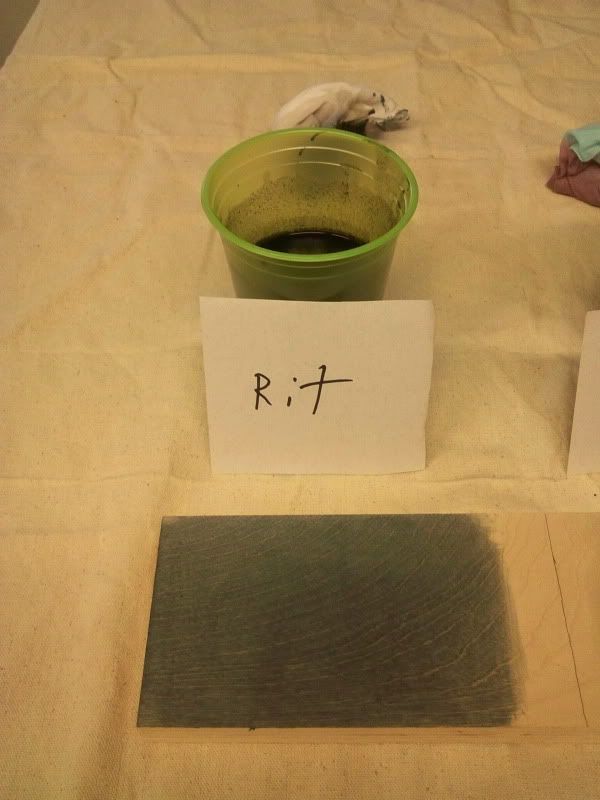
Rit dye ($1.10/package) – I mixed this popular clothing dye at the ‘strong’ ratio of one packet per cup of hot water and let it sit for a while.  It gave a very dark green cast to the board on the first application, and it got even darker on the second application. While the Rit dyes aren’t typically offered in wood-tones, if you are looking to add a splash of vibrant color to a project (say for a child), this ultra-cheap yet effective dye may not be a bad choice.

Kool-Aid (20¢/packet) – I mixed one package of this unsweetened kid’s drink into a cup of water (normal ratio is one packet to two quarts of water) and wiped it on.  This had an interesting effect – where I wiped it on, the color was a sickly purple, but the mix that wicked away on the wood fibers appeared to be a pure blue.  Ultimately, the color was a very unattractive purple and didn’t do it for me.

Coffee (the one pound bag cost $6.00 – we used about 35¢ for this pot) – BoyhowdydidIgettodrinkalotofcoffeetomakethishappen…. After I got over my jitters, I wiped three coats of strong black coffee on the board and I have to say was I ever unimpressed.  Either it wasn’t quite strong enough, I didn’t use enough of it or coffee is a terrible wood stain.  It did impart a very pale tan to the board, but it was very subtle.

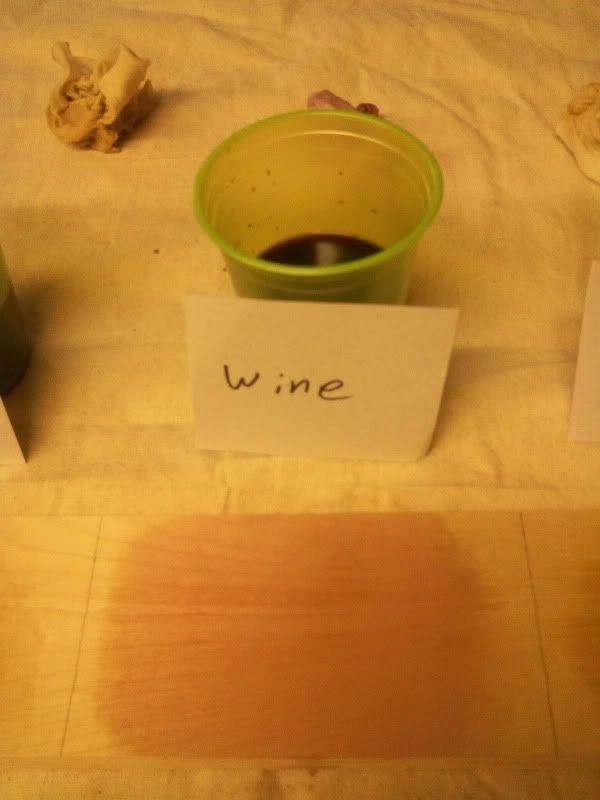
Wine ($2.95/bottle – I told you it was cheap) – In vino, veritas.  And, the truth is that the wine proved to be a very interesting dye.  I wanted this to work very well, but the first coat wasn’t impressive.  By the time I got to the third coat, however, things changed.  Cab tends toward the ruby end of the spectrum (versus a shiraz, which is more purple), and the final results were very easy on the eyes.  A very pleasant look that might be suitable for accent pieces for a wine cabinet.

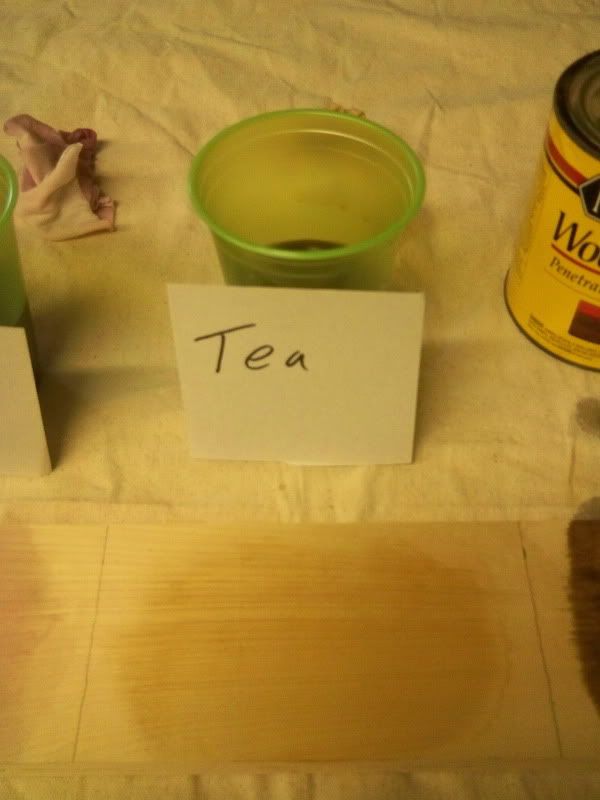
Tea ($1.15 for a box of 24 family size ice tea bags) – With all of the sickness that’s been in our house the past few weeks (colds and flu), we’ve been through a lot of tea bags. I have heard that people have used tea successfully as a dye for lighter woods, so I was looking forward to trying this.  From the first (of three) coats, the tea showed it was superior to coffee and provided a warm patina, much like wood that had been allowed to age for a while after being cut and surfaced.  I would certainly consider using tea for future projects.

As was expected, the commercial Minwax stain provided a deep, rich color to the wood on the first coat with minimal fuss.  Of course, there was the inevitable smell did fill the shop and the stain on the rag did color my fingers, but it was the winner hands down.

What did this test teach me, besides the need to use gloves when staining a project?  I found that some lower cost alternatives to commercial wood dyes and stains are viable options.  They can provide an interesting and unique look to your piece – whether as an accent or to set a tone for the entire project.

Oh, and I learned that all of these different items which have gotten me into trouble all of these years can be used for the power of good, instead of making your mom angry.

A long e-mail chain…

In case you haven’t yet guessed, I love to write.  And, when readers of Tom’s Workbench send me an e-mail, I enjoy the back and forth that takes place.

Some people have called me a know-nothing hack, while others have said I’m pretty decent with a saw.  While those are intersting to read, the ones I really enjoy are those that come in from readers asking for my opinion or assistance because – for some strange reason – they want to use a technique I had described.

This past April, reader named Big Bill McDonald wrote in, asking what appeared to be a simple question about the finishing recipe I had described in my post I’m So Finished.

Little did I realize that for the next four months, Bill and I would be exchanging a series of e-mails back and forth about finishing methods and philosophies.

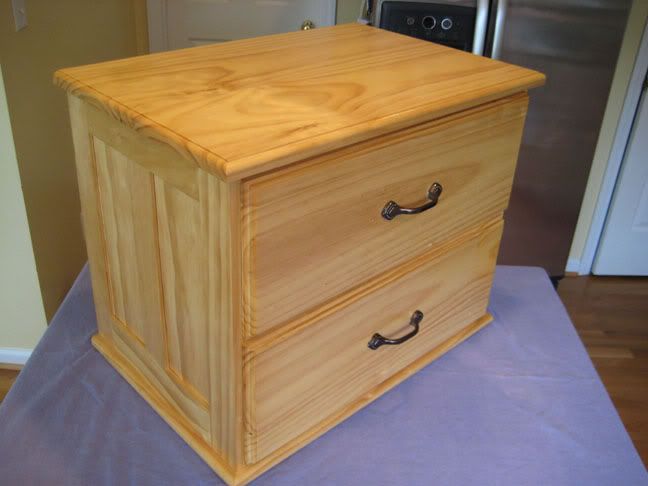
Bill stared out asking about using the Rude and Crude finishing method on a pine toy box he had built.  Concerned about splotching on the piece, we communicated about the shellac seal coat and its purpose and the rest of the finishing regimen.  Judging from the results he got, I’d say this piece came out beautifully, and his son Ben should be one very happy camper to have such a nice piece in his room.

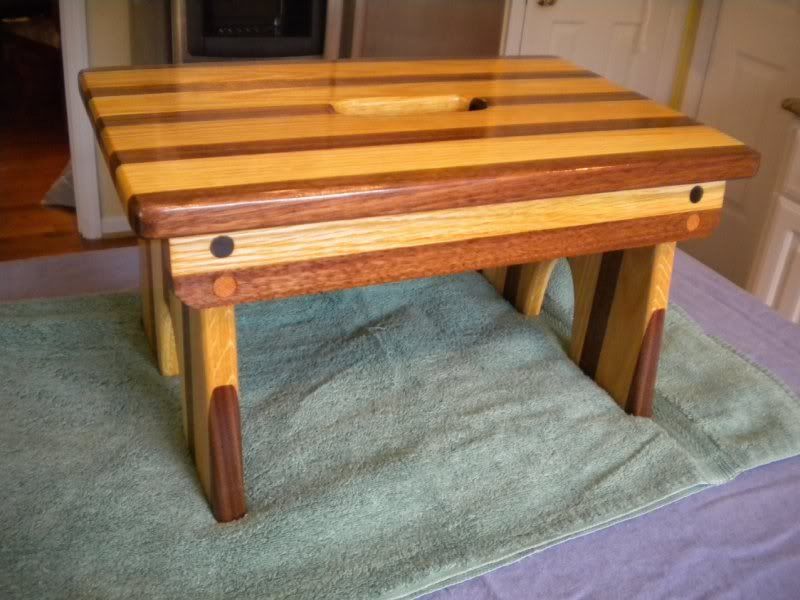
Being that we are both dads, we quickly understood that one project was going to lead to many more. The next one he tackled was a very sweet looking walnut and oak step stool, so his kids would be able to do those important tasks we always hope they will learn to do WITHOUT us having to hound them… (OK, go back into the bathroom, flush AND wash your hands with soap…)

Ben had based his design on a piece he saw on the Internet.  Using strips of walnut and oak to laminate the panels, Bill did a very good job, building a sturdy step stool that will see many years of good use.

Of course, the stool presents its own challenges – it will stepped on by clean and not-so-clean shoes and will undoubtedly see a lot of water.  Bill was concerned that the finish recipe may not be durable enough to survive those rigors.  Once I assured  him that the step stool I built for my sons managed to survive with very few marks, he seemed relieved.

Now, to be fair, Bill did start this last series of e-mails with the line:

Ok – this is my LAST finish question, I promise ! (I say that to myself every time – sigh.  Finishing, I have learned, is it’s own whole world).

However, that’s OK if you keep e-mailing, Bill.  It has been fun discovering this world of finishing with you, and you are teaching me a great deal about your methods along the way.

E-mails like yours are some of the best I get in my inbox and prove, once again, that the online woodworking community is an active and vibrant one.

Become your own mixologist

The coolest job in any restaurant belongs to the bartender.  Sure, the chef gets the credit for the outstanding meal, the maître d’ for the ambiance of the place and the wait staff for the overall dining experience.

But, when people want to have fun and strike up a conversation, they turn to the bartender.  Think Isaac on the Love Boat.  Tom Cruise in that stinkin’ movie about being a bartender.

“Yes, Mr. Bond would like his martini shaken, not stirred,  Mr. Sinatra wants a highball, and Evel Knievel wants two fingers of Wild Turkey before he tries to jump the fountain in the parking lot on his Harley.”

While no one may be hanging out in your wood shop, you can be just as cool by mixing your own wiping finish.  Why mix your own?  Instead of just relying on what a manufacturer thinks is the best mix, you can adjust your formula to fit your own needs – faster drying time, more film build, etc.  Also, if you have cans and bottles of the components, you can use them in your finish instead of throwing them out.

Mixing your own finish is very easy.  There are dozens of formulas out there to suit individual needs, but this is my formula I have used very successfully through the years.

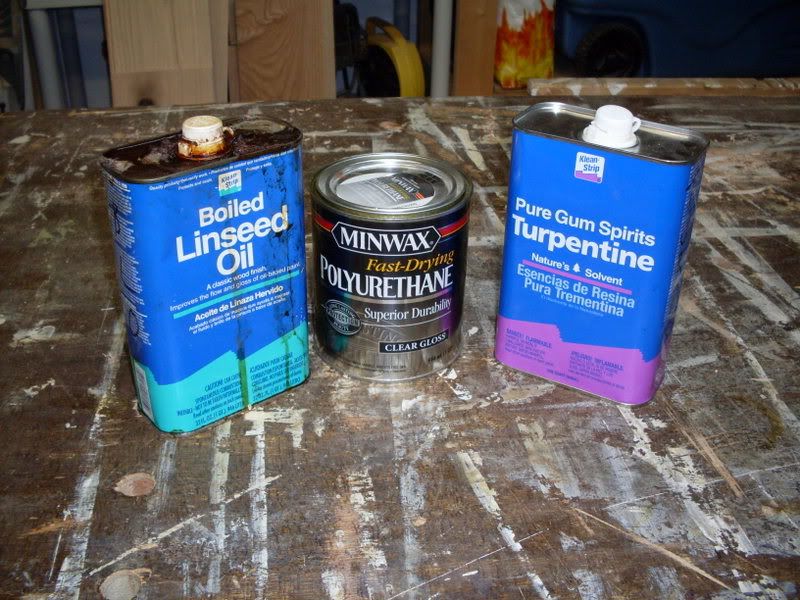
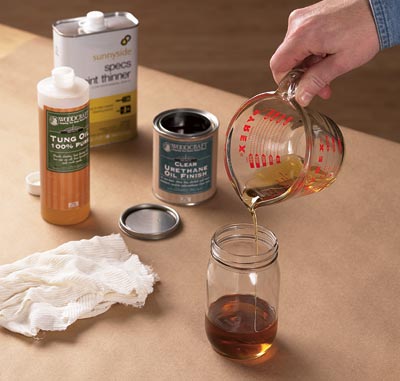
The ingredients can be found in any hardware store and start with boiled linseed oil (BLO).  This natural oil helps the figure in wood ‘pop’ and gives it a rich, deep finish.  The next ingredient is polyurethane or some other type of varnish. It offers a great deal of protection from water, abrasion and other hazards.  Finally, you have to add a thinner to the mix.  I like turpentine, but paint thinner or naptha will work as well.  It makes the finish flow nicely and level without brush marks and runs.

Now, here comes the hard part – mixing it together.  The ‘standard’ mix that a lot of people refer to is 1/3 varnish, 1/3 BLO, 1/3 thinner.  While this does make a nice mix, I have found that I can mix it 1/2 varnish, 1/4 BLO and 1/4 thinner.  It gives me a little faster build on the finish while still making for an easy wipe on.

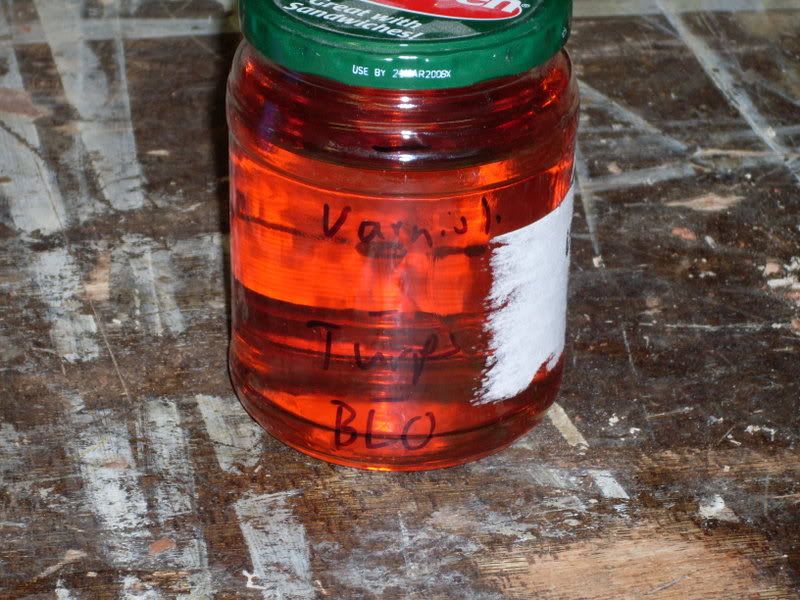
My scientific method for mixing involves an old pickle jar.  I measured up from the bottom in one inch increments, and poured the ingredients up to the lines.  No, you are not trying to send people to the Moon or split the atom, close enough will work…

After sanding the piece, I again prefer to wipe on a coat of 1# cut dewaxed shellac and sand it down to 400 grit after letting it cure.  Then, I wipe on the finish with a rag.  Don’t be bashful, the wood will soak up a lot of the finish – especially in end grain.   Let it sit for about five minutes, then wipe off any excess with a dry cloth.

I love how easy the mix is to use, and I have yet to be let down.

Now, after all that hard work, I think I’ll take one of those fancy martinis to celebrate.

I’m so finished

There’s an old Vaudeville line that goes something like this:

A man is not complete until he is married. Then, he’s finished.

I remember chuckling when I first heard that, and the hurt look on my wife’s face when I told her for the first time. That one took a lot of flowers and a homemade dinner to make up for.

For years, when I first started woodworking, I had a similar expression I used to tell everyone:

Finishing is the easiest way to ruin a perfectly good woodworking project.

I hated finishing a piece. It never failed – I had my finishing regimen, and it was always a disaster.

First, I would sand the piece. I don’t like to sand, and all I owned was a ¼ sheet finishing sander. Do you know how long it takes to sand saw marks out of a piece of wood with one of those? I’m asking because I just don’t know – I would always stop sanding WAY before the surface was smooth. I’d run the sander, step back (eyes watering from sawdust) and say, “OK, that’s enough for me.”

Then, I would stain my project. Since my first pieces were made of the cheapest wood I could buy, that meant pine. No. 2 common from the local home center. And, if you have ever tried to stain pine, you know that you should expect the worst. The blotching was incredible.

Impatient, I would never wait the recommended time for the stain to dry. I would pick up the can of brush-on poly and proceed to slop the stuff on with the first brush I could find that wasn’t totally clotted up with old, dry paint.

Needless to say, the pieces were always a disaster. Machining marks, blotchy stain and sags and runs in the finish were always hallmarks of my pieces. Oh, and the finish was very rough to the touch, what with all the dust in the film. It was pretty nasty.

After ruining several projects, I just had to find a new way to do things. After reading some great books – notably Bob Flexner’s Understanding Wood Finishes – and posting lots of questions on woodworking message boards, I was turned on to a method I use with great success. Maryland box maker Dave Knipfer calls it the Rude and Crude method of finishing, and I’ve found that there’s a lot of sound wisdom in giving it a shot.

First, I’ve really done away with staining. When I need a piece of wood to look like cherry – I go and get cherry. The range of colors in domestic and exotic hardwoods – and softwoods, for that matter – is very impressive. I’ve found it easier – and gives a better result – if you let the wood’s natural color come through.

The next thing I did was improve my sanding technique. Now, I’ll use a smoothing plane and scrapers to do the bulk of the work, and I will use sandpaper wrapped around formed bocks to reach into molding profiles. My Porter Cable random orbit sander does occasionally make an appearance, but the sweet action of planes and scrapers eliminates the drudgery of sanding.

The next thing I do is to use Zinnser Seal Coat as a sanding sealer. It’s a 2# cut of clear, dewaxed shellac, and I usually cut it half and half with denatured alcohol to ensure a very light coat. I’ll blow off any dust on the piece and then use a rag to wipe the shellac on. Don’t be bashful, use a lot of it!

Once it’s all covered, then you set the project aside for the shellac to dry. Give this process at least two hours for the shellac to really get set – overnight is preferable.

This next step may seem kind of counter-intuitive, but bear with me. You want to use a fine grit sandpaper (320 or higher), #0000 steel wool or a fine plastic abrasive pad, and rub the shellac finish. You want to sand that surface for a good long time. Dave says to rub until your arm is about to fall off – if your sanding arm hurts after a few minutes, you are doing a good job!

What you are doing is removing all of the shellac from the surface, leaving only the stuff down in the pores. Remember the blotchy pine problem? Leaving this shellac seal coat in the pores will eliminate it once and for all.

After what seems like an eternity, you’ll have a very smooth, begging to be touched surface on your project.At this point, I blow the dust off of the piece and get ready for the final step.

I have given up on brushes. Period. My new motto is, “If I can’t wipe it on, I don’t use it.” Wipe on polyurethane, varnish, Danish oils or similar finishes go on beautifully in very thin, even coats. You would have to try really hard to leave a wipe mark, sag or other imperfection in the surface if you use these products. The finish goes on very smooth over the prepared surface, and I set the piece aside to dry. Later, I will put on additional coats of the finish, following the manufacturer’s directions.

What do my projects look like now? The wood absolutely glows under a picture perfect finish. People who look at my stuff want to see it first, and then they want to touch it.

It’s a finish fit for a king.

Here King!