Category Archives: Finishing

A finish not lacquing…

When I started woodworking, I brushed on polyurethane. And, it was good.

Then, I developed a wipe-on finishing regimen with some home-mixed stuff. And, it was better.

Now, I’m on a new type of finishing kick, and it’s fast as lightning and does a very good job. Let me start of by saying that, yes, I do own an HVLP spray setup. I picked it up for pretty cheap over at the Lowe’s mega mart, and it does a good job. I think I have sprayed some water based poly and some shellac with fair results. I will need more practice. A can of lacquer 
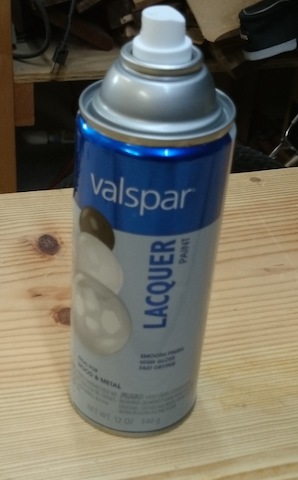
But, for speed and convenience, it’s hard to beat a can of lacquer. This stuff is the cat’s pajamas. Well, actually, it’s not – it’s nitrocellulose lacquer, made by the nitration of cotton. I’m not sure what the heck that means, but I can tell you boy howdy, does the stuff stink. If you are going to use it, make sure you use the appropriate respirator and PLENTY of ventilation, or you will be – how should I put this – overcome with the fumes.

But the finish it produces … wow. The lacquer dries very quickly when you spray it, minimizing the amount of time that dust or other stuff can collect in the finish. Like a shellac, the solvents in each new coat dissolve some of the coat laid down before, making the finish easy to level and easy to repair. It take a beautiful polish as well, and it’s plenty durable, which makes it one of the primary finishes used on musical instruments. Lacquered guitar 
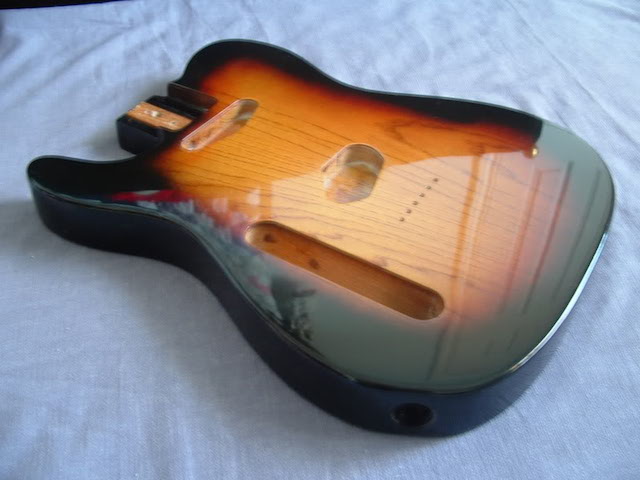
To help make applying the lacquer easier, I bought a simple spray can handle from the spray paint section of the store and attached it to the can. This way, I can hold my hand in a more comfortable position and apply the product in a smoother fashion. Can with the handle 
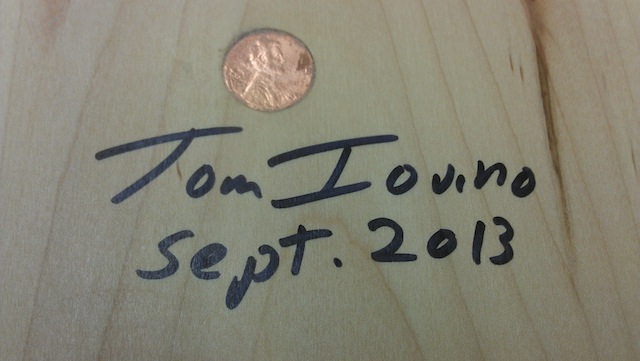
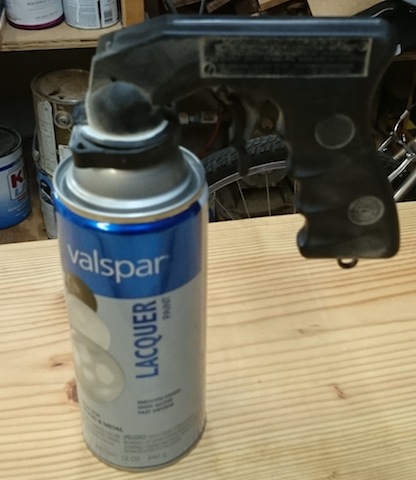
The regimen is pretty darned simple. I sand the piece down to 220 grit, then make a decision. On the dedication plaque I made for my friend Len, I first applied a coat of my wipe-on finish to give the wood a bit more depth. I had to let that dry for at least a week, since the finish contained boiled linseed oil and poly. Once I had that on and let it dry, I applied six coats of clear lacquer. Len's plaque Woah, you’re thinking. Six coats! Won’t that take an eternity to dry? The fun part of spraying lacquer. You have to wait – maybe – five minutes between applying coats. If that. And, since the solvents in the next coat bond with the previous ones, there’s no need to sand between coats as you build. You simply shoot layer after layer. To finish the piece off, I did sand it down with some 320 grit paper to ensure I had a very smooth surface, then hit it with one last coat. I can tell you, the finish on that piece is gonna be there for a while. Dogwood guitar's spray booth 
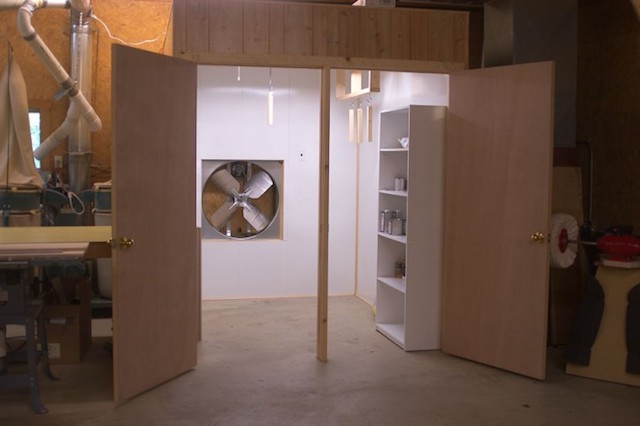
Now, if you are going to move beyond the simple spray can of lacquer, you are probably going to want to build a dedicated spray booth with an explosion-proof fan to provide TONS of air flow, plus an appropriate filter to get the solvents out of the air before you expel it into your neighbor’s yard. Kind of like the folks at Dogwood Guitars build in the picture above here.  But, that will be a post for another day.

Until then, if I need a high-quality hard film finish on a smaller project, I’ll get my can out into the shop.

You got your color in my finish!

Putting a finish on a project is one of those processes people have written books about. Yes, those books are worth their weight in gold. Adding color to – or changing the color of – your project is also a topic that throws a wrench into the works.

Wait a second… what if you could add color to the finish … wouldn’t that at least cut your problems in half?

Reeses... mmmmm

Or, could it cause an issue, kind of like when someone combined chocolate and peanut butter? Hmmm, or, I mean mmmm…..

Polyshades

Surprisingly, there are already products out there that do this. My first experience with this type of product is made by Minwax – Polyshades. This is basically polyurethane mixed with an oil-based stain. I read the label recommendations very closely, but ended up with a finish that ended up with some pigmented brush streaks.

The instructions on the can state very clearly that you are not supposed to thin the finish at all, but I mixed some thinner into the finish to the point where I could apply it with a rag, and got a better result.

Ingredients for your own home brewOf course, you can accomplish something similar by mixing some stain into a clear finish you use. In the jar, I have my homebrew finish of boiled linseed oil, thinner and varnish, and I have mixed the two together and finished projects in the past. Of course, you want to match the solvent in the stain or dye and the finish…

My dining room table

For instance, the top of my dining room table was primarily done with a clear finish. The first coats looked good, but after a while, I realized I couldn’t get the tone right. So, with a splash of some red oak stain into the finish, I put on the next coat and I was a lot more happy with the results.

Watco colored Danish oil

Another color and finish combo I have used is made by Watco. It’s sold as Danish oil, and it comes in the standard clear color. But, it also comes in blends that add color to the wood you are finishing. I am using the golden oak mix right now on the surprise project I am building, and it’s matching the color of the wood in the office I am trying to mimic. I have also used the dark walnut color on oak in the past to simulate an arts and crafts look, and it comes out looking good.

It really is a matter of simply wiping the finish onto the wood, letting it sit for a while and then wiping it off. I have yet to have it give me streaking when I apply it, and the surface is that same soft, touchable type of finish that I get from the clear version.

What they look like

As you can see from these samples… that’s some pretty good looking stuff.

A primer primer

Sometimes, I like to paint my projects.

Holy smokes, someone call out the people with the butterfly nets!  Tom has lost his mind!

No, seriously. Sometimes, painted furniture is just what a room calls for. I have a number of pieces that I have painted through the years, and they look crisp against the walls and on the oak laminate floor I laid in my house.

And, when I want a nice, smooth, durable surface, I like to use primer on the project to set up my finishes for success. And, for years, I used a latex-based primer. And got OK results.

Zinnser's shellac and red primerBut, recently I saw a shellac based primer for sale at the local home improvement center. Since it is from the same company that makes the seal coat shellac I use for my finishes, I knew it would be a high-quality product. I also wondered if I could treat it like the shellac basecoat I lay down under my finishes?

The unstirred primerSo, I thought I would show a little bit of what it’s like to use. When I pried the lid off the can, I could see that the pigment settled out of the solution, and the top layer was slightly amber shellac. I was also greeted by a similar warm aroma of the alcohol the shellac was dissolved in. The pigment was a little gloppy at the bottom of the can, but a few minutes of stirring got everything mixed up.

prepping the brushI was going to apply this test with a brush, so I took the extra step of splashing some denatured alcohol onto the brush to prepare it for the primer. I shook out the excess, dipped it into the primer and started brushing onto a scrap piece of plywood.

Applying the primerThe primer laid down very easily, covering the plywood with little effort. After cleaning the brush and resealing the can, I stepped inside to wash my hands and catch up on some Winter Olympic competition.

After letting the primer cure for half an hour, I got out a sheet of 220 sandpaper and scuff sanded the plywood to get a nice smooth surface. The excess primer cut cleanly, leaving the glass smooth surface I normally get when I sand down the seal coat on my clear finish projects.

Sanding up the dustWith just a little clean up for the dust, This piece is now ready for a finish coat of a latex enamel paint. Knowing that I can use the shellac based primer just like the seal coat means I can be pretty sure that the finish on my entertainment center is going to be something impressive.

Signing the piece

Well, Sydney’s medal and ribbon rack has made it safely across the country, and Kevin is planning on giving it to her this weekend. I can’t wait to see how she reacts when she sees it.

One thing I did before I sent it was ask Kevin if it was OK to sign the piece. I always ask if that would be OK, because I don’t want to presume that customers want me to sign the piece.

In the past, I used to use a branding iron to sign my pieces. That was great, but I always had issues getting a good brand. I never knew when the iron was hot enough to lay in the brand, and I was never comfortable burning a plumber’s torch in my shop.

My trusty Sharpie

The other thing I have done is to just sign the piece with a Sharpie marker. I have written some nice messages to my friends on their pieces, and I always try to put a little flourish on pieces with my name.  Dating the piece is also a great idea, so people will know when things were built.

The bright, shiny pennyOne thing I also discovered a few years ago was a set of coin-sized forstner bits. The penny sized bit looked pretty cool, so I ordered it. And, when I find some bright, shiny pennies from the current year, I put them aside to insert into my projects. I recently got this one in change from the purchase of my lunch, so it was kept aside for the project.

The drill jig setupDrilling the hole was easy with the special jig that the bit came with. It was a simple matter of putting the shaft of the bit through the jig hole, chucking it into the drill and doing the deed. There is no depth stop with the setup, and I know that coins are not very thick, so I went very shallow with the bit at first. I had to deepen it a bit after my first attempt, but it was easy to register the bit with the rim of the hole I had bored.

Getting ready to glueThe result was a nice, clean hole exactly the size of the penny, so I knew I was going to have one shot to get this in. A few drops of CA glue went in first, and then I pushed the penny in, aligning Lincoln’s head with the orientation of the project.

Signed and sealedThere. The penny is in place, my name is signed and the piece is dated. Hopefully, she will like the final result!


Tom talks finishing

I know this is kind of a short post, but this video was shot at the January meeting of the St. Petersburg Woodcrafter’s Guild. I was asked to do a quick presentation about my wood finishing regimen. I thought I would also post it here.

BTW – many thanks to Dave Knipfer of Maryland.. he’s the guy who taught me the method.  You see, Dave, I did pay attention!


Tom’s Workbench Invasion: Heading to the finish

Who left the shop door unlocked? It looks like Rhonda got back into the shop – again – to finish the step stool.  Since she was there, I had to press her into service writing another blog post.  Hopefully, you are going to enjoy this!

What with school starting and all, it took a little longer to get back in the shop than I had planned. But when I did get in there and shut the door to the house, I enjoyed it. The peace, the solitude, the task at hand all captured my attention. Besides, not even the most robust yells including, “Mom! I dropped something!” can be heard over the sander. Awesome.

* The first step was to go back to the step stool and re-sand. This seemed excessive to me, because I thought we were done, but Tom is the expert and if he says “sand”, you gotta sand. Actually, the real reason was that once assembled, joints must be smoothed and glue removed to get the most pleasing and professional product.

I started by using 120 grit sandpaper. This, in fact, achieved the amazing “like butta” texture Tom wanted. Since people will someday step on it as they ascend to the cozy bed in their bare feet, it makes sense to avoid all ouchy splinters and sharp edges.

* Second step: Finish the surfaces. After wiping down with a damp cloth, I put a “spit coat” of thin shellac on the step stool to seal the wood. I don’t know why they call it a “spit coat,” but I suspect it’s a guy thing. On the “gridiron,” a “spit coat” would fit right in.

* Third step: Sand again. This time I used a 400 grit sandpaper. I could NOT believe, and I’m being completely serious here, just how magically smooth that made the surface. You could literally sleep on the wood. It was just like a pillow… but harder.

Pause here. Sometimes I find that things get tedious around the 3rd or 4th step. I didn’t want to lose interest in this project, though. The end product might suffer. Therefore, I sought a tattoo for inspiration. (Duh!) Tom was mixing the solution used in the 4th step while I made sure NOTHING would interfere with the proper application of my “measure twice, cut once” tattoo.

* Fourth step: This was the “beauty” step. Wiping varnish all over the wood surfaces, including underneath the steps and the bottoms of the step stool’s legs, was a pleasure. I saw it turn into a piece of furniture that I would want to keep for years. The varnish was a concoction of boiled linseed oil, varnish, and paint thinner.

* Fifth step: Dry. (The time goes by faster if you have an addiction to “RHONJ” or “The Voice.” If you don’t know, don’t ask.)

* Sixth step: Paste wax over all surfaces finished off this project. I have to say that even though I had lots of help, I will be very proud to show the step stool to my mother –in-law. She will LOVE it. And so will her guests. Hmmm… maybe I should book a reservation in that guest room.

OK. So… what’s next??????

The secret ingredient

My other favorite hobby is cooking. I love it. I can’t really get enough of thinking out a menu, getting the ingredients and working through the recipes to bring a  great meal to the table. From appetizer through dessert, I love the whole process.

As an enthusiastic home cook, one of my favorite magazines of all is Cook’s Illustrated. Yup, I’m a subscriber, and I’m not sure who loves the subscription more – me for getting the magazine and great recipes, or the family, who gets to eat what I’ve cooked!

A few of the things I love about the recipes in that magazine are that they are very thorough (they will often make a dozen – or more – iterations of the same recipe to ensure they get the best results), they often rethink classic recipes in new ways to improve the product, and they will often reveal a ‘secret’ ingredient that can take the recipe from eh to WOAH!  A splash of cola in barbecue sauce adds a deep, sweet flavor. A little powdered gelatin helps keep meatloaf juicy. And, amazing enough, a dab of anchovy paste can make most meat dishes taste a whole lot more savory…

In many ways, finishing is very similar to putting together a delicious meal in the kitchen. You have to have the right technique, the right ingredients and do things in the right order to get the best results. And, sometimes, you have to have the secret ingredient that makes your final product something that folks will rave about.

For me, this is the secret ingredient. Zinsser’s Bull’s Eye Seal Coat. While I have never used this as a final finish for a single project, it gets used more than anything in my finishing cabinet.It is a dewaxed shellac dissolved in denatured alcohol. Now, I’m sure you can buy your own shellac flakes and dissolve them when you need them, but I have found the prepared version is a whole lot more convenient, and I have yet to have it fail on me.

I’m not sure what the exact pound cut is, but it’s a little bit too thick for my tastes. What I do is take an old glass jar and fill half of it with denatured alcohol. I will then top the rest of the jar off with the Seal Coat. I recap the jar and give it a good shake or two to mix the liquids together (probably unnecessary, but it’s a habit). Now, I call this mix my spit coat… sort of a pre-sealer kind of arrangement.

When it’s time to finish a project, I will sand, scrape or plane the project until it is nice and smooth. Once I get to that point, I will brush, blow or vacuum off as much dust as I can. Then, I’ll grab the jar of my solution, dip a clean piece of cloth into the mix and wipe it on in nice, long strokes with the grain.

Now, you have to let this dry for a few hours at a minimum. Yes, this happens before you apply the finish, effectively sealing the wood.  Why on Earth would you do that?  Well, on blotch-prone woods such as pine and cherry, this prevents the wood from absorbing too much stain, dye or finish, especially in the wavy grain of hardwoods like cherry or the earlywood of softwoods.

The next step is to sand that finish down with some 400 grit wet-dry sandpaper. Really go to town on it. What you are doing is removing the bulk of the finish on the surface, but leaving enough of it down in the pores of the wood to prevent the blotching. Also, the shellac freezes the wood fibers as it dries. So, when you do this sanding, you will get the surface ultra-smooth. Like baby’s bottom smooth. There’s a lot to be said for a very smooth finished surface! After that, simply apply your finish of choice over top of that, you are good.

Since Seal Coat is shellac, if you are building a project for a child –  who may decide to try teething on the toy – it’s a safe, non-toxic finish that will work like a champ. After applying the thinned down sealing coat, apply some full-strength layers to finish it off.

OK, it’s not the most glamorous of ingredients, but if you are looking to take your finishing to the next level, give this secret ingredient a shot. I think you might just like it.