All posts by Tom

I'm the guy who writes the blog...

Stuff I’ve Built: Katie’s Carved Confirmation Container

OK, so I like to alliterate… what’s it to you?

Anyway, on Monday, I showed you a little bit about what I was working on for my niece Katie’s Confirmation.  It’s coming up this weekend.. so there’s no pressure to get anything done, right?

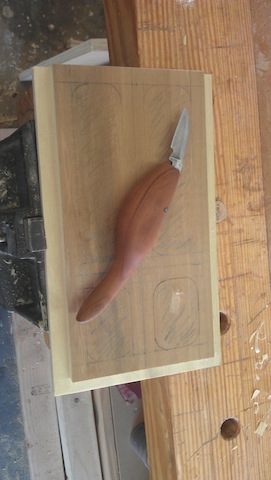
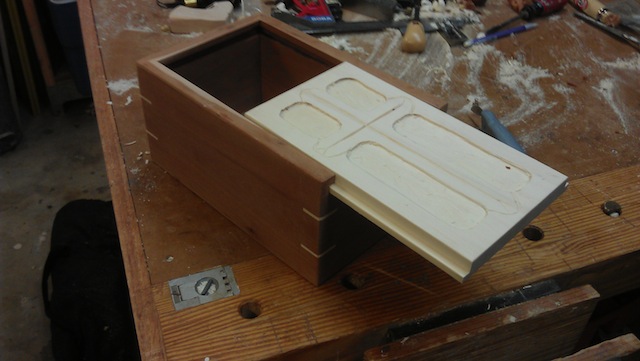
Looking for a  new lid to carve, I decided to head to the local home improvement center. It was the only place that was open that had any sort of cabinet grade woods, and I picked up a piece of aspen.  Interesting stuff, that aspen. The piece I got was super white, with a very subdued grain pattern. I also took some time to try carving it… and it worked well!  OK, that was going to be my new lid. So, I measured out the lid, cut it to size and marked my new design on it.

IMAG1050

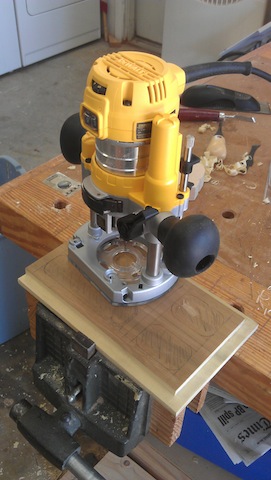
Again, I went back to my trusty trim router to tackle the bulk of the material removal. The more I use that tiny router, the more I appreciate that I bought it. I also appreciate the help of David Venditto over at Infinity Cutting Tools for helping me select the right bit.  That was the winner.

IMAG1054

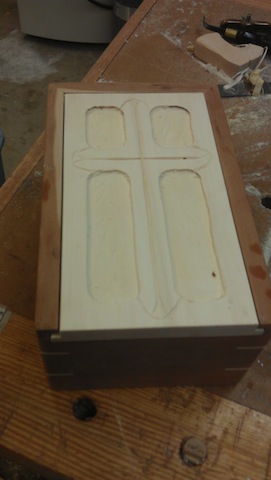
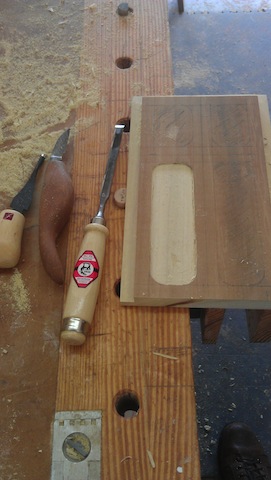
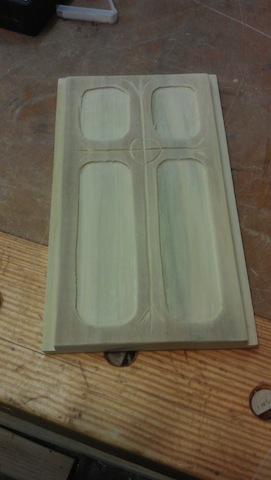
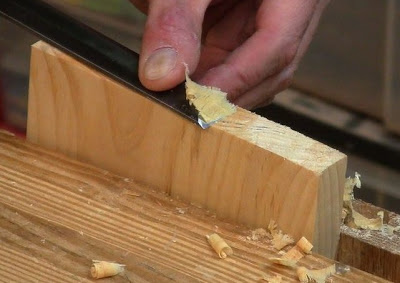
With the piece all routed out, I tried my hand at carving.  Not sure how well I did, but you know what, for a first real crack at it, I think I did fairly well.  Yes, I have to work on carving curves, but this is definitely a step in the right direction.

The spline jig set up on the saw

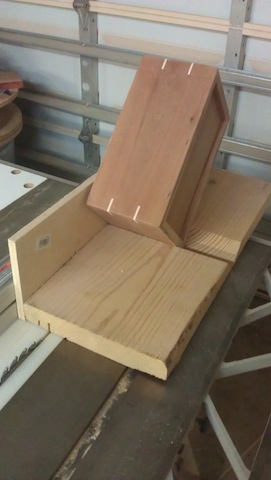
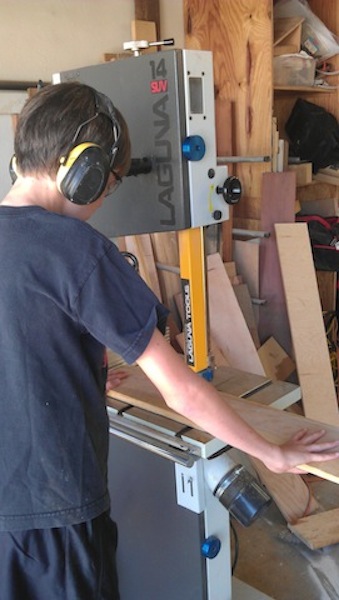
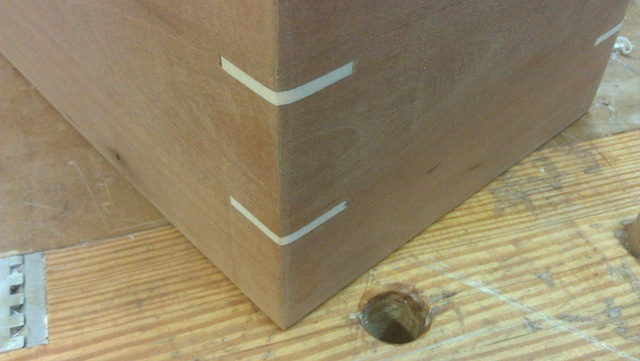
As for the box itself, it was a very simple design I built out of cherry for a nice contrast. A four-cornered mitered box with splines to help hold things together.  I really love my spline jig – it couldn’t be easier. It’s a 2 x 10 I fished out of the scrap barrel at the nearby home improvement place, crosscut it at a 45 degree bevel, and flipped the pieces so I ended up with a 90 degree cradle. I screwed both pieces to a piece of half inch plywood that runs against the rip fence.  I simply raised the blade until it cut as deeply as I wanted it to, then cut some aspen stock into the cherry box sides and glued the pieces into place.

The splines glued in, waiting for a trim

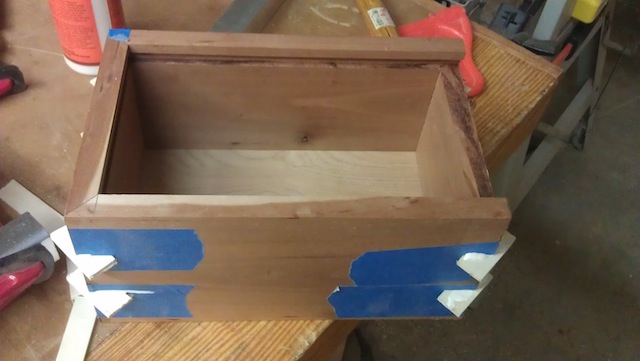
Once the glue dried, it was a simple matter to use a flush cut saw and some sandpaper to get everything where I wanted it to be.  I dunno, it’s a pretty sweet looking detail that makes the piece stronger. That’s good in my book!

Spline close up

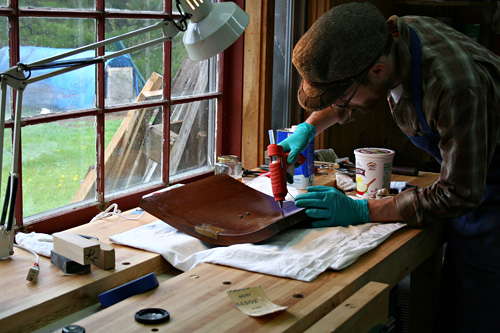
From there, I still have to sand and finish the piece – no later than Thursday night – or it won’t dry in time for the big event.  But, judging on the progress I have made so far, I’d say I was well on my way to completion.

The box, lid opened

And, hopefully, another happy niece!


The first slice

My niece Katie – she also happens to be my Goddaughter – is having her Confirmation into the Catholic Church this upcoming weekend.  This is a big event in her life, and I know that if Rhonda and I were going to give her a gift to commemorate this event, it was going to have to be special.

Hmmm… how about my first carved project?  Yeah, that sounds about right.  After all, it will take a true leap of faith to believe I can do this.. in time to have it ready to go for this weekend.

So, I took out a poplar board (figuring that hey, poplar is pretty good for practice) and laid out a kind of cross design in pencil. I used a ruler and a quarter to draw straight lines and curves so there wouldn’t be any right angles… I wanted this design to swoop. Once I marked everything out, I used a carving knife to score the outline to ensure there wouldn’t be any splintering when I got to the edges.

IMAG1042

Once I got everything laid and cut out, I secured it in my vise to get ready for the excavation. I used the built-in dog on the vise and a bench dog from the folks at Time Warp Tools to pinch the board where it had to stay. My initial plans were to do everything by hand, but, you know what?  I have this brand new DeWalt trim router that hasn’t yet seen any true shop time. It was time for that baby to come out and play.

The router ready to fly

I was using a down spiral 1/8″ carbide bit, and I took my time to carefully excavate the areas on the design.  It took a very steady hand, but the tool was very well behaved, and in about half an hour I had hollowed out the four quadrants of this cross design. Boy, was I happy to see that I hadn’t messed things up too much.  The next step?  Break out some classic carving tools to put some embellishments on the project.

More traditional carving tools

The knife came out again in cooperation with my bench chisel to clean up any issues with the edges. With a VERY sharp edge, these things cut like nobody’s business, and before you knew it, I was ready to have a little fun.  I had gotten a set of Flexcut carving tools for Father’s Day two years ago, but other than playing with them, I have never really used them for a project.  That was about to change.

The more embellished surface

I really love the v-tool that comes with the interchangeable handle. I was able to play a little bit with the layout lines and try to accentuate things.  I dunno, for a first crack , I think it came out looking OK. Now, it’s time to finish the box the lid is going to fit into, and cut the real lid out of some flame birch I have lying around.  I think I can have this done so it won’t stick to the inside of the wrapping.

Quick Poll

Hand tool woodworking can be a real joy. When your tools are sharp.

If not, well, it can be one of the most frustrating experiences you can have in your shop.

A sharp chisel is a thing of beauty

And, just as in woodworking, there are many ways to get from a dull worthless tool to a sharp performer. My friends at Tormek have helped me out with a sweet T-7, but I have tried lots of different methods over the years. From simple sandpaper stuck to plate glass to more expensive options… I’ve done most of them.

So, this week, it’s your turn.  What is your preferred method of getting your cutting tools into fighting shape?


Link of the week

The Workbench Diary

To get to the blog of Joshua Klein, you have to head to Brooklyn.

The Brooklyn Bridge
The Brooklyn Bridge

No, not THAT Brooklyn. More like this one:

Joshua Klein's Maine workshop

There. That’s more like it. Up in the quaint coastal city of Brooklyn, Maine, you will find Joshua Klein and his blog The Workbench Diary. Joshua takes the time to pour the love into antique furniture looking to be restored, and makes replacement pieces for furniture – and new pieces – using  traditional techniques.

Joshua working at his workbench

Besides learning a lot about furniture restoration and building, a visit to his site is just so soothing, and it will do your heart good to watch beautifully hand-crafted furniture built by craftsmen in days of yore get a second chance at life … a better fate than being thrown into a dumpster somewhere.

A very special Modern Woodworkers Association

What makes woodworkers tick?  How did they get into woodworking in the first place?  What are their favorite tools?

At the last Woodworking in America, Dyami Plotke and I took around a voice recorder on the floor of the convention, and we asked some of the biggest names in woodworking these basic questions.  The answers.. well, they were enlightening….

Interviewing Chuck Bender on the floor of the event

Keep in mind that this was recorded on the show floor so the sound is not the greatest at times but the content is well worth listening to.

Interviews include:

  • Andy Brownell
  • Burce Wang
  • Charles Brock
  • Chris Schwarz
  • Glen Huey
  • Greggory Paolini
  • Mark Harell
  • Megan Fitzpatrick
  • Roy Underhill
  • Scott Meek
  • Scott Philips
  • Thomas McDonald


Band saw basics

The band saw is a very versatile tool. It is also one of the safer power tools in the shop. With the blade cutting in only one direction, there is little chance of a kickback on the saw (unless you are trying to cut something that doesn’t sit firmly against the table.. then you can see some wild action…). And,with my sons both showing some interest in the craft, it was my duty to show him the safe way to work with it.

The wany piece of cherry

I figured the best way for him to learn was to take a piece of scrap for practice. This piece of cherry was mostly sapwood and had some serious wane on it, so I figured it would be a good thing to work with.

As you know, the first and most important safety rule is to wear safety glasses and ear protection. Dom wore my setup, while I put on a backup pair of glasses on. One day, I will need to buy that boy a set up of his own. We also tensioned the blade, plugged in the saw and lowered the blade guard into place to ensure that just the minimal amount of blade would be exposed. This also put the guards closer to the top of the board, giving better control on the cut. I also explained that the Laguna has a very powerful motor, and that all he needed to do was guide the wood while the saw did the work.

Dominic working on the board

Dominic started first by making a crosscut on the board. I explained carefully to him that he should keep good control over the board while keeping his hands away from the blade. It took the young fella a little bit of time to get the hang of things, but soon, he was doing a great job with crosscuts. He soon learned, of course, that no, you can’t get any wider of a cut than the distance from the blade to the saw’s column. That’s just part of the fun of working with a band saw!

Dom making the rip cuts

We also pulled over the rip fence, and Dom was able to get some experience making some rip cuts. I showed him how to get the cut started, how to set the fence and how to push the wood through. I stressed that no – he shouldn’t be reaching anywhere near the blade to finish pushing the wood. Instead, he should rely on a push stick to help guide the pieces through. His first lesson was a success, and I think he likes the saw.

But, what did we do with the scraps? I mean, cherry is a SWEET wood to work with. And, that’s one of its major strengths, especially when it comes to the culinary arts! Dom and I were in charge of making roast lamb for the holiday dinner yesterday, and we had a crazy idea as to how to get some more flavor on the roast.

soaking the wood

We took his perfectly formed strips and the prepared leg of lamb down to my mom’s place, where we soaked the strips in water. This was going to help prevent the kiln dried wood from burning too quickly. Instead, it would smoulder over the hot burner, creating.. yes… smoke!

The grill setup

On the grill, I set the properly seasoned leg of lamb on the side of the grill with the burner off. On top of the grill on the other side with the burner on medium-high, I arranged the soaked cherry strips. I put the probe thermometer into the roast and closed the lid. This turned the grill into a slow-cooking oven/smoker type of affair. After two hours of gentle cooking in the fragrant cherry smoke, the roast came out done to perfection with a beautiful smoke ring from the cherry.

Mmmmm... leg of lamb

Hey, if you have to use up your scraps, there are worse ways to do so!


Quick Poll

When I was a little kid, my mom used  to dress me in these clothes called Garnimals. It was a brand of clothing that allowed kids to dress themselves and have some kind of matching look. Basically, if you wore your tiger pants and tiger shirt, the darned stuff would match. It was supposed to be fool proof…

While I can’t find Garanimals clothes for adults to help me dress in the morning, I have noticed that some woodworkers would like to have a Garanimals system for their tools. They tend to want to buy their tools in sets or from the same manufacturer to ensure they look alike. I mean, come on. If you mixed a green Festool track saw with an orange Fein dust collector… ugh…

Milers falls made a distinctive looking set of tools called the Buck Rogers
Milers Falls made a distinctive looking set of tools called the Buck Rogers collection

Or, heavens forbid, you didn’t get your chisels all from the same set from the same manufacturer.  I mean, could you see how the clashing could affect your work?

This week, tell us – do you have to match your tools, or does it even matter to you?