
 Sometimes, a breath of fresh air is needed to keep everyone on their toes.
The American Basketball Association brought the slam dunk and colorful characters to the old guard of the National Basketball Association back in the 1970s. The Kennedy Administration brought a new youthful exuberance to the formerly stodgy office.
And, new groundbreaking woodworkers continue to keep the craft vibrant and inspirational. That’s one area in which woodworker Amy Devers shines. You may know her from her home improvement shows on the DIY Network and The Learning Channel, but she’s far more than someone who can teach you how to spackle a hole in your wall.
Amy comes to woodworking through academics. While taking classes at a junior college and sharing a crowded apartment with four other tenants Amy was visualizing multi-function pieces of furniture that would allow some privacy in the cramped quarters. “At the time, I had no idea that furniture design was even a field of study, but then I found out that San Diego State University had one of the best furniture design programs in the country. As soon as I heard the words ‘furniture design,’ a switch flipped in my brain, and I knew that’s what I had to do.”
 With her degree from San Diego State – along with an Associates of Applied Science degree from the Fashion Institute of Technology and a Masters of Fine Arts from the Rhode Island School of Technology – Amy unleashed her creativity. With her strong background in fine woodworking, joinery, metal work and upholstery, she has created some very interesting pieces developed from a combination of materials. “Wood on its own is challenging, as you know. But any time you add new and different materials to the mix the technical and aesthetic challenges are much greater. Marrying diverse materials requires a greater deal of sensitivity to transitions, textures, and balance. Of course there’s an additional learning curve to working with the new material, plus there are the physical aspects of the different materials to consider.”
After working her way into TV on several home improvement shows, the DIY Network offered her the opportunity to work on her own woodworking show called Freeform Furniture. As with any endeavor, a TV show can come with its own set of challenges. “What I love about TV, besides meeting great people and the kick-in-the-pants fun, is the ability to teach and share my passion with a much larger audience. Least favorite aspect? It’s like doing what you love but with a gun to your head. TV always needs it faster, cheaper, and simpler. Woodworking and TV have very different schedules. It’s a struggle to keep the highest standard of quality under those conditions, but I always do my best. Honestly, if I were just doing this as a hobby I would have the latitude to be much more adventurous in my design. TV just doesn’t have time for too much experimentation, so it’s a good thing woodworking is not only my profession, it’s my hobby!”
 Now a celebrity among woodworking circles, Amy says she hasn’t yet lost the luxury of walking down the street without being mobbed by adoring fans. Her family has been exceptionally supportive of her work, but her interest in woodworking did catch her family a bit by surprise. “I’d always been into typically girly stuff – fashion, make-up, boys you know, the usual. I remember one Christmas I totally threw my parents for a loop when a cordless drill was #1 on my wish list, and high-heeled boots, and lipstick were demoted to #2 and #3.”
While the rigors of producing a TV show do take their toll, woodworking still holds its charm. “I love the sound of a happy machine. I love sharp blades and chisels. I love the smell and feel of wood in it various stages of being manipulated. I love a nice tight fit. I love the moment of assembly, you know, when you can finally put all of those parts you’ve been working on for so long together and they become a piece. I love complicated jigs. I love cranking the music and singing while sanding. I love searching the pages of the McMaster-Carr catalog for that obscure but perfect piece of hardware. I love the a-HA moment when I solve a problem that’s been bugging me. I love blowing off the dust and cracking a cold beer at the end of the day.”
 What does the future hold for Amy? Her vision not surprising in the generation that has come of age with instant communication through the Internet is to keep an open dialogue with her viewers. “I’m interested in how people are incorporating greener practices, and the resulting pros and cons. I’d also love to know what your readers would like to see on TV. Are they satisfied with the old guard of TV woodworkers? Are they interested specific techniques, materials, and styles? Also, I’d love, love, love to hear from people with green, creative methods of re-using or recycling saw dust!”
+++
Amy can be seen on the DIY Network’s DIY to the Rescue, Freeform Furniture and Blog Cabin. She is also a carpenter on the long-running TLC Network program Trading Spaces. To e-mail Amy, contact her at mail@amydevers.com.
 One of the things my oldest son loves more than football, fighter planes and annoying the heck out of his younger brother is playing chess. He can’t get enough of it.
 This one came from Duan Packard in Kerrville, Texas – and it’s a good one. Thanks, Duan!
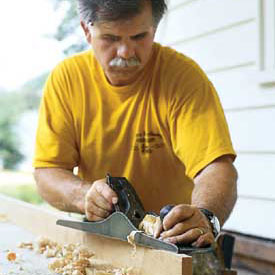 Leave it to the guys at the longest-running home improvement show to tackle the task of teaching their readers how to choose and use hand planes.