Legs

So, now that the Cotterman is done, it’s time to (literally) turn my attention to the new table for the front room in our home.  Now, in the back room, I had no problem going with a rectangular, rustic looking piece (which, by the way, has ended up being a great piece), But, for the front room, Rhonda was thinking something round to make it look a little more elegant.

A column base

A logical choice for a coffee table might be one large turned column It would free up some leg room underneath, I could get creative with the feet and it would certainly showcase my turning skills. Only a few problems. I don’t turn. I don’t have a lathe, and I really don’t (yet) have the skills to make something like this even if someone did hand me a lathe.  Besides, columns like the one I showed above are more for dining tables.

Round with shelf

Rhonda also had the idea originally of doing something with a shelf underneath – a place for us to tuck books, baskets and all of the other stuff you might expect to see in a living room, I dunno. There’s something about an elegant round table with a shelf jammed under it that doesn’t do anything for me.

craftsman-coffee-tables

Of course, I could go modern with bent legs – almost an Eames looking piece – with a ‘modern’ feel to it. But, something tells me I wouldn’t like it. Plus, you know, Ikea makes a lot of that mid-century modern looking stuff.

So, I got to thinking… Why not go for something a little more simple, yet classic? Something strong yet pleasing to the eye? In other words, how about some type of cross bracing connecting the legs under the table?

I had posted this picture a few weeks ago, and it really caught my eye. Nice, strong looking piece with a simple base, ample top and clean lines?

I will have to sketch out some ideas – maybe based on this, or maybe with a simpler x brace across the bottom. Either way, it will be something that will be a piece that guests will see first when they come to the house, so it’s going to have to look good.

No pressure, right?

The weekly plan

DIY’s Home Backyard Play Set plans

Now that the kids are home, out of school for the summer, you may start to hear the words you dread whenever school is out.

“I’m bored.”

the DIY playhouse

Well, here’s one way to keep the little ones busy this summer – why not build a backyard play set? This plan from the DIY Network comes complete with all types of high seating places, cubbies, ladders and hiding places to entertain youngsters until they start to gripe about having to go back to school in September.

Some ‘Man’pering

No, no post yesterday. After all, yesterday was Father’s Day, and I was celebrating a really fun day with Rhonda and the boys.

Rhonda made an awesome breakfast and an awesome lunch followed (I mean, Salmon with mustard cream sauce? Get out…).

Mr. Gruff

But, the highlight of the day happened when Rhonda and the boys took me to St. Petersburg to the Shave Cave for an old fashioned straight razor shave. Since I hadn’t shaved since last Thursday, I was ready for one! This place gave me the promise of what very sharp steel could do to whiskers. No guards. No training wheels. Just an edge, a steady, experienced hand and my skin.

mmmm, beer

Oh, and beer. While I was waiting for my turn in the chair, the owner offered me a glass of a nice summer ale. With Tampa Bay’s oppressive humidity already in full swing, who was I to turn down a glass of ice cold beer?

Waiting my turn

While I waited for my turn, I couldn’t help but get over a few things. The camaraderie that existed was like the barber shops I used to visit a long time ago when I was a kid. The barber’s tools carefully laid out, ready for each step in the process.

A vintage shave

It got me thinking about the barbers in days gone by who did more than their fair share of shaves this way. It reminded me about the resurgence of hand tools – how the skills that could have possibly been lost forever were brought back from the edge by flea market hunters and premium hand tool manufacturers who sought these tools out and learned the techniques.

One smooth customer

After four different towels (three hot, one cold), pre shave oils, post shave masks, a facial massage and some after-shave lotion, I rose from the chair feeling relaxed, refreshed and – as Rhonda said – ‘Man’pered for Father’s Day. I even got my own special shave brush to use at home.

It also gave me a new appreciation for how well sharp tools work, and let me know that perhaps now that I’m between projects, it’s a good time to break out the Tormek and do a little sharpening of my own. Hey, that wood’s not gonna shave itself.

Happy Father’s Day – belated – to everyone!

Stuff I’ve built: The Cotterman

OK, so the name is a bit of a portmanteau between a coffee table and an Ottoman, but you get the idea – it’s a table for our family room that I built out of some beautiful, clear Southern Yellow Pine.

The Cotterman

That’s right – the piece came from a pair of 2 x 12 Southern Yellow Pine framing timbers and a 12 foot length of tongue and groove boards for the bottom shelf. After building the piece and placing it in the living area, both Rhonda and I agreed that the piece needed some under table storage for magazines, our chess and checkers set and some other goodies.

Under boards

The tongue and groove boards were sweet, clear pine, and I had the option of either having them at their full six inch width or flipping them over and exposing a bead halfway down the middle of each board. I decided to go with the more plain looking side. I glued the tongues and grooves together, and secured them to the frame with a single Miller Dowel at each end, square in the middle of the center board. The two outside boards fit snugly between the frames, and with the glue dry, they won’t  knock free.

The top laid out

The finish started with the boys sanding the pieces with some 100 grit random orbit sanders (they need something to do during their summer break) until the parts were nice and smooth. Since it’s more of a rustic piece, I rounded over the edges with some rasps and sandpaper. Makes it look a little more weathered that way.

From there, I wiped on a coat of spar varnish. There’s something about that yellowed finish on the pine that really makes it look about 100 years old right off the rag. Once that dried, I sanded it down with some 320 paper, wiped it down with some mineral spirits, then put three coats of wipe-on polyurethane over the top to protect it against the spills that are bound to happen on a table like this.

Chess anyone?

With it in its place in the family room, I can see us using it for family game night, snacks for the big game, homework or whatever for years to come. It’s going to be a piece we use and appreciate every single day.

It’s not the size of the shop ….

There’s an old expression my dad used to use just about whenever we felt down or put upon growing up. Maybe our Little League team was down by two runs going into the ninth inning. Or, maybe it was a test we had to take that made up half of our grades. Whatever.

Anyway, it went, “It’s not the size of the dog in the fight, it’s the size of the fight in the dog.”

Paco the Brave

I’m sure you are aware that the meaning behind this bit of pithy advice is that it doesn’t matter how big you are, it’s what’s inside that makes all the difference.

So, two weeks ago, when I introduced you guys to the Smart Vise, I asked you guys to show me the shots of your micro shops. The shops shoved into all too often overlooked corners of basements, garages and spare bedrooms. The shops that you need to step outside of to change your mind. Those shops that leave you scratching your head wondering, “Just how the heck did that project come out of that shop?”

Well, I had a few entries, and all of them were tiny. Small. Diminutive. Without any further ado, here’s what we got.

Paul

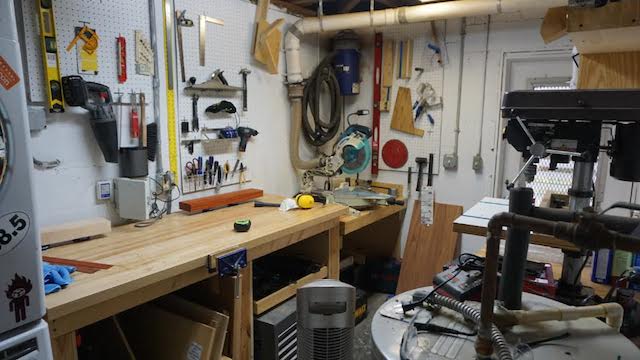
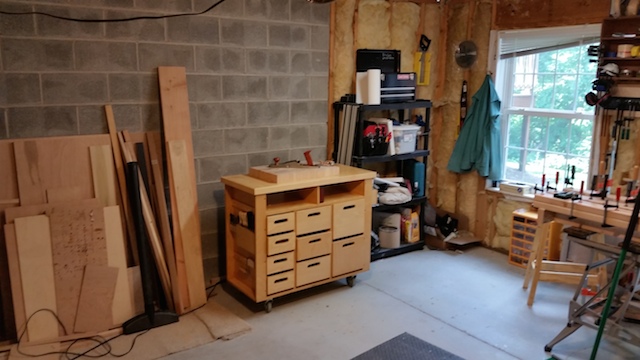
This is the shop of my good friend Paul Carroll. He lives a few miles from my house, and, yes, the shop he occupies fits neatly into a 60 square foot area. Not only does his shop serve as storage for the portable table saw he has to wheel out into the garage or driveway when the weather cooperates, it also serves as his home’s laundry room. It’s very neatly laid out, and you can see that just about every ‘permanent’ power tool has its own dust collection hookup. Believe me, every possible nook and cranny serves as storage, and I’d have to say this is pretty darned impressive.

James Little

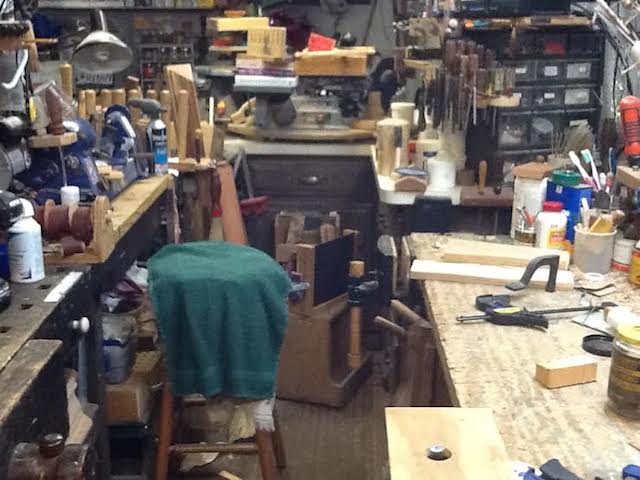
This tiny shop belongs to the appropriately named James Little, and as you can see, it’s one of those shops that just looks bursting at the seams with stuff. But, you can see a few different work benches, a whole lot of storage and organization out the ears. Pretty sweet looking shop.

Warren Valente

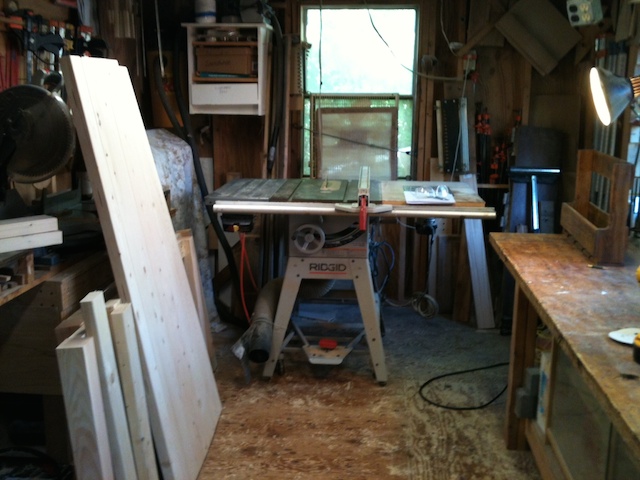
This spacious abode is the hide out of Warren Valente. Shoehorned into his 10 x 15 foot shop, he manages to build some big pieces. Check out the harvest table and benches he has working in the shop in this shot. Of course, if he needs any extra space for outfeed on his table saw, he can just push the piece through the (hopefully open) window!

Rossetti storage

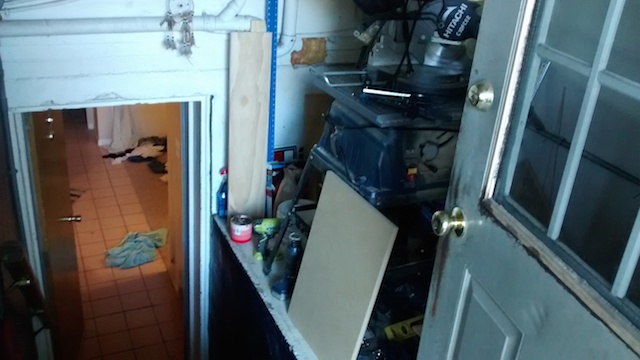
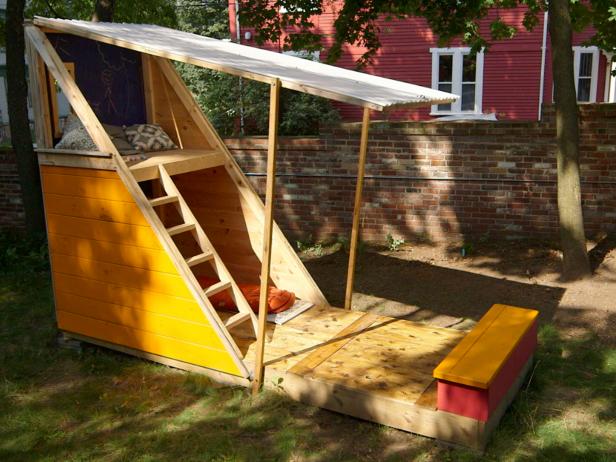
Next up is the small shop of Justin Rossetti. Man, talk about small. This guy has to move ALL of his stuff outdoors to get anything done at all. That’s right – there is no real indoor shop space. Basically, the only space he has to work is outdoors. The storage area is right off his kitchen, those, so his wife usually doesn’t mind because she gets to keep an eye on him and see what he’s up to.

Eric's shop

Eric Cole from Pennsylvania has a very neat looking shop setup in his condo. While it measures a tiny 8 x 12, he has it packed with a lot of mobile bases on his tools, so he can get things exactly as he needs them for whatever operation he has planned. This he got from Wood Magazine, and his next project is a knock-down workbench by Chris Schwarz so he can get into more hand tool work.

Micklus 1

Micklus bench

Micklus Nail Chest

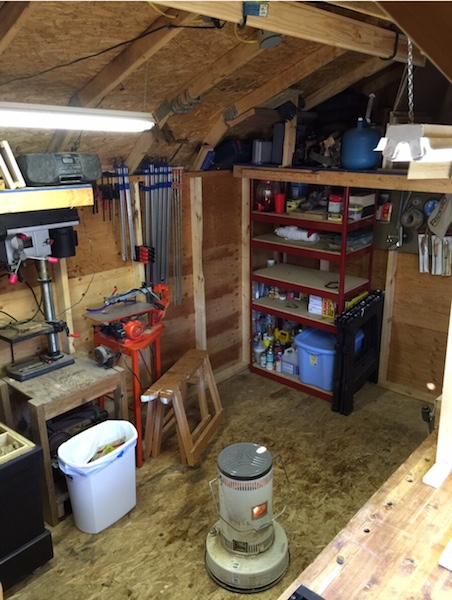
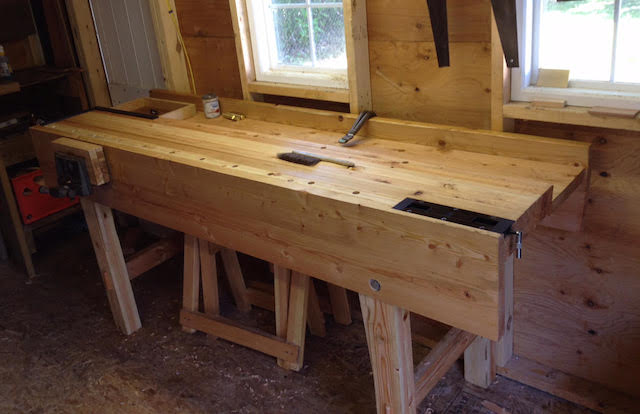
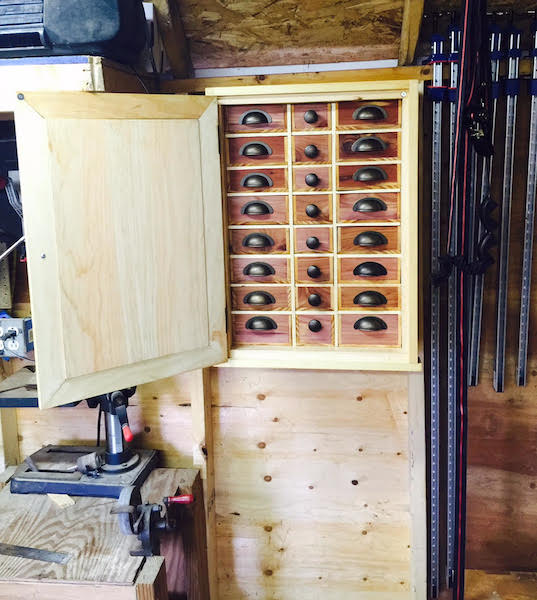
The winner, however, has to be the cozy shop of George Micklus of Connecticut. When he’s not aboard one of our nation’s submarines (thank you for your service, George), he’s working out of a cozy 10 x 14 shed near his home. He actually downsized a bit from where he started (in his garage), because as his family grew, he was voluntold to move out to convert the space into a new master bedroom. His time on a submarine has inspired his shop layout, which includes a sweet looking workbench, an Anarchist’s Tool Chest and a few other projects designed to maximize storage and working area.

Iggy would like to thank all of you who submitted your shop entries for this contest. It’s amazing to see just how much goes into planning a workshop in a very small space. One thing is for certain, however, from here on out. I will never complain about having to work in a two-car garage ever again. I promise!

The weekly plan

Yellawood’s garden arbor plan

It’s the season when gardens grow and flowers are in full bloom. And, there’s nothing quite like the experience of entering  a beautiful garden through an arbor full of bursting blossoms and cool, green foliage.

The Yellawood Arbor

This plan, provided by the folks at Yellawood – one of the leading manufacturers of pressure treated southern yellow pine – is free of charge, doesn’t take much material and should provide you years of service in your garden.

A strong frame

For the coffee table (the Cotterman, as Rhonda likes to call it. She’s still torn between calling it a coffee table and an Ottoman), the next step is to build a base for it. After all, if the top just sits on the floor, it’s going to be too low to hold my coffee. Right?

Nice legs

So, I cut four legs down to size. Since most coffee tables want to be about 16 inches high, I cut them a little longer than 14 and a half inches long to have the top land at the sweet spot. Fortunately, there was lots of extra wood left over from the original 2 x 12 to work with for this operation.

I also cut some rails for the sides of the table and cross rails that would help to hold the frame together and provide a strong surface for the table top to bear against and be screwed to. How did I attach them?  Sure, I could have gone all mortise and tenon on them, but, meh, with the shop as hot as it was and Rhonda wanting the piece as soon as possible, I opted to go the pocket screw route.

The pocket screw option

There’s a lot to be said about how fast projects go together with them. And, believe me, for what this table will be doing, they are plenty strong.

After just a little bit of work, I was able to get the frame together and just set the top on it to give it a test run.

perched

I dunno… looks pretty good perched up there on top of the workbench. Since it won’t be there forever, I had to make sure the measurements were going to be perfect on this, so I trimmed the ends even with my track saw, screwed the top into place through the battens and set it into the living room. Then, the moment of truth. I called a young, strapping lad in to give me a hand.

Big Stevie

So far, I’d have to say that the table is pretty strong to handle this much beefcake. Now, to build a deck for the bottom part of the table for magazines, board games and the like, and this one will be ready for the finish.

part of the Wood Talk Online community