Just listen to me

Hey, everyone. It’s me, the little voice that whispers in Tom’s head.

No,  I’m not the type of voice that will tell Tom to go out and become the supreme leader of some third world country or anything like that. I’m really a force for good. In honor of Woodworkers Safety Day, I thought it was a great time to make my introduction.

Woodworking Safety Day

Speaking of introductions, I also happen to  have lots of friends. In fact, many of you reading this post probably have one of my  associates taking up some room between your ears. Why not take a moment to introduce yourself properly?

There, that wasn’t so bad, was it?

Tom and I have been together ever since the very early days of life, and during many important times.  I was there telling Tom that it wasn’t a good idea to shoplift that candy bar, even though some of his friends were doing that and telling him it was OK. I was there telling him that he should stop playing his video games and study for that math test back in eighth grade. That he should probably stop drinking at that New Year’s Eve  party before he got behind the wheel and regretted his decision.  I was even there the day he took my advice and realized that Rhonda was the girl for him.

Sometimes, he listens. Sometimes, he doesn’t. I find that surprising, since I have nearly a perfect track record. Whenever Tom does  something stupid, I would remind him that I was looking out for him BEFORE the incident took place, and if he had just stopped for a second to listen to me, he would have stayed out of trouble.

It's a subtle voice

My problem? Unlike Tom, I am not boisterous.  I do a lot of my communication with Tom through subtle whispers that he can hear only when he stops and thinks…

Sometimes he does, sometimes he doesn’t…

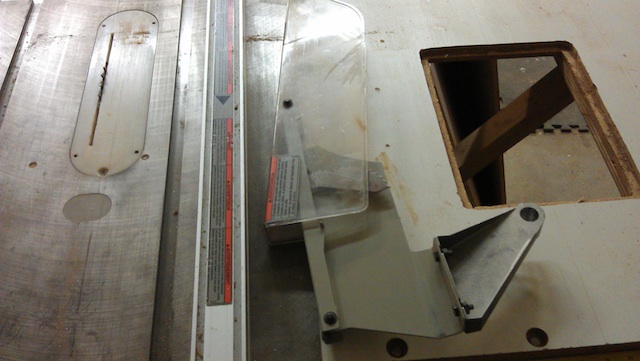
This past weekend, Tom was working on another project – a gift for his nephew who is getting his first communion this coming weekend.  It’s the simple cross project he has built probably 30 times. Really easy to build.  So, when he went out to the table saw to rip out the strips for the body and contrasting outside of the piece, he didn’t really notice that the splitter and blade guard was off the saw. It had to come off to use the spline cutter for Katie’s box. There it was, laying on the outside of the rip fence, mere inches away from where it had to be installed.

My splitter... doing nothing

I said something to Tom to the effect of, “Hey, you gonna put that on the saw?”  To which, the brash, ‘experienced’ woodworker part of his personality said, “No way. These are simple cuts that aren’t going to need the splitter. Besides, the two final cuts are going to be 1/8″ strips, and I’m afraid that they will get hung up somehow.”

I hate the brash voice.  It tells Tom stuff that isn’t really true (when was the last time a thin strip really got hung up on the splitter and pawls?) and tells him to bypass many safety precautions that I dutifully remind him to follow.

So, there he was, ripping a piece of mahogany for the main body of the cross project. No problem with that.  He then brought out a piece of holly to make the contrasting side pieces. The first cut went without  a problem. The second one?  Well, Tom watched as the thin strip nosed down and fell off the saw’s table to the floor.  For a split second, his mind told him what a pain in the butt it was going to be to reach down to pick that up, when something very bad happened.  He lost focus on the board next to the spinning blade, and allowed the workpiece to twist away from the fence.

Ouch

Quick as lighting, the board, propelled by the uncontrolled back teeth of the blade, forcefully shot the piece  straight into Tom’s right side. Below the ribs, above the pelvis. Right in the gut. Felt kind of like a shot from a boxer to an unprotected part of the body.

As Tom slapped the off switch and threw off his hearing and eye protection, he bellowed loudly enough for the neighbors to come running.

The injury was pretty bad.. the edges of the board tore into the skin to create a perfect image of the size and shape of the piece of wood he was cutting, and it created a large bruise that spread from the location.

And, as Rhonda helped him back into the house to have him  lay down and put ice on the injury, he kept repeating, “Why didn’t I put the splitter back on the saw?”

It’s not a loud warning, but it’s plain as day…  take the time to consult with me now on before you do any work in the shop. I promise I’ll be there to help you out.


How about a hand?

With Woodworkers Safety Day just two days away, it’s important to remember some of the basic rules… A few of the most important include keeping your hands away form the spinny, whirly things and holding work securely while you work on it. Some days, it seems as if you need an extra bullet proof hand…

Woodworking Safety Day

Well, one of the most important tools that can work that way is a vise. When it’s bolted to a sturdy workbench, you can get some serious, accurate work done.  But, what happens when you need to do the work away from that bench?  I mean, it would be backbreaking work to drag your bench to a drill press every time you needed to bore accurate holes.  Wouldn’t it be great to bring the vise to where you need it?

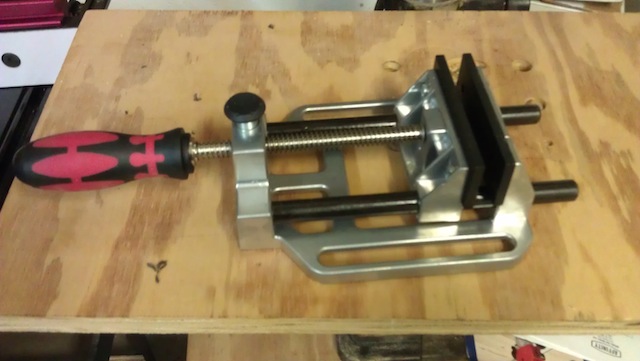
The Bora Vise

Well, that’s what a portable vise can do for you. And, my friends at Bora Tools are very happy to release their large woodworking vise to the public. This handy little tool can help make your woodworking a lot more safe.  It features a very wide base with holes to bolt to a surface. A padded grip handle to tighten the jaws – with a quick-release button on it – allows you to get a snug grip on your work for sanding, drilling, routing or whatever…

Many people use mechanic’s drill press vises to hold their work for some of these purposes. The only problem is those hard steel jaws are designed to hold metal and can easily dent wood. The Bora vise is designed with cushioned jaws that won’t mar the work.

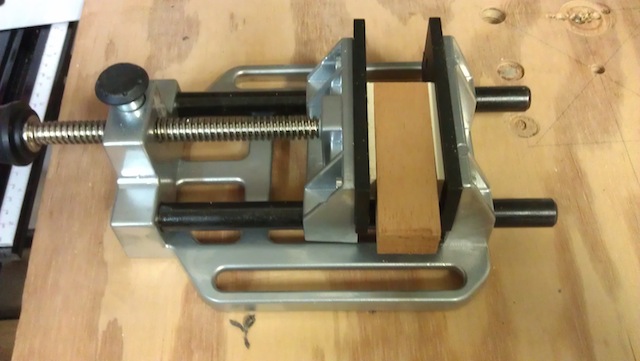
In the past, I have used some type of jury rigged setup to hold work for my drill press. Or, even more stupidly, I would just hold it with one hand and work the press with the other hand. And, yes, I have had the work spin out on me.  To demonstrate how much better this arrangement is, I decided to bore a 1/4″ wide mortise into a very small scrap of wood.  The first thing I had to do was to secure the little scrap into the vise.

The scrap is secure

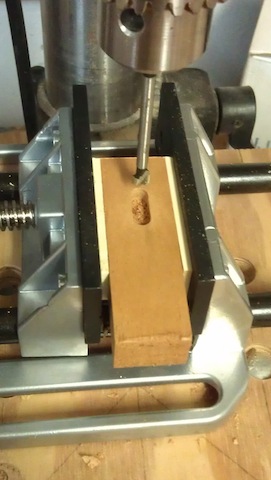
Then, I chucked a 1/4″ forstner bit into the drill press and started chain drilling the mortise.  I bored the outside holes the drilled out the middles.  The work was pleasant, and at all times I had the work under total control. Before long, I had the whole shebang bored out, and all I had to do was cut a wee little tenon to fit inside.

The wee mortise is ready!

As long as I keep this handy tool somewhere I can see it, I’m sure I’ll be using it a whole bunch more.  Great stuff!

Quick Poll

With Woodworkers Safety Day coming up this Wednesday, May 1, it’s the perfect time to take a moment to assess your shop’s safety plans and procedures.  Remember that one moment of inattention can lead to an injury that can leave you sidelined from woodworking for weeks, months, potentially forever.

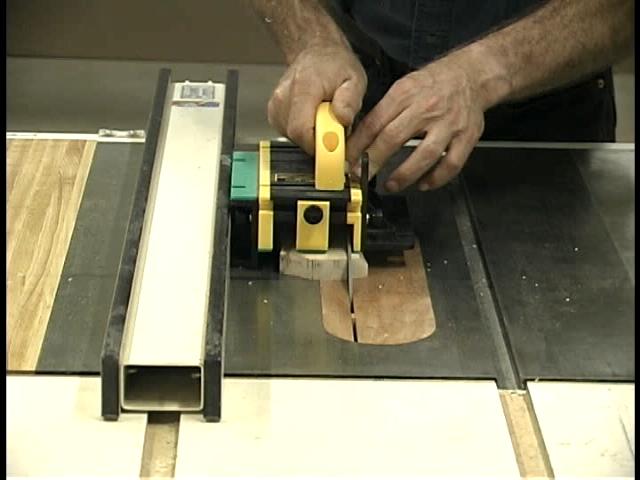
A Grr-ripper push block in action

This week, let’s take a look at devices that give you more control and keep your hands farther away from the blades and bits we work with… push sticks and other devices. Whether cut from a simple piece of scrap plywood or elegantly designed devices such as the GRR-Ripper push blocks, these tools can help keep your fingers out of the danger zone and have you work with more confidence.  Do you use them regularly, or do you just keep them around the shop to make you look more safe?


Link of the week

Gibson Woodworking and Design

In Wednesday’s post, I mentioned that I was working with fellow St. Petersburg Woodcrafters Guild member Andy Gibson to get my old saw sharpened.  I thought it was only fitting to feature his website this week.

Andy Gibson with one of his sweet ukeleles

Andy is a talented young woodworker, skilled in the use of hand tools. But, he’s also more than that.  You should see the ukeleles he builds And, he’s also building his first guitar out of locally-harvested camphor wood. He had to name his instruments as Sideways Eight instruments, because Gibson Guitars was already taken.

Check out his work. I think you are going to be pleased with seeing his skills.


Sharpen that saw

Over the past few years, this blog has  led me to some interesting places in the woodworking world. One of the most interesting is the hand tool world embraced by folks such as Shannon Rogers, Kari Hultman and Mike Siemsen. Hand planes. Chisels. And, most impressive of them all… hand saws.

Most of my collection are new models that I have purchases. A dozuki. A Veritas dovetail saw. A gent’s saw. Some nice stuff.

A Disston D-7 rip saw from the 1920s

But, my favorite is my old Disston 5 TPI ripsaw.  I bought it online, stunned by how much steel was left on the saw.  As you can see, the handle is still in very good shape. The listing said that the saw dates back to the 1920s. The blade has some rust on it, and the distinctive etching has all but disappeared.

The best part of the saw is the amount of steel on it. The width of the blade is impressive given the age of the saw. As the saw gets sharpened, steel is filed off from the toothed end, narrowing the blade. Given enough sharpenings, the width of the blade gets so narrow that the saw eventually becomes unusable. Unless, of course, you want to cut the plate up into scraper sized blanks.

At last night’s St. Petersburg Woodcrafter’s Guild, I brought the saw in to have it looked at. Turns out that luthier extrodinaire Andy Gibson sharpens saws in his shop. He give the tool a once over, and was very impressed with its quality. He pointed out that when the saw was sharpened in the past, the teeth were never properly dressed, so it was something that was going to have to be fixed before it can be sharpened.

Andy Gibson checks out the saw

He also pointed out a subtle design in the saw. The front teeth of this rip saw were set closer together. He said that was in order to get the saw started into the kerf, with the larger teeth set toward the rear for heavier cuts.

Andy was going to take the saw back to his shop to do the sharpening, but then he had an idea. Why not come to my shop where we could do the sharpening together?  Hey, now that’s a good idea. We’ll have to set up a time to see when we can do that.  Heck, while we are at it, he’s also offered to help me build a new cherry handle for this old baby.

He’s a pretty sharp guy!


Crossing the Tampa Ocean

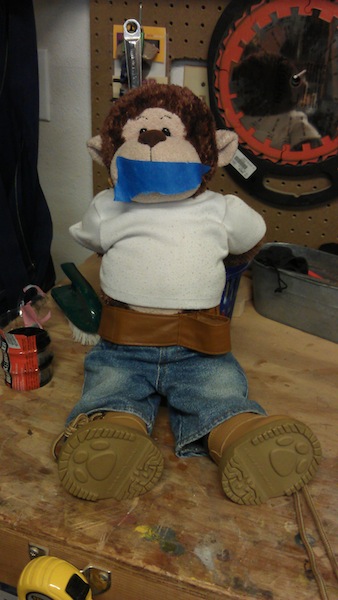
This past week was kind of crazy for me. I got sick with bronchitis. My son Dominic had his Confirmation (’tis the season, right?). And, to top it all off, I had to ‘waylay’ Iggy to make my presentation across Tampa Bay to speak with the folks at the Tampa Woodworkers Guild.  The monkey didn’t go down easily, but you’d be surprised how effective a roll of tape can be…

The monkey put up a struggle

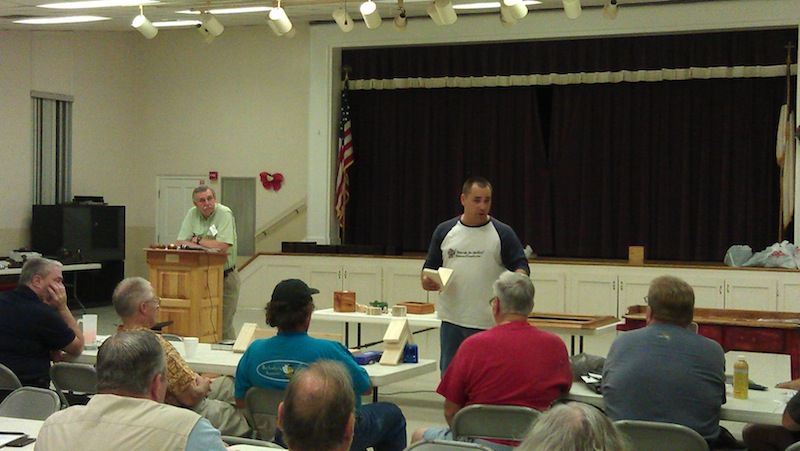
After I took care of the monkey, Jay Marino, the St. Petersburg Woodcrafters Guild’s event coordinator, and I headed across the long bridge to Tampa. The meeting was well attended, and I have to admit I was a little nervous.  I mean, this was a meeting of woodworkers who are pretty darned talented. What was I going to be able to teach them?

It was then that I remembered the reason why I was there in the first place. The reason I was asked to speak there was to show some corner joinery options for club members while building burial urns for indigent veterans. When veterans pass, the Veterans Administration handles the cremation and interment, but this is done in a cardboard box. The woodworking guilds in the area are putting together urns to provide a more dignified resting place. If we are going to batch out the boxes to meet the needs, we are going to need all joinery options on the table.

Talking to the Tampa club

So, I presented my heart out. I covered all manner of joints from the basic brad joints to cut nails, dowels and biscuits. I covered plugged screw joints and pocket screw joints with plugs. Splined joints like I had used on Katie’s Confirmation box. Dovetails and box joints.

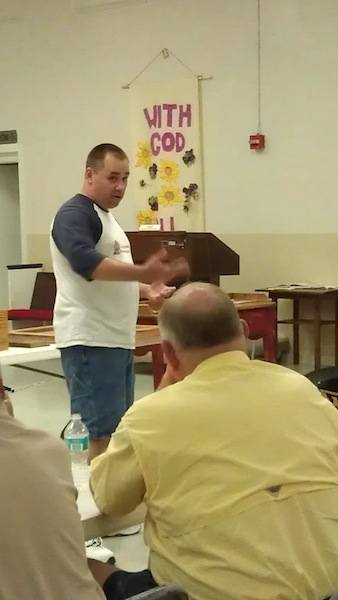
As the presentation wore on, I became a lot more confident. The jokes (that would have made Iggy cringe) started flowing more freely. The laughs started coming from the audience. Soon, I started answering questions from the room. How long have I been blogging? What are my favorite projects to build?

Wowing the crowd

Could I serve as that guild’s vice president as well?

Alright, maybe I can’t spread myself any thinner, but I feel like we had really done a great job bridging the bay between the two groups. And, since it was such a great project, it’s a pleasure to be working together.

Now, how do I get adhesive out of monkey fur?


Quick Poll

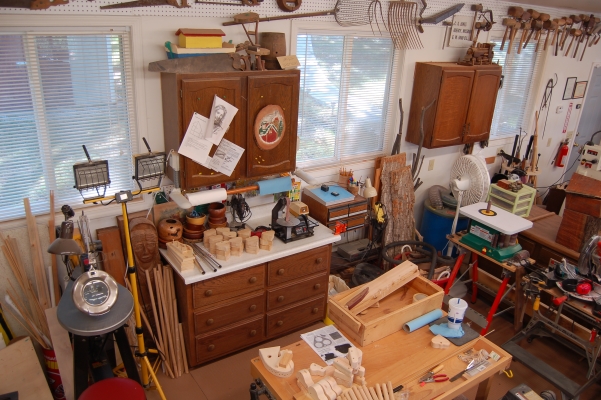
Our workshops are very much like fingerprints. Each one is unique to every woodworker. Whether you are shoehorned into a small corner of your basement, or have a separate, dedicated building with tons of space, your shop is an expression of your woodworking style, your living conditions and the amount of money in your bankroll. Sometimes we love it, other times… well…

A tight but tidy shop

This week, I want you all to come clean and let us know how you feel about your shop space. Whether it’s the perfect place for you to make sawdust, or it’s a rat hole you would abandon at the first opportunity, let us know what you think.


part of the Wood Talk Online community