Book Review: Working Wood

Jim Tolpin's Working WOod Jim Tolpin’s Working Wood (ISBN: 978-0871923011) was the first reference book I ever bought for my shop – and I really haven’t needed any more since.

This book has nearly everything that the aspiring woodworker would want to know. Two extensive chapters go in to great detail about hand and power tools – complete with clear illustrations showing the major features of each tool – a HUGE plus. From the lowly sheet of sandpaper to the largest cabinet saw, Jim shows what the tool looks like, tells its purpose, offers safety suggestions and gives tips on how to get the most of the tool.

The wood section goes into great detail on each type’s properties (nailing, gluing, finishing, cutting, etc.), wood movement factors, crush strength, bending characteristics, etc. All of this information is provided in easy-to-read table formats, which allow for head-to-head comparisons of wood species (i.e. – what’s the difference between red oak and white oak? How much softer than hard maple is soft maple?)

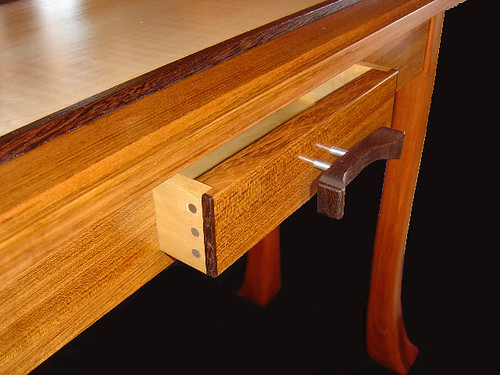
Want to know how to cut the most commonly used joints? Jim offers a primer on how to hand cut dovetails, build a finger joint jig, use biscuits to make a strong connection in sheet goods, etc. For example, the section on cutting dovetail joints, it shows step by step how to lay out the depth line, the best way to lay out the angle to get maximum strength in the joint, how to cross-hatch the waste so you don’t accidentally remove the wrong part (a very common mistake among beginners) and how to remove the waste with a coping saw and chisel.

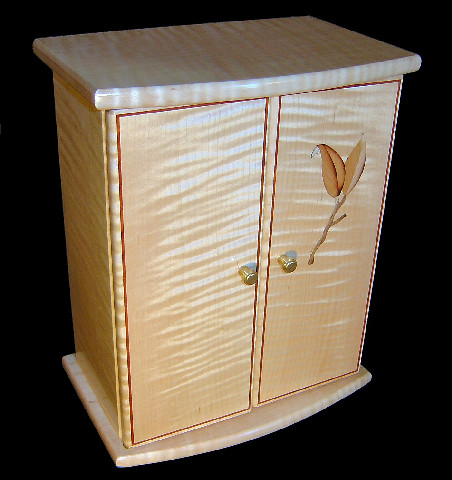
How do you build a door or drawer? Jim answers these questions and offers a host of options and how to build each one (Frame and panel doors, batten doors, slab doors, etc.) The drawer joinery options spelled out were very informative, and ran the gamut from simple rabbet drawer joints all the way to half blind dovetails. Very thorough.

Where should you put your jointer or band saw? Shop layout gets a section, and it goes in to great detail about the rationale for placing which tool where (for instance, grouping the planer, jointer and table saw to true a board and cut it to the proper length and width without hiking all over your shop).

Then, there is a whole chapter of tables which tell how tall to build a bar stool, how wide to build a desktop, where to put drawers and doors on kitchen cabinets, etc. There are also illustrations that clearly demonstrate the relationship of furniture parts to people parts (where will an average male’s knees fall in relation to a bar stool and the bar top). Very useful information when you get into the design phase.

What’s the best finish to use? Tolpin brings out all the stops to explain the difference between penetrating finishes and surface building ones. Stains and dyes get a strong mention and a description of which one is best to use in different situations. Ever wanted to learn how to mix your own milk paint? Tolpin gives his recipe so you can whip up a batch of your own home brew and give rustic pine pieces the old schoolhouse look.

Even more chapters on adhesives, fasteners, how boards are cut, and others round out a very full tome that fits into a very small footprint. Tolpin took the time to illustrate what the individual types of fasteners look like. Rather than explain what an oval head screw looks like – the book illustrates it! Just bring the guide to the local hardware shop and point at the drawing. It’s that useful!

The design of the book is even well thought out – it’s spiral bound so it will lay flat on your bench while you refer back to it. Beats having to find something heavy to lay across a saddle stitched or perfect bound book that wants to close itself. Little touches like this further increase the utility of this very important ‘power tool’ in any shop.

I’ve got a cold – yuck

OK, I’m sitting here in my living room, reading the same woodworking magazines over and over again and watching a few taped episodes of the New Yankee Workshop while I suffer through a bad cold.

I'm so sick...
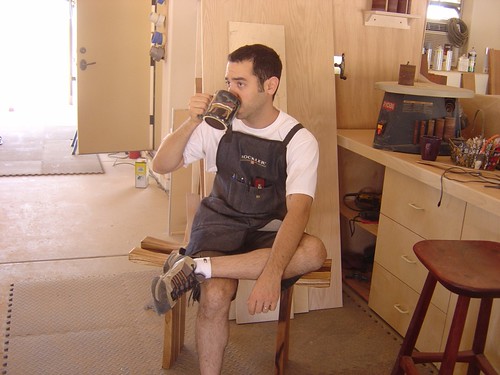
I’m sure you are not the least bit interested in hearing about my health. However, this does remind me of a woodworking experience.

Back in 1999, I had promised my sister-in-law that I would finish a little train table for my nephew. He was huge into Thomas the Tank Engine, and she wanted a place to set up his tracks.

As I was getting to the end of the project, I got nailed by a bad bug. I was running a low-grade fever, my head was clogged and I could barely get out of bed.

But, there I was in the shop, trying to concentrate on getting the final coat of finish on the project in time for the tyke’s birthday party.

If you have a similar story, send it my way at tom@tomsworkbench.com, and I’ll post some of the more interesting entries. I can’t promise you any fabulous prizes, a new Unisaw or a whole catalog’s worth of Lie Nielson planes, but, can I interest you in a few dirty tissues and cough drop wrappers?

Link of the week

Lee Valley’s Steam Bending Guide

Lee Valley's Steam Bending GuideGraceful, flowing curves in a project always fill me with awe. They also leave me with lots of questions – Just how the heck did they get the wood to bend like that?

Lee Valley Tools offers this excellent primer on how to steam bend wood.

Selecting the right species, building the steam box, even when to use a steam-bent piece are all covered in highly-detailed, easy-to-read descriptions.

Plenty of how-to know how is offered as well. What’s the best way to build a bending table? How long should each piece sit in the jig? How do you bend more intricate shapes, such as compound curves and recurves? It’s all in there, and the information is provided free of charge.

If you ever thought of steam bending for a future project, this should be one of your first stops.

Stuff I’ve Built: Breakfront Entertainment Center

  • March 2007

This piece was an interesting one to build. In our family room, we used to have a 21″ TV in an el-cheapo particleboard entertainment center. But, for a holiday gift, we received a 32″ TV to replace the old one. Man, what an improvement! A nice, big picture, stereo sound and very high resolution.

Only one problem – it didn’t fit the existing entertainment center anymore.

We junked the entertainment center (thank goodness) and perched the TV on top of a blanket chest for a few months. That was OK, but it looked terrible. Since I had all those fancy tools in the shop, I went to the drawing board and designed something new.

Here’s what I came up with. This entertainment center addressed a few issues that needed to be given some attention.

The design for the piece was relatively simple. First, I built a base out of strips of 3/4″ plywood that would serve as a firm foundation. I brought that inside, cut the carpet out from under the unit so it sat level on the concrete floor.

The piece itself was built in three sections – a large central unit flanked by two towers. The piece was built using through screws, dadoes, biscuits and pocket screws where necessary. I sanded and painted the piece with a coat of primer, sanded it, then rolled on two coats of latex enamel paint with a sponge rubber roller.

I brought the piece inside and screwed it down to the base and into the wall studs. I also screwed the pieces together to ensure the most rigid piece possible.

Once the pieces were mounted and unified, I trimmed them as one unit, which gives the impression the piece was built as one piece. The crown molding on the top consists of one 1×4 nailed over the top of the case, mitered at the corners. A 1×2 is nailed to the case face frame and butts up to the bottom of the top piece. A quarter round molding fills the intersection, making a nice built up molding.

The doors are poplar, cope and stick cut on a router table. The solid panels are 1/2″ plywood rabbeted to fit the groove. The two glass doors were glazed by a guy who does stained glass work locally.

Besides giving the TV a nice place to rest, the inside of the unit provides a great deal of storage space. This shot was taken before I built the doors, and you can see just how much storage space that’s built in. Now, we can hide all of the DVDs, books, tapes, toys and the other various and sundry items a family of four collects.

The storage area under the TV is an excellent place for the VCR, DVD and PlayStation 2. The door that covers that gap actually flips up and is held in place with a lid support. We raise it when we need access to the components, and, when closed, it looks like a pull-out drawer.

Just an aside, yes, that’s my wife and youngest son. Hey, fame is the price you have to pay when someone in your family runs a blog!

Woodworking Spotlight – Marc Spagnuolo

The Wood Whisperer himselfThere’s a lot of great woodworking information out there on the Internet. It seems as if every woodworking magazine, television show and product manufacturer has a web site jammed to the gills with great tips, how-to’s and background. (Click on the images for larger versions)

But, what if you also want some entertainment while you learn?

Enter The Wood Whisperer. Young, up and coming Arizona based woodworker Marc Spagnuolo runs a web site featuring a dynamic blend of solid advice, sound techniques and a unique, quirky style of humor.

Jewlery BoxWhile Marc’s Internet outreach represents the cutting edge of interactive woodworking education, his journey into woodworking began while watching his stepfather tackle a kitchen remodel and a living room addition in their New Jersey home. After a while, Marc soon found himself making his first cuts and swinging a hammer at his side. And, as a self-confessed tool drooler, he was into each of his dad’s tools. “It’s funny. He used to yell at me for not putting his tools away. These days, I’m the one who cringes watching him use my tools!”

After moving into his own home outside of San Diego, Marc started doing the handyman thing himself, turning his house into his own California Dream. Watching the transformation of raw materials into finished projects proved too fascinating for Marc, and the carpenter inside him quickly turned into a woodworker.

Marc and David MarksWhile developing his skills, Marc got hooked on David Marks’ show Woodworks on the DIY Network. Soon, his amateur woodworking methods began to become more refined, and Marc took the first step toward becoming a master of the craft.

At a woodworking show, Marc met David Marks and scheduled a class with him in his Santa Rosa, California shop. “What struck me about David was his unwavering love of woodworking. It was inspirational to see a man who, after woodworking for decades, still spoke about woodworking with a passion that I had never seen before.” After spending a few days with David, Marc realized he could learn a great deal more. Shortly after his class, Marc approached David about a short-term apprenticeship. David accepted, and a few months later, Marc was at David’s shop,

Marc learned the intricacies of freehand inlay, marquetry, power-carving and veneering. The pair completed several projects, most notably a hollowed 400 pound redwood burl that is still on display at a California winery.

Coffee BreakIt was shortly after his internship that Marc knew what he wanted to do for a living, and left the biotech industry that he had worked hard to enter. In 2003, Marc and his wife Nicole left California and moved to their new home in a suburb of Phoenix, Arizona. That’s when he established Marc’s Wood Creations, where he builds custom projects and runs the Wood Whisperer website out of his shop

Marc’s philosophy is simple when it comes to commissioned pieces. “I want to build the best possible piece I can within the budget. I want every piece I sign my name to to be an heirloom quality piece that will certainly outlast my lifetime.” One of the most challenging projects Marc undertook was building an entire book store’s worth of book cases for a small Christian bookstore in Phoenix. While this might be a production style job for most woodworkers, Marc takes the time to carefully craft each piece to ensure that each case is as perfect as it can be.

Marc and Tom goofin aroundBy far, the most rewarding aspect of Marc’s business is teaching, and it shows in his enthusiasm. I was fortunate to meet Marc Spagnuolo at the American Sycamore Woodworker’s Retreat in Cloverdale, Indiana. Marc was going to attempt to teach me – a cabinetmaker who sees the world as a very square place – how to work in curves while creating an Asian-style contemplation bench.

There were several times during the class where I had to stop and look at Marc as if to ask, “Do I really want to carve into this beautiful piece of wood?” With a knowing nod, he told me to give it a shot. As the Arbortech blade bit into the slab of tiger maple in front of me, Marc stood off to the side, carefully observing my technique. With the skill of someone who knew what the wood could tolerate, he knew as I approached the layout line in the seat carving and told me that I needed to slow down and get ready to refine the curve.

That’s how the entire week went, with Marc patiently guiding a class-full of students as they crafted their own benches out of purpleheart, mahogany, zebrawood and other exotic timbers. And each day, after a pile of wildly colored sawdust covered the floor, Marc went from student to student to encourage each of them, telling them that each was crafting a unique bench that would eventually be a piece of art. For a young teacher, just a few years away from his initial learning of the craft, he is well on his way to developing the skill and patience of a master.

Hall TableWhile serving as a guest teacher is a rewarding experience, Marc’s true passion reaching out to the woodworking world at his Wood Whisperer website. This one-time side project has taken off during the past year, and is now becoming his calling card.

Understanding that it is better to show than tell, the site features a series of downloadable podcasts that walk beginning woodworkers – and those more experienced who need a refresher – the finer points of the craft. How to equip a shop. How to select lumber. He even did a holiday shopping guide aimed at the friends and relatives of woodworkers to guide them through purchasing gifts for that special sawdust covered someone in their lives.

The site also goes beyond the video lessons,hosting a blog, offering tutorials – there’s even Wood Talk Online, and audio podcast he co-hosts with Matt Vanderlist, administrator of Matt’s Basement Workshop Podcasts. Not only can you listen to the podcasts at the site, you can also download them at iTunes, so you can listen on your iPod at your leisure.

Who is that next to Marc?Marc has further enlisted the help of other woodworking bloggers and established the Wood Whisperer Network. From here, there are links to dozens of other blogs hosted by talented woodworkers. From the amateur to the professional, there’s a vast array of woodworking disciplines bound to suit just about anyone’s taste. “The member sites represent some of the best of the best in the field. I’m really excited about the quality of the woodworking blogs out there. There’s definitely something for everyone.”

And, it’s all coming to your computer, courtesy of the Wood Whisperer.

part of the Wood Talk Online community