There are certain statements that are beyond refute.The sun rises in the east. The only two things that are unavoidable are death and taxes. Bread always lands butter-side down.
And, as most woodworkers will agree, you can never have too many clamps.
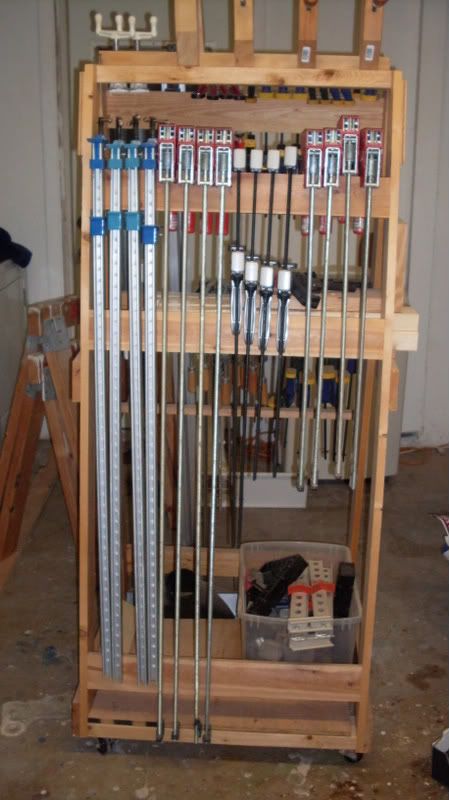
Here’s the arsenal that I work with on my shop-built rolling clamp rack. I have what I consider (especially given that I’ve seen other woodworker’s collections!) a pretty modest, yet fully functional setup.

This side I call the ‘short’ side of the rack – all of my frequently used short clamps are parked on this side. From the top down, here’s what I have:
An assortment of handscrews. Sure, they can be a pain in the rear to get aligned the right way, but these clamps will work when none other will do the job. They can get a solid grip on angled pieces, and can also serve as a ‘kick stand’ for cabinet components when assembling them.
My 6″ Quick Grip clamps. These babies are some of the most versitile ones in the shop. Holding jigs, clamping small parts, breaking apart components (They switch to spreaders) and any one of dozens of other tasks.
Staying on that top rack, you’ll see some medium duty 4″ F-style clamps with the red heads. Got them from Lee Valley and they are really nice little clamps when I need more pressure than the Quick Grips can offer.
Next, I have a clamp and edge guide. I haven’t used this one much recently, but, when I need to cut or route a straight edge, that’s the one I look for.
Two 3/4″ pipe clamps. I break these five footers out whenever I need a greater reach. The pipes are threaded both ends, so I can use a coupler to get a 10 foot clamp if need be. Also, these are great for squeezing an assembly square if it’s racked.
Down from there, I have my 12 inch Quick Grips, and a set of ultra-cheap discount F-style clamps. None of the bars is straight, the heads slip and they don’t clamp all that well. But, I can’t bring myself to throw them out, because they are the clamps I used when I started out. Sentamental fool….
 On the flip side, this is where the bigger clamps call home. This is where I go when I need the muscle to glue up big projects.
From left to right, I’ll start with my first serious clamps. These 36″ aluminum channel clamps were the first ones I purhchased to glue up larger assemblies. I like these because they are lightweight, give me tremendous pressure and are easy to use. If you had to buy longer clamps for the first time, these are the ones you should get.
From there, we go to the 50″ Bessey K-Bodies. These clamps are BUTTER. Large clamping faces, robust clamping bars… what can’t these babies do? Really nice for large assemblies. They have become my first go-to clamps.
The next clamps I’m not 100% sure I like yet. These are the aluminum assembly clamps that Lee Valley recently sold. I’ve only used them once and didn’t really like the way they worked. I’m sure all I have to do is get more practice with them….
And, of course, four 25″ Besseys… nice for putting together smaller projects.
The bucket at the bottom contains an assortment of band clamps, Rockler right angle clamping jigs, spring clamps and other assorted odds and ends. I use them, but not for every application.
Where the A-Frame meets, I decked the area in and store my eight 24″ clamping cauls I cut out of common 2×4’s. They are great for holding panels flat while the glue dries…
And, yes during large glue ups, I find myself thinking, “Ya know, this job would go easier if I had more clamps…”

 One of the things my oldest son loves more than football, fighter planes and annoying the heck out of his younger brother is playing chess. He can’t get enough of it.
 This one came from Duan Packard in Kerrville, Texas – and it’s a good one. Thanks, Duan!
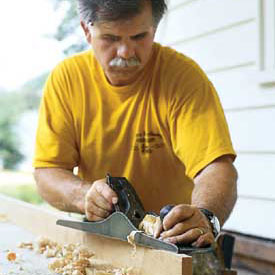 Leave it to the guys at the longest-running home improvement show to tackle the task of teaching their readers how to choose and use hand planes.
 From those humble beginnings, Bell Forest Products has grown to a 37,000 square foot warehouse and full production sawmill. While the majority of the wood they sell is locally grown bird’s eye and tiger maple boards, they have branched out to carry a tremendous variety of exotics. At any one time, they have about 50-60,000 board feet in inventory. They buy logs and saw them at the mill then closely supervise the kiln drying of the stock to ensure the highest quality possible.
 While all of this sounds impressive, convincing woodworkers that they can trust the online wood buying experience was one of the most difficult issues that Bell Forest Products had to overcome. “Oh, buying wood online can be a huge leap for some woodworkers. A drawback to buying wood online is that they can’t fulfill that desire to pick up a piece of wood, to smell it, drool on it, taste it… you know. Some folks just need that close connection with the wood before they decide to buy it.”