 Talk to most beginning woodworkers about what gives them the most anxiety, and you might be surprised to hear that it’s not buying tools, planning projects or even tackling necessary joints such as the Mortise and Tenon…
It’s building drawers.
As amazing as it may sound, drawers have this ability to freeze a woodworker in his or her tracks. However, when you consider that a drawer is just a box inside a box, building drawers can actually be one of the easier parts of building a cabinet.
There are some things you do have to consider when building a drawer. First of all, it should be truly square to fit inside the case and operate smoothly, so proper assembly is a key.
 Secondly, drawers are also exposed to tremendous pulling forces on the front corners. Consider that a drawer may be opened tens of thousands of times in its lifetime, and, if it’s like the drawers in the dressers in my kids’ rooms, those drawers may be jammed full of clothes and have to be forced open.
Finally, drawers aren’t just functional pieces. Many times, they add to the overall look of the piece, so making them tough and beautiful is important.
 As far as materials go for drawer construction, few things are as useful as 1/2″ cabinet grade plywood. This stuff is easy to work with, very stable and strong. You can also either edge band or install a piece of solid wood on the top edges to hid the plies in the plywood if you wish.
Materials such as melamine coated particleboard are also stable and easy to clean, but I have seen my share of particleboard sided drawers fall apart if abused and exposed to water… something that can happen in bathrooms and kitchens.
Solid wood drawers are stunning and allow the widest variety of drawer joinery methods, and are excellent choices for furniture projects. Frequently, a ‘secondary wood’ such as poplar, pine, alder or red oak will be used to make the drawer sides, saving the prized cherry, maple, walnut or other exotic wood for the visible outside of the case.
 The joinery methods which connect the back of the drawer to the sides are very easy – these joints don’t normally take much abuse. So, setting the drawer back into a dado with some glue and bradding it into place should do the trick. Pocket screws can also work. Dovetailing or fancier joints can be done for drawer backs, but it would be considered overkill unless the drawer opens both sides of the case (a push through drawer) or it’s done for aesthetic reasons.
Drawer front joinery is where the challenges lie, and there are many different methods for joining them. While not all joints will work in every situation, each can play a role in drawer construction.
- Reinforced butt/rabbet joints – Simply butting the sides to the front by gluing and bradding or screwing the sides to the front can work for light-duty drawers and utility models out in a work shop. While they may work for a while, over time it’s unlikely that the drawer will hold together well. With that being said, I have used pocket screws to join the sides of some pantry drawers from solid red oak in a project I built six years ago, and they are still holding together well even with tough use.
- Wooden-fastener aided joints – Dowels and biscuits can be very useful in constructing drawer front joints because they are set into place through the two boards with modern glues, which tends to anchor them in place and allows the forces to focus on a larger surface than can be provided with a brad. In fact, cabinet makers will frequently use contrasting wood through dowels or the Miller Dowel system to give a stylish appearance and plenty of strength.
- Locking dado/groove joints – By cutting a series of dadoes or rabbets into the front and sides of the drawer, you can create an interlocking joint with a table saw or with a router equipped with a straight or drawer lock type bit. These joints can be mass produced, making cutting a bank of drawers a piece of cake. Of course, you want to be as accurate in your setups as possible, but, once the heights are set, it’s off to the races. Sliding dovetails also fall into this category. They are really slick joints, but they can be kind of finicky to use in drawer joinery.
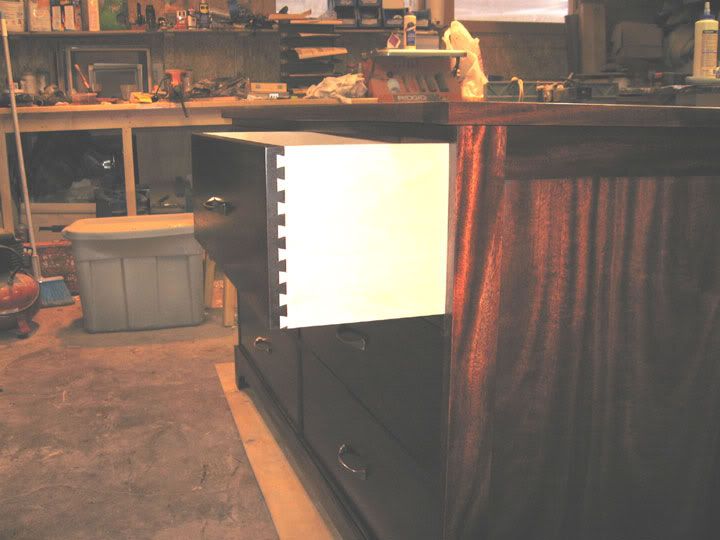
- Interlocking joints – Through dovetails, half blind dovetails, and box or finger joints have set the standard for drawer front joinery for centuries. While finger and box joints can be outstanding for this kind of application – especially with today’s modern adhesives, the dovetail joint’s mechanical interlock ensures that little short of a stick of dynamite will cause the joints to fail. These joints are often seen as the true sign of quality, but they may be overkill for smaller drawers and against other capable joints.
 By the way, if you don’t have a dovetail jig capable of cutting half-blind dovetails, or you don’t want to learn how to master cutting these joints, all isn’t lost. By cutting through dovetails with a jig or by hand – or cutting dovetail splines as with a Kehoe jig – and attaching a ‘false’ or ‘added’ drawer front, you gain the appearance of a half-blind dovetail joint and you can stretch your supply of good project wood by resawing thicker boards down to a thinner size. I prefer this method, because it also allows me to get the drawer face absolutely centered in the project opening.
Drawer bottoms can be made out of plywood, some other sheet good or solid wood. You can simply route grooves into the insides of the four box sides with a router, dado blade or with multiple passes on a regular table saw blade. Just be careful about having the dado on the drawer front hidden when the drawer is assembled… you can plan to have it fall where a socket will fall if using dovetails or box joints, or by having the drawer sides extend to the front of the drawer box for other kinds of drawers.
I prefer 1/2″ plywood for drawer bottoms, and I will rabbet it to fit into a slightly undersized dado (3/8″ seems to work well) to get a tight no-slop fit. This is unless the drawer is going to be small and not carrying a lot of weight. Then, I’ll choose 1/4″ plywood.
Solid wood drawer bottoms are a very classic touch, but you have to remember to allow for seasonal wood expansion and contraction – so don’t glue the bottom into the box. A squirt of glue in the middle of the drawer front dado and a screw to secure the bottom to the back of the drawer should be sufficient. You can build these drawer bottoms like a raised panel door if you want to give the drawer bottom a little more mass and not have to create an extra wide dado in the sides.
 One easy way to install drawer bottoms is to cut the dado only into the front and two sides of the drawer box. Make your drawer back the same height as the top of the drawer sides to the top of the dado. This way, you can slip the drawer bottom into place past the drawer back and secure it to the bottom of the drawer back. By building this way, you can replace the drawer bottom easily should something happen to it, instead of having to pull the entire drawer apart if you captured all four sides of the bottom.
Armed with a little bit of knowledge and some confidence, if you haven’t yet tried building drawers for your projects, now’s a good time to give it a shot.

 It may seem tough to believe, but I actually have two consuming passions in my life. (Well, three if you count my wife – I don’t think she’d ever forgive me for NOT counting her on the list!)
 Woodworking is of course one of my favorite things. The other is the weather – especially hurricanes. That’s why my office sent me to the National Hurricane Conference taking place this week at the Austin Convention Center.
 I met Craig Andrews while at a woodworking school up in Indiana. We have kept in touch, and he is hosting me at his house. Besides the great Tex-Mex food, we’ve been doing a little work in his shop.
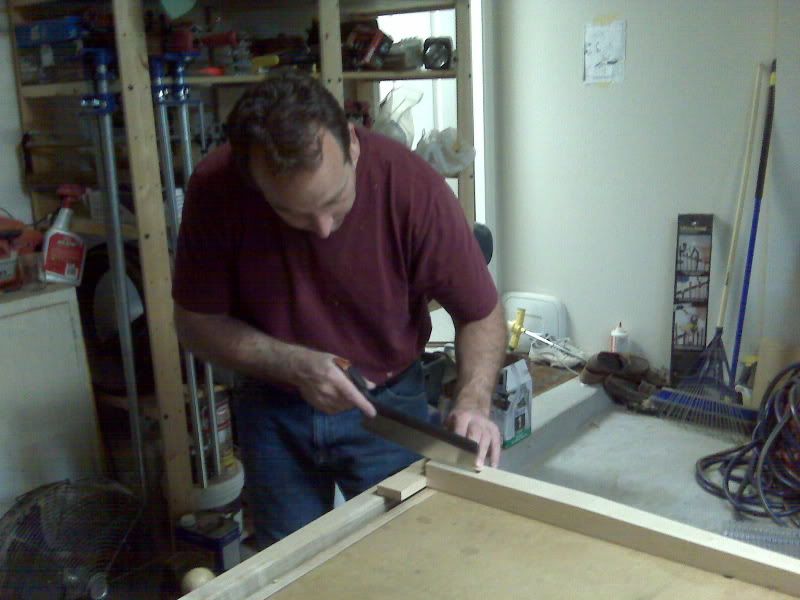 Before the trip, Craig promised me that he would show me a technique he picked up on how to hand cut a haunched tenon. Armed with a Veritas dovetail saw, a few chisels and some hand planes, we made a sample tenon to fit into a pre-milled mortise. Since all I had was the camera on my cell phone, I couldn’t get good shots. However, I will write that technique up once I get back to my shop.
 According to Derek, “The tool has made woodworking a whole lot easier for beginning and advanced woodworkers alike. Sure, there may be some who prefer more traditional joints, but for building fast,strong, and easy, pocket screws are a great choice.”
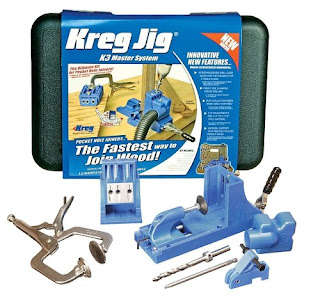 The variety of pocket hole cutting jigs offered by Kreg is pretty staggering. There are pneumatic, high-volume set ups for furniture factories all the way to the simplest single hole jigs offered for the handy DIYer. By far, their most popular model is the Kreg Jig Master System (model K3), the system favored by most woodworkers. Complete with set ups for semi-production and portable bases, the Master System is an improvement over the K2000, the former sales leader. “Even something as simple and elementary as moving the clamp handle to the front of the jig was a huge convenience for woodworkers. Now, instead of having to reach around the back of a large panel to secure the work piece, they can do it all from the front.”
 And it’s not only pocket screws when it comes to Kreg. In 2003, the company started building a line of highly accurate (and well reviewed) fences and guides for band saws, router tables, miter saws, table saws and other shop tools. “So far, all of our precision guides, fences and jigs have all been met with broad support, and our customers have been very happy with what we’ve come up with.” Even more recently, Kreg has announced an entire line of Klamp System™ components designed to improve clamping around anyone’s shop and a family of Precision Routing products including the new Precision Router Table which includes a table saw style fence which self squares with the table’s miter slot.
 For many of us, the allure of woodworking is that we get a chance to work in our own shops – our own space set up exactly to our wishes … well, maybe you would add a sweet brand new Unisaw to round out the collection…
 Armed with a tool chest of traditional tools from his Hungarian homeland, skills honed by years of apprenticeship under his father and a burning desire to build furniture, Frank Klausz immigrated to the United States back in 1969.
 It was just last week that I took delivery of my brand new Veritas Dovetail Saw. I have used it several times and have gotten a lot of practice with it cutting straight lines to a marked strike line.