Category Archives: Shop Talk

Supplies!

OK, so you start working on a project. You either buy, find or draw up your plans. You source your wood. You think carefully about how you are going to make your cuts. You think about what tools you are going to need, and if they need to be sharpened.
image

Yup, you are ready to build. Then, you get to that one point in your project where you reach for something small and seemingly insignificant – the glue bottle, a screw, a sheet of a particular grit of sandpaper – and BAM, it hits you like a 2 x 4 to the head – you are out!

Doesn’t that just drive you nuts?

Oh, it’s happened to me more times than I care to admit. And, every time it happens, I have to stop everything and shoot off to the store to grab what I need. For me, it’s pretty convenient, because I have one each of the competing home improvement centers less than a mile from my home and a few woodworking specialty stores about a 20-minute drive from the shop. But, for some of you guys and gals who live further away from the nearest retail outlet, I’m sure it has to be a momentum killer.

image

Even after all these years of woodworking, I still have yet to find a solution to this problem that works 100% of the time. For instance, to help keep me more organized, I have a special cubby where I store my sanders and the sandpaper that makes them effective. Years ago, I bought one of those accordion office paper organizers to hold the different grits of paper to keep them sorted out. The only problem is that I blindly take the sheets of sandpaper out of the organizer, then discover when I reach for the next one that – woah – I used the last sheet on the last project! Dagnabit…
image

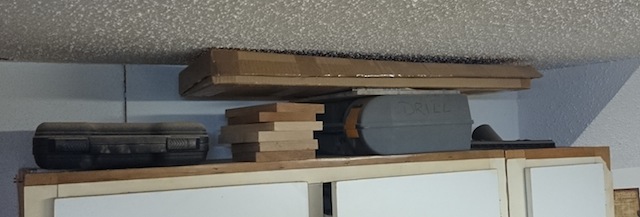
I keep my fasteners stacked in their original boxes on a shelf over my front bench. Now, over the years, I have had to buy my share of special fasteners for some specific tasks. (Roofing nails? Seriously?)  Rather than throw them out, I just keep them tucked away on the shelf, just in case I ever need one. As you can imagine, this clutter prevents me from seeing – say – how may 1 1/4 inch specialty wood screws I have on hand for when I build a cabinetry project. Needless to say, I have found myself dashing out to the home center, project glued and in clamps, racing to get those screws home in time to reinforce the joints.

Finishing supplies? Glue? Faggetaboutit. The song remains the same.

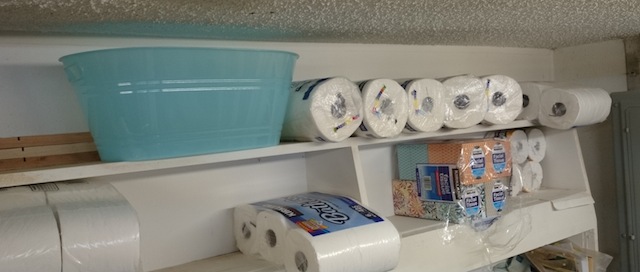
I’m not sure what the answer is. I might need to reorganize the storage areas in my shop, disposing of what I don’t need and getting some more clear see-through containers to keep track of what I do.  I could also go in on large lots of products that I use more frequently, but that would involve some foresight on my part.

Besides, it’s a lot more fun to buy wood for projects and new tools, isn’t it?

Old fashioned cutting edge

I have a few old hand planes that were given to me by friends. A few of them serve as desk ornaments at my office, while others are in bins, waiting for me to refurbish them. This is one that I had in the refurbish bin – an old Ohio Tools coffin smoother. I just love the way these old planes look, and I wondered if I could make this one work.

The old planeSo, I knew I had to break it down to get to the pieces I had to tend to… basically, the iron so I could sharpen it.

The plane broken down

Using a small warrington hammer, I tapped everything apart.  There was the wedge, the iron, the chipbreaker and the body. They are all in very good shape, with no cracks in the body and plenty of steel to work with with the iron. The plane looked nice, but there was one problem…

Super dull

The iron was as dull as a butter knife. I mean, I could press my finger onto the edge of it, and there was absolutely no chance of me hurting myself.

Flatten out the back

So, I broke out my Tormek and got to work on it. The first thing I had to do was to flatten the back of the iron. Concentrating mostly on the last inch of the bottom, I held the plane iron’s back to the side of the wheel. Unlike high-speed grinders with narrow wheels, this is perfectly safe. The water in the reservoir keeps the blade cool, and the nearly two and a half inch thick wheel has plenty of mass to allow you to really flatten things out.

Confirm the angle

From there, I had to make sure I had the angle right. This iron was ground to 30 degrees, which I confirmed using my angle gauge.  After that, it was easy to grind the bevel coarse, then fine, then hone it on the leather wheel. I put the plane back together, gently seating the wedge in place with a few taps of the hammer.

Shavings!

Sure, it took a little fussing (remember, you aren’t using a depth adjustment knob, but taps with a hammer), but I was able to get this baby making some sweet shavings in short order.

I’m not sure how old the plane is, but I hope it will continue to work for me for years to come.

Accuracy vs. Specificity

I am trying to make my son Dominic a film geek.

The effort, so far, is going well. We’ve seen movies like Jaws and Close Encounters of the Third Kind, and marveled at the cinematography. We’ve watched movies like Paths of Glory and Lawrence of Arabia and were astounded by the casting. Next up, I want to show him the classic Cold War era knee slapper Dr. Strangelove or: How I Learned to Stop Worrying and Love the Bomb.

Slim Pickens rides the bomb

Strangelove is one of those gems of a movie that comes along once in a lifetime. The dark humor, the outstanding acting of Peter Sellers and the off-the-wall humor of Slim Pickens – from going through the contents of the survival kit to his climactic riding of the atomic bomb to its target of Laputa, in the Soviet Union.

When I think of Strangelove, I always remember a class I took back in college. It was a class, in fact, that was partially responsible for me getting into the disaster response field. It was called The Sociology of Nuclear War. Sure, it sounds strange now, but the class proved to be a hard-hitting study of society’s perception of civil defense, their trust of government and military authorities and the portrayal of our communist adversaries on the other side of the Iron Curtain.

Fallout Shelters

While I can bore you to tears with all I learned in the class, as a woodworker, I keep coming back to an important distinction that my professor made in class when we were speaking about the dangerous weapons: Accuracy vs. Specificity.

I learned that in the world of nuclear weapons, that accuracy was a measure of how many times a warhead would land within a certain error diameter – say 50% of the warheads would land within a 2 mile radius of a target. Specificity, on the other hand, was a measure of how ‘targetable’ a device was. Could it hit a hardened missile silo, or would it be better used on a large, unarmored target?

Rulers can be accurate

When it comes to woodworking and we are building projects, a very similar concept comes into play. Accuracy is the ability to mill and cut pieces to exact measurements. Say you are building a project from a commercially available plan. If the drawer runners need to be exactly 1/4″ by 1/4″ by 6 5/8″ long, can you cut that piece accurately enough to recreate the project as it was built on the designer’s workbench? Remember, these dimensions are checked time and again to ensure they are accurate enough for you to build the piece in your shop as designed.

Story Stick

Specificity, however, in woodworking is also known by other names such as relative dimensioning. In other words, can you carefully dimension and cut a piece of wood to fit a specific part of a project you are building? This too is an important skill to have in your repertoire, because, in the real world, not everything is square, true and the exact size you need it to be. When it comes to specificity in woodworking, who cares if the piece is 7 23/64″ exactly? What you are really going for is a snug fit with no gap. This is the world where story sticks come into play.

Which is better? A ha!  That’s a trick question. The answer is they are both very important, and both skills need to be honed in order to ensure that you can build exactly what you want. Accuracy ensures that your project will end up the right size, and specificity ensures that each component fits accurately.

Things are looking up!

You know, I’m feeling pretty good these days. I’m feeling stronger every day, work is keeping me busy and, yeah, I am getting a bit of time in the shop.  The best part?

Check out that ladder!

Well, the best part is that I have found a sweet new tool!  Yes, it is a ladder. Why do you ask?

Oh, what does it have to do with woodworking?  I knew you were gonna get there!  The thing about my shop is this – it’s fairly decent sized. My wife allows me to use the entire place (thank you, honey!) for woodworking, giving me some serious space to spread out and practice my craft.

But, even a two-car garage still fills up quickly. To help make the most out of my shop space, I have been constantly reclaiming shop storage space wherever I possibly can. Fortunately, there are still nooks and crannies that I can access for storage, but I have to think in the third dimension. In other words, I have to look up.

My veneer storage

Upward storage started with this area on top of my tool shelf setup. After I built my Fujiwhara Chest, I was left with a supply of beautiful veneer that I didn’t want damaged. So, I folded it in the cardboard that it shipped in and stashed it up here. It was also a good place to stow the veneer tools, just keeping them handy for when I need to do some work. Before I got the ladder, I had to go snag a dining room chair to reach up there, but with the ladder, it’s easy to get up there.

The area above the finishing cabinet

Then, there’s this space at the top of my finishing cabinet. It has crap on it now, so I’ll have to clear it off, sort through what I want to keep and prep this area.

The plane storage

Now, this area above my front bench I envisioned setting up as a ‘plane display shelf’, and I have put a few planes that didn’t make the cut up here. But, no one sees them, so I should sort through this and get it ready for storage.

Bulk storage

And, finally, this area above the washer and dryer. Yeah, maybe I should just clean this area off and use it to store the huge bulk rolls of paper towels I get at the wholesale club. At least that will keep them out of the woodworking areas.

A half-year with my bench

So, it was just a little bit more than six months ago when I decided the time had come to build my new workbench. Building a traditional Nicholson bench was a big risk for me. After all, my old bench was plenty wide for doing lots of different things at once, it was heavy and it served me well for many years.

But, it had some other shortcomings. It racked when I planed on it. It was a pain in the butt to clamp to it. And, well, it was kind of amateurish…

That’s why I jumped in and built the Nicholson. Why that design? Well, I didn’t have immediate access to seriously thick lumber for a Roubo, and I liked the looks of the Nicholson. Plus, from what I have read, these babies can take a beating.

So, now that I have had the bench in the shop for six months, and the new-bench smell is gone, what have I noticed?

  • This bench is solid. Some people knocked on the Nicholson because it was a ‘light weight’ alternative to a Roubo. Let me tell you something, this bench is a monster. It has quite a bit of construction lumber in it, and planing hasn’t been a problem at all. And, I was amazed at how rigid the structure was. My old bench had some give to it – this one doesn’t budge an inch.
  • The clamping situation is awesome. Those large aprons give plenty of places to set a peg where I can rest a board to be clamped, eliminating the need for clamps to hold the piece from falling onto the floor, and plenty of places to drive a hold down. Clamping to the top is easy, too. Those large sides do make clamping to the top a bit of a puzzle, but I quickly discovered that I could clamp on the end of the bench, making it easy.

  • Insetting my face vise was inspired. By insetting the rear jaws of my face vise into the sides of the bench and using an oversized chop, I have fallen in love with my face vise all over again. That baby grabs like nobody’s business, and works so much better that the old setup.

  • It works for traditional – and modern woodworking. Pocket screws. Hand planing. Pattern routing. This bench has filled the bill admirably. I am totally surprised at how flexible the design has been.

  • It’s a great place to podcast from. I routinely head to the shop to do podcasting duties for the Modern Woodworkers Association. Seated at the end of the bench, I can pull right in, close to the microphone, and really get into the discussion.

If you were sitting on the fence, wondering if a traditional style bench would suit your needs, I’d have to say go for it. The Nicholson was easy to build, and for the past six months has proven easy to live with.

The space between

So, I’m done with the front entertainment center. And, my bench is clear, with no project on it.

Making it the perfect time to tend to some important shop maintenance. One of those tasks is to tend to a little sharpening. My bench chisels have been taking a lot of abuse lately, and while they have worked well, it’s time for me to show them a little bit of love.

The bench is ready to workFirst step was to break out the Tormek to put a new edge on those suckers. I took the time to fill the water bath with water and a capful of Bora’s HoneRight Gold, which helps prevent rust from forming on the tool and the sharpener. While it may not be absolutely necessary, I need every advantage I can get in my humid shop.

Water additiveAfter jigging up the smaller chisels and doing them in ascending size order, I got to my one inch chisel and noticed this crap…  What?

Glue rust? Dang, I have got to do better than thisApparently, I had left a glob of glue on the edge of my chisel, and it created a rust spot on the top. Dangit.

Fortunately, my Hirsch chisels are made of pretty tough stuff, and I was able to tackle the rust on the blade.

Rust restorerI put a little dab of the rust restorer on the stain and rubbed it gently with some 600 grit wet/dry paper. I wasn’t looking to impart a satin sheen on the chisel – just use enough abrasive to get the glue, rust and crud off of the tool.

Back into fighting shapeJust a little bit of elbow grease was required, and the results were very nice.

After each of the blades got a good sharpening and honing, I wanted to test just how sharp each of the edges was. After all, if I wasn’t getting a sharp edge, I was just wasting my time. Being of Italian decent, I am not lacking in a way to test the sharp edge…

Good monkeyI wonder how long it will take for that arm hair to grow back?

Satisfied with the edge, I put the chisels back into my tool chest, and I started planning for my next build… what will it be? I’m not even sure!


What’s coming up?

This is always the best time of the year. The holidays are coming up fast, people are feeling pretty darned good, and we’re getting ready to ring in 2014. And, just as with this year, there are some big events coming up that you should be putting on your calendar.

A great shot from last year’s Folk Festival

First. on January 25, the St. Petersburg Woodcrafter’s Guild is going to be working over at Heritage Village, Pinellas County’s historical park for the annual Folk Festival. We have been there in the past, doing some woodworking demonstrations, But, this year, we are looking to build a workbench for Heritage Village to use for future demonstrations.

We are going to try to build – in one day – a Nicholson bench sort of like the one that I built for my shop. Since the guild has a number of talented hand tool woodworkers, we’re looking to do this without power tools. OK, I may do some initial planing and sizing on the power tools in my shop, but the main work will be done on site. We have already secured a donation from Lee Valley Tools for a face vise, we are looking for a donation for the wood, and we are working with the village’s blacksmiths to get some custom forged holdfasts made.

I am also trying to figure out how to live broadcast this event. So far, it looks like I can use UStream to do this from my iPad, but we’ll have to make sure that it works down at the park. If anyone else has any good ideas, I’m all ears.

That same day, my friend Chris Wong of Flair Woodworks will be holding a shop stool build along. Tired of plain-Jane store bought shop stool by his bench, he will be leading an online build-along on Saturday, January 25. If you would like to join in on the fun (this does sound like a total blast), be sure to check out his link.

This is not the first time Chris has conducted a build-along. Just 11 months ago, he and Scott Meek held a scrub plane build along, which was pretty successful. I hope this becomes an annual event.

Get Woodworking Week 2014

And, as if that wasn’t enough, mark your calendars for the first full week of February, because I’m going to be hosting the 2014 edition of Get Woodworking Week.

For the past two years, we have gotten woodworkers off of the sideline and into the shop to try their hand at the craft, and we hope to continue the momentum as we move into 2014. There has been plenty of support for it, but this year, I think we need to step it up a notch. I think we need to get into some schools to talk with kids about woodworking. I’m cooking up some details on this, but I think that’s where our aim should be pointed. If we are going to get new folks into the craft, it’s time to break onto the scene.

So, strap on your shop aprons, ready your safety glasses and let’s get ready to make some serious sawdust in 2014.