Category Archives: Projects

Outta This World

The folks at NASA think of everything.  They taught the world how people can survive for days on food squeezed out of a toothpaste tube.  The taught us how well monkeys endure the rigors of space travel.  And, they are learning how people react to long duration missions.

The reason is simple… Say, you have a mission to Mars. The crew would launch, then accelerate toward their destination.  They would quickly watch the Earth shrink to a pinprick of light – then were would be nothing but blackness… For a long time.

Then, as that little red dot starts to fill the ship’s window, the crew would get excited.  Finally!  The destination is approaching.  But, as the destination grows closer, the speed of the ship has to start decreasing. Progress will slow, and the crew would start to get antsy.  When will we get there?

NASA has done so much research in this field, in fact, that the Chilean government has consulted with space psychologists to better understand how the miners trapped underground will fare with their prolonged stay in a collapsed mine.

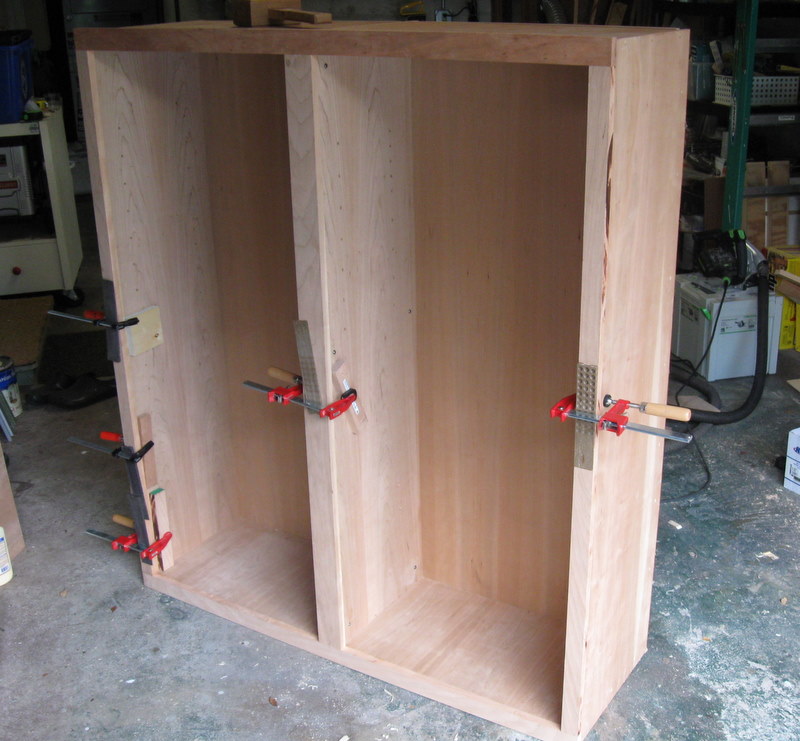
Since I live in Florida, perhaps I should consult with the folks at NASA about how to deal with the final phases of a woodworking project.  This past weekend, a major milestone was reached on the cabinet project at Paul’s house. With a final pocket screw to pull the face frame snug, construction came to a conclusion.  I had built these two bookshelf units early on, but it’s nice to see them screwed together and framed out.

Back in the house, the two banks of cabinets are in place and the desktop spanning the gap between the two cabinet banks is fitted into place. Paul was able to oil the drawer fronts and doors and get them into place.  I’ve got to tell you, with those in place, the project no longer looks like a jumble of boxes and lumber.  I’m stunned how nice it looks.

From here, Paul and his wife will take matters into their own hands. Sanding and several coats of finish – Waterlox – will be applied over the next week or so.  I’m going to have to spend some time over the next week or so collecting the tools I had brought to Paul’s house over the past two months – that is, if Paul doesn’t put them up on eBay first.

Once the finish is done, the last thing to do is mount the bookshelves to the top of the right bank of the cabinets.

And, when that’s done, I’ll be so happy, you can see me in orbit.

Me, My Shelves and I

The cabinet project is moving ahead, and the end appears to be in sight…

Of course, this is when things get trickier. More refined. Every single boo boo stands out.  So I have to be on my game, otherwise that’s what everyone will notice when they look at the project.

Next up are the shelves for the bookcase units and the desktop that spans the two banks of cabinets.

The plywood that Paul selected is some very cool stuff. It has great grain, and it blends very well with the solid cherry, so it looks like the shelves are made out of one piece of wood – the ideal situation.

When you build plywood shelves, you have got to keep a few things in mind. How much space you will allow the shelves to ‘float’ side to side in the cabinet, how deep they should be inset inside the case… those basic aesthetic considerations.

Mechanically, though, you have got to consider how well the shelves will stand up to the weight of the objects placed on them. As you place a heavy-duty load (such as books) in the middle of a shelf, you will start to notice a sag in the shelving material. How much will it sag?  Well, there are a couple of ways to figure it out.

Sure, you could just build the shelf, load it up and hope everything works out … nah.  I don’t think I can handle getting an angry call from Paul in the middle of the night because a shelf full of family photos fell to the ground.

I imagine I could do a bunch of complicated math, but I was an English major… so math and I don’t do well together.

Fortunately, there is a great utility out there called the Sagulator.  Designed by the folks at Woodbin woodworking, the utility allows you to compute how much your shelves will sag under a load before you build them.

In my case, I selected the plywood option with an edging strip of solid cherry. Figuring a load of 40 pounds per linear foot (given as a standard load for a library shelf), I came out with a total of .02 feet for the total of the 24 inch span. Since the eye can detect a deflection of .03 feet per linear foot, I’m doing pretty well.

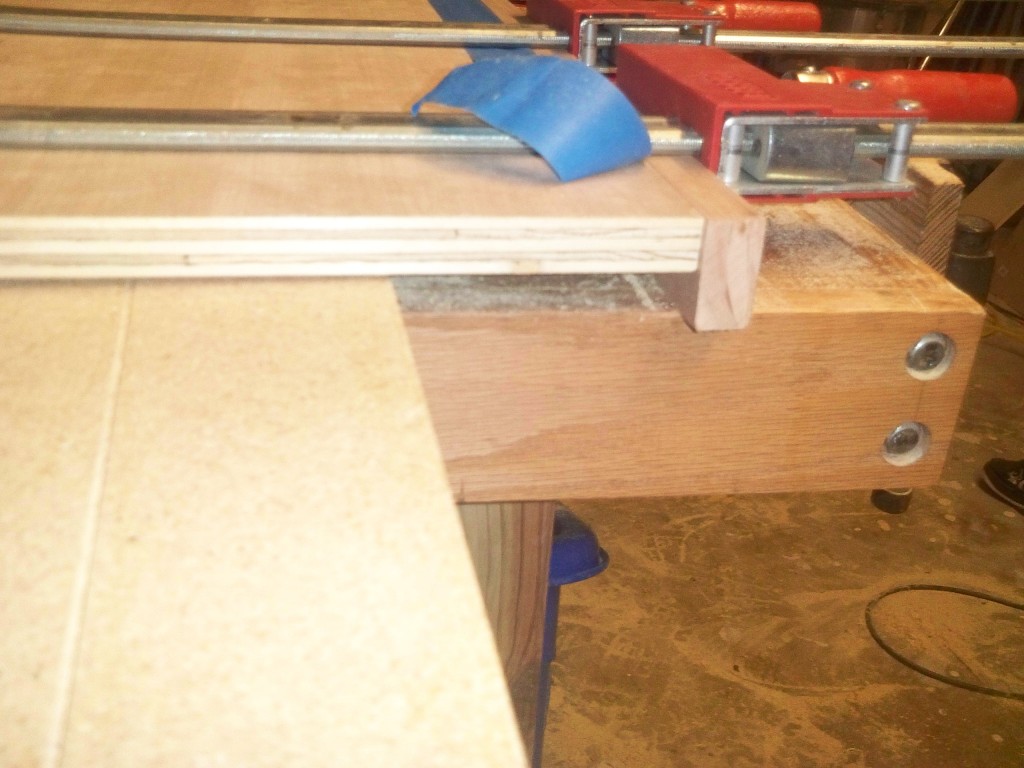
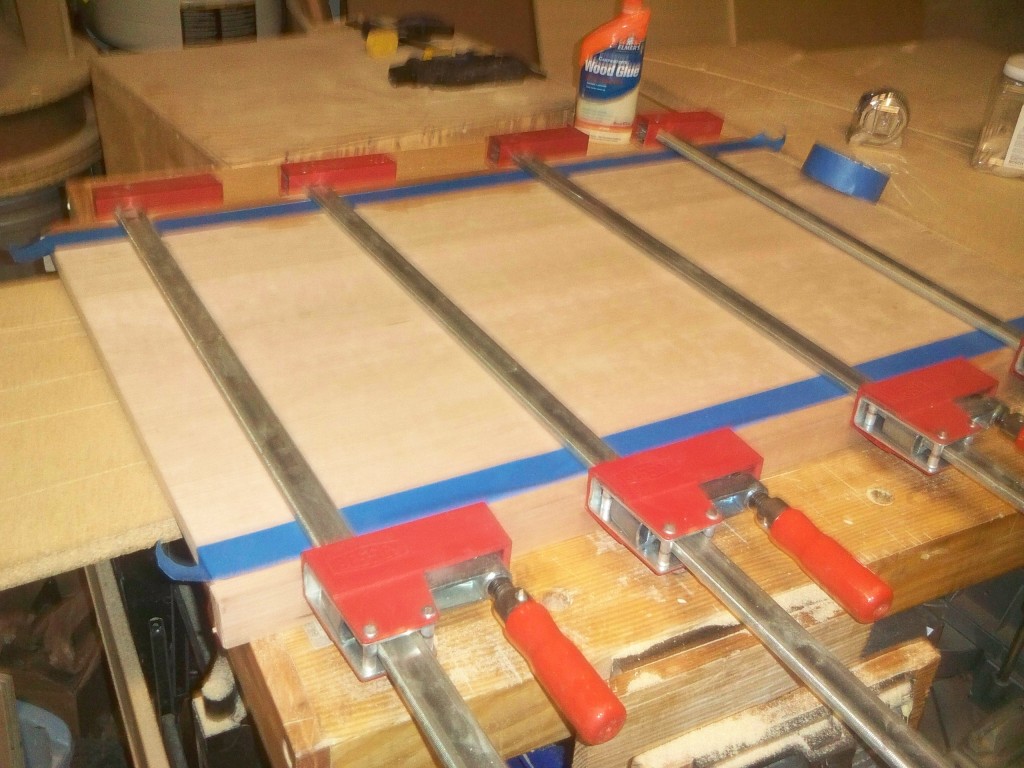
The desk span is essentially another shelf that will bridge the base units. Since it will be nearly three feet long, I decided that perhaps I should beef up both sides of the desktop to make it even sturdier. Again, it’s a simple piece of cherry plywood with a 3/4″ wide by 1.5″ tall solid cherry edge. I glued the edges in place, using biscuits to keep it aligned and provide some additional reinforcement.

Later, we will drill a hole for a grommet to allow monitor and keyboard cables to come up from below. Once the glue dries, it will be ready for some finish sanding and installation.

And, yes, that’s it. The desk shelf is the last piece of the project I will have to build (Although I will need to mill a little bit of molding…)

We’re getting closer!

Are we there yet?

If you were ever a child stuck in a car on a very long family road trip, no doubt there came the moment during the long time in the car that you piped up and asked the burning question on your mind.  “Are we there yet?”

And, if as an adult, you have ever had to drive during a long road trip with at least one child in the car, you have experienced that sinking feeling as one of the little  passengers in the seat behind you asks that universal question. Of course you will get there when you do, and it’s up to you to ensure that you get there in one piece without collecting any speeding tickets or having an accident.

My inner woodworking traveling child and adult are battling it out on my latest cabinet project I’m building for my friend Paul.

The woodworking child in me is kicking the front seat and growing impatient with the pace of progress.  Plus, the fact that working in the shop  on 98 degree days with a heat index of 110 is bringing out his grumpy side.

On the other hand, the woodworking adult in me is watching the project odometer consistently tick by, adding up the miles until we reach our woodworking destination and can begin celebrating the finished project.

For instance, we no longer have a jumble of cut cabinet parts, but actual cabinets that were built and moved to Paul’s house.

While I was out in the shop, Paul had built a base frame for the cabinets and prepared the area in his living room for work.  While the cabinets were nice to see by themselves, they really came into their  own once they were stacked onto the base and screwed together.

Now, as the rational, well reasoned woodworking adult, I know there are many more miles to go with this project.  Assembling and mounting the other bank of cabinets to the right.  Building nine drawers and mounting them into the right boxes. Face frames. Tops. A bookcase and desktop. Finish. There will still be some tough traveling to go until we get there.

But, boy, with that woodworking kid inside me be jumping for joy once we do!

To the Barricades, Mes Amis!

Bonjour!

Why is Tom writing en Francais today?

Well, if your calendar mentions it, you will notice that today is Bastille Day – the day the French commemorate the storming of the notorious prison named the Bastille – which also happened to contain quite a large stash of gunpowder.  It was this day when the three estates unified and the French citizens started down that long road to today’s republic.

But, that’s not what I want to write about.  I actually want to let you  know about a large project I just started.  It’s actually a big bank of cabinets that I’m building together with a friend from the Woodworker’s Website Association.

You see, Paul lives in a really sweet house built in the 1940s  just a few miles from where I live.  Over the years, as with many homes in Florida, the home was added to.  One of the largest parts of the addition was the enclosure of a large outdoor patio. In this room, he and his wife have created a lovely living room with a comfortable seating area and a bit of a home office.

But, Paul wants more.  So, he asked if I could help him build a home office area in this room.  A number of cabinets with drawers and doors for the lowers and a pair of uppers to serve as bookshelves.  He sketched out the design, and I figured out how many of which parts we needed for the cabinets.  We were building the cabinets just as Norm Abram did in his nine-part opus on building kitchen cabinets.

And then he ordered the materials. Last week, the stuff arrived.  A dozen sheets of prefinished and cherry ply.  A box of hardware he ordered online.  A few boxes of screws.  And one of these…

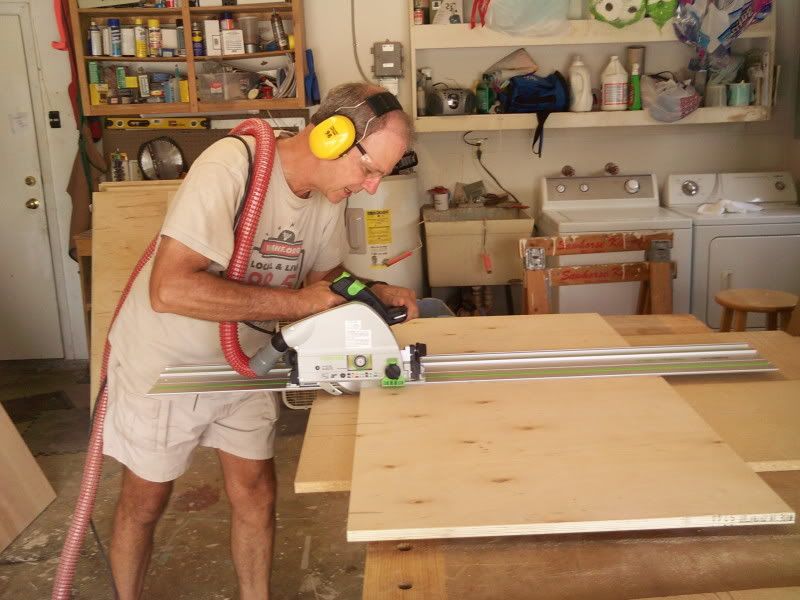
Yes, he brought over a Festool track saw.  Perhaps you have heard about these saws and the hype that goes along with them.  Every word of it is true.  The saw cuts beautifully, leaving a very smooth cut edge in its path that rivals what I can get on my table saw.  What I liked most about the saw was that we could flip those large sheets of plywood up onto the workbench resting on a few sacrificial strips of particleboard, mark and cut away. No need to hoist and balance large full sheets on the table saw or cut and then recut rough edges…

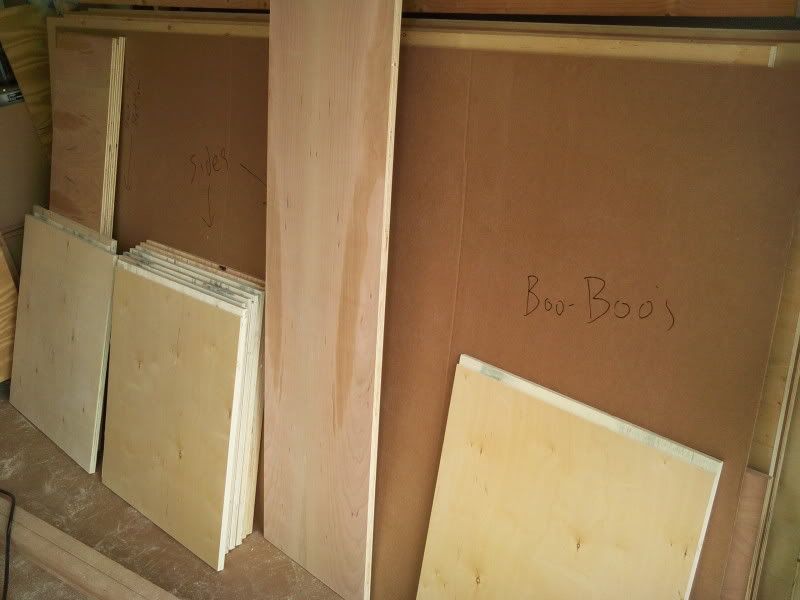
It took two five-hour days, but we ended up making all of the cuts for the boxes.  We even had a few miscuts that ended in the boo boo pile. It was hot work in my Florida workshop, but we got all  of the cuts done and dadoes and rabbets milled.  Now, I am spending a few hours every night after work putting the boxes together with screws and glue, and things seem to be progressing quite nicely.

Once the boxes are complete, we will take them up the road to Paul’s house where we will build a base frame, install and face frame the cabinets in place.

Believe me, I will keep you updated on this very ambitious project as we progress.

Now, what about the French lesson at the start of the article?  Well, I decided that today would be a great day to reenact the scenes of the French citizens emerging from behind their barricades to storm the Bastille.  Standing in for the barricades are the cabinet boxes.  Look, I know it’s a reach, but sometimes ya gotta do what you gotta do to keep it topical.

No, I’m not wearing the tricolor cockade or flying the banner of the French Republic, but I am hoisting a glass of Pinot Noir as my salute to the viniferous contributions of la République Française.

Stuff I’ve built: Lou’s CD/DVD rack

I work with this guy named Lou.  Lou is a pretty darned worldly guy.  He’s the kind of cat you would expect to find trekking the Andes by himself.  He’s the dude you wouldn’t think twice about if he was called up on stage to jam with a fusion jazz band.  He creates beautiful stained glass pieces in his living room.

In many ways, he reminds me of the character in the Dos Equis beer commercial – the guy known as the Most Interesting Man in the World.

Now, you’d figure a guy like Lou would have a plush home with zebra-skin covered sofas, but, no, Lou is a very practical guy.  He spends more time kayaking the mangrove estuaries looking for rare birds than worrying about his home furnishings.

I discovered this about Lou when he asked if I could build him a rack to store a portion of his large CD and DVD collection.  “I want something plain … nothing fancy.  Don’t  put any of that fancy cabinetmaking mumbo-jumbo on this piece, OK.”

So, I had to come up with something that would have that certain kind of ‘industrial’ quality but be well designed.

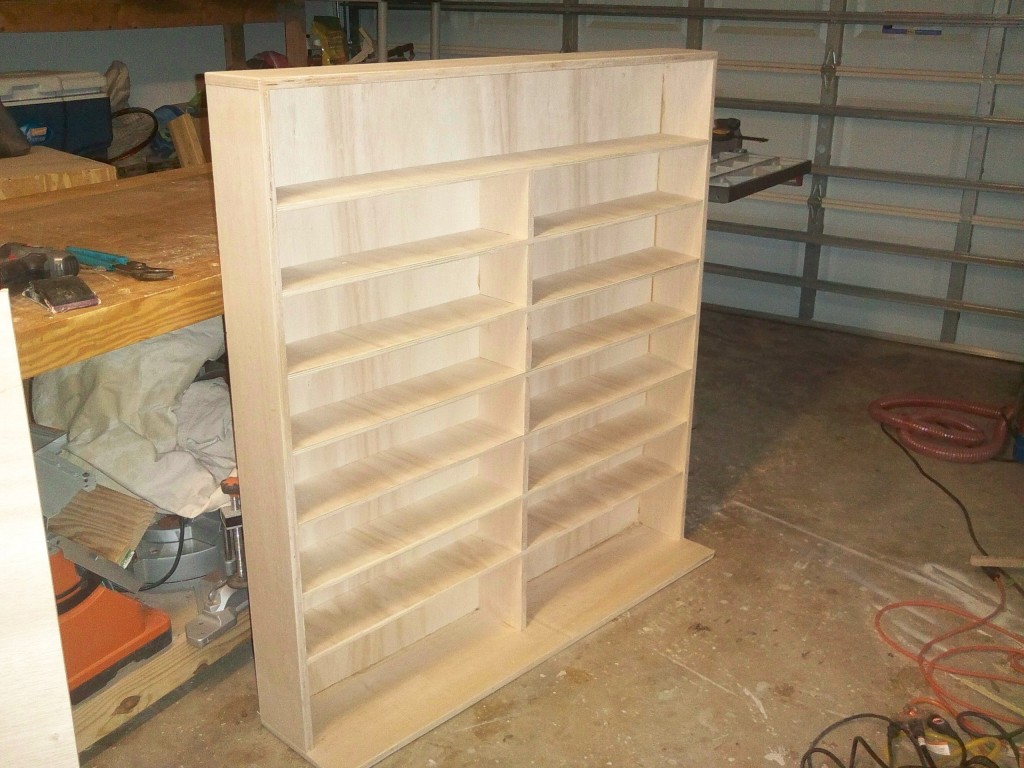
This is what I came up with.

It’s a pretty large piece.  Made of nearly two sheets of plywood, it has a number of shelves for storage of CD/DVD cases. I used pocket screws and glue to hold it together. My plan was to face the edges of the shelves, but Lou was clear… “Don’t you do anything fancy on that.  Unfinished plywood edges are fine with me.”

Oh, no… that meant I couldn’t use a face frame to help support the shelves.  So, I added the central supports between each shelf to keep the long, narrow shelves from bowing.  I sanded those edges as cleanly as possible and broke the edges so they would be smooth to the touch and wouldn’t splinter.

Right now, it’s still in my garage.  But, Lou has seen a photo of it and said he likes it.

And, when he’s done with his latest safari-at-home adventure, he said he’s going to come to my house to strap the piece to the roof of his car to take his trophy home.

Stuff I’ve Built: The corner entertainment unit

March 2002

You wanna know what’s awkward?

Asking a woman how far along her pregnancy is, and being told that no, she’s not pregnant.

Attending a dinner party at a friend’s house and remembering – right at the front door – that it was actually your friend’s birthday and you forgot to bring a gift.

And, then there’s this awkward corner in my home’s front living room.  It’s a beautiful room with three large windows looking out over the front yard.  There are two solid walls that allow a great place for our uber sweet motion sectional sofa.  And, of course, the ‘fourth’ wall is actually the opening that gives our home a roomy feel.

This means that there is just a very small corner between the windows and a short return wall to place a TV.  Not a lot of space to do anything.  When we were shopping for the house, the former owner used a low entertainment center just placed cocked into the corner.  Very clunky.

When we moved in, we found kind of a semi-circular small TV stand that fit into the corner a little better, but not by much.

What we needed was a piece of furniture.  Something that would fit the corner and hold the TV and much more.

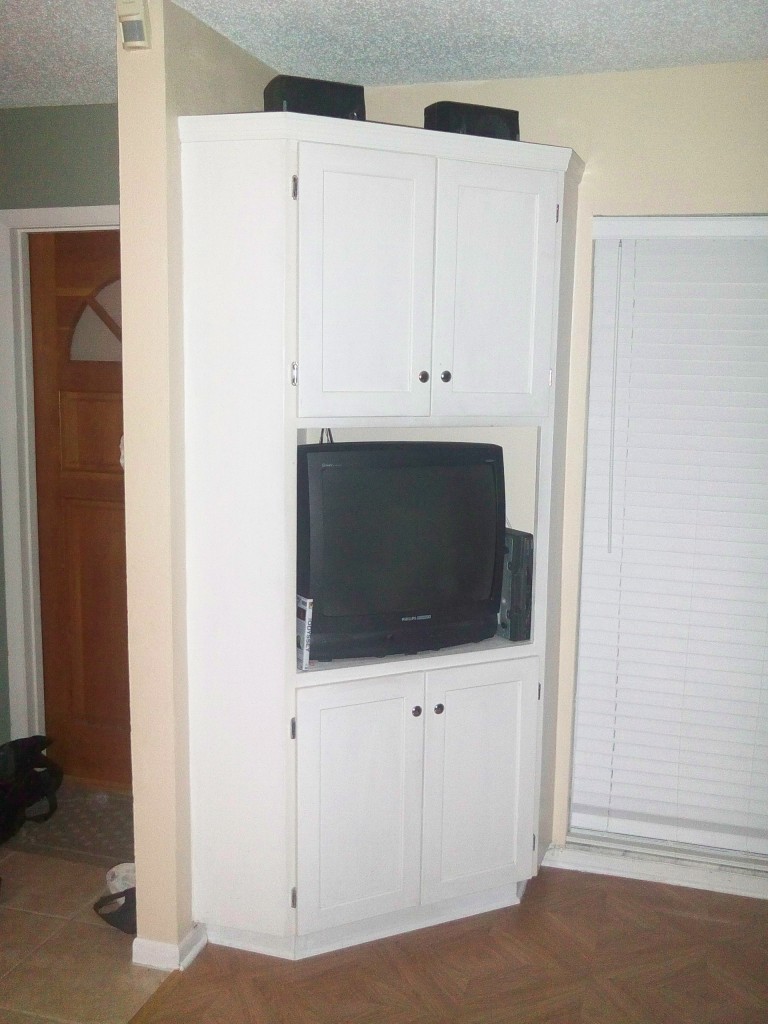
So, this was my solution.  It’s a built-in corner entertainment center that was built as a piece  of carpentry instead of furniture.  The heart of this project is a series of cleats ripped from 2×4’s and screwed to the walls.  These became the supports for the plywood dividers that formed the shelves and top of the piece.  From there, the sides are pine boards joined at 45 degrees.  This was necessary to create the front of the unit while still returning back to the wall.  The face frame was nailed to the plywood edging there primarily for looks rather than support.

These are the first doors I ever built and hung on a project.  I don’t think they look too bad, but, hey, they do the job.

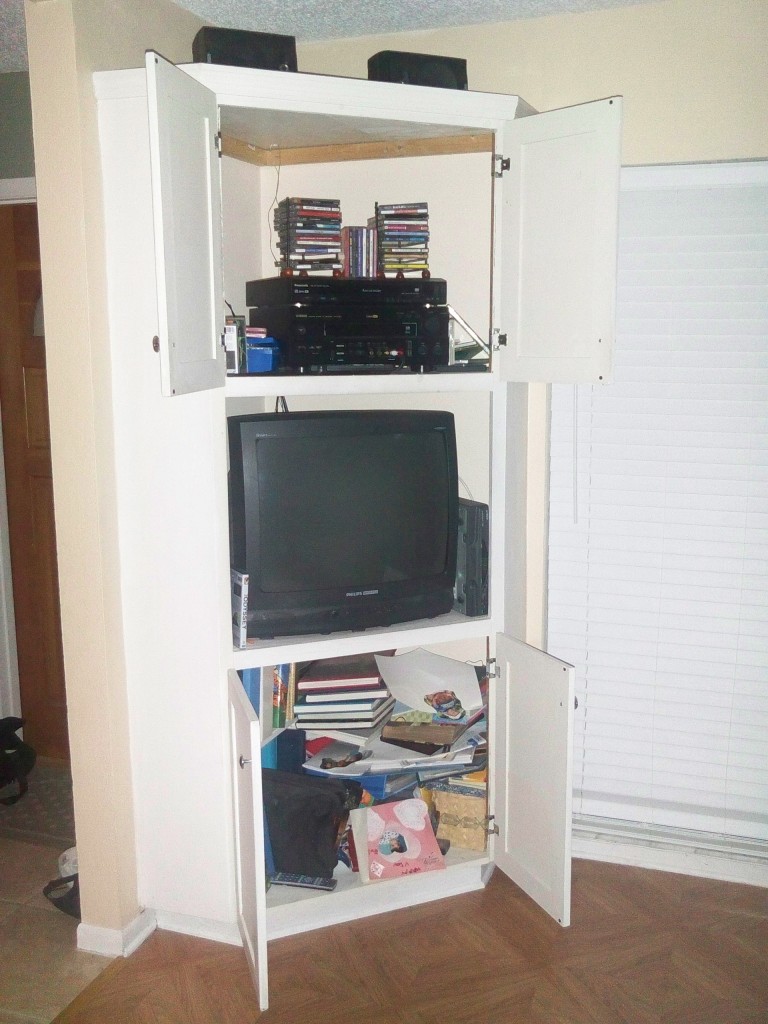
It’s amazing how much this project can hold!  The TV sits in the open middle of the case, all of the audio components are neatly hidden behind the top doors and behind the bottom doors is just about every picture we ever took.  Photo album after photo album are stacked shoulder to shoulder down there, keeping them from overwhelming another area of the house.

The best part is that we took an awkward spot in our home that no one was able to use and turned it into a great storage solution.

Now, this design is kind of interesting.  I know I have seen something like this before in my life… but you will have to wait for a special Sunday edition of Tom’s Workbench to discover who deserves the thanks for this handy design.

Great Jigs: The Vertical Router Push Shoe

There are some really awesome router bits you can use on a router table.  Panel raising bits.  Cope and stick bits.  Lock miter bits.

While these are pretty awesome, some require a risky kind of maneuver in order to use them correctly. Those are the bits that involve pushing the workpiece on edge across the bit.  Vertical panel raisers and lock miter bits come to mind as two types requiring this move.

While some woodworkers may feel comfortable pushing the wood past the bit in this manner, it has always scared me senseless.  I have to coordinate holding the board down to the table and tight to the fence without having it wobble, which would ruin the cut.  Then, how do you prevent massive tear out?

After trying to push a board past a bit like this, I had to make things easier on myself.  I spoke briefly with Jim Heavey at Wood Magazine and, with a little inspiration, came up with this design.

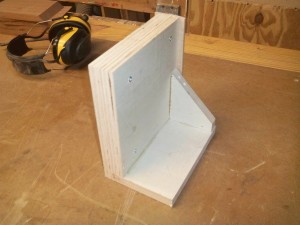
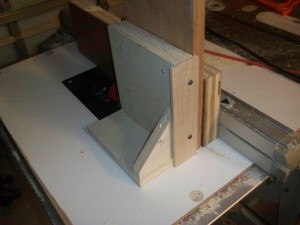
VERY easy to build.  The upright is two pieces of 3/4″ scrap plywood.  One is 8″ tall by 8″ wide, the other one is 8 3/4″ tall by 8″ wide.  When glued and screwed together, I created a rabbet for a piece of 8″ long by 5″ wide that rides flat along the table.  I put a gusset to hold the assembly at 90 degrees and to serve as a handle.

The trailing edge is a piece of maple that was planed down to 1/4″ for another project.  That was screwed to the back edge of the assembly with a 1/4″ overhang to serve as a push cleat. Don’t use glue here… just in case the cleat gets chewed up and needs to be replaced.

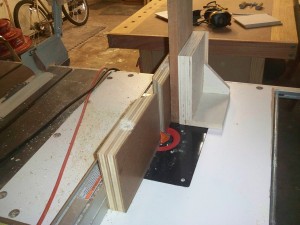
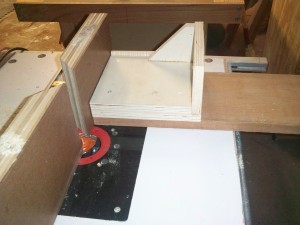
I used it by placing my board against the router fence and sliding the push shoe until is captured the board against the fence.  Now, instead of concentrating on three things at once, all I had to do was push the piece through the router bit.  No panic, no fear and because the cleat was supporting the back edge of the piece… no tear out.  Very easy stuff.

By ensuring the cleat was as tall as the top of the push shoe, I could also use it as a horizontal push shoe for the mating piece as well.

Believe me.. anything that makes your work safer and more accurate is something worth looking into.  And, when it is that easy to build… all the better!