Category Archives: Projects

A full-sized map

I like to watch comedians perform. Going to a comedy club is – well – a barrel of laughs for me. If I can’t go, I’ll tune in to Comedy Central for my funny fix.  Each comedian approaches the material from his or her  own point of view and with his or her own quirky observations. From the full-force in-your-rapid fire delivery (think Gilbert Gottfried or Sam Kinison) to a more laid back, mellow approach that throws you off guard (Bob Newhart or  Steven Wright), there’s someone out there who can leave you doubled over in laughter.

I still remember one of the stand up routines Steven Wright did.  He would just deliver deadpan lines, one after another, each a little more offbeat than the last.

I’ve been doing a lot of abstract painting lately, extremely abstract. No brush, no paint, no canvas, I just think about it.

Right now I’m having amnesia and deja vu at the same time. I think I’ve forgotten this before.

And, one of my favorites from the show…

I have a map of the United States… Actual size. It says, “Scale: 1 mile = 1 mile.” I spent last summer folding it. I also have a full-size map of the world. I hardly ever unroll it. People ask me where I live, and I say, “E6”.

It was so funny because it was just so absurd. And, later as I was in the shop thinking about the bit, a thought hit me…is there ever a time when a full-sized map would be useful?

I didn’t really need to look any further than my shop for the answer.  I am getting ready to start on a new project – a ladder-step looking bookshelf made of some cool looking cherry from my friends at Bell Forest Products – and I have yet to cut my first board. In fact, the piece right now hasn’t seen anything more than a drawing I made on a sheet of 11 x 17 graph paper.

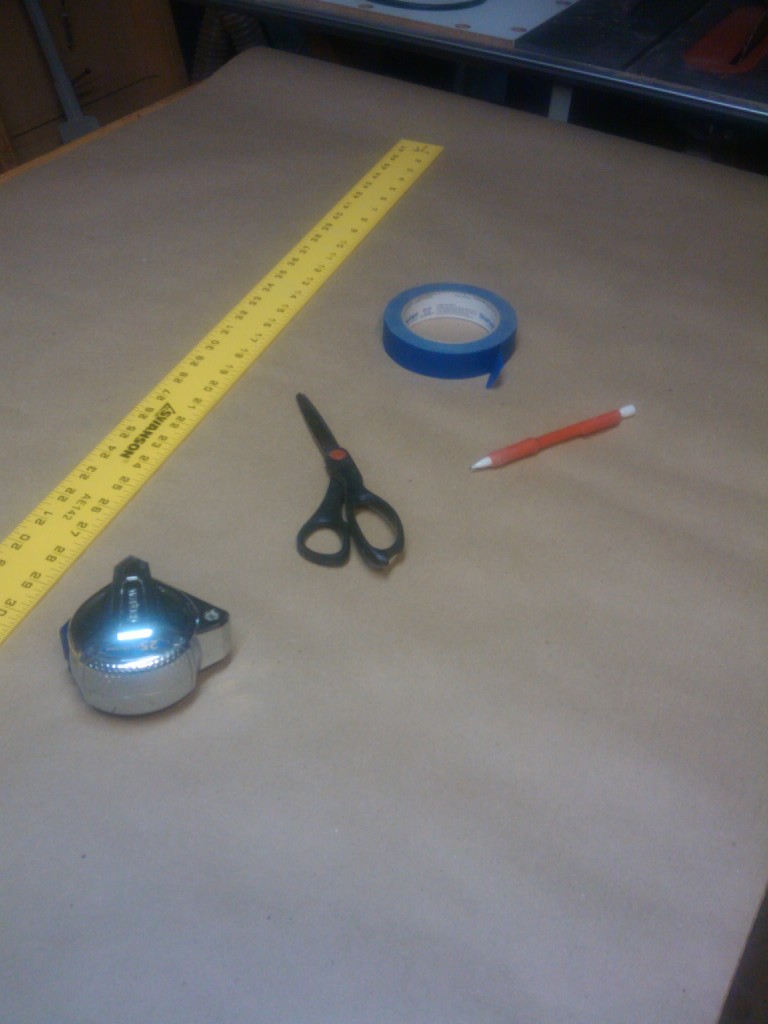
So, I took the drawing into the shop with a roll of brown builder’s paper, some drawing tools and a cool glass of iced tea.

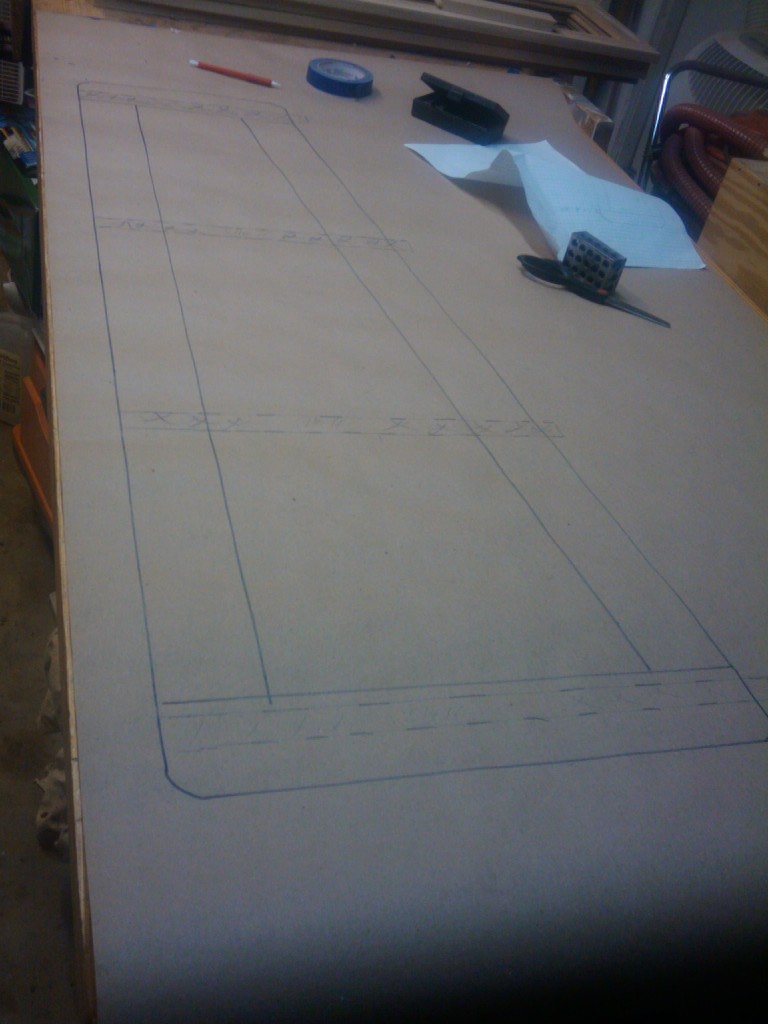
Using a pencil, a ruler, and a 48 inch rule (can’t call that a yard stick, right?) I marked out the critical measurements.  Length of the bottom and top boards, height and depth of the piece and the locations of the shelves. After I marked them, I connected the dots.  There. A full-size rendering of the bookshelf sides. That simple.

Why on Earth would I do something like this?  Well, there are plenty of reasons. As I cut each of the pieces for the bookshelf, I can hold them up to the drawing and compare sizes.  I can use my sliding bevel to get accurate angles for the sloped front leg.  And, it finally gives me a look at just how deep this bookshelf is going to be. I’m glad I did this, because I think 18 inches at the bottom of the shelf is just a tad too deep. I may be able to talk to the client and ask her about reducing the width two inches for a slimmer appearance.

I’m hoping by doing this step, I can prevent giving each of you more material for your own stand up routines!


My grandfather’s chair

What can I say about my maternal grandfather John Schwab that won’t make me tear up?  I loved the guy. I still do. He was one of the first heroes in my life.

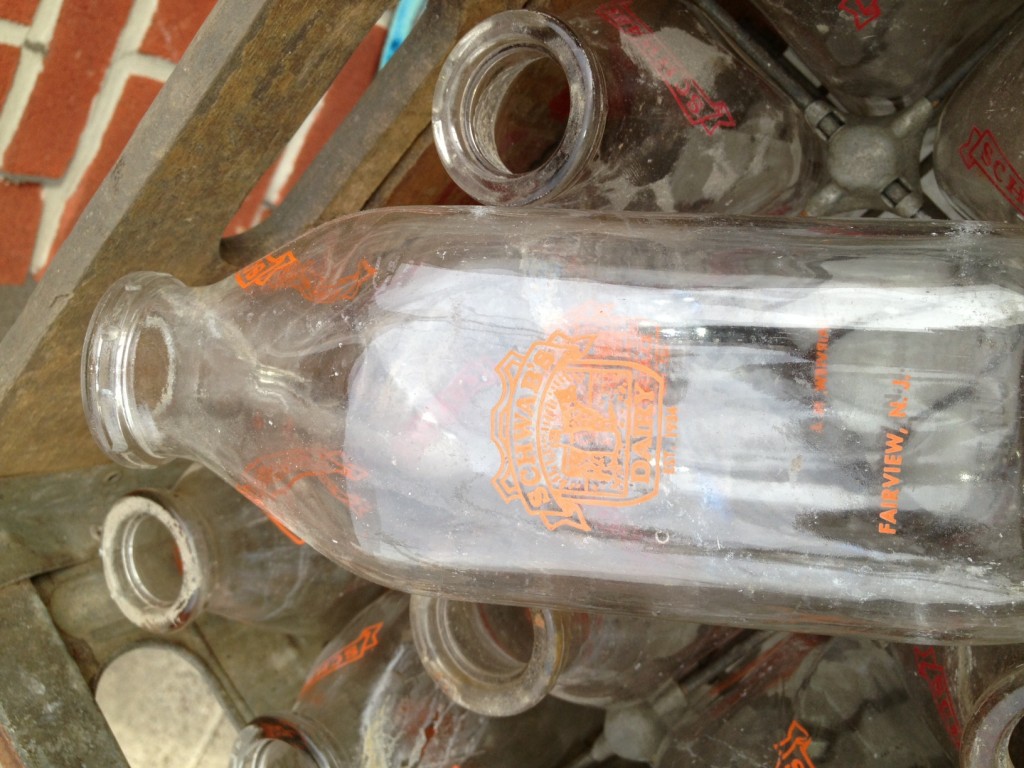
He was a very unassuming guy who lived in in Fairview, New Jersey, just across the Hudson River from midtown Manhattan.  He ran a dairy. The big treat for us was to sleep over at our grandparent’s house, wake up early and go to the dairy to ‘work’ with him.  My older brother would get up early and ride in with him, doing some deliveries.  My grandmother would drive my younger brother and me in later, once the sun was up and we had a chance to eat breakfast. My grandfather would do most of the work, selling milk and cream to people who walked into the dairy. We would either help him taste chocolate milk or ice cream.

Bottles from his dairy

The other great memory I had of the dairy was watching him do his books. He would sit at a big desk on this stout wooden oak chair and count the money, occasionally stopping to give each of us a piece of Bazooka gum and read us the comics that came along with the pieces. He had a huge pile of old silver coins under his desk calendar – he was keeping them to give to each of us in the future.

My grandfather passed away in 1986 – the start of my senior year of high school. His loss was very difficult for me, as we were both very close. As my senior year went on and my grandmother was going through his property, I was given three very special things of his.  The first was his watch.  The only one he ever wore. The one I learned to tell time by looking at.  The second was one of his Schwab’s Dairy delivery jackets.  An Ike-style jacket with the dairy’s name embroidered on the back. The third was his oak desk chair from the dairy.

I very ham-handedly attempted to refinish the chair back in the summer of 1987 before I went off to college, and brought it with me.  I did my homework sitting on it, and it moved with me from Maryland to Florida. It was the chair we used at our computer desk for years, until one of the original rubber wheels delaminated on it, preventing it from rolling.  I put the chair out in the garage and vowed that one day I was going to repair it.  But, it sat out there, collecting dust for more than two years.

This weekend, I finally was motivated enough to head to the local home improvement store to buy a set of new wheels.  While I had the chair up on my bench, I started to notice some things about the old chair that I had never truly seen before…

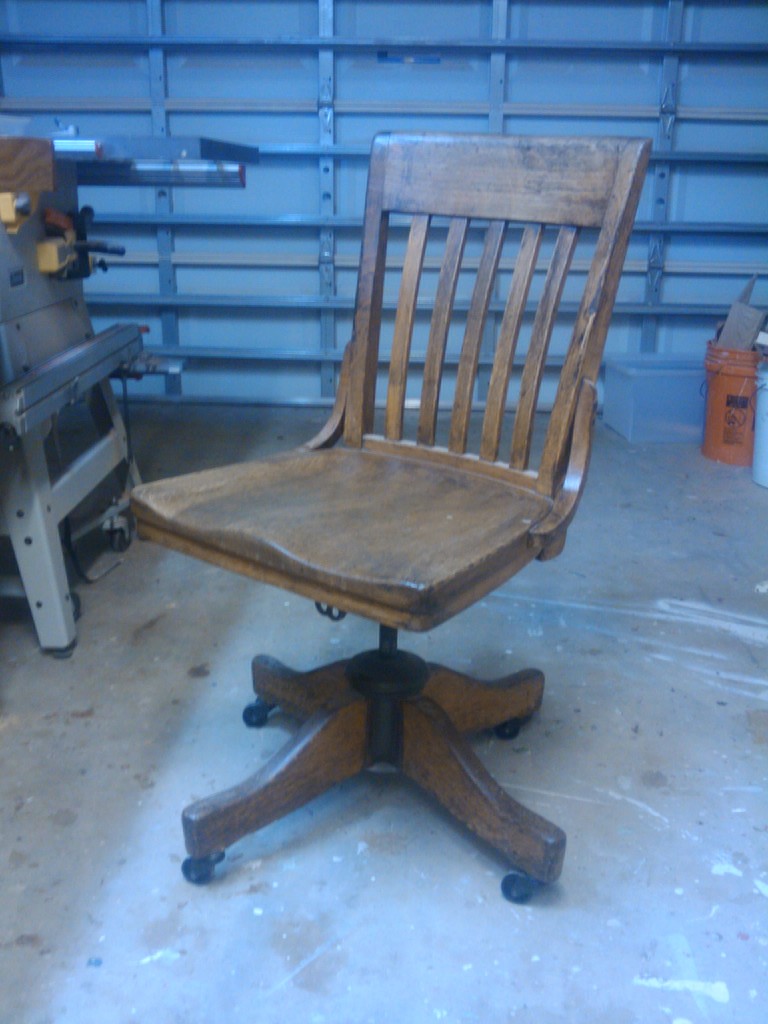
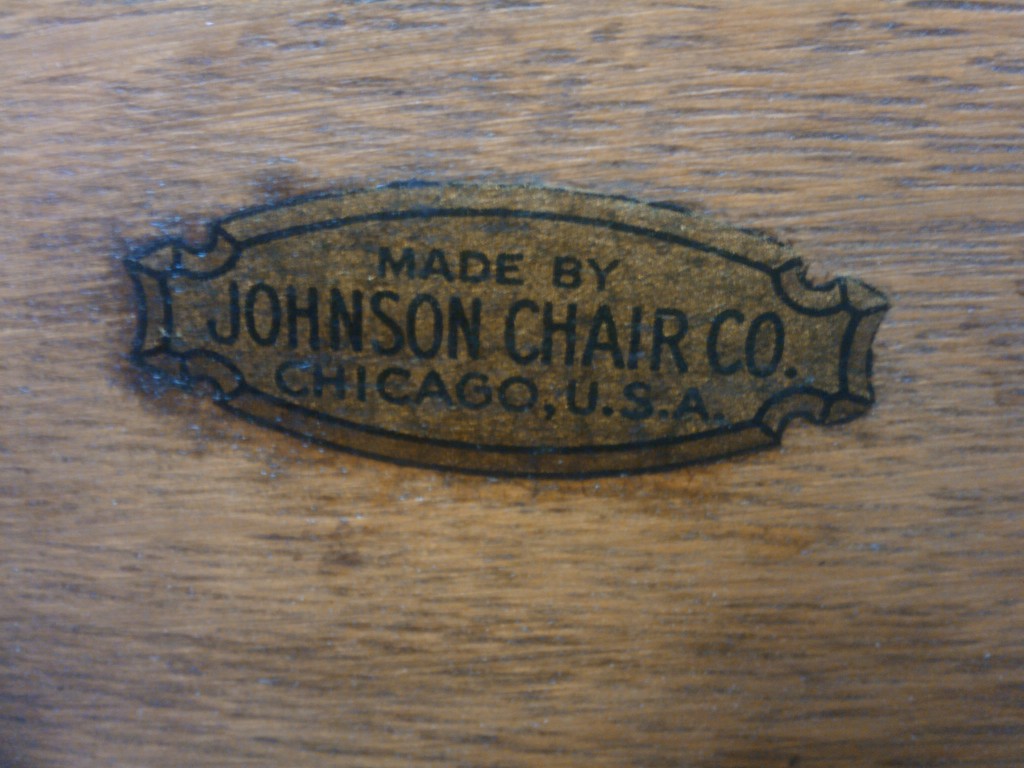
It’s a very austere looking desk chair that has seen a tremendous amount of service. The piece is plain, yet graceful in its simplicity. On the back rail is a maker’s mark – the Johnson Chair Company of Chicago. From what I have been able to learn, the Johnson Chair Company built Mission-style chairs from the 1890s through the 1930s.

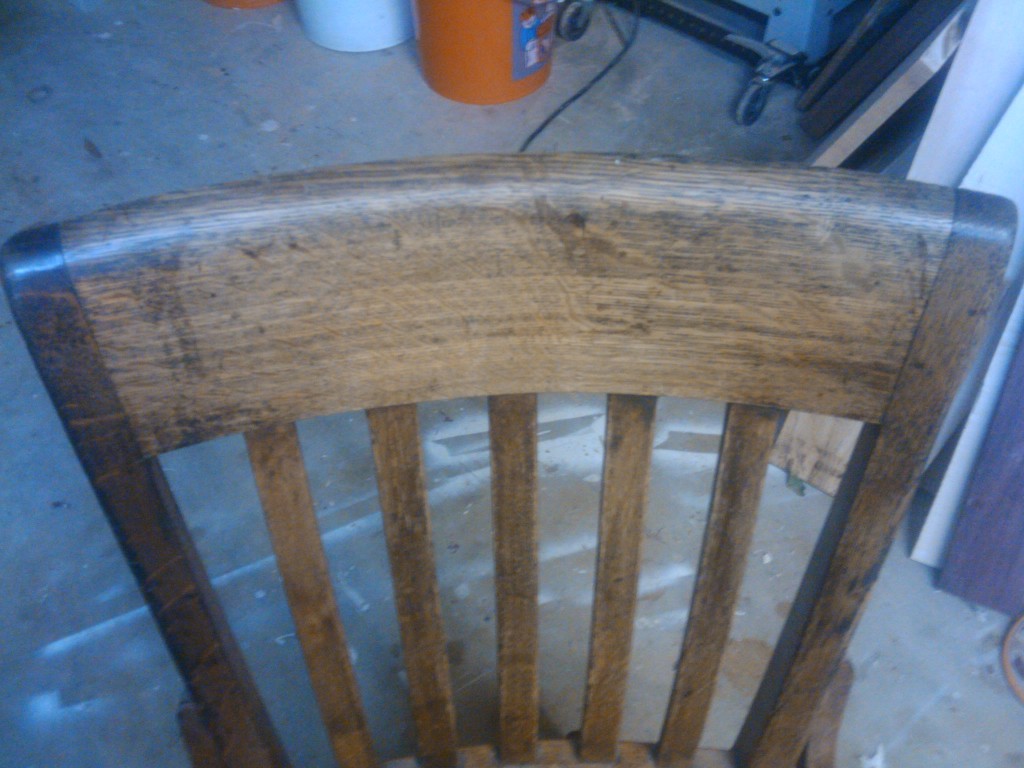
The chair has a beautifully sculpted seat that’s very comfortable to sit in. It also has two large side rails with five gently bent splat pieces that rise from the seat to the curved crest rail. There are two bent pieces that help to anchor the side rails to the seat. One of them has a split on it and lost its glued plug.

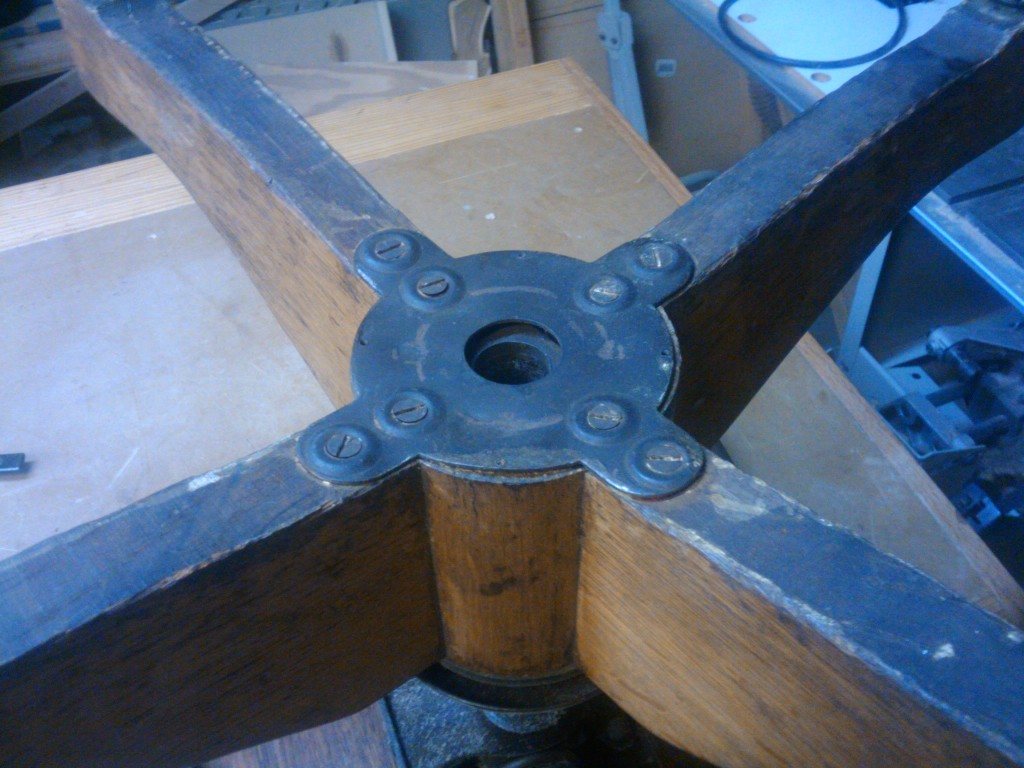
The undercarriage of the chair is very interesting.  When I had the piece flipped up on my bench, I could see how the legs were attached to the central column of the chair. The four legs radiate out from a cast iron base, which is threaded through to allow the height adjusting rod to screw up or down, allowing he user to set the height of the chair exactly where they want.  The action is smooth, and requires a little work to operate. But, once it’s set, it holds the adjustment very well.  The legs themselves are joined through a massive mending plate on the bottom of the chair, with beefy screws holding to the iron inner workings and each leg. The space between each of the legs is filled with a thin piece of bent oak, which slips into a pair of kerfs cut into the base of the legs. One of these is missing on the chair, but the three others are in very good shape.

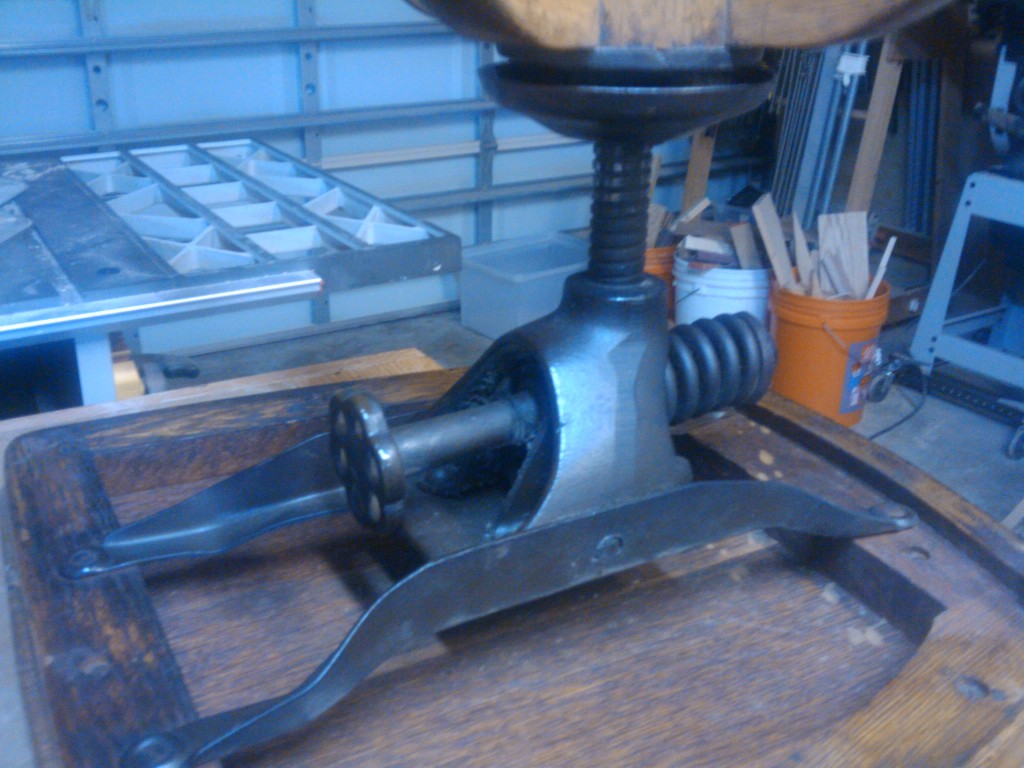
The seat adjustment control determines how easily you can rock the seat backward. It consists of a hefty iron handle that screws into the workings of the adjustment device.  Screw the handle in, and a coiled spring in the back gets stretched, making it more difficult to rock backward on the chair. I had never noticed how massive the control was until I had it up on the bench.

Once I fixed the broken wheel on the caster, I wiped all of the cast iron pieced down to clean them, and then wiped them again with a silicone lubricant to allow easy movement of the pieces. I also took the opportunity to carefully clean all of the dust off the piece and vacuumed the thing spotless.  After I wheeled it into the house, I made a decision. Something this important to me doesn’t belong out in the shop or at the home office… I am going to bring it to my desk at work and replace my 12 year old chair that’s getting more uncomfortable by the day.

And, when I’m sitting on the same chair my grandfather worked at, I’ll get inspiration to work harder to be more like him….


Stuff I’ve built: The microwave shelves

I often wonder why two things that go together often don’t match up.

A few years ago, a hot dog manufacturer proudly announced that their dogs now came in a bun-length size. Color me curious, but as far as I could tell during my 42 years of life, hot dog buns have pretty much been a standard length.  I’m just wondering why dog manufacturers took so long to adopt this new size?  That will make you go ‘hmmm’ at your next cookout for sure.

Another place I have seen this involves the width of a range hood vs. that of an over-the-range microwave.  When my wife and I moved  into our house, we had a pretty standard issue contractor grade range hood in a lovely shade of avocado above our range.  It was disgusting, and we needed to have it ‘taken care of’.  So, I took a can of high-temperature black paint and – heeding the advice of Mick Jagger – I painted it black.

That was great until we noticed that our microwave oven was taking up space in our efficient kitchen. Why not combine the best of both worlds – get an over the range microwave that also functioned as a range hood?  So, about five years ago, I vowed that we would do that.

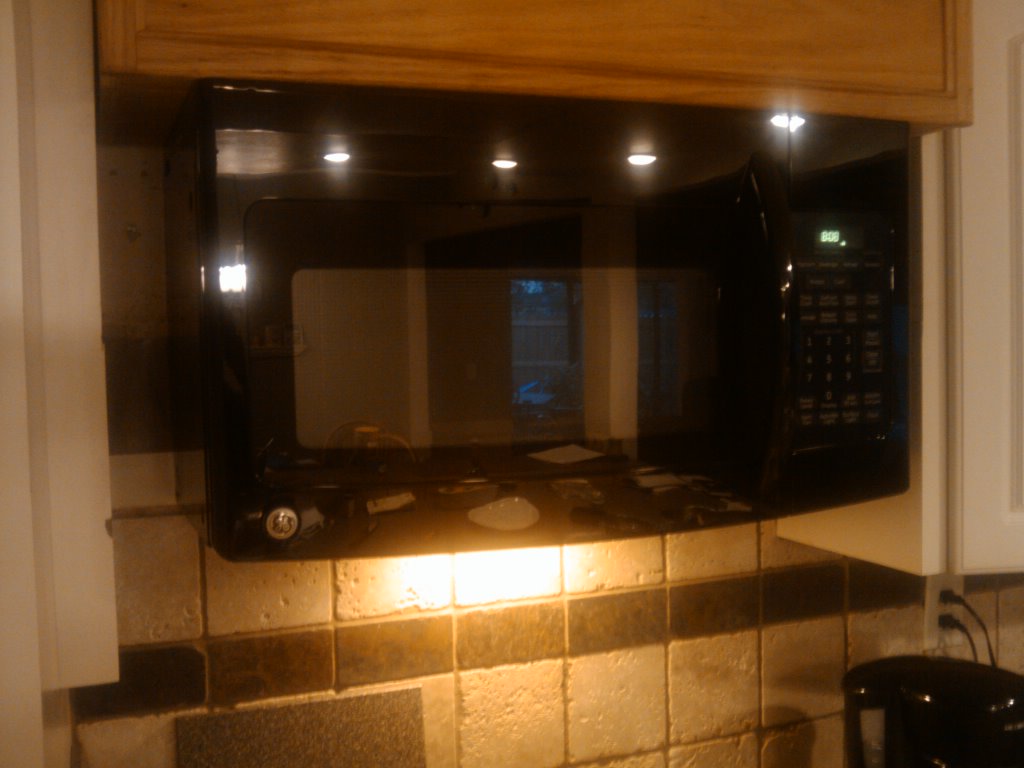
Well, imagine my surprise when I discovered that the cabinet above our range was too low to install a microwave into.  Bummer.  So, my friend down the street and I got ambitious, cut the cabinet free and created a huge void above the range top.  I had to build a simple ‘filler’ cabinet above the range to drop the unit lower than the ceiling and to hide the electrical connections and venting.

When we went to install the new unit, my stomach sank. You see, over-the-range microwaves are about 30 inches wide, but range hoods are 36 inches. What was I going to do?

Back at the home improvement center, they wanted to sell me a ‘filler kit’ – basically a few filler panels to close the unused space in.  But, that didn’t seem right.  After all, we have a number of cutting boards we need to store, and all they do is clutter up the cooktop. So, I thought for a while and came up with this insanely simple yet useful idea.

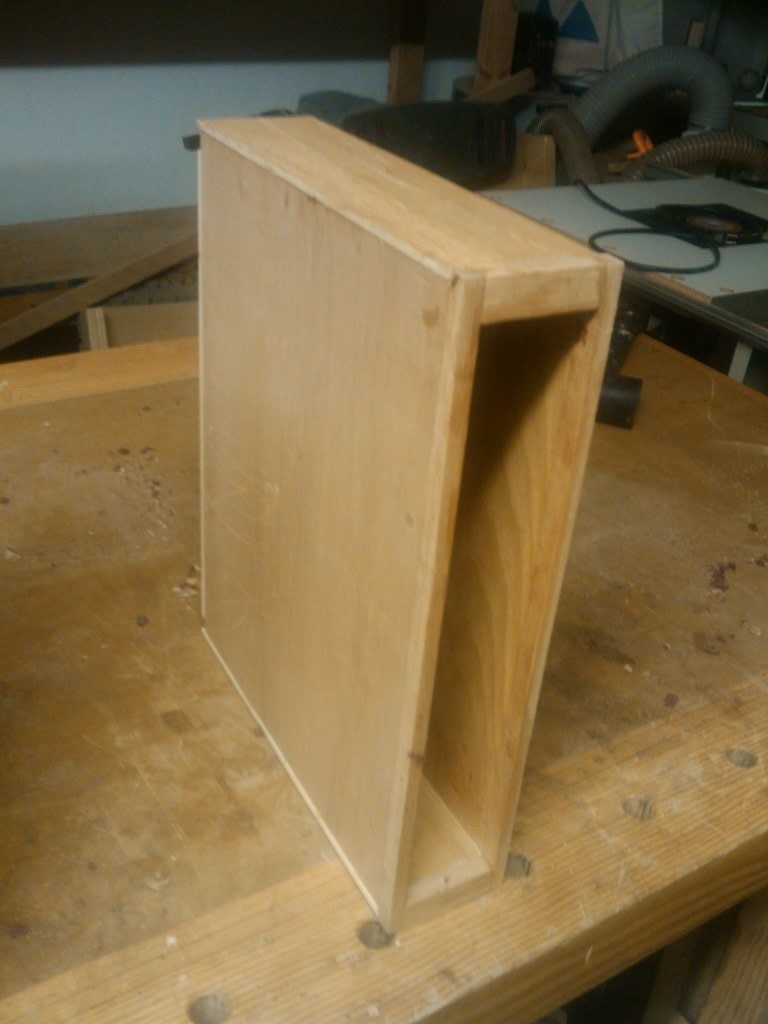
Basically, what I created were two slip bookshelves out of some scrap red oak plywood. They were very simple to build – the tops, bottoms and backs were strips of 3/4″ plywood  cut to width and rabbeted to accept the side panels.  Those were made of some 1/4″ ply which was glued and stapled into place.  They fit snugly into the opening and are screwed into the bottom of the filler cabinet with a pair of pocket hole pan head screws.

In place, they provide a convenient area to stash the cutting boards and keep them off the counter top. They were very easy to build and – I think – provide a convenient place to stash the cutting boards until they are needed.

Why am I writing about them now?  Well, after five years of popcorn, reheating and way too many door slams, we had to replace the microwave.  The new model is a sturdier, brawnier one which – I hope – will be able to handle the force of the two growing lads in my house as they enter their teen years and eat us out of house and home.


Stuff I’ve built: The wine bottle balancers

In addition to watching the Kentucky Derby at the big soiree this past weekend, we also held a wine tasting event.  At the same party.  The wackiest wine name or label won a prize. (For the record, a wine named Cardinal Zin took the top honors)

So, I had to figure out what to give as the big award.  Some of those wine glass charms are always appreciated.  A waiter’s corkscrew was also a nice addition. But, I knew I had to add something special.  But, what to build?

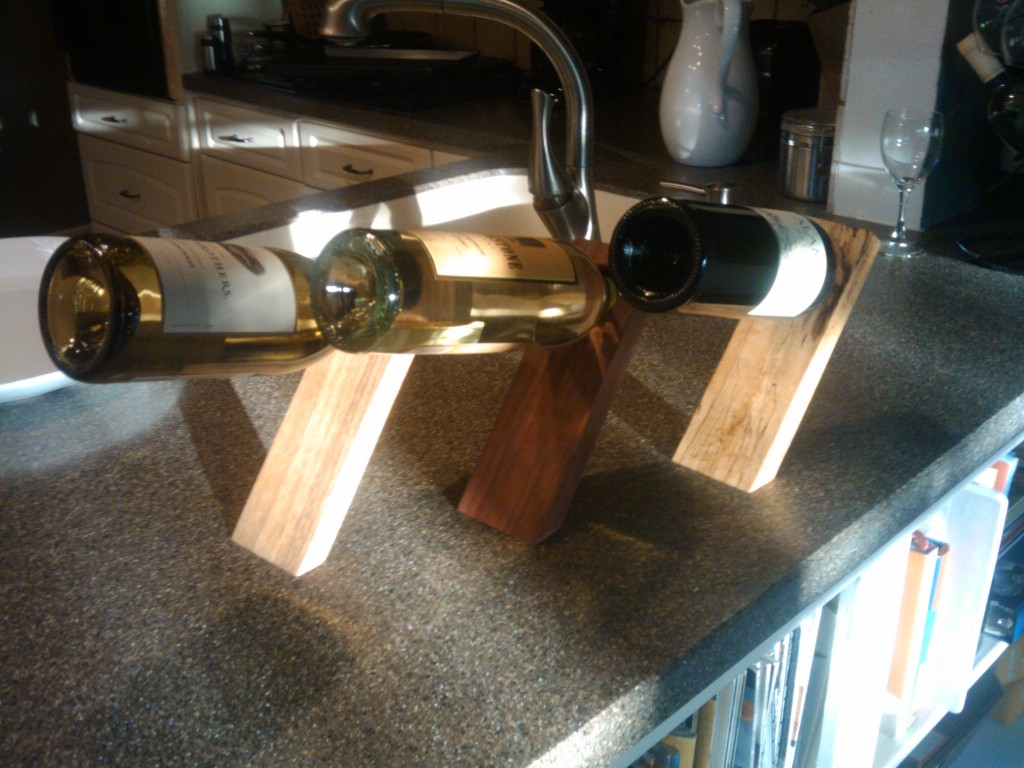
I had thought about those balancing wine holders.. you know, the simple sticks with a bevel cut on one end and a hole drilled in the other… and realized that it could be a simple but interesting project to build.

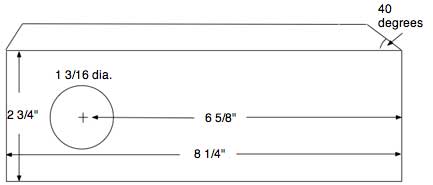
Yes, it is an insanely simple plan.  But, as with all simple plans, you have to get the details right.  In this case, how large of a hole to cut, how long a stick of wood and what angle to cut the bevel? That could be critical later when actually putting a wine bottle in the holder.

I did a quick search and found a drawing at the Timeless Treasure Trunk Wood Shoppe that showed the details of the project. Easy Peasey!

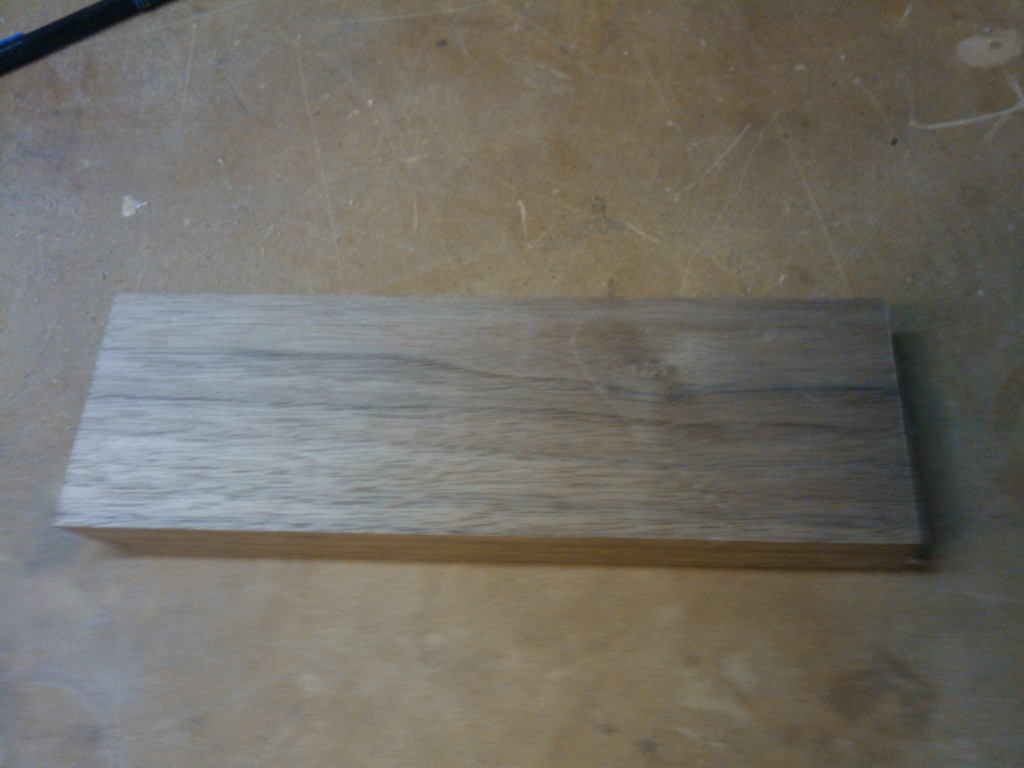
I fished around in my scrap barrel and found a few choice pieces of walnut, spalted maple and purpleheart that were big enough for the pieces.  I cut them to rough size and planed each of them by hand to get them square, flat and true.

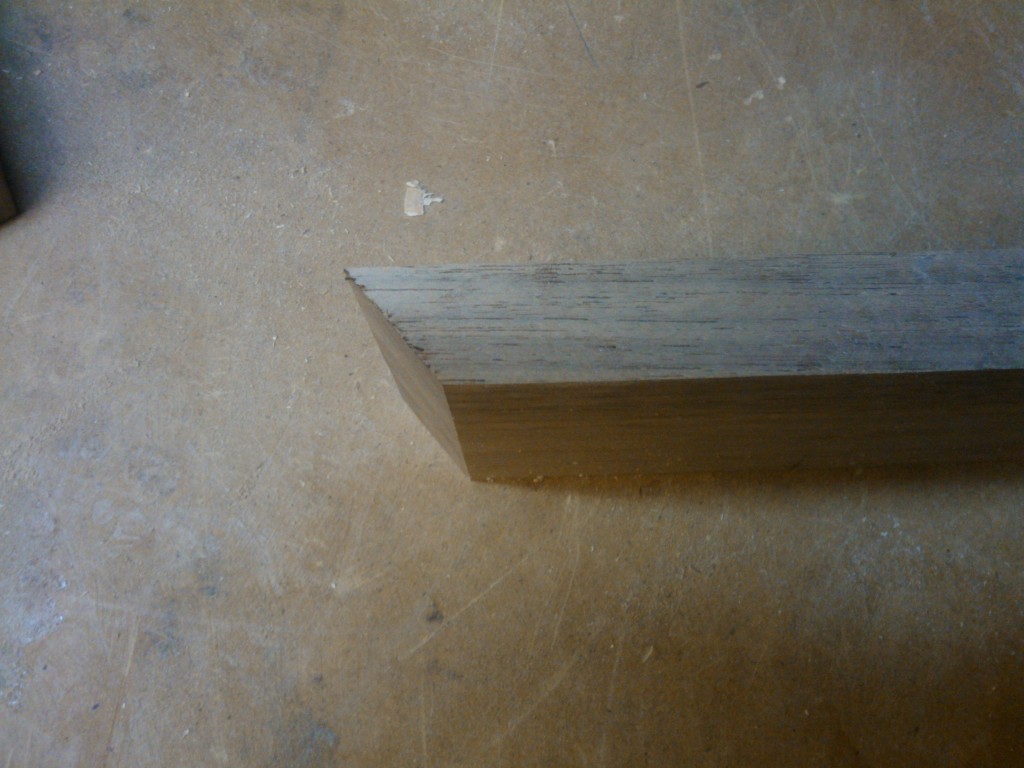
From there, I cut the bevel on one end of a test piece.  I wanted to make sure that everything was going to work well when I put the bottle in. The plan called for a 40 degree bevel – not sure how that was arrived at, but I wasn’t going  to mess with the plan – for now, at least.

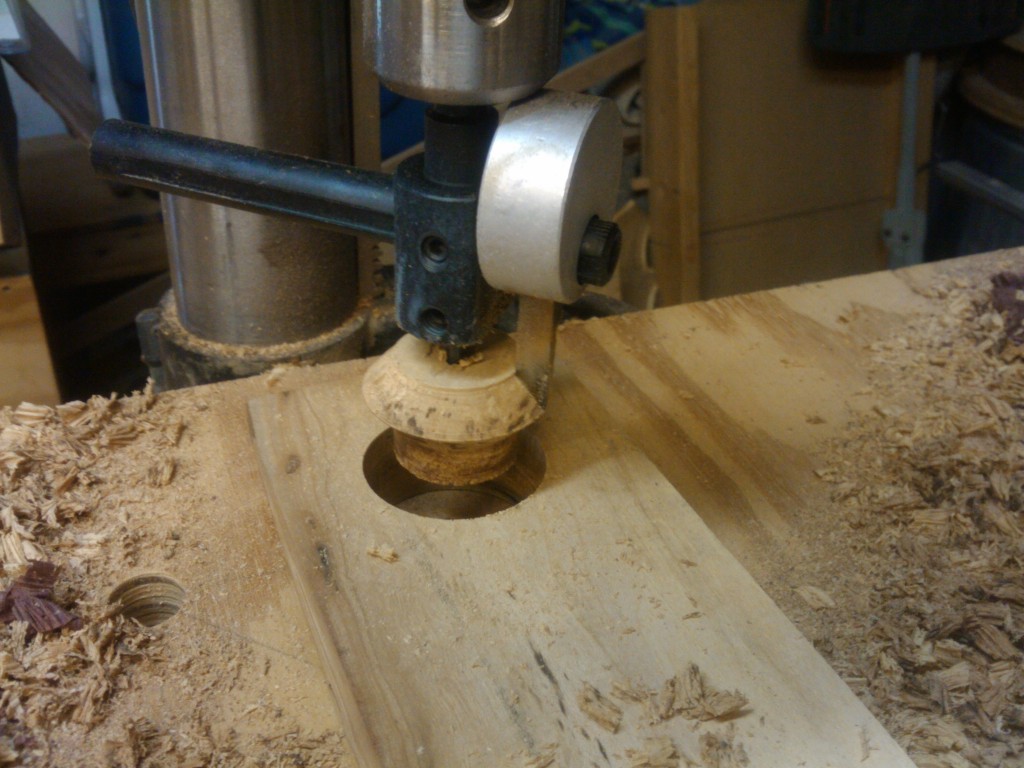
The next task was to cut a circle on the other end of the board to accommodate the neck.  The plan called for a 1 3/16″ hole, but I wanted to go a little larger so it would work with fluted bottles and other larger bottle necks.

When I took the bottle  holder inside, it worked.  VERY well. Once I got the measurements done, I jumped on the other ones.  If it was easy to make one, it was easier to make a dozen!  I cut the bevels on the other ones and started to drill. I used a 1 1/2″ forstner bit to cut the hole on the walnut holders, but the going was much tougher with the maple and purpleheart. For that, I switched to my drill press and a circle cutter.

I put a 1/4″ roundover bit in my table mounted router and rounded over all the edges except the ones at the bevel. I then sanded the pieces down with my random orbit sander and used my spindle sander to make the inside nice and smooth.

I finished each of them with three coats of Watco Danish oil.

Now, the trick to using these is to push the neck of the bottle in as far as it will go, then set the bevel flat on a (stable!) table. Slowly let go of the bottle, and then let go of the stand, and it should stay put. The weight of a full 750 ml bottle of wine will counterbalance the tendency of the holder to tip, making a very impressive display.

I went with the basic rectangular shape for the holders, but you could go with a fancier design if so moved!


Stuff I’ve built: The kitchen pantry

No, no post yesterday.  Instead of writing something for the blog, I spent the day cooking Easter dinner for 16 folks. My two sisters in law with their families, my in-laws and my mom and step dad. And, boy, did we ever eat. Roast lamb. Ham. Roasted potatoes. Two veggies. Two different kinds of salads. It was nuts.

And, when it comes to the kitchen prep in our house, we like to keep a lot of the staples close at hand. Different oils, vinegars, rices, pasta… the works.  This way, we can whip up a meal fit for guests whenever we need to.

Unfortunately, it wasn’t always so easy to store these staples. We had very limited pantry storage area in our kitchen – basically a linen closet in one hallway and whatever space we could eke out of our cabinets. Very tight and sloppy.  We needed a solution.

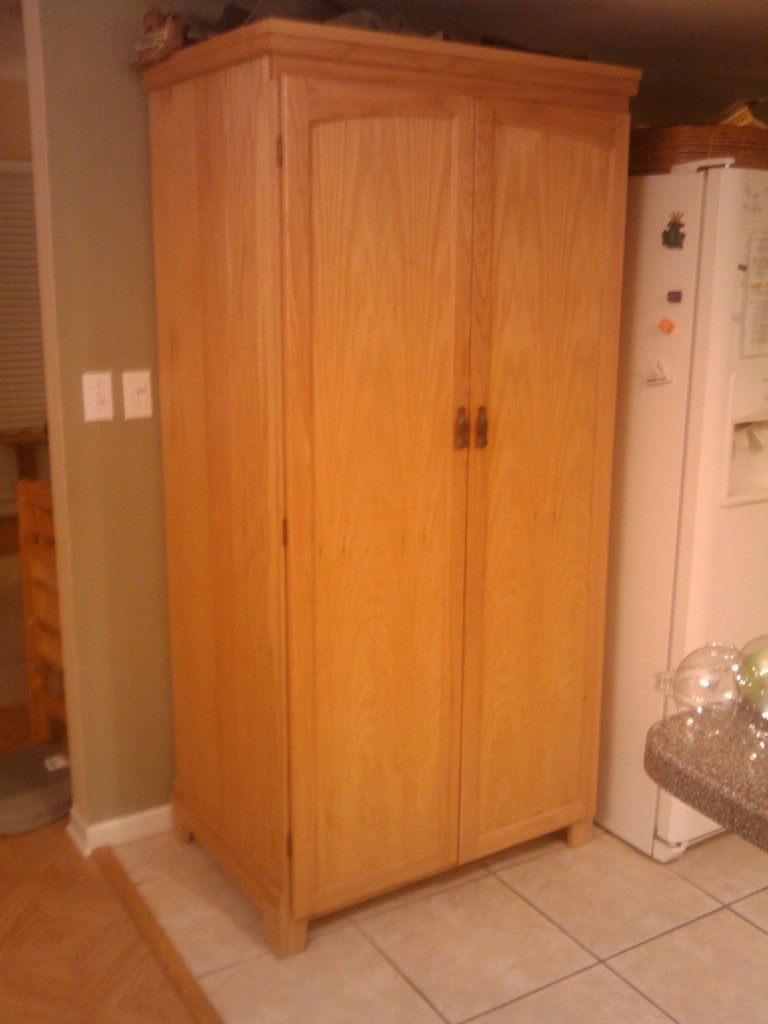
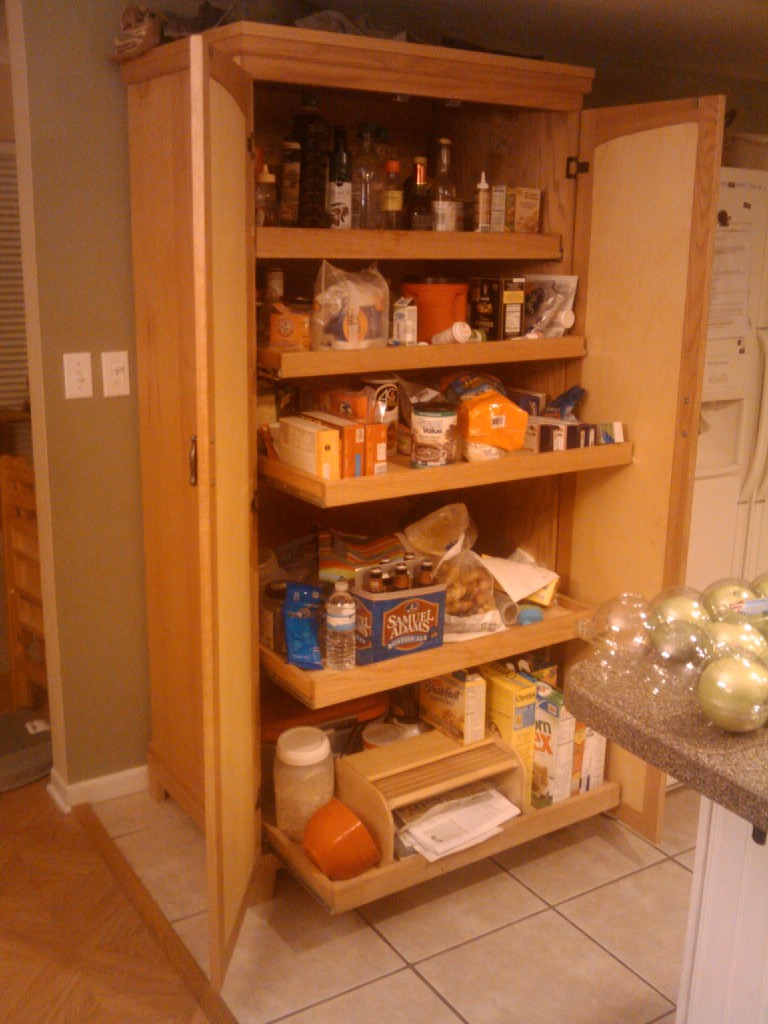
To help contain all of these goodies in one convenient place, I built this freestanding pantry unit for my house. Based on Danny Proulx’s design in his book Fast and Easy Techniques for Building Modern Cabinetry, it is a very simple yet useful design.

Basically, it’s a large cabinet built out of red oak plywood. About seven feet tall and 18 inches deep. Rather than sitting on the floor, I built a frame for the piece to make it look a little more graceful. The piece is held together with glue and pocket screws, and I built the doors for it. I figured the curved top rail would allow it to look a little fancier. It’s as plain as plain can be… but when you get into the inside, this is where the piece shines.

Inside, there are five full-extension heavy duty pull out shelves on runners that can handle 100 pounds each. This baby is designed for heavy lifting and ease of use. I built the shelves from pieces of 2 inch wide by 3/4 inch thick red oak runners with 1/2″ plywood grooved inside. The sides are held together with more pocket screws.  I purposely graduated the height of the drawers from the bottom to the top of the piece to allow for taller storage on the lowest shelf, and to restrict the number of canned goods that could be stacked on the upper shelves, preventing too much weight from being placed on one shelf.

The best thing about the piece is simply how much stuff it can hold. We store all kinds of goodies in there – the breakfast cereals, the bags of coffee, the large mega-retailer packs of pasta – the works. This way, we can stock up at the local membership clubs and keep all of those things out of the way safely tucked in the pantry.

This piece has allowed us some great flexibility in storage at our home, and we’ve had more than one visitor remark how they would like to get their own copy of the pantry for their kitchen.


Flowers again? No way!

Albert Einstein was pretty darned smart. No. Seriously. His work in physics has helped unlock many of the mysteries of the universe – that mass could be converted to energy and energy could be converted back to mass. The whole space-time dealio. And, my favorite, the theory of relativity.

Relativity is something my feeble mind can wrap itself around because Einstein gave a really good example to describe how it works:

Put your hand on a hot stove for a minute, and it seems like an hour. Sit with a pretty girl for an hour, and it seems like a minute. That’s relativity!

Einstein was spot on. When I’m sitting in a meeting at work, the time seems to drag on forever. But, when a holiday is approaching, and you realize you haven’t done anything to get ready for it, the days quickly slip by, leaving you in full-blown panic mode.

You don’t have to be an Einstein to know that Mother’s Day is on the way. It’s just one of those holidays that creeps up on you, leaving you scrambling at the last minute to find the appropriate gift. “It’s happened to all of us,” said Tim Walter of Eagle America. “Your mom, mother in law, wife, daughter… whoever is a mom in your life is expecting you to remember the big day is coming. While they may not be expecting you to break the bank and buy them something lavish, the fact that you noticed and thought to remember the occasion is expected – and greatly appreciated.”

That’s why Eagle America is helping make it easy for woodworkers to come up with ideas to show a little extra appreciation for that special someone in their lives. “Sure, you can go the whole flower route, but that could be a little impersonal. Besides, cut flowers last only a few days in the vase. A wooden gift – that will be treasured for a lifetime!”

Let’s start with the basics. Picture frames are great gifts for moms to showcase pictures of their moms, their kids and the entire family. “Whether you want to build something elaborate or simple, the handcrafted touch really helps those special photos stand out.”

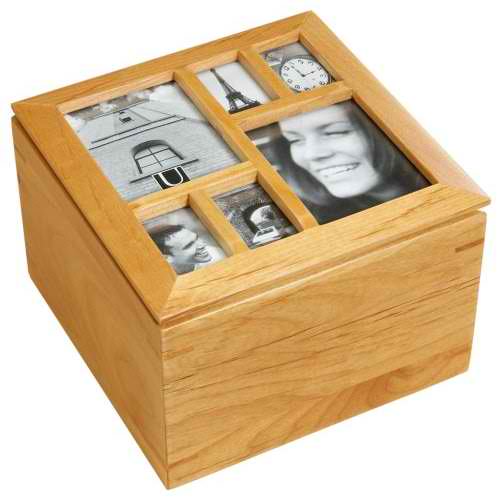
Small ‘treasure’ boxes are also a great place for the mom in your life to stash some of her more special and memorable items. “With digital photography, we don’t always get prints of those memorable shots. But, for those pictures sitting in plain storage boxes, a beautifully crafted box makes an awesome place for her to stash some of her favorites.” Tim continued, “Heck, go crazy and build your box, but make the top a picture frame! This way, it will serve a dual purpose.

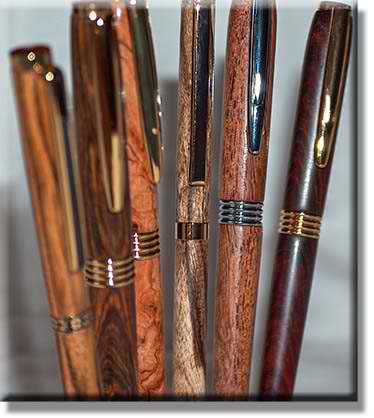
For turners, it’s difficult to go wrong when turning an elegant pen. There are dozens of styles of pen works out there, and with some imagination and a few wood scraps, you could make a unique creation she will love. “Go all out. Turn a pen out of the best looking pieces of wood you have, then invest in a little personalized stationery for her. You will be a hero!”

If you really want to go out there with a different twist on things, why not plan a family project? “We have plans for easy woodworking projects that are perfect starting places for kids to build. Plus, we also offer a number of simple woodworking kits the whole family can enjoy. That quality time will be remembered forever.”

Just be smart about the time you have to work. “Even Einstein would tell you – get started now so you won’t be rushed trying to beat the deadline!”


Stuff I’ve built: The half-round entry table

This was a sweet little project I built a long time ago – back in 2001 when I was just a few years into woodworking.

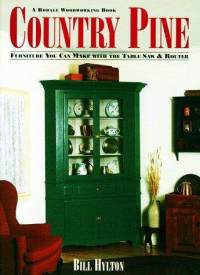
Back then, the only wood I could afford to use was pine, and there was one book at my library that dealt with building pine projects – Bill Hylton’s Country Pine: Furniture You can Build with the Table Saw and Router. It was a great book for a rookie woodworker to get his or her hands on. Hylton offers a great selection of projects to choose from, and many practical shop tips to make your build a success.

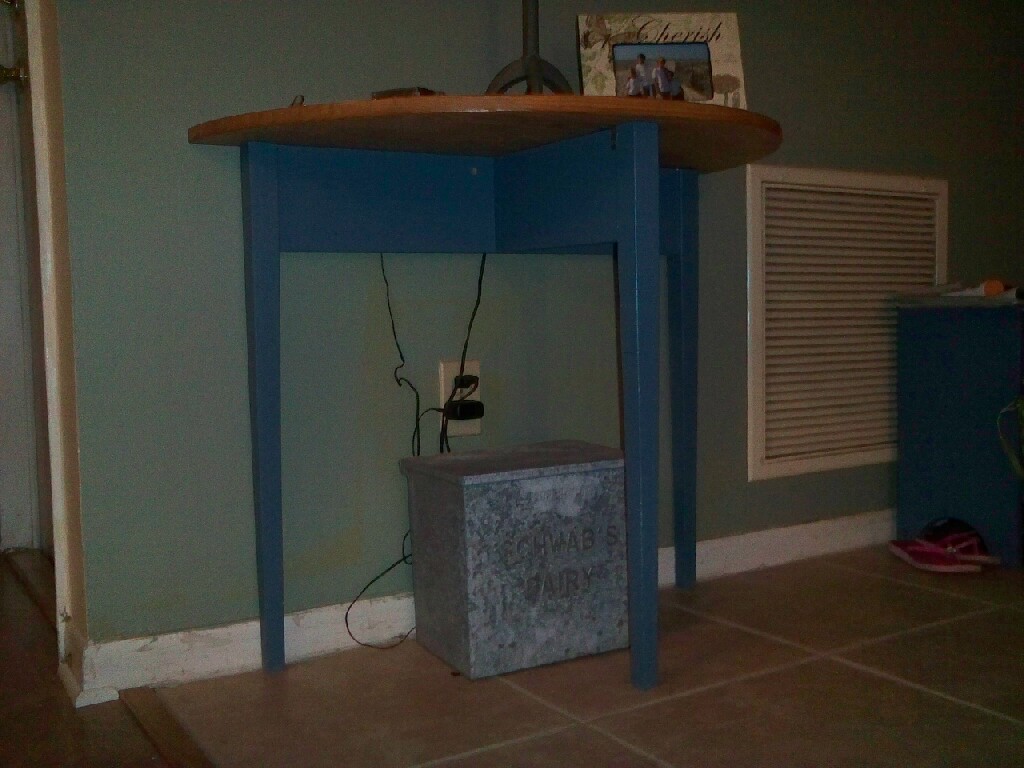
One of the projects caught my eye, and would be an excellent way to learn some new techniques. His half-round table would be a great addition to my entryway.

This project is actually pretty sophisticated.  The three legs stand28 inches tall, and are tapered.  The right and left legs are tapered on the side that faces the room and the inside, and the middle leg is tapered on both of the sides… a little more involved.

Rather than a curved front rail, this table has a straight back rail and a mid rail that connects the front leg to the middle of the back rail. While Hylton suggested using mortise and tenon joints to make the connections, I went with sliding dovetail joints to get more mechanical strength.  Knowing now just how strong a mortise and tenon joint is, I may have been able to save myself a little bit of trouble.  But, hey, the joint worked.

The table top is made with a jointed pine board that was cut out using a jigsaw.  I traced a radius from a nail with a string and pencil.  Once I cut it out, I sanded the heck out of the edge to get it smooth.

Hylton’s project had a painted top and a clear finished base, but I decided to flip the script.  The top was sanded down to 220 grit sandpaper, and I put on three coats of brush on poly.  Surprisingly, it was one of the few projects I used that finish on that came out looking good.

The base was primed and painted with an acrylic latex paint in a “Wedgewood blue” type color.

Right now, the table holds a lamp, some pictures and my wife’s cell phone when she charges it.  This way, she has to wake up in the morning and get out of bed to silence her alarm instead of just hitting the snooze button.  It’s also a great place to stash one of the milk boxes that belonged to my grandfather’s dairy.

While I’m using fancier wood now, I still look at that old pine project and think back to the feeling of accomplishment I had when I put the finishing touches on it.