So, you want to build some sweet looking interlocking joints, but you aren’t sure about your saw and chisel work? Maybe you are too cheap to lay out bucks for a dovetail jig? Perhaps you don’t want to go the whole dovetail route?
Fortunately for you, it’s easy as pie to make sweet fitting box or finger joints right on your table saw. And, the best part, is that you don’t need a fancy jig to make it happen. In fact, with a piece of plywood, a scrap piece of hardwood and a few pan head screws, you can be on your way.
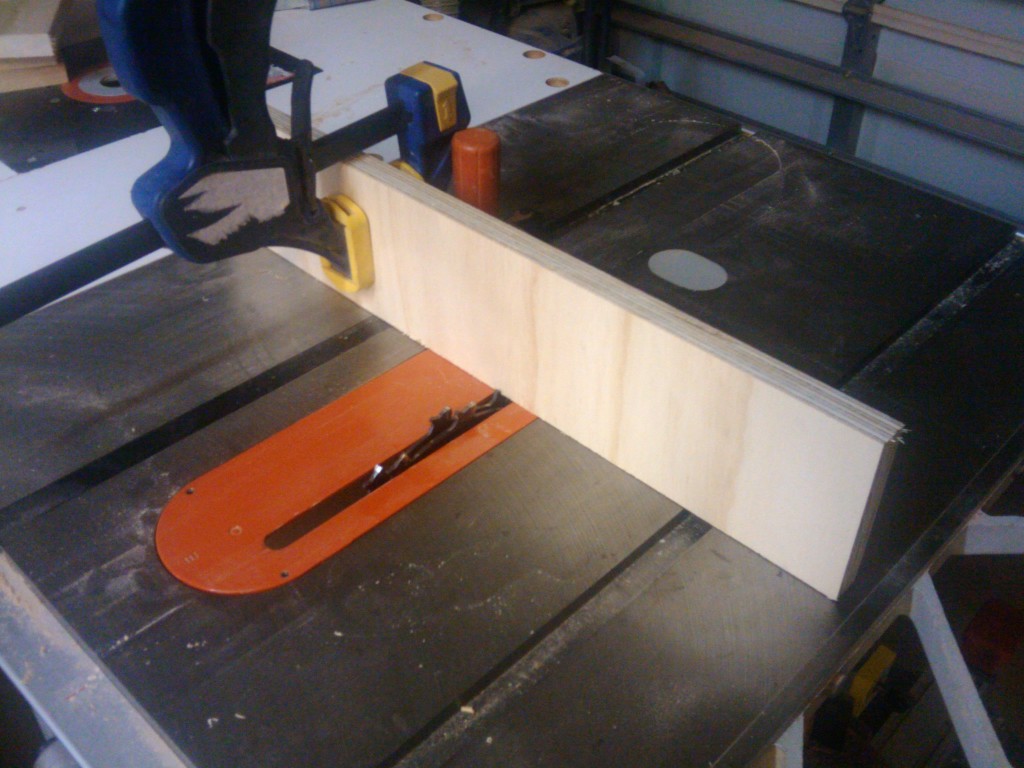
The first thing you need to do is to decide how wide you want your fingers to be. For most applications, 1/4 or 3/8 inch will be great… of course, you can go to any measurement you want. For this one, I’m going 3/8″. So, I set my rip fence to 3/8″ rip width (verified by my 1/8 and 1/4 inch spacer bars) and my zero clearance insert to prevent the thin piece from falling into the saw’s body.
I found a piece of maple in my scrap bucket and ripped a piece 3/8″ wide about 12″ long. I also noted how thick it was – just shy of 1/2″. This way, as long as my project boards are thicker than 1/2″, this jig’s gonna work. I cut this length into 3 inch long pieces to serve as inserts.
Next, I found a piece of 3/4″ plywood (STILL from the home office project) and cut it to a strip 4 inches tall by 14 inches wide. This is going to be the main body of the jig, and I had to make sure it was going to be wide enough to span across the blade while giving a good bearing surface for the project board.
I switched the regular combination blade off of my saw and replaced it with my dado stack set for 3/8″ width. Now, I know there are those dedicated box joint cutting blades… and, maybe I might go for one of those setups. But, for now, the dado works well. I set it as high as the thickness of the insert.
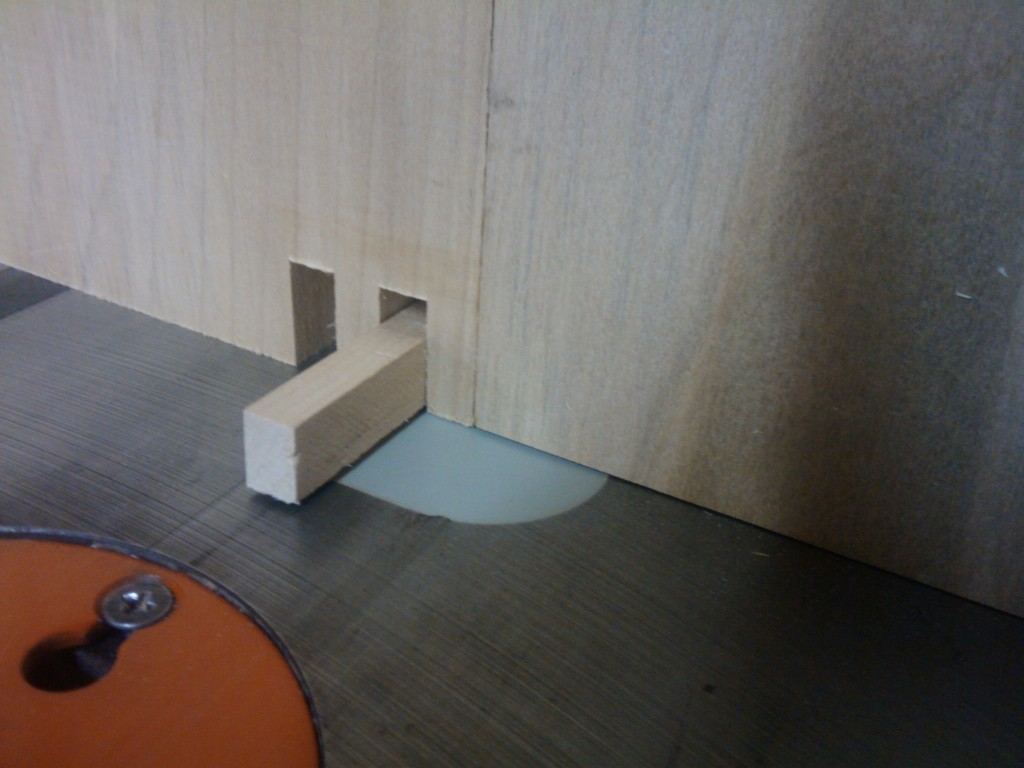
Once that was set up, the next step was to clamp the plywood to the miter gauge so it straddled the dado head. The clamp has to hold the board perfectly still. There can’t be any shifting. I turned the saw on and pushed the plywood through the dado stack. Now, I had a plywood board with a notch that measured exactly 3/8″ wide. I unclamped the plywood, stuck one insert stub into the notch and tacked it into place with my brad nailer.
The next step is critical. I put the jig back in front of the miter gauge and shifted it over to my left (as I faced the saw). This shift has to be exactly the width of the dado blade thickness. If you don’t get this right, the jig’s not gonna work. To help ensure I get this right, I reached for a 3/8″ drill bit. The diameter of the bit comes out to the exact measurement. I wedged the bit between the insert and the teeth of the dado stack. Be careful doing this – the hardened steel bit can do a number on the blade’s carbide tips.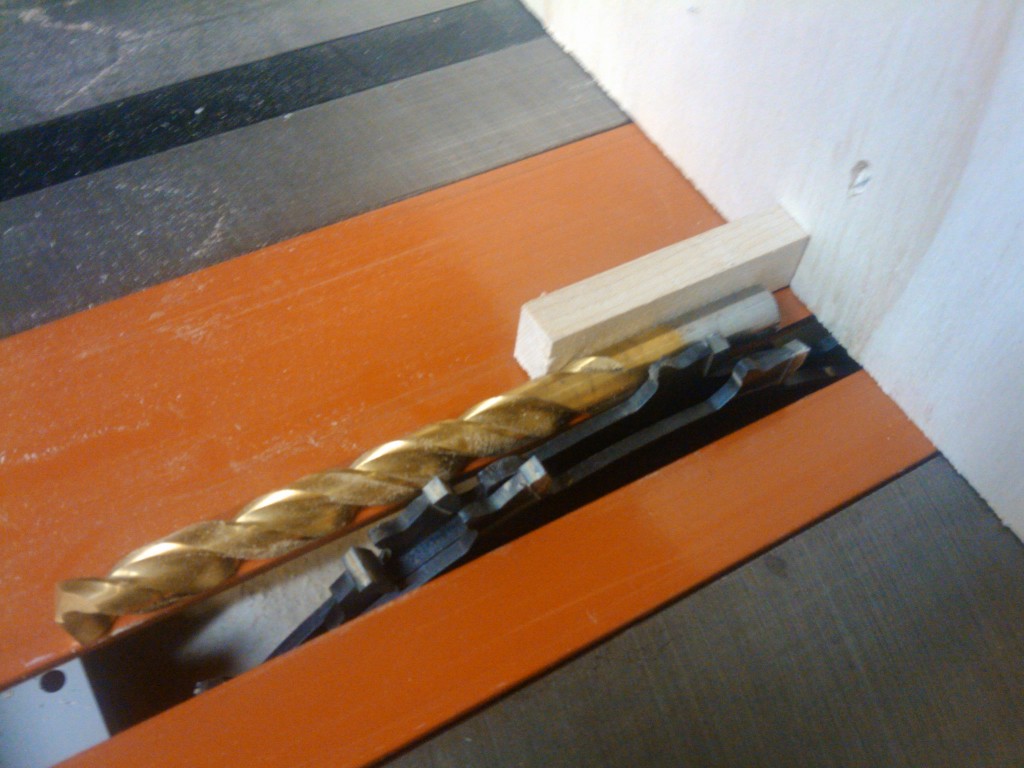
I firmly clamped the jig to the miter gauge and drove two screws through the gauge into the jig’s body. This fixed the jig into place at the right distance from the blade. Then, a quick push through the dado, and bingo, it’s notched and ready to cut.
Now, when you go to cut your workpieces, just like you would do with a dovetail, you want to mark which edge is top and which face is out on your boards. Start by pushing your first board’s top edge against the key and make your first pass. This gives you a full finger at the top.Then, move the last notch over the insert and cut again. Repeat until you are all the way down the board.
To cut the mating board, take the first board you cut and put the top notch over the key. This offset provides the perfect spacing for the mating cut with its staggered fingers. Push through to notch the top of the board, then move the first piece and repeat the cuts on the mating board as you did with the first.
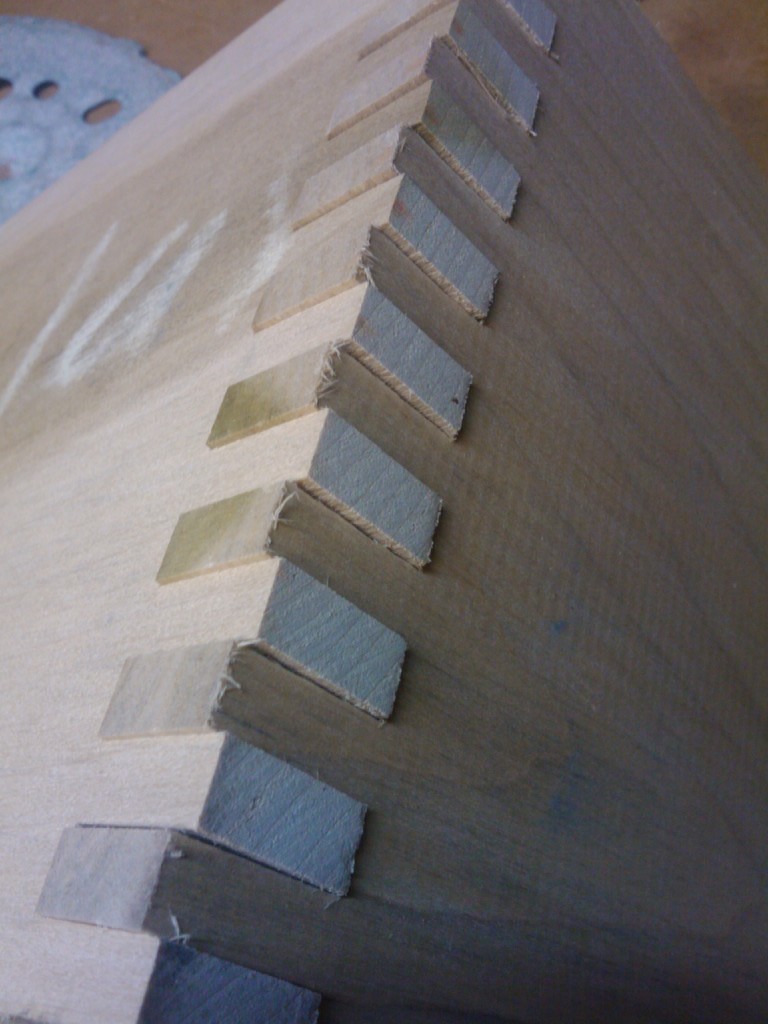
The moment of truth comes when you snug the pieces together. My sample joints cut in this 7 inch wide piece of poplar needed just the lightest of mallet taps to get it to seat perfectly. I had cut the notched a little deeper than the board was thick, so some work with a sander or plane is in order to get them flush. I would recommend a sander over a plane for the initial work. Just rub a little fresh glue over the joints, sand and that slurry will fill any imperfections in the joints.
Another note – when I pick my project pieces, I always mill them a little wider than I need them. This way, I can trim the final joined pieces to width to eliminate any partial fingers on the box. This way, you will always have a full finger at the top and bottom every time.
Now, this was a pretty simple version of the box or finger joint jig. There are designs that adjust side to side to tighten or loosen the fit, plus other jigs offer more safety features and other adjustments. A quick search for box or finger joint jigs will give you plenty to work from, and you’ll also discover a number of commercial jigs for sale that give you great results.
Give this jig a try – you might be surprised how frequently you find yourself going for box or finger joints in your projects.

Thanks for the clear information on making a finger joint jig. How do you attach the bottoms to your boxes?
I usually put the bottom into a groove I cut in the sides. Otherwise, I will assemble the box, rout a rabbet into the bottom of the box walls and set a bottom into that rabbet.
How would cut the grooves before assembling the box without ending up with gaps? And doesn’t routing after assembly make the corner round?
Well… if you rout the groove, you can rout a stopped groove, which won’t show through the sides. Use a plunge router, and Bob’s your uncle.
As far as the rounded edges go, you can correspondingly round the edges of the bottom, or you can use a chisel to square up those edges.