Category Archives: Tools

Giddyap!

When it comes to carpenters, there are few tools as ubiquitous as the sawhorse. The create a great place to stack lumber and a nice, sturdy platform to make hours and hours of cuts.

But, what about for woodworkers? Are they just as important?

For me, yes, they sure are. Throw a piece of plywood over a pair of them and you have either a tool rest, an assembly table or a great place to do a little finishing. Want to cut a sheet of plywood? Lay it over the two horses, set your blade depth and cut straight through, kerfing the top of the horse to ensure you get a full depth cut. And, if you really need to work on large timbers (say you had to work on some large pieces for a deck, gazebo or play structure), they are a must!

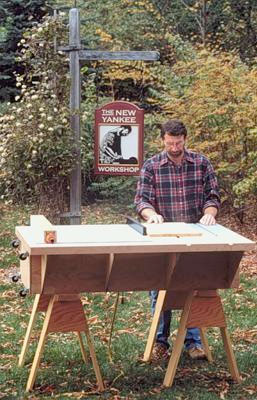
Most sawhorses are cobbled together on a job site. I can remember reading many of my dad’s home improvement books that showed how to quickly bang one together with some 2x4s and a few easy beveled rip cuts. This all-wood sawhorse zen reached its zenith when Norm Abram featured them as an integral component of his table saw station for a little bench saw. Yes, I built one of these when I had my first undersized and underpowered saw, and the saw horses were without a doubt the most sturdy I had ever dealt with.

When I sold this saw to a friend, it had to go with both of the saw horses, so I was steed-less. That’s when I turned to the next evolution in saw horses – the pre-made kit. These babies came with the pre cut 2×4 stock and metal brackets to make building these babies a piece of cake. They served me well for several years and were sturdy enough to work for most projects. The did have a lot more wiggle in them than the Norm-designed ones.  They also shared another issue that I had to resolve – they were always ‘set up’, taking up precious space along the wall. No, I needed a new solution.

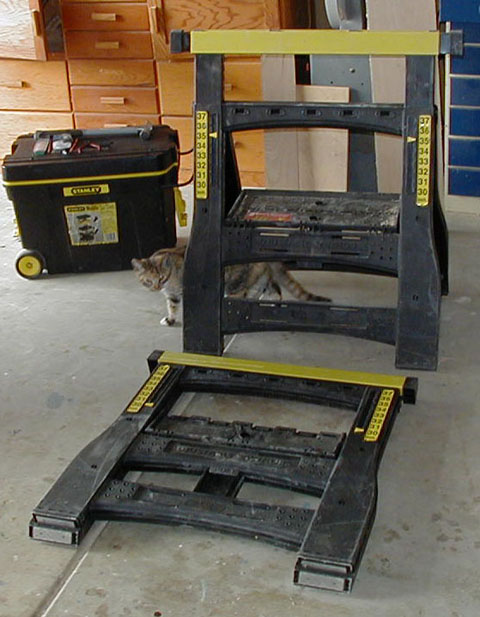
My first thought turned to those fancy plastic fold-up sawhorses. They have all kinds of features, from height adjustment to built-in tool storage. Some have extended outrigger for wider pieces. This was looking more promising, but I still had a few issues. Even folded up, they still take up a considerable amount of space. I have also used them at work for set construction and wasn’t ever really satisfied. They seemed a little flimsy with heavier items stacked on them. And, they were just a little awkward to carry around.

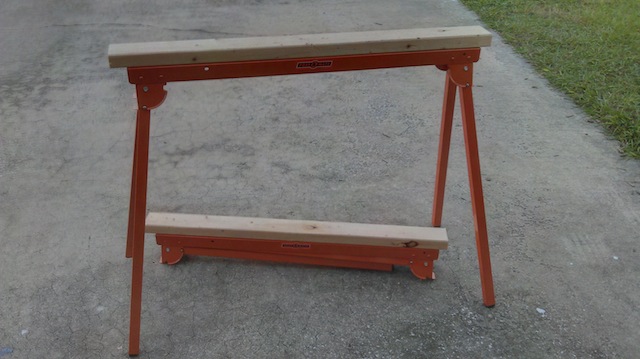
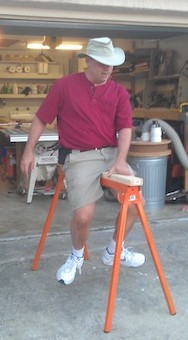
No, I needed a better solution. And, it came to me from Craig Ursell over at Portamate tools. He sent me a pair of Portamate 3300 saw horses, and these babies were just about what I needed. First of all, they are made of sturdy steel. I have thrown some heavy weight on top of them (when I assembled my son’s new basketball hoop), and they held the weight beautifully. They also have folding legs, which means that they collapse into a very small package when you want to store them. And, you also have the ability across the top beam of the horse to screw some 2x4s to the horse, allowing you to cushion your work while you lay it across the horses, and to replace these if they become cut up after they are used up.

These babies also have another useful feature – they can be used low on the ground with the legs folded up. If you have ever worked on your workbench and struggled with trying to clamp – say – a middle shelf on a bookshelf while it lies on its side, placing these two folded up sawhorses on the bench under the project will leave plenty of room for you to get the head of the clamp under the piece… easy peasey lemon squeezy!

Now, you may never be able to ride these babies off into the sunset, but having your trusty steed in your tool stable, you will find your work a little easier…



I see that new saw

My shop has a comfortable mix of  homeowner and ‘prosumer’ tools. There are some nifty routers, a set of sweet hand tools and a table saw that has been a good performer for me for nearly a decade now.  And, while I have had the basics, I’ve noticed recently that I am ready to do some upgrading. For instance, this past winter I upgraded my old entry-level Delta thickness planer with a more capable model from Ridgid. I upgraded my chisels. I upgraded my drill press by bringing it someplace where I can use it!

Another place I really wanted to upgrade was my band saw. That Delta was OK, but the six inch resaw capacity was just too little, and the blade tended to wander all over the place.  I would tweak and adjust and all that other goodness, but it still took a long time to make resaw cuts and the results were often lackluster.

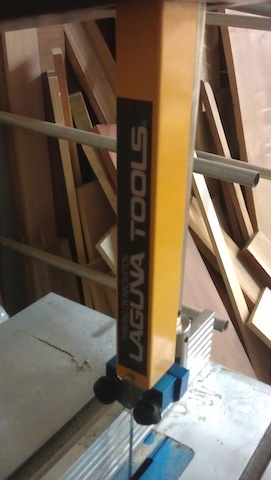
That’s why a few weeks ago I contacted the folks at Laguna Tools about entering into an advertising agreement with the site. When they looked at what I have been doing for the past five years – but they still said ‘yes’ – I could barely contain my excitement.  Especially since it involved a new band saw.

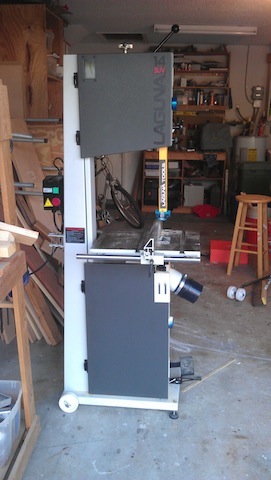
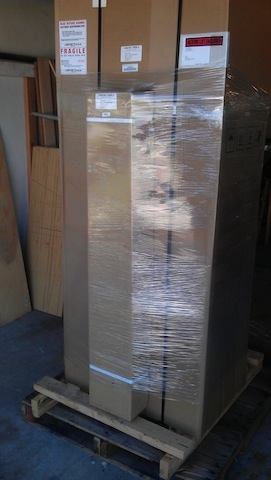
Yup, I’m the proud owner of a new 14 x 14 SUV Band Saw. The folks at the shipping company dropped it off last Wednesday at the house.  He had a really big truck, and it took a pallet jack to get the moving skid from the truck to my garage.  Good thing, because this saw weighs a cool 375 pounds.

I don’t normally deal with big industrial tools that arrive on the backs of trucks, so it took me some time to figure out how to even unpack this sucker. Laguna had built an internal plywood frame around the saw and encased that with cardboard, with the saw bolted to a skid to prevent it from toppling over. I was able to unpack the saw and open each of the elements, and, surprisingly, the saw went together very easily.

But first, I want to say this about Cosmoline – the brown, grease-like substance that gets smeared on the bare metal parts of machinery before it gets shipped… It’s a pain to get off, but it keeps the metal completely rust-free. Just take your time, use mineral spirits, WD-40, a bunch of rags and an old toothbrush, and you can get it all off in pretty short order.

The motor – a beefy 3 hp Leeson – mounts to the side of the saw cabinet. This time, I was very careful to ensure that the belt was tightened properly so I got maximum efficiency from the saw.  I also had to run a 220 line from the power panel to the saw location – it was an extra cost, but the motor is a beast.  That should make resawing a breeze.

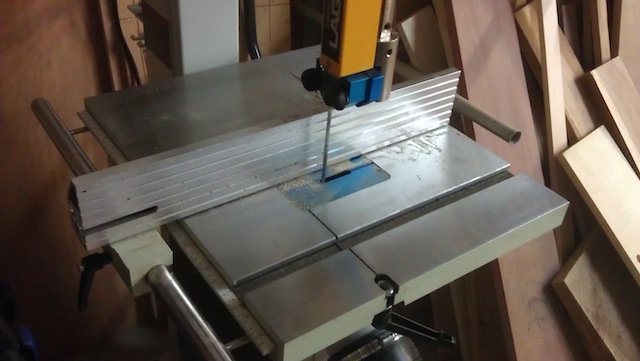
Next up was the table and rip fence. The table is another heavy duty component, featuring integrated cast iron trunions in the bottom. The table is very heavy, so I’m glad they included a gas piston to help with adjusting the angle of the table – very clever little design feature that will save me a lot of issues later.  The stock rip fence slides onto a round bar on the table, locking securely. It has the ability to be used as a high fence or a low fence, depending on its orientation… a very clever idea.

One knock I have heard about the table on this saw was that it is kind of low to the floor. I must admit, it is lower than some other band saws I have used, but it’s really about the height of my table saw table, so it’s OK with me.

The mobility kit appears to be a one-size-fits-all item for all of their band saws, so it seems like a bit of overkill on the 14 inch model. However, it is uber-robust and rolls smoothly across the floor.

The blade guard and guide system is surprisingly elegant, and has already won praise in the market. Using two pairs of ceramic guides on the top and the bottom guides, there’s plenty of support for the blade, which should make my cutting a lot more accurate. The bottom guards are easily accessible, unlike the old Delta’s, meaning I will actually use them on this saw.

Changing blades does involve removing the upper and lower blade guards, which seem like a pain in the rear when you first do it. But, once you realize that they will protect you totally if a blade breaks, the extra step is no longer an issue.

The saw does use massive 120- inch blades, so I’m going to have to think ahead when I need new blades or blades of a different size. You can’t just mosey into the local woodworking store and find these babies just anywhere.

Once I got the saw set up, I decided I would make a quick test cut. After two evenings of putting the saw together, I was eager to make some sawdust. I put on the 1/4″ blade and figured I would do two tests.  For the first one, I set the rip fence about a 1/4″ from the blade, took a straight milled piece of wood out of my lumber pile and ran it against the fence. Without any tweaking or drift adjustment, the saw cut a straight slice right off the end of the board. No wander. A consistent thickness along the entire length. WOAH!  I’ve never seen a saw do that…  Oh, and the saw cut very quickly. The old saw took some time to make it down the length of a board – this one didn’t bog or slow down while I fed the board at a very speedy clip.   I can see some bent lamination projects in my future.

The next test I did was to grab a piece of 1/2″ plywood and raise the blade guard to make a resaw cut. The piece was about six inches wide, and I wanted to see what kind of control I would have with it. I eyeballed one ply line and made that my target. Again, with the 1/4″ blade, the cut was smooth, accurate and aggressive, splitting the same ply down the board the entire foot and a half length. And, the cut was VERY smooth – no gouges as the blade wandered.  Now THIS is cutting!

What can I do with this saw? I don’t know yet, but I’m looking forward to doing a whole lot more work with a band saw.

My new tool

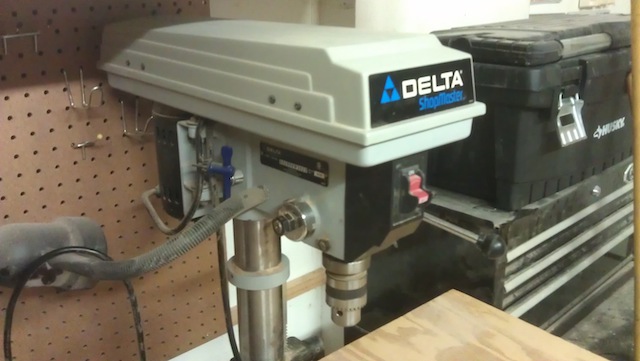
Look at this baby right here! Yup, I’m just strutting as proud as a papa, because now I am the happy owner of a drill press.

The only problem is that I bought this tool back in 2003.

Lemme explain. I have heard from other woodworkers that a drill press is a piece of must-have equipment for the shop. You can do all kinds of stuff with it. Why, you can bore holes. But, you can also use a circle cutter. And a plug cutter. And a sleeve sander. Gosh, there are a ton of tools you can use!

As far as applications? Sanding. Cutting mortises. I mean, drill presses are Jacks of all trades. So, I collected my pennies back in the day, and I went out to the local Lowe’s and purchased this.

Now, it’s not the most tricked out drill press out there. Not by a long sight. There are no lasers, no hold downs, no expanding tables… Just a really basic, smallish sized unit with a fairly powerful motor, an adjustable table and the ability to drill nice straight holes.

The only problem I have ever had with the unit? I couldn’t find a place to put it. Just as with my miter saw, it sat, tucked neatly away behind a piece of shop furniture for the better part of a decade while it got covered with dust.

There were times I used it for sure. I would have to squat down and manhandle the unit out from its hidey-hole, find a place for it – usually on the workbench – and use it to do the five or six things I needed done. After that, I would manhandle it down into storage again.

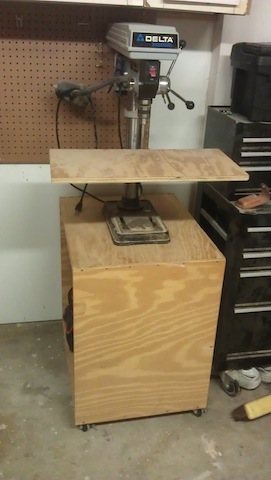
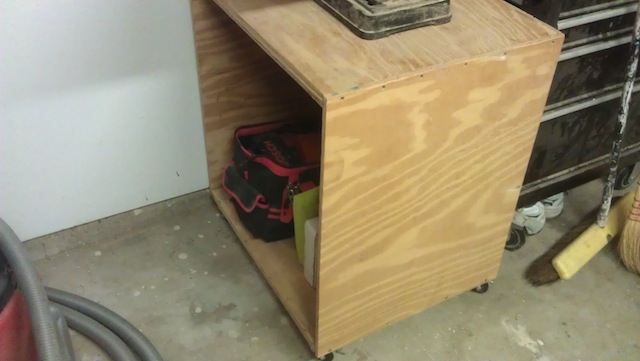
I tried to make it more useful by building a rolling cabinet for it. Some plywood, a few casters, a handful of screws and BAM, I was there. I even made the piece the same height as my workbench so I could use that for infeed or outfeed on my table saw. But, the vast amount of time, the drill press sat in its case.

When I pulled the side cabinet out this past weekend, I was wondering if I could fit the drill press under there with the drill mounted to the top. The stack was about six inches too tall. Flummoxed, I spent the better part of my evenings after work trying to figure out how I could make this arrangement work. That’s when the idea hit me… how about a cabinetectomy?

Using my track saw, I set the case on its side and sliced it apart about six inches from the bottom. Once it was free, I banged the bottom of the case free from the three sides and screwed it back into place. I stood the drill press up on it and wheeled it over to the new area. It fit with about two inches to spare! I used a pair of screws and some fender washers to attach the drill press to the top of the cabinet, and then cleaned the caked-on sawdust off the tool. Much nicer.

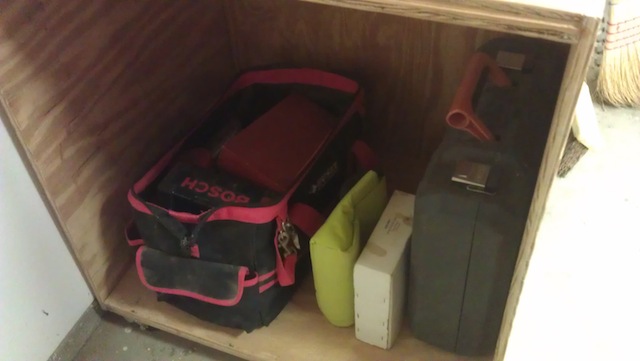
I also took the opportunity to gather up all of my drilling supplies and stash them in that cabinet. This way, when I need to do any work at the press, I can simply reach in, find the bit and get to work.

The best part of this whole operation? It took maybe ten minutes to get the stand cut to size! Now, I have to build myself a little bit more useful table to expand the small machinist table – something with a little T-track to help make drilling a pleasure.

I’m looking forward to getting some good use out of my nearly decade-old brand new tool.

How sharp?

When it comes to sharpening tools, you can always take things to extremes. I mean, there are people who say they won’t go to the bench unless they have tools that gleam like mirrors and have come off a 10,000 grit water stone. That’s an awful lot of work to do to get your edge sharp, when you really don’t have to go that far. In fact, you can stop the sharpening process a whole lot earlier when you get your edge to the proper degree of sharpness.

But, how can you tell if you have gotten there? I know of five common tests to gauge the sharpness of your chisels, plane irons and other edges. And, when I’m done sharpening my edged tools on my Tormek, I like to give them the once-over to ensure they are as sharp as they need to be.

The glint test. Kari Hultman of the Village Carpenter told me about this one. Under a very bring light, hold the edge of the tool pointing at you. If you see any glint of light reflecting back from you from that edge, it’s not sharp enough. Remember, sharp is the point at which the two planes of the chisel’s back and the bevel meet, and any flat on that edge indicates that your sharpening job has more to go. It’s a very subtle thing to notice, so you’ll have to build some expertise. Oh, and using a magnifying glass, jeweler’s loupe or some other sight aid helps tremendously.

The fingernail test. Your fingernails are made out of keratin –  a tough and smooth protein, so it takes quite the sharp edge to scratch them and not just slide off. When you pull your blade off your sharpening medium, GENTLY drag the edge over your nail. Again, a dull edge will glide over the nail, where a sharp edge will bring up shavings. Again, BE GENTLE!  You can hurt yourself badly if you push too forcefully.

The shave test. It’s called woodworker pattern baldness. You’ll see sharpening enthusiasts sporting bald spots on their arms (or even legs) after time at their sharpening stations. It’s not a surprise, a very sharp edge has the ability to slice hair as it is dragged across skin (don’t try to shave your face with a chisel or plane iron… it will be a rough shave, no matter how sharp you have your irons. Razors have a much more acute angle). A keenly-sharpened edge can clear a patch of hair with minimal pulling.

Steve Branam of closegrain.com shows his sharpening prowess

The paper slicing test. If you hold a piece of copy paper in your hand and a sharp edge against, you should be able to cleanly slice the paper with minimal fuss. Again, we’re talking about very sharp tools here, and the finer that edge, the easier it will be to slice. In addition to demonstrating how sharp your edge is, it’s also a great party trick that will make your guests ooh and ahh with pleasure.

The end grain slice test. This is the test I use, and I think it works best for woodworkers. Before I set up for a sharpening session, I will clamp a block of wood in my bench vise. Normally it’s just something out of my scrap bin, but I have found that softer woods give a better indication of just how sharp the edge is. When I pull the edge off the Tormek, I will go over to this block and use the edge to slice a ribbon of end grain off the board. If the chisel or plane iron just pushes right through with minimal effort and leaves a sweet looking ribbon of end grain, I know I am there. Softer wood gives a great indication – if it slices cleanly, but doesn’t push the end grain down, you are there.

Ultimately, the proof will be when you work with the tool at your bench. If it cuts nicely after you sharpen it, you are good to go. Just monitor how the cut feels, and when you don’t get clean cuts anymore and it takes more effort to use the tool, it’s time to think about breaking out the sharpening medium and getting back to work.


Just Try One

If you have been a regular reader of Tom’s Workbench, you know of my legendary, epic failure in trying to assemble a square project. I mean, everything starts out straight and true. I have all kinds of clamping squares at my disposal. I know the whole make the diagonals measure up trick. Heck, I even carry my well-loved double square that I keep handy… just in case…

But, I still end up from during assemblies struggling to get things nice and square in the clamps. My problem?  I need a convenient way to measure square with one hand while adjusting clamps with the other. My combination square is great, but if you are too ‘enthusiastic’ in your handling of it, you could force the blade to unseat from the head, giving you a bad reading. Nope, I needed something fixed to a handle at a true 90 degrees.

It was then that I realized I had never – in my dozen plus years of woodworking – ever used a try square.

What a dope I am.

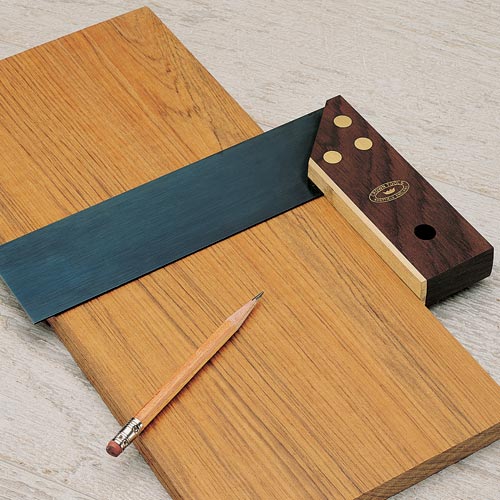
You see, the try square is one of those tools you can handle easily. It has a fixed blade with a handle that’s beefy enough to get a good grasp on. Slap that puppy in a corner, and you can easily see how true things are. And, if you have to mark a line across a board’s surface, heck, that’s easy as can be.

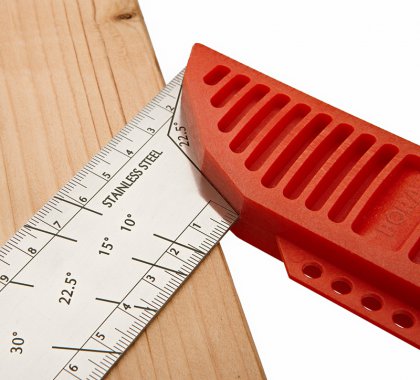
My friends over at Bora tools sent me a pair of beauties. Two of ’em.. one with a 12 inch blade, the other with an 8 inch.  The markings are etched on, making them easy to find and read. So, if you need that line to go out only four inches, bingo, you got it.  It is also etched with a number of angles on the face. Now, I have to admit that at first I was scratching my head. I mean, isn’t this just a square?

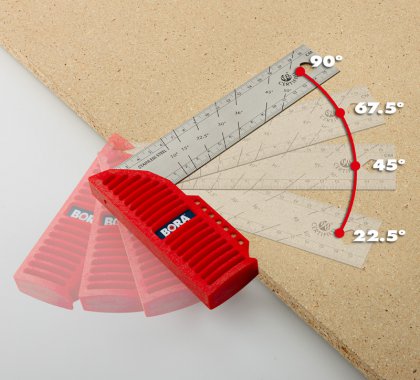
Then it hit me, the red handle on this square has a number of angles where the blade enters the body. By having one of these facets touching the board, you can get some common angle readings – 45, 22.5 and a few others. The handle also has a ledge on it, allowing you to rest the square’s handle on the face of the board, preventing it from rocking while you are trying to mark. Nifty.

While I haven’t had much woodworking time in the shop recently, I was able to use it when assembling my mom’s step stool, and, I have to admit I used it while tiling my bathroom. Nice, clearly marked lines were great to work with while on the tile saw, making my life a whole lot easier.

Oh, I’m sure I will still have my challenges while trying to make my assemblies square. After all, I’m me, right?  But, I’m hoping that by keeping the try square handy at the bench, my accuracy will improve.


About face!

With football season coming up, I always think back to my days when I attended the University of Maryland. I worked on campus all summer, and every afternoon, my co-workers and I would talk about the upcoming season, which games we were looking forward to, and how cool it was going to be to sneak some ‘adult libations’ into the stadium for the games. Ahhh, to be young and dumb again…

After work, though, I would always look forward to the walk back to my apartment. As I crossed Route 1, I had to pass in front of the campus’ chapel and the large field that rolled up the hill toward it. It was at the bottom of this hill where the school’s marching band was practicing, getting ready for performances. And, boy, did they ever suffer in the heat as the band director took more than one hundred individual performers and made a cohesive unit. The staff would teach the band members how to play together. How to create formations. And, most importantly, how to march together. It was always impressive to hear just one command – for example, ABOUT FACE – and see the entire formation of students turn on their heels and change direction in an instant. Such power used with such finesse.

Sharpening is a task where you also need to use more than a little bit of finesse. For instance, if you want to sharpen a hatchet blade, you need to be aggressive to remove enough material to get that edge into fighting shape. But, when my barber hones his straight razor for my post haircut neck shave, he’s very careful with the leather strop.

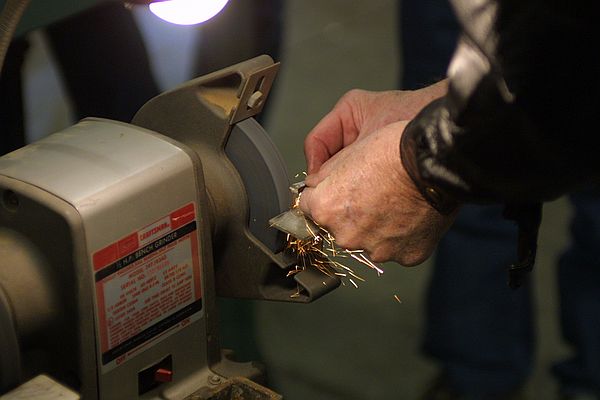
In much the same way in the shop, there are some sharpening applications where you want to be extremely aggressive with the tool, and times when you need that feather soft touch to ensure the finest edge. Many woodworkers go for a high-speed grinder to get that rough stuff out of the way, then turn to stones to get the fine honing. But, can that be done on a single machine?

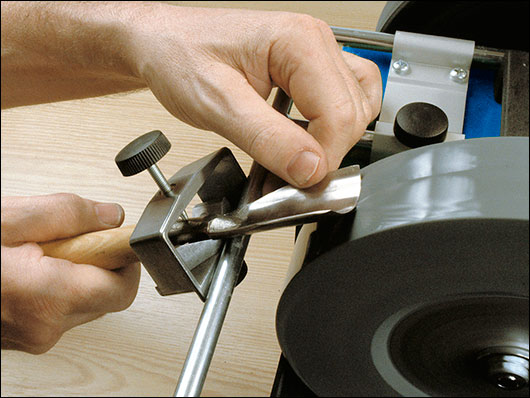
Surprisingly, my Tormek can handle both tasks. The wheel on the sharpener can be graded to a coarse cut for edge shaping, then later regraded to a finer grit for the polishing process. Just as important as stone grading on this system is the direction in which the stone rotates.

If you sharpen a blade with the stone turning toward you, the cut is far more aggressive. The wheel can remove a tremendous amount of material in short order (something you do need to pay attention to, otherwise you could totally reshape your tool!) with the turning direction turned toward you. So, if you are trying to get a nick out of your blade, this is a great feature. When you want to put the final polish on the blade, simply turn the machine around, and with the wheel turning away, you lay the blade edge on the wheel and the cut is much less aggressive.

The only problem with this arrangement? The machine is solidly built and kind of heavy. Plus, with a tub full of water keeping the wheel wet, you can get quite a bit of sloshing going on, soaking the stuff on your bench. That’s why I sort of parked it in one configuration – wheel rotating away – and kept it there. It was OK, but it would have been better to have that other option.

That’s why I was so pleased to see a new accessory for my Tormek sharpener. The folks over at Tormek sent me one of these turntables to mount the tool on, making this twist a piece of cake to pull off. The base is solidly built, with gripping feet on its bottom and a smooth ball-bearing guided turntable. The top of the base is relieved to have the Tormek’s feet rest in place, preventing it from slipping.

With this new base in place, I can easily move from the coarser grinding to the finer honing. This has encouraged me to do more sharpening of tools as they dull, instead of waiting for them to all be dull and setting aside a block of time to sharpen them all at once. My tools stay sharper, the quality of my cuts remains high and it can help me make some beautiful music at my bench in the shop.


Tools I use: Woodworking T-shirts, part deux

Can you remember my previous tour de force about my woodworking shirts?  If not, check here to see what I was wearing back in the day. (Yes, I still have many of these!)

Since then, I have added a lot of new ones to the collection. Enough, in fact, to do a SECOND post. So, here’s a little love to the folks out there who are helping to cover my growing gut!

Once again, with feeling, clockwise from the top middle, and click on the image to see a larger version:

Got Wood? They sure do over at Bell Forest Products. Scads of it! I have really enjoyed working with them through the years, and the wood they have there is really just amazing to look at!

Mike Siemsen gave me this next shirt for volunteering at the Hand Tool Olympics last year at Woodworking in America. This shirt reminds me that hand tools are indeed fun, and I have a LONG way to go before I get good with dovetails!

What can you say about Ron Hock over at Hock Tools? He’s super knowledgeable about blades. He’d go way out of his way to be helpful to even the most ham-handed woodworker. And, he’s just a plain nice guy. If you get the chance to talk to him, you will come away a much better person for the experience.

The folks over at Bessey Tools send me this black beauty. They sure have helped me put the squeeze on projects for years now, and they make some awesome clamps. I hope they can handle the pressure now… snort…

We are Modern Woodworking.. and we mean it!  If you haven’t been to the Modern Woodworkers Association, what are you waiting for? There’s some awesome stuff going on in the different chapters around the world… oh, and I also hear they do this online podcast with a silver-tongued host… 🙂

Matt Vanderlist.  The Podfather. A fixture in the online woodworking community for years… And, the mastermind behind Matt’s Basement Workshop.  He’s the man, and here’s the shirt!

Iggy the Trained Shop Monkey gets excited when I wear this shirt I got from Gorilla Glue. It’s easy to see why… that big monkey on the front.  Iggy’s definitely stuck on them.

There’s no tool like an old tool.. and when an old fool wears it, well, that just makes for great rhyming. This one came from Duluth Trading Company… and I just love the slogan.

And, if you are interested in wearing the latest in Shop Monkey fashion, why not check out my storefront at Cafe Press? I’m modeling one of the baseball T’s with the shop monkey logo emblazoned on the front.