Category Archives: Tools

Convertable sanding

There’s a tool that I have used a lot over the past five plus years of blogging, but it has barely gotten a mention. Which is sad, because it is probably the best value I have ever seen in a tool.

Sanding is a job that can be a real challenge. I mean, it is just so darned boring. You sit there with a running sander in your hands, the work clamped down to the bench. The only excitement comes when you have a difficult area to sand and you can’t fit the random orbit sander.  That’s when I start to search for the right tool that can solve all of my problems.

The Ridgid sander

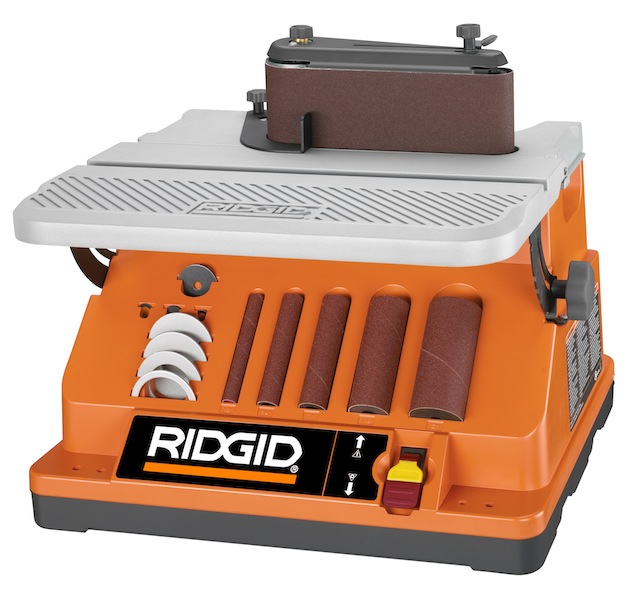
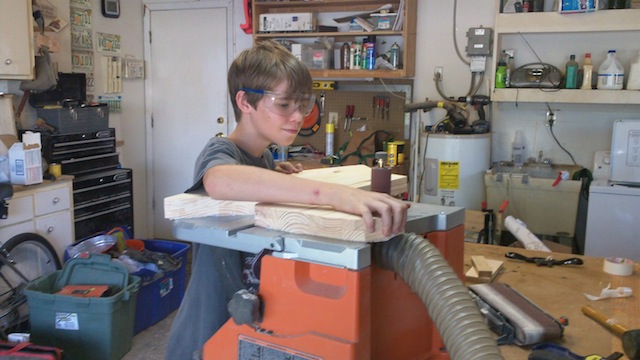
This one can’t solve ALL of my problems, but it can fix a bunch of them. It’s my Ridgid combination spindle/belt sander.  I picked this little jewel up back in 2006, and it has been a trusty performer for me since. It’s about the size of a portable thickness planer, so it can easily be tucked out of the way when you don’t need it.

When you do need the sander, you have an option  First, you can use it as a belt sander.  I have used that to sand outside curves on things like bandsawn boxes, as well as a straight sides on boxes I want to remove excess spline from.  The belt oscillates as it spins, allowing me to get the most out of the life of the belt.

Dominic working with the spindle on a curved piece

As if that would be enough on its own, the sander also converts to a spindle sander.  This little gem shines when it comes to doing inside curves, like I had when I was building a rocking horse for a charity build-along for the Wood Whisperer.  Again, the spindle oscillates as well, allowing you to get the most life out of your sanding sleeves. Changing between the belt and spindle sanders is very quick, and is completely toolless.

The aluminum top is a very good size for balancing larger workpieces on, giving a lot of support for larger work pieces. It also folds down to cover the spindles and attachments so they won’t get lost when you are moving it around. And, when it is time to deploy the sander, you can set it at any angle from 0 – 45 degrees, meaning it’s a piece of cake to sand bevels or miters. The table also has a sweet miter track on it, which allows you to use the miter fence from your table saw to get some additional purchase on a workpiece.

The sander has a 2 1/2″ dust port out of the back, which does a great job picking up the sawdust generated by the unit while in use. I have used the sander without dust collection for ‘quick’ jobs, and let me tell you, the dust collection makes a HUGE difference in your enjoyment of the work.

Best of all is the price… I picked up mine for less than $200, and I’m positive I have gotten more than my money’s worth over the years.  Plus, when I bought mine, it came with a free lifetime warranty. I think the new agreement is a 3 year warranty, with the option to buy a lifetime agreement. Not too shabby…


What’s your angle?

90 degrees. It’s the ultimate expression of accuracy in many woodworking projects. Cabinets. Tables. Chests. Boxes. If you can get two adjacent sides of your project to flush up to the legs of a square, you are there. If the diagonals match perfectly, rock the heck on. When your miters meet at a crisp edge, pat yourself on the back.

It's hip to be square

But, if you have to cut a diagonal, errr…. Maybe you want to mark out the slopes of your dovetails. Maybe you want to find the exact angle at which the back of a chair leaves from the seat.  This is where things get a little trickier, if you don’t have the right measuring tool.

Meet the sliding t bevel. Some folks may call it an angle finder, bevel gauge, bevel square or a host of other names, but whatever you call it, it’s  a great little multitasker that can help you get out of trouble. This simple tool has a handle typically made of wood or plastic with a separate adjustable blade made of steel. That blade can pivot freely around a pin inside the handle, yet can be secured in place with either a latch or a thumb screw once the angle is found. It really is that simple.

The Bora T Bevel

The model I use is a sweet little red number from Bora Tools. This baby comes with a red plastic handle with a spirit level vial in the handle. The blade also serves as a seven inch ruler, but also can be secured with an easy to use plastic lever. The end of the blade is clipped at a 45 degree angle, which allows it to read into tight spaces.

So, what can you do with one? First – and probably most obviously, you can use the tool to find the angle of something.  Place it against a leg on a chair, and you can find out what angle that leg meets the seat. If you want to know the exact degree of the angle, hold it against a protractor and bingo, you have that number.

mark that angle

But, say you don’t want to play the numbers game.  That’s cool, too. Simply take the t bevel from the angle you want and set up whatever tool you want to use to duplicate that angle. Just be sure to lock the blade in place before you move it, otherwise things won’t line up exactly.

Get the bevel down perfectly

Oh, and if you are trying to find the angle of blade drift on your band saw, a t bevel will make that job a piece of cake.

Lock the blade at 90 degrees against a known reference and – yes – you have another square to check an assembly.

Mark those dovetails

And, if you need to carefully mark out a given angle for a cut – maybe a dovetail – why invest money in a dedicated dovetail marker, when your t-bevel can be set to 7, 9, 14 or any other degree in between and locked in place to mark just one dovetail or a whole dresser’s worth.

While it’s not a tool I reach for every time I woodwork, for the times I do, it has been a true winner. At least that’s the angle I am taking.


Get Woodworking Week 2013: Monday

Get Woodworking Week 2013

As an English major back in college, one of the things I had to do – a lot – was read literature.  Lots of it. I mean, tons.

Chaucer. Twain. Shelley. Shakespeare. Oh, and this one guy named Tobias Smollet who wrote a novel named Humphry Clinker, which, I believe, is the most painful of all novels ever written. In fact, I swore an oath during that one semester that when time travel is invented, I would go back to the time when he wrote the novel and burn his entire pen and paper collection and encourage him to take up botany… It was horrendous.

But, I digress.  Since many of these works were written by folks influenced by the classic Greek stories, I had to read more than my share of ancient Greek gems. One of the ones I had to read was the Odyssey, written by Homer (no, not Simpson!).  Our brave hero Odysseus and his merry band of cohorts get into all types of adventures in a world filled with all manner of magical creatures and beings.

"Hey, dudes, why don't you swing a little closer to the shore?"

The crew while out on the high seas ran into a group of beings known as Sirens, who appeared as beautiful young ladies with sweet singing voices. But, their beautiful outside covered an evil intention – their irresistible singing would attract sailors close to land, where they would shipwreck and drown. Hmmm… sounds like some of the women I used to date before I met Rhonda…

Why the mythology lesson? Beginning woodworkers have a similar battle to fight with another kind of Siren… the ‘starter’ tool. Now, I’m not advocating you hold out until you can afford a top-of-the-line, uber expensive tool. But, in the same way, you don’t really want to follow the melody being sung by tools that are way too small, underpowered or cheaply made to work well for you.

Let me give you both a power and a hand tool example to illustrate.  When I started woodworking, my only saw was a jigsaw. And, it was good. But, I could never get a good, straight, smooth cut with it. Plus, it took forever to make the cut on long boards, and I was going through jigsaw blades like nobody’s business. That’s when I upgraded to a circular saw. Nice move. It cut fast and smooth, but, after a while, I realized that it couldn’t do everything I wanted it to.  That’s when I followed the song right into the rocks.

What a cute little table saw...

I bought a $149 bench saw from Delta at a local home improvement center. And, I was tickled with it. It cut quickly and smoothly, and it seemed to tick all the boxes for me. That was, of course, until I had to rip something thicker. Or crosscut something that wildly overhung the edges of the puny table. Or, I had to rely on the wonky rip fence to be accurate and square. Then, it stank…

Eventually, I had to bail on that saw, and I bought the one I use now. The Ridgid saw I bought back in 2003 was the latest version of the line carried at Home Depot, and it has been a solid performer for me since day one. Accurate, repeatable cuts. Power to spare for most cutting applications. Can handle a stacked dado blade.   And, best of all, no frustration and lost hours trying to get everything to line up.  Just what I was looking for!

Ridgid TS2424

At the time, it ran me $500, which is a considerable amount of money to spend on a tool. However, right next to the 3612 I bought was the recently discontinued 2424.  For $300. Just twice the cost of the el-cheapo I was dumping. Had I held my funds for another few months when I bought the cheap saw, I could have started with a big cast iron contractor saw with excellent performance, a shorter learning curve and a lifetime warranty from the get go.   I probably would have still owned that baby today.

The same thing happened with my first hand plane. Jack planes sold at most home improvement centers aren’t worth diddly. Poorly cast and ground soles. Inadequate steel used in the iron. Clunky adjustment mechanism.  I can’t tell you how many hours I wasted trying to get that plane to work properly… to produce a shimmering curl. Instead, I got chatter, splinters and the thought that I was the problem and that hand planing wasn’t for me.

El Cheapo Buck Brothers Plane

It wasn’t until my friend came back from a flea market and handed me an old, dirty Stanley No. 5 made in the 1930s. He spent a grand total of $10 on it, and told me to knock myself out. After reading up on plane restoration online, I spent a few hours cleaning and waxing up the plane.  I ordered a replacement iron for the old workhorse and sharpened it carefully. I clamped a chunk of wood in my vise, and was planing like nobody’s business right out of the gate.  Was it perfect?  Nope, but it did show me that hand planing wasn’t outside of my abilities.

So, what’s the lesson here?  Yes, woodworking can be an expensive hobby to jump in to. And, yes, it may be tempting to think that it’s OK to just hop in on a ‘starter’ tool to get your feet wet. But, in the end, you will be happier with full-sized tools looking for bargains on discontinued or refurbished items. Maybe in your future lies a well-loved used tool.  Maybe you can let the loved ones in your life know that you would appreciate contributions toward a (fill in the blank) for your birthday/holidays/anniversary/graduation/festivus.

In the meantime, here’s a collection of some really cool articles written by others for Get Woodworking Week:


Table this discussion

I have been talking about the upgrades at my shop for a while now. The miter bench. The rolling cart that holds the drill press. The rearranging to get more usable space.

There’s something else I had to add to the shop – a far more capable router table. Years ago, I had built a router table into my table saw’s top, and it was good. For a while. Until I first had to rout a nice molding profile and then rip it off a wider piece…  that just became a real mess. I also desperately needed to get a far more precise setup. I mean, I have been using a cobbled-together router fence that I wasn’t 100% sure was square to the table…

That’s when David Venditto of Infinity Cutting Tools stepped in to fix my issue. He had already sent me home with a new Triton router and router plate, and this past week, he finished me off with a router table, fence and stand.

The fence is a sweet Jessem Mast-R-Fence 2. This baby comes complete with dust collection, a built-in scale, sliding fence faces to let you control the opening for the router bit and secure clamping to ensure it holds a measurement.  Everything you would want a router fence to do.

The stand was sort of like an erector set.. lots of steel legs and plenty of bolts. And bolts. And, some more bolts. I had no idea how many bolts it would take to assemble the stand, but I did have my set of wrenches and sockets, so that helped.

Once I had it put together, I had to top the stand with a VERY cool top. David gave me one of his brand new black microdot router tables. Turns out, they are milled right near my house. The edges are wrapped with a tough edging and a miter channel that accepts both mini and miter T-track accessories. The best feature?  The top is a black microdot laminate that is very hard, and reduces the friction on the wood that you push over the table.  I’ve played with it a little bit this weekend, and boy, has it been fun!

Once I got it all assembled, I had to put it into its place of honor in the shop, next to the drill press. I’m looking forward to putting this router table through its paces, and eventually doing a shop 2.0 tour for you folks to enjoy.


Tweaking my technique

When I was at Woodworking in America last month, by pure chance the Modern Woodworker’s Association booth was back-to-back with the Tormek booth. What a very real and very pleasant surprise!  I knew within a few minutes that I was going to be in for a real treat – watching some very talented Tormek users sharpen the right way.

Hey, I have been getting good results with the Tormek all along, but for some reason, it did seem to be taking a bit longer and was a bit fussier than I had hoped for. As with most things that don’t work exactly as planned in my life, I knew it was all operator error, so I was happy to see the only bad variable in the system was about to be corrected.

Jeff with Tormek went through the process step by step. I took lots of pictures and copious notes, realizing in mere minutes what I had done wrong with my setup, but vowing to get back to the shop to correct my issues and start getting sharper tools in much less time.

First things first – I realized I needed to spend more time with the stone grading tool to prepare the surface of the wheel to get things going. The rough side of the stone grader does a great job unclogging the wheel and exposing new grit – something that you can feel. Doing this before starting any sharpening is essential. I discovered that most complaints of the system taking tool long revolved – pun intended – around this critical first step.

The instructions in the Tormek system said that a more ‘advanced’ way of getting the grind angle correct was to use a marker and sort of  ‘free hand’ the angle. While it may work in certain situations, the grinding gauge is a much easier way to ensure the blade is at the proper angle.

The other thing I learned is that I wasn’t spending nearly enough time on the rough grit, assuming that I wanted to get to the finer honing steps faster. As with sanding a project, the more time spent with the rougher grits makes the finish sanding go much faster.

I also learned – as foolish as it was – not to change the items to be sharpened in the gauge after each step. Stupid me would grind one chisel on the coarse, take it out of the gauge, insert the next, lather, rinse, repeat. Keeping the chisel, plane iron or whatever other tool in the guide through the whole process – and working one tool at a time – is the only way to fly.


Once I hit the stone with the fine side of the stone grader, I simply put the tool back on the guide bars and went on to start honing the edge. And, yes, you need to spend some time on that process, because you are looking to refine the scratch pattern. Under a bright light, it all became very clear.

Finally, once that was done, it was time to move to the honing wheel. That’s when you free the tool from the gauge and do some freehand work. First, you have to charge the leather wheel with the honing compound. Then – and no, I wasn’t doing this right, either – you have to take the wire edge off the back of the blade. The proper way is to lay the flat on the wheel and then raise the end up until you can feel the edge make contact with the wheel. It’s a very positive feel, and it’s difficult to push it beyond that point. The fine abrasives in the honing compound take the wire edge right off in no time flat.

Once that is complete, Jeff taught me another trick – polish the bevel on the strop wheel as well. Ingenious, don’t you know… I did know this, but I had no idea – until I saw it being done – how mirror-perfect you can make the bevel doing that. Jeff also told me to lift up a little bit past the point where the bevel contacts the strop wheel and polish it there briefly – that actually cuts a micro-bevel on the edge of the blade.

How sharp are my chisels now?  Well, let’s just say that I went through a lot of notebook paper proving how sharp things are!

Now, how many more blades can I find to sharpen?


Strength and precision

A quarterback spies an open receiver down the field and throws the ball with tremendous velocity and extreme accuracy to a place where only his guy has the ability to catch it. A sports car that pours power from its highly tuned engine, yet allows the driver to turn a corner as if she’s riding on rails. A gymnast generates an awesome swinging speed, launches herself into the air above the parallel bars with such precision that she merely has to extend her hands to catch the bar, saving her from an terrible fall to the floor.

Raw power is a great thing, but without precision, it can leave things a mess. That’s especially true with it comes to power tools. When you are talking about fractions of an inch meaning the difference between a perfectly fitting joint and one that’s suitable for the scrap heap, being able to put your power in the right place means a lot.

For about the past nine years, when I needed to rout something in a table set up, I would turn to my trusty, second hand Freud FT2000 router I had bought from a friend. And, for years, it did a fair job. Oh, it had the power to spin big bits – cope and stile, panel raisers.. the works.

http://i61.photobucket.com/albums/h43/Tampa_Tom/SDC10156.jpg

The biggest problem I had was that there was no above the table adjustment for setting cutting depth on the bit I was working on. In order to get things to the right height, I would have to hold my set up block or bit height gauge over the bit, duck down under the table to grab the adjustment knob (the old router was a plunge model I removed the spring from) and spin it until I got close, then look above the table, trying to spin the knob to get the exact height. Sometimes, I was right on. Other times, well, let’s just say that with the fire pit season closing in here in Florida, there soon won’t be any evidence of my mistakes.

The other pain in the butt with this router set up was that I had to pull the entire router assembly out of the table to change bits. Not a problem if I was using a pattern bit with a bearing, but if I had a fence set up, I had disassemble the entire set up and reset everything from scratch. A total time waster.

All of this changed when David Venditto of Infinity Cutting Tools asked me at lunch one day, “So, what’s your router set up like?” I told him my tale of woe, and before you know it, David asked me to swing by his old Tampa location. He had something for me.

This is quite a something! Infinity is now carrying the fully redesigned Triton 3 1/4 hp plunge router. This is one extreme bit of tooling.

First of all, I was terrified that it would be a brute. The old router I was replacing was very heavy unit that screamed when you turned it on and vibrated the table to no end. The Triton, while loud, is nothing like the old one. It also has very little vibration, spinning the bit with ease.

And, does it ever have power! I was using my cope and stick door set, and the router didn’t bog down once. It poured out the power smoothly and evenly throughout the cut while I made full-depth passes. Rock solid.

The other feature I love about this router are the above the table adjustment features. Sure, you could go with a router and a separate router lift, but when one machine does the deed, that’s just pure gold. This router is set for that kind of operation. First, it’s easy to remove the plunge spring from the unit if you are going to dedicate it to the router table. (I already have two hand-held routers for above the table work, and won’t be needing a third). From there, a handle can drop through a hole in the router plate to adjust the height of the bit from above the table. This makes setting the depth a whole lot easier.

And, another cool feature of this router is that a spindle lock/safety is incorporated into the switch. When the switch is off, a clear plastic shield prevents the switch from being bumped. When it covers the switch, it also locks the spindle on the router, allowing for simple one-tool bit changes above the table. Where has this feature been all of my life?

The unit also features a sealed area around the bit with an integral dust collection port. This, paired with a dust collection fitting on your fence, should be able to keep your work area clean of dust.

I still have yet to totally put the router through its paces, but I can tell you from what I have seen, it has this whole power and precision thing down cold.

My new little friends

This big shop reorganization/clean up/redesign that I’m in the middle of has been quite the eye-opening experience. My whole status-quo has been thrown into the air. Tools in new locations. New work flow patters. Heck, new tools…

And some tools I had, but never really used. The drill press was a big discovery, but there was another one that wasn’t as big. But, it has been pretty useful.

I bought a set of these little clamps about seven years ago. I brought them home from the Woodworking Show in Tampa, set them down on my workbench … and, well, they got pushed to the back. And buried under a ton of stuff. That was a shame, because I just learned just how darned useful they can be.

How do they work? They are a simple as can be. First thing I did was took a strip of 3/4 inch  plywood that was about as long as my rip fence, but just a bit shorter in height. Then, with a simple 3/8 inch drill bit, I drilled two holes into the top of the piece. It was a simple thing to drop the front into the hole I had just drilled and opened the clamp screw wide enough to clear the fence. Then, I tightened the clamp and bingo, the strip of plywood was in place.  But, for what?

Well, obviously, it was as an auxiliary fence so I could bury a dado blade in it to cut rabbets.  What I like about this setup is just how easy it was to get in place. And, since they don’t become part of the jig, and can be used on other fixtures, I can see a bunch of other uses for them.  Offset blocks for crosscuts. Stop blocks for the router table. The mind boggles at the opportunities.

This cleaning up business isn’t all that bad, once you think about it!