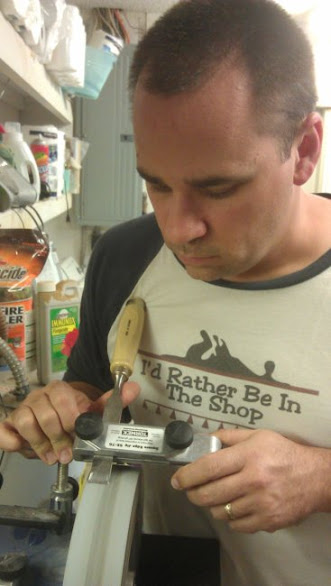
When I was at Woodworking in America last month, by pure chance the Modern Woodworker’s Association booth was back-to-back with the Tormek booth. What a very real and very pleasant surprise! I knew within a few minutes that I was going to be in for a real treat – watching some very talented Tormek users sharpen the right way.
Hey, I have been getting good results with the Tormek all along, but for some reason, it did seem to be taking a bit longer and was a bit fussier than I had hoped for. As with most things that don’t work exactly as planned in my life, I knew it was all operator error, so I was happy to see the only bad variable in the system was about to be corrected.

Jeff with Tormek went through the process step by step. I took lots of pictures and copious notes, realizing in mere minutes what I had done wrong with my setup, but vowing to get back to the shop to correct my issues and start getting sharper tools in much less time.

First things first – I realized I needed to spend more time with the stone grading tool to prepare the surface of the wheel to get things going. The rough side of the stone grader does a great job unclogging the wheel and exposing new grit – something that you can feel. Doing this before starting any sharpening is essential. I discovered that most complaints of the system taking tool long revolved – pun intended – around this critical first step.

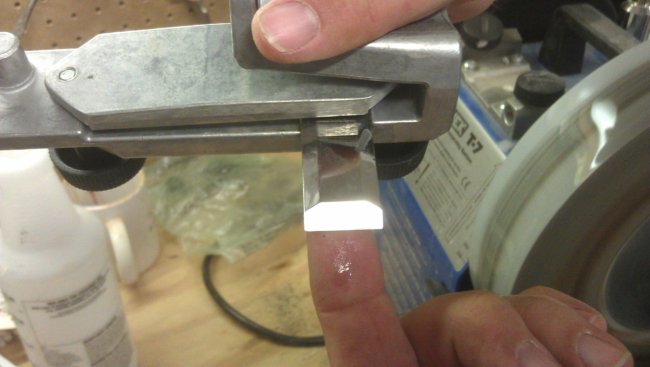
The instructions in the Tormek system said that a more ‘advanced’ way of getting the grind angle correct was to use a marker and sort of ‘free hand’ the angle. While it may work in certain situations, the grinding gauge is a much easier way to ensure the blade is at the proper angle.

The other thing I learned is that I wasn’t spending nearly enough time on the rough grit, assuming that I wanted to get to the finer honing steps faster. As with sanding a project, the more time spent with the rougher grits makes the finish sanding go much faster.
I also learned – as foolish as it was – not to change the items to be sharpened in the gauge after each step. Stupid me would grind one chisel on the coarse, take it out of the gauge, insert the next, lather, rinse, repeat. Keeping the chisel, plane iron or whatever other tool in the guide through the whole process – and working one tool at a time – is the only way to fly.

Once I hit the stone with the fine side of the stone grader, I simply put the tool back on the guide bars and went on to start honing the edge. And, yes, you need to spend some time on that process, because you are looking to refine the scratch pattern. Under a bright light, it all became very clear.

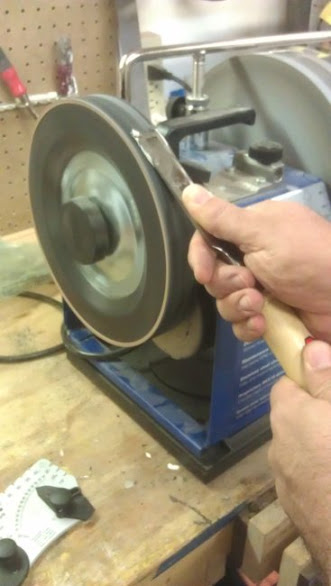
Finally, once that was done, it was time to move to the honing wheel. That’s when you free the tool from the gauge and do some freehand work. First, you have to charge the leather wheel with the honing compound. Then – and no, I wasn’t doing this right, either – you have to take the wire edge off the back of the blade. The proper way is to lay the flat on the wheel and then raise the end up until you can feel the edge make contact with the wheel. It’s a very positive feel, and it’s difficult to push it beyond that point. The fine abrasives in the honing compound take the wire edge right off in no time flat.
Once that is complete, Jeff taught me another trick – polish the bevel on the strop wheel as well. Ingenious, don’t you know… I did know this, but I had no idea – until I saw it being done – how mirror-perfect you can make the bevel doing that. Jeff also told me to lift up a little bit past the point where the bevel contacts the strop wheel and polish it there briefly – that actually cuts a micro-bevel on the edge of the blade.

How sharp are my chisels now? Well, let’s just say that I went through a lot of notebook paper proving how sharp things are!
Now, how many more blades can I find to sharpen?

I am glad you like your new way to sharping your tools. It look great from the pictures. By the way where did you get the great t-shirt?
Have a nice day
Monte
The shirt came from Cafe Press… I love that one! http://www.cafepress.com
Tom,
I’d be glad to send you a pair of safety glasses if you would use them. I’d never consider grinding without them.
AAAAHHHH… good point. I should have put those babies on. The Tormek, unlike other grinders, does go at a very slow speed and does not throw sparks. It also floods the wheel with water.. so there is little chance of anything flying. But, still, safety third!
Good stuff Tom. Did you get a feel from Jeff how often one should re-grade the stone during work? I wonder if that has been a problem for me when I feel things are running too slowly. I guess I have avoided using it too much for fear I would grind down the wheel prematurely. Moreover, what is a good mix between grading and using the flattening diamond jig?
Jeff regraded the stone every time he switched tools he was sharpening.. So, if you were working on a 1″ chisel, you would jig the tool up, grade the stone rough, sharpen rough, grade the stone fine, hone, unjig the tool, strop. Then, before you sharpen the next chisel, you would regrade the stone rough again. Very easy to do.. probably takes less than 15 – 20 seconds to get a good rough surface again…
I have used the diamond dressing tool twice.. both times, the stone started to become difficult to get a good coarse grade. It took maybe a minute, and the stone’s diameter hasn’t yet changed much…
Tom,
Good tips. Reading this article gives me more confidence in using the Tormek system.
Chris
Tom,
Good article. I’ve had a Tormek for a while but see from this article I have a LOT to learn. I must be doing something wrong because I have to put a block under the water reservoir for the wheel to reach it. Maybe time for a new wheel?