All posts by Tom

I'm the guy who writes the blog...

Quick Poll

In most shops, there are remote corners of your shop where little takes place. You know, you might chuck a few seldom-used tools there, or pile your lumber into there that you are reserving for future projects.

Me at my old workbench

That’s nice to have. But, there is also that one area that is just mission-critical to your woodworking. Maybe it’s your workbench. Maybe a table saw or a band saw.  Maybe a multi-function router table.  Whatever it is, it’s the area frequently referred to as the heart of the shop.

In this week’s poll, let us know what that area is in your shop.


Link of the week

The Toolstore Blog

North of the Canadian/U.S. border, Ian Waltenberry is running a blog attached to the Tool Store of Canada.  While he does reviews of the tools offered on the site, the strength of his blog is the incredible number and the skill of the projects he’s building.

A jewelry box

The blog is a nice balance of projects, reviews and techniques – a great place to spend a few hours and get some ideas for your shop.


Back where we started

I bought my current table saw back in 2001 – April, I believe. When I got my hands on it, wow, it was just love at first flip of the switch. The thing surged to life – a whole lot more quietly than the universal drive benchtop table saw I used to have. That baby was a dream.

The table saw with the wing mounted router table

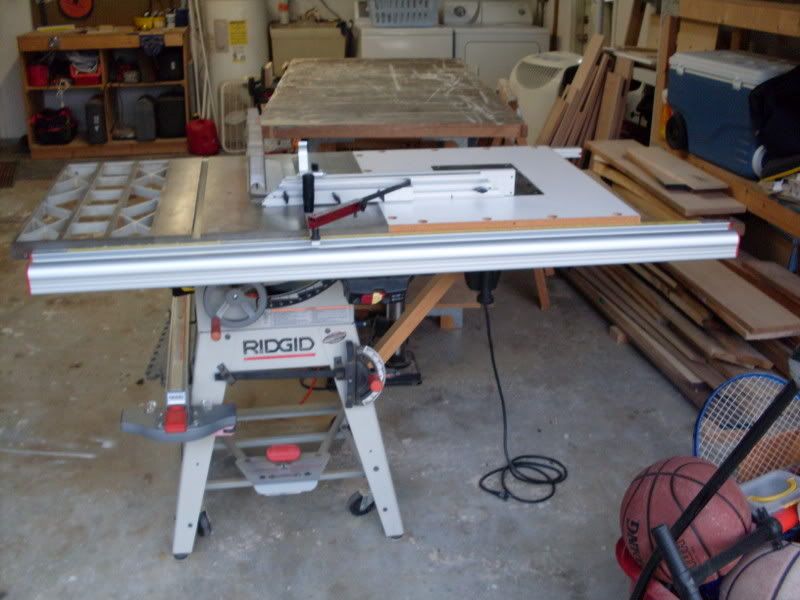
And, after a short while, I had heard that I could add a router table to one of the wings of the saw to open up some space in the shop. I was sold!  So, I cobbled together a little something – a sheet of melamine covered particle board, some bolts, a little bit of aluminum angle and I had myself a plan. So, I took out the right most extension wing and put my shop-made model in there. And it was good.

That’s when the one shortfall of this plan hit me. If I had to use both the router and the table saw – for something like shaping some molding on an oversized piece of wood and cutting the molding free – I had to move the rip fence between acts. Which meant I was never going to get my measurements exactly right. And, once the folks at Infinity Cutting Tools set me up with a new router table, well, this wing-mounted router table was unnecessary.

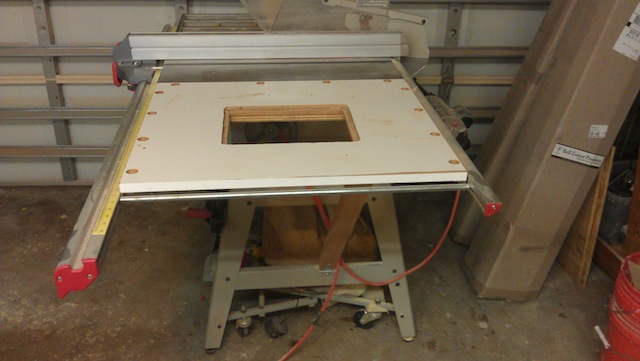
Fortunately, I had saved the original cast iron wing (even though I hadn’t saved the original bolts…), so all I had to do was break out the owner’s manual, buy some new bolts, washers and lock nuts and hook everything up again.

IMAG0318

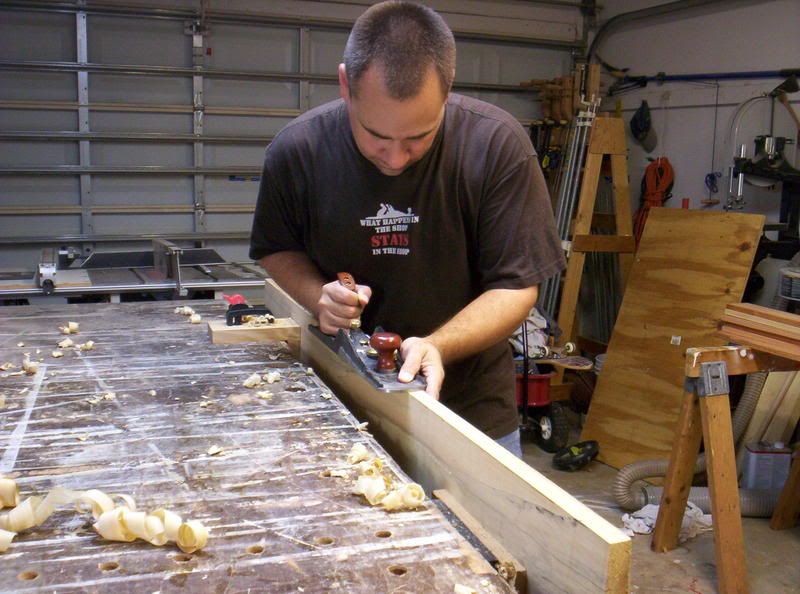
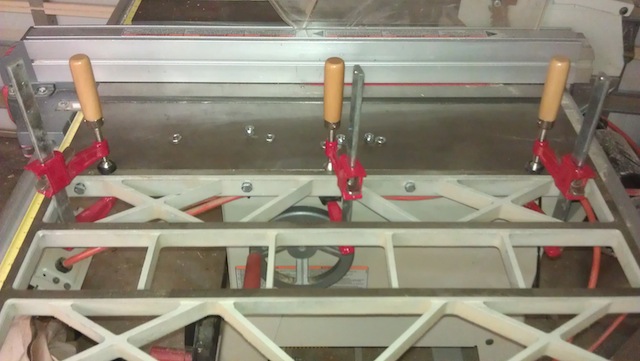
Getting to the table was going to be easy. The saw rolls nicely on the caster system, so I was able to spin it around to get lots of well-lit working space.  As you can see, it fits between the front and back rails, and has a diagonal brace to help support the weight of the router, table and work on it. The brace was going to have to go first.

The support

Since I had no earthly idea how I was going to get a diagonal brace into the space, I mounted it with a pair of T-hinges between the stand and a support block I had glued to the bottom side of the table with epoxy. Sure, it’s probably not the best idea, but it worked for nearly a decade.  That was just a simple matter of unbolting it from the stand and unscrewing from the bottom of the support block.

The steel bar glints beside the table

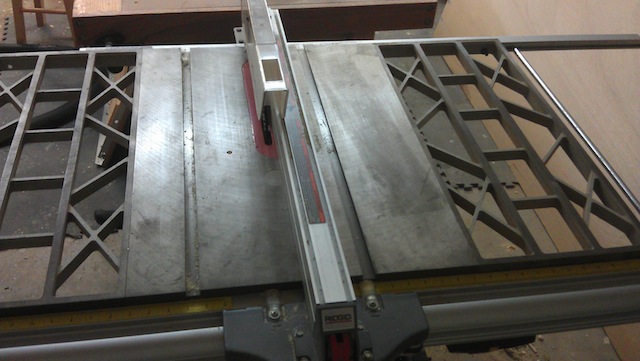
From there, I had to remove a round steel spreader bar that adds support to the rails. This was easy to do with an allen wrench. I was very careful to not lose the clips that held the bar in the tracks of the front and back fences.  Then, it was a simple job to unbolt the carriage bolts that held the table to the rails and the table to the saw, and slide the whole assembly off the rails. It took a little jiggling, but it worked.

While I was in there, I took the opportunity to replace a broken wire tie that allowed the power and motor cables to hang loose in the back of the saw. A wire zip tie was all that was required.  I also gave the retaining screws on the two hand wheels a quick turn to tighten them while I was there. I then installed the bolts into the wing and slid the assembly into the rails until it was snug to the saw’s body.

Clamped into place

The instructions in the manual said to use a set of clamps to hold the wing flush to the saw table, which I did. I put the lock nuts on the back of the bolts and tightened everything into place. This was much easier than I had imagined. I slid the steel spreader bar into place and put the end caps back on the front and back rail. There, good as new…

The wing, back like before

While I was down there, I noticed that the velcro strip for the  canvas dust collector bag I had put on the saw failed to hold in the dusty environment. I am thinking about finding a new way to hold that bag onto the saw to help contain the dust it generates. But, that’s another post for an other day…


Quick Poll

Regrets. I’ve had a few, but then again, too few to mention…

Francis Albert Sinatra...

Right. You can tell that Sinatra was not a woodworker. I know, because I have a bunch of tools in my shop that I regret buying. Whether it was the spring-loaded corner chisel thingamabob that Norm used all the time, or the Freud router with the proprietary base that I can’t use standard guide bushings on, I have my share of mutts out the shop that should have never gotten there in the first place.

For today’s poll, give us an idea of how many tool purchases you have regretted over the years. Maybe you are batting 1.000 and have never picked up a dog, or you should start consulting with more seasoned tool purchasers to ensure you get usable items, we want to know. And, if you have a great story about some tool that you regret with your entire being, be sure to put that into the comments. We would love to commiserate with you…


Link of the week

Chief Woodworking’s wood movement page

As I had written on Wednesday, I am building a trophy case for a friend’s daughter. They live in parched Yuma, Arizona, while my shop is here in soggy Tampa, Florida.  So, how much will the boards in my project shrink when it arrives at its new environment?

Wood that has moved

Fortunately, there are resources like today’s link of the week that can help. Chief Woodworking’s blog has some interesting information on why wood moves when humidity changes, how different cuts of wood (quartersawn vs. flatsawn) react to these changes and a calculator to determine how much a particular board will move when the humidity changes.

Now, I will be able to stack the deck in my favor. I hope.


Junior Achievement

So, I have this friend Kevin. He and I were both instructors up in Emmitsburg, Maryland last year at the Emergency Management Institute. Over the past year, we have stayed in touch, using Facebook, e-mail and other methods. And, over that time, we have talked about our careers and our families.

Kevin's daughter in the pool

One thing I discovered is that his daughter is quite the gifted swimmer. In fact, she continues to push records for her age group, and she is racking up quite the collection of ribbons, trophies and medals.

Which means, of course, she needs someplace to display these things.  Now, I  think this could be an awesome project to undertake. In fact, I am sketching out a wall-hanging design that will have space above and below for the medals and ribbons, and some shelves for the trophies in the middle. Yes, this is how I ‘SketchUp’ my projects…

a rough sketch of the case

OK, it’s kinda rough, but that’s OK.  You can see my trophy at the top. The ribbons at the bottom are hanging from a rod supported between the two sides. Pretty easy design.

The only problem, Kevin lives in Yuma, Arizona. Yeah. About as dry as it is humid here in the Tampa Bay area. It’s a place I hear that ice cubes will evaporate even when in your freezer…

Ahhh, Yuma

This means that more than ever I am going to have to plan for changes in humidity in the wood I will be working with. As you may recall from a wood movement experiment I conducted a few years ago, the results were pretty striking.

I am going to have to find a species of wood that won’t move a lot with the changes. And, whatever that wood may be, I will be looking for some quarter sawn  boards to help reduce the propensity to contract once the wood hits its new environment.

And, of course, I will have to do a careful job of finishing to reduce the speed of the moisture exchange between the environment and the wood in the project.  I will even have Kevin buy the glass for the front of the case after it has had a chance to acclimate.

Now, let’s see what we come up with.


Link of the week

Andy Chidwick teaches a new generation

So, what has woodworking coach and mentor Andy Chidwick been up to? Well, he’s only been teaching some members of the next generation of woodworkers in his shop together with Salem, Oregon shop teacher Dan Mattson.

In many ways, this program is not just teaching woodworking – it’s also helping to get at-risk kids looking forward to a more successful future…

One of the greatest challenges faced by this teaching team was their lack of interest in this subject and getting the students to see beyond the now to realize what kind of industry skills they could develop. Through hands-on instruction, a healthy dose of competition and the very real possibility that they may lose their space in the program if they chose not to focus on what was being done has already developed a sense of pride in each of these students.

Read along with Andy and company as they do their life-changing work.