All posts by Tom

I'm the guy who writes the blog...

Link of the week

Rough Cut: Woodworking with Tommy Mac

A few years ago, shortly after Norm Abram hung up his tool belt from the New Yankee Workshop, a young woodworker with a distinct New England accent debuted a new woodworking show on PBS. It was Tommy MacDonald, and in the past three year, he has entertained and informed woodworkers with a variety of projects covering the basics all the way through more advanced techniques.

Tommy MacDonald from Rough Cut

This site features a listing of the projects he has tackled, some basic skill-building techniques, a peek behind the scenes of the productions and a whole lot more. If you are looking for a whole lot more background on the show, this is definitely the site to visit.


A dust gulper

Dust. Ugh. Sawdust is one of those things you have to deal with in a woodworking shop. One of the biggest contributors to the sawdust load is my contractor’s saw. I bought it about a decade ago, back in the days of open stand contractor’s saws with splitters. It’s been a good performer, but the dust that pours out of the bottom of the saw has always bothered me.

A Dust Cutter canvas bag

To help curb this problem, I have turned to several different types of solutions. A plastic plate that sat on top of the saw’s stand. It was a pain in the rear to get the dust collector hose to it. I went with the canvas bag type of setup, but that never held in place.

No, what I wanted was a hopper. With a dust fitting I could plug the hose into. That was sloped so the dust would migrate down to the outlet. But, how to make one?

I fished around on the Internet and saw lots of crazy complicated plans, but none of them did it for me. I broke out a sheet of graph paper and started figuring out an idea.  It wasn’t as tough as I thought it was going to be.

Taping the inside of the hopper

What I drew up was a five-part hopper. The first part was a plywood deck that had a hole cut into it. This serves as a frame for the rest of the hopper to fit onto. These pieces were complicated, but pretty simple to cut. The wall that holds the dust flange is attached to is 9 inches tall by 12 inches wide where it attaches to the top at a right angle.  This tapers down to 6 inches at the bottom. Before I cut everything out to size, I used a fly cutter on my drill press to cut a 4 inch diameter hole on this piece of the screw on dust flange.

A look into the mouth of the collector

The sloped piece that connects the deck to the flange piece took some finagling, but by using a little bit of scrap wood, I was able to determine the angles that both ends needed to be beveled at. Once I had them all cut to size, I simply glued and bradded into place.

The sides were cut out of some scrap 1/4″ plywood, and were very easy to cut by simply holding them up to sides and tracing them. More glue and brads, and they were ready.

Foil tape seals it up

The fun came in when I started using foil duct tape to make everything airtight. That stuff is sweet. If my car’s bumper gets damaged, I’ll just use this metal on a roll to make the whole thing look good again. The beauty about this stuff is that it sticks like nobody’s business, and really seals the thing up well.

I was able to hold it against the bottom of the saw’s stand, and then screw it through four conveniently placed holes at the top of the legs. I used some shop made wooden washers to bridge the width of the hole so the screw heads don’t slip through the hole.

The saw with the flange

As you can see, I have the dust flange facing the right side of the saw as you face it. This keeps it out of the way of the rip fence and miter fence storage, and out of the way of the foot pedal for the lift. It also happens to be the side that the dust collector is stationed to in my shop, so I don’t have to step over the hose.

By the time that I got this done, I was too tired to try it out. But, judging from some tests I have done, it should serve me well for a while.


Got this one pegged

Once people in your circles start to know you woodwork, from time to time, you get requests for some small jobs. Can I cut some things down to size? Can I drill a few holes into a board?  And, can I stretch the length of a piece of butcher block to fit a particular dimension in a new kitchen?

That last request came from a good friend who was the proud recipient of chunk of quartersawn white oak butcher block that was a grand total of 1 inch too short for the dedicated place. So, basically, I had to add a pair of strips to the sides. Yes, they had to go cross-grain, but the saving grace about this block is that the strips are quartersawn, which should limit the amount of cross-grain expansion.

The block ready to get the edges

So, I cut the strips from a larger piece and milled it straight and true – making half-inch thick strips.  I set four clamps up under the piece and glued the pieces in place with some Gorilla Glue yellow glue. It is a II rated yellow glue, which should be more than sufficient for kitchen use.

Miller Dowels

I wanted to use something else besides just the glue to hold the strips to the edge. I thought about just using screws, but I wanted to try something different – maybe just wood. I had always looked at the Miller Dowel system for joinery and wondered just how well they worked. Well, gosh, this would be the time to pick up a set and use it.

The Miller Dowel 1x bit

The set works around two components. First, there is a special stepped bit that works closely with the dowels in the set.

A Miller dowel

Those dowels are really kind of interesting.  They are tapered, and there is a section that has a set of grooves cut into it. They come in a variety of species, and I went with the birch. That’s what they had at the store.

The system works very easily. With the piece in the clamps, I measured where I wanted to put the holes, then I chucked the bit into my drill. The bit fed nicely and cut quickly, leaving me with six holes ready to go.  The instructions said to smear glue on the ridged part, and I took that to heart, putting enough on to coat the dowel.

Glued dowel


The next step was to tap the dowels into the holes once they were glued up. They didn’t push in too deeply, with finger pressure, but with a few taps of my hammer, they set right to the bottom. There was no play at all. It was good….

The end of the dowel

Once the glue dried, it was a simple matter to trim the dowels flush with the board, then to sand everything flush.  I took the time to plane the strips down to size and then sand the edges flush with the board. Once that was done, it was easy to run the random orbit sander over the surface of the butcher block to get everything nice and smooth.

The final product...

The end result? Gosh, I hope he likes it!


Quick Poll

Most woodworking tools do their jobs through the use of very sharp edges.  Woodworkers can spend countless hours grinding and honing their tools to a razor sharp edge.  Manufacturers can get a keen edge on carbide router bit cutters or table saw blades…

A rasp can handle some serious curves

And, then there are rasps and files.  These oddballs don’t slice the wood they are cutting – they grate the wood off much in the same way you might grate some parmigiano reggiano onto your pasta or into your risotto.

There are times when the only tool that can do the job is a rasp or a file, yet they aren’t normally the first tools a woodworker will purchase.

This week, we want to know what you think about files and rasps…


Link of the week

Oregon Woodworker: The Nicholson Bench Build

Workbenches have been a hot topic as of late with woodworkers. And, one of the most popular bench designs that has been built is the Roubo bench, with it’s thick top, through mortised legs and stout dimensions.

But, another design that should be considered is the English style – or Nicholson – bench. It’s a piece of engineering genius, giving plenty of clamping and working area.

Andy Margeson's finished Nicholson Bench

One of the best – and best documented – resources was put together by Andy Margeson. He took the time to show us how he designed, built and photographed the bench from start to finish. And, boy, what a finish!


It was 20 years ago today…

And, no, Sgt. Pepper had absolutely nothing to do with today’s post. I just thought it was a cool title for what I am writing.

Sgt. Pepper's Lonely Hearts Club BandYou see, it was 20 years ago today – at 11:30 a.m. – that Rhonda and I said, “I do” at a little old Catholic chapel in Bowie, Maryland.

Shortly after the big moment on the big day

Sometimes, I feel so sorry for her. Back on that day, did she know when we took our vows that she was going to one day be a workshop widow?  A blog widow? A woodworking show or woodworking store widow?

Did she know she was going to be a sounding board for woodworking designs? A trusted adviser, expected to know the benefits of a dual-base router vs. a pair of dedicated fixed and plunge base routers? A progress evaluator as I would hold up semi-complete sub assemblies of projects and ask for her unabashed enthusiasm?

Did she know that one day she was going to be angry at me for tracking sawdust into the house?  That she would be yelling at me to stop running the power tools after 10 p.m. so she could get some sleep on a work night? That she was going to be holding ice on a kickback injury or gauze on a nasty cut I suffered in the shop?

Did she know that she was going to hold back some snickers while I showed her my first few pathetic projects? That I was going to present those projects to her family as holiday presents and she was going to hope that they liked them? That she would be biting her fingernails in anxiety as she wondered if the finish would cure in time for them to be given as presents?

Rhonda taking to the shop

Did she know that her future sons were going to get snagged and sent out into the shop to help with the grunt work? That she was going to be out in the shop one day herself?

I bet she didn’t, but I am also willing to bet that even with all of the struggles, miscommunications and successes, that she wouldn’t trade the experience for anything.

Rhonda, thank you for being my supporter, my cheerleader and my biggest fan for the past 13 years as a woodworker. And, happy anniversary to you!


Shankapotomus

Summertime, and the living is easy. Everyone is headed outside to take in some glorious sunshine and enjoy the outdoor activities we look forward to. A trip to the mountains. Sand between your toes on the beach. Picnics in the park.

Getting into the swing

Oh, and some folks like to go out and enjoy a round or two of golf. While I have only ever played golf once (no, you don’t want to know what my handicap is), there are lots of people who play a whole lot more frequently. From what I understand, it’s a great way to get outdoors, be social, and spend hours looking for a tiny white ball you just smacked with a club.

Every player is looking for the perfect shot, but I’m pretty sure I have never hit one. My mantra on that warm spring day was that if it went left, it was a hook; if it went right, it was a slice; and if it went straight, it was a miracle. The other shot I made a lot was the shank.

Shank happens

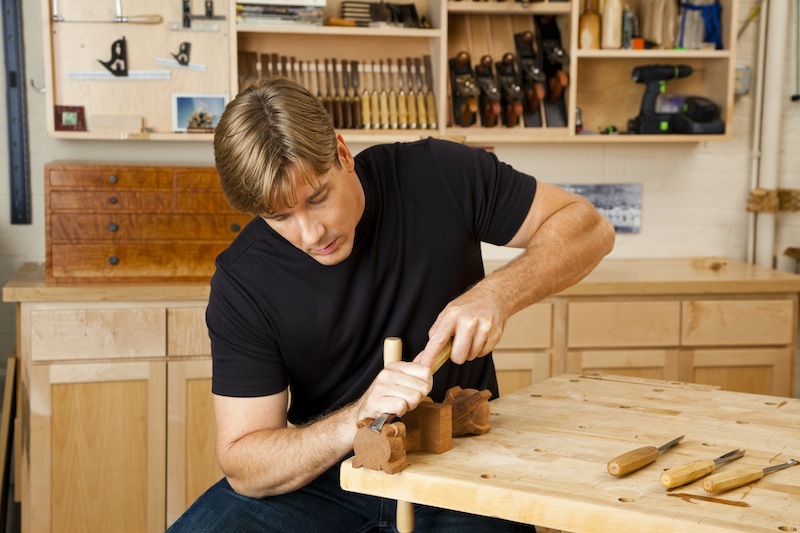
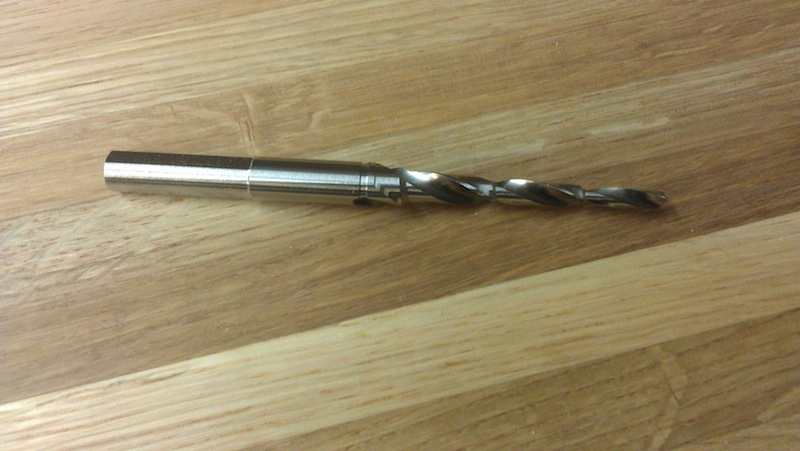
I’m not sure why it was called a shank, but it didn’t look anything like the shanks I see on my router bits. Now, those babies are sweet looking – precision ground, perfectly round and made of sturdy steel. Sure, the cutters of the bit get all the glory, but the shank is equally as important to the health and well being of your router bit, and deserves a little bit of love from time to time.

A router shank

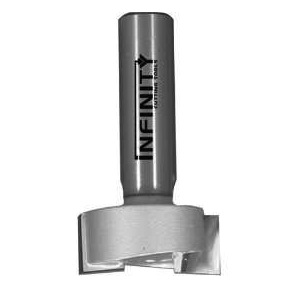
That’s what Kurt Raschke – the craftsman in residence at Infinity Cutting Tools – told me at a recent router basics class. The key thing to remember is that the shank is precision milled to hit an exact dimension. Yes, a 1/2″ shank is 1/2″ diameter, and a 1/4″ is a 1/4″.

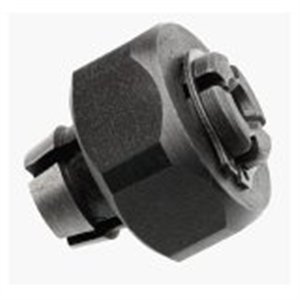
The reason they have to be so precise is that the sit in a collet, not a chuck, as you would see in a drill press. The collet can be smaller and lighter than a geared chuck, has tremendous holding power and is automatically self-centering. The downside is – of course – the collet can’t really adjust to different sized bit shanks. Keeping those tolerances tight is critical to getting a good fit.

A router collet

Fortunately, keeping router shanks – and collets – in good shape is a simple matter of maintenance. First of all, every so often, you should inspect your bits. Is there any sign of wear? Burrs and grooves worn into router shanks could be a sign that the collet on your router may need to be replaced. Try not to sand them out, because that will affect the dimension of your shank, which can lead to pretty disastrous results. Can you say ‘bit slippage’?

You may want to wipe down the shanks from time to time with whatever you are using to clean pitch build up off the cutters to ensure debris or residues are cleaned off the shanks. Be sure to avoid using anything slippery on the bit, for obvious reasons.

It’s also a good idea to check your collet from time to time. After numerous bit changes, metal fatigue can begin to settle in, making it more difficult to tighten down your collet on the bit. Your first reaction will be to crank down heavily on the collet to get things snug, but that just compounds the problem you had in the first place. Spare collets for popular router brands can be found easily online. Some less-expensive routers may have a permanently attached collet on their models. In this case, a new router may be in your future.

brushing out a collet

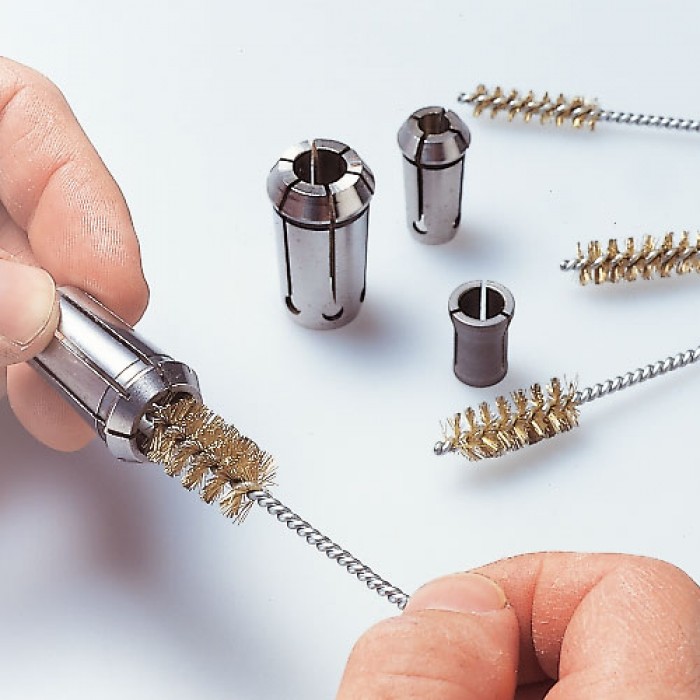
Also, be sure to give the collet a good wipe out on occasion. This helps remove any residue that gets in there, extending the life of the collet a bit. A great tool to clean out the bits can be found at a gun shop. Pick up a .25 brush for your quarter inch collets and a .50 for your half inch ones. The soft metal of the brush is designed to be gentle on the rifling of a weapon, and it will also do a good job on a collet.

When you insert the bit into the collet, push it in until at least 2/3 of the shank is inside, or push the shank until it bottoms out, and then pull it up a fraction of an inch – maybe 1/16 or 1/8, to give the bit some room to move as the collet is tightened. You don’t want to leave the bit bottomed out as you tighten things up, because the tightening action will pull the bit closer to the router.

tighten that bit

Also, just be sure to snug the bit up until it’s hand tight. If you have to crank down on the collet to get it to tighten up, you are looking at a replacement,, and you are making bit removal a nightmare later.

While they aren’t the prettiest or highest-tech part of the router bit, treating their shanks with some respect will keep your cuts true things of beauty.