
Once people in your circles start to know you woodwork, from time to time, you get requests for some small jobs. Can I cut some things down to size? Can I drill a few holes into a board? And, can I stretch the length of a piece of butcher block to fit a particular dimension in a new kitchen?
That last request came from a good friend who was the proud recipient of chunk of quartersawn white oak butcher block that was a grand total of 1 inch too short for the dedicated place. So, basically, I had to add a pair of strips to the sides. Yes, they had to go cross-grain, but the saving grace about this block is that the strips are quartersawn, which should limit the amount of cross-grain expansion.
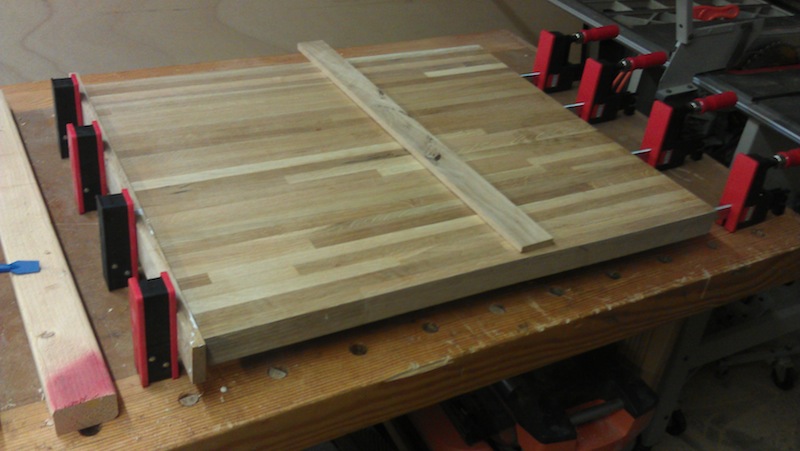
So, I cut the strips from a larger piece and milled it straight and true – making half-inch thick strips. I set four clamps up under the piece and glued the pieces in place with some Gorilla Glue yellow glue. It is a II rated yellow glue, which should be more than sufficient for kitchen use.
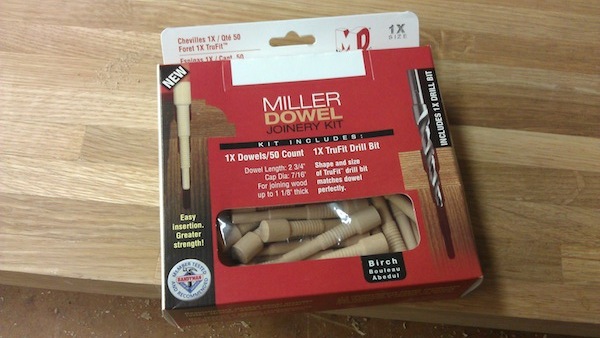
I wanted to use something else besides just the glue to hold the strips to the edge. I thought about just using screws, but I wanted to try something different – maybe just wood. I had always looked at the Miller Dowel system for joinery and wondered just how well they worked. Well, gosh, this would be the time to pick up a set and use it.
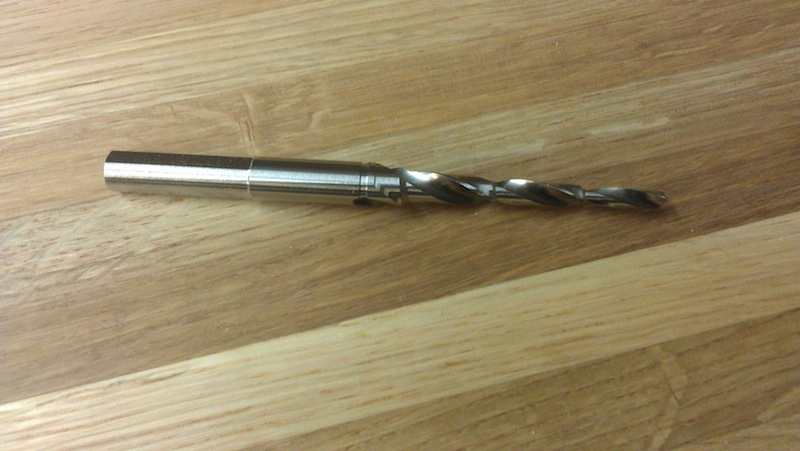
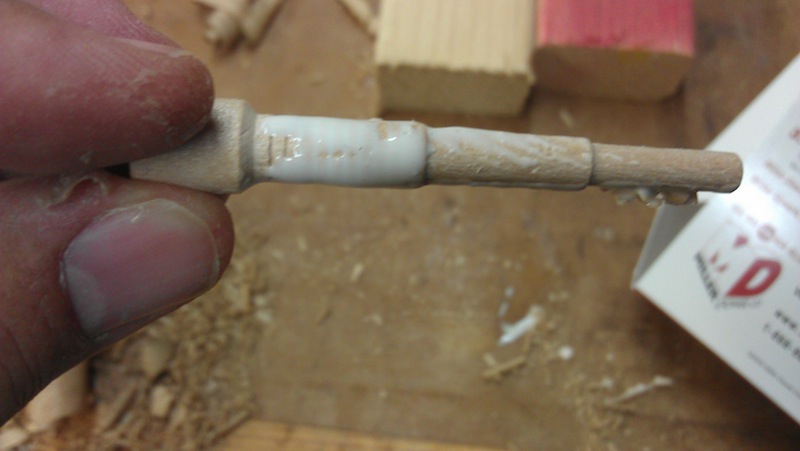
The set works around two components. First, there is a special stepped bit that works closely with the dowels in the set.
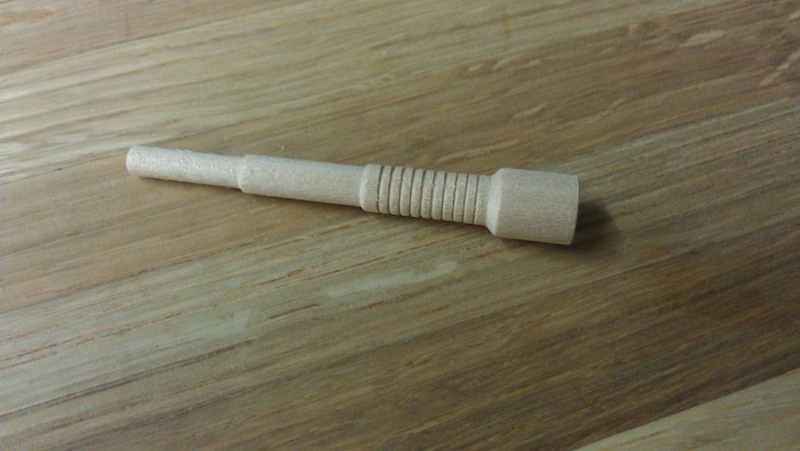
Those dowels are really kind of interesting. They are tapered, and there is a section that has a set of grooves cut into it. They come in a variety of species, and I went with the birch. That’s what they had at the store.
The system works very easily. With the piece in the clamps, I measured where I wanted to put the holes, then I chucked the bit into my drill. The bit fed nicely and cut quickly, leaving me with six holes ready to go. The instructions said to smear glue on the ridged part, and I took that to heart, putting enough on to coat the dowel.
The next step was to tap the dowels into the holes once they were glued up. They didn’t push in too deeply, with finger pressure, but with a few taps of my hammer, they set right to the bottom. There was no play at all. It was good….
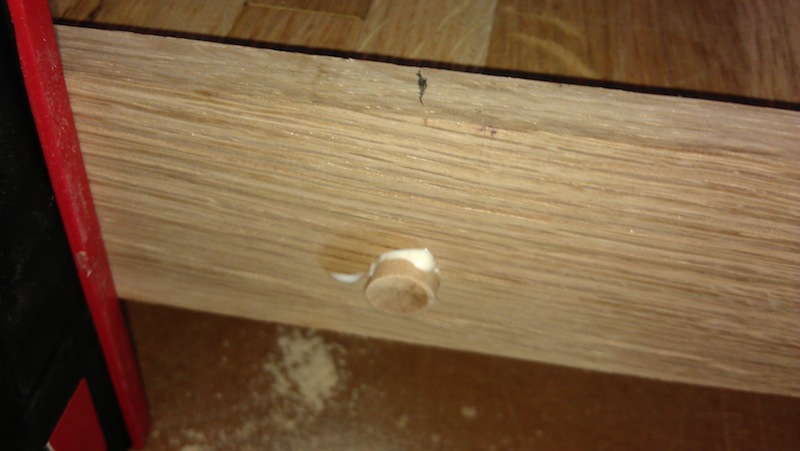
Once the glue dried, it was a simple matter to trim the dowels flush with the board, then to sand everything flush. I took the time to plane the strips down to size and then sand the edges flush with the board. Once that was done, it was easy to run the random orbit sander over the surface of the butcher block to get everything nice and smooth.
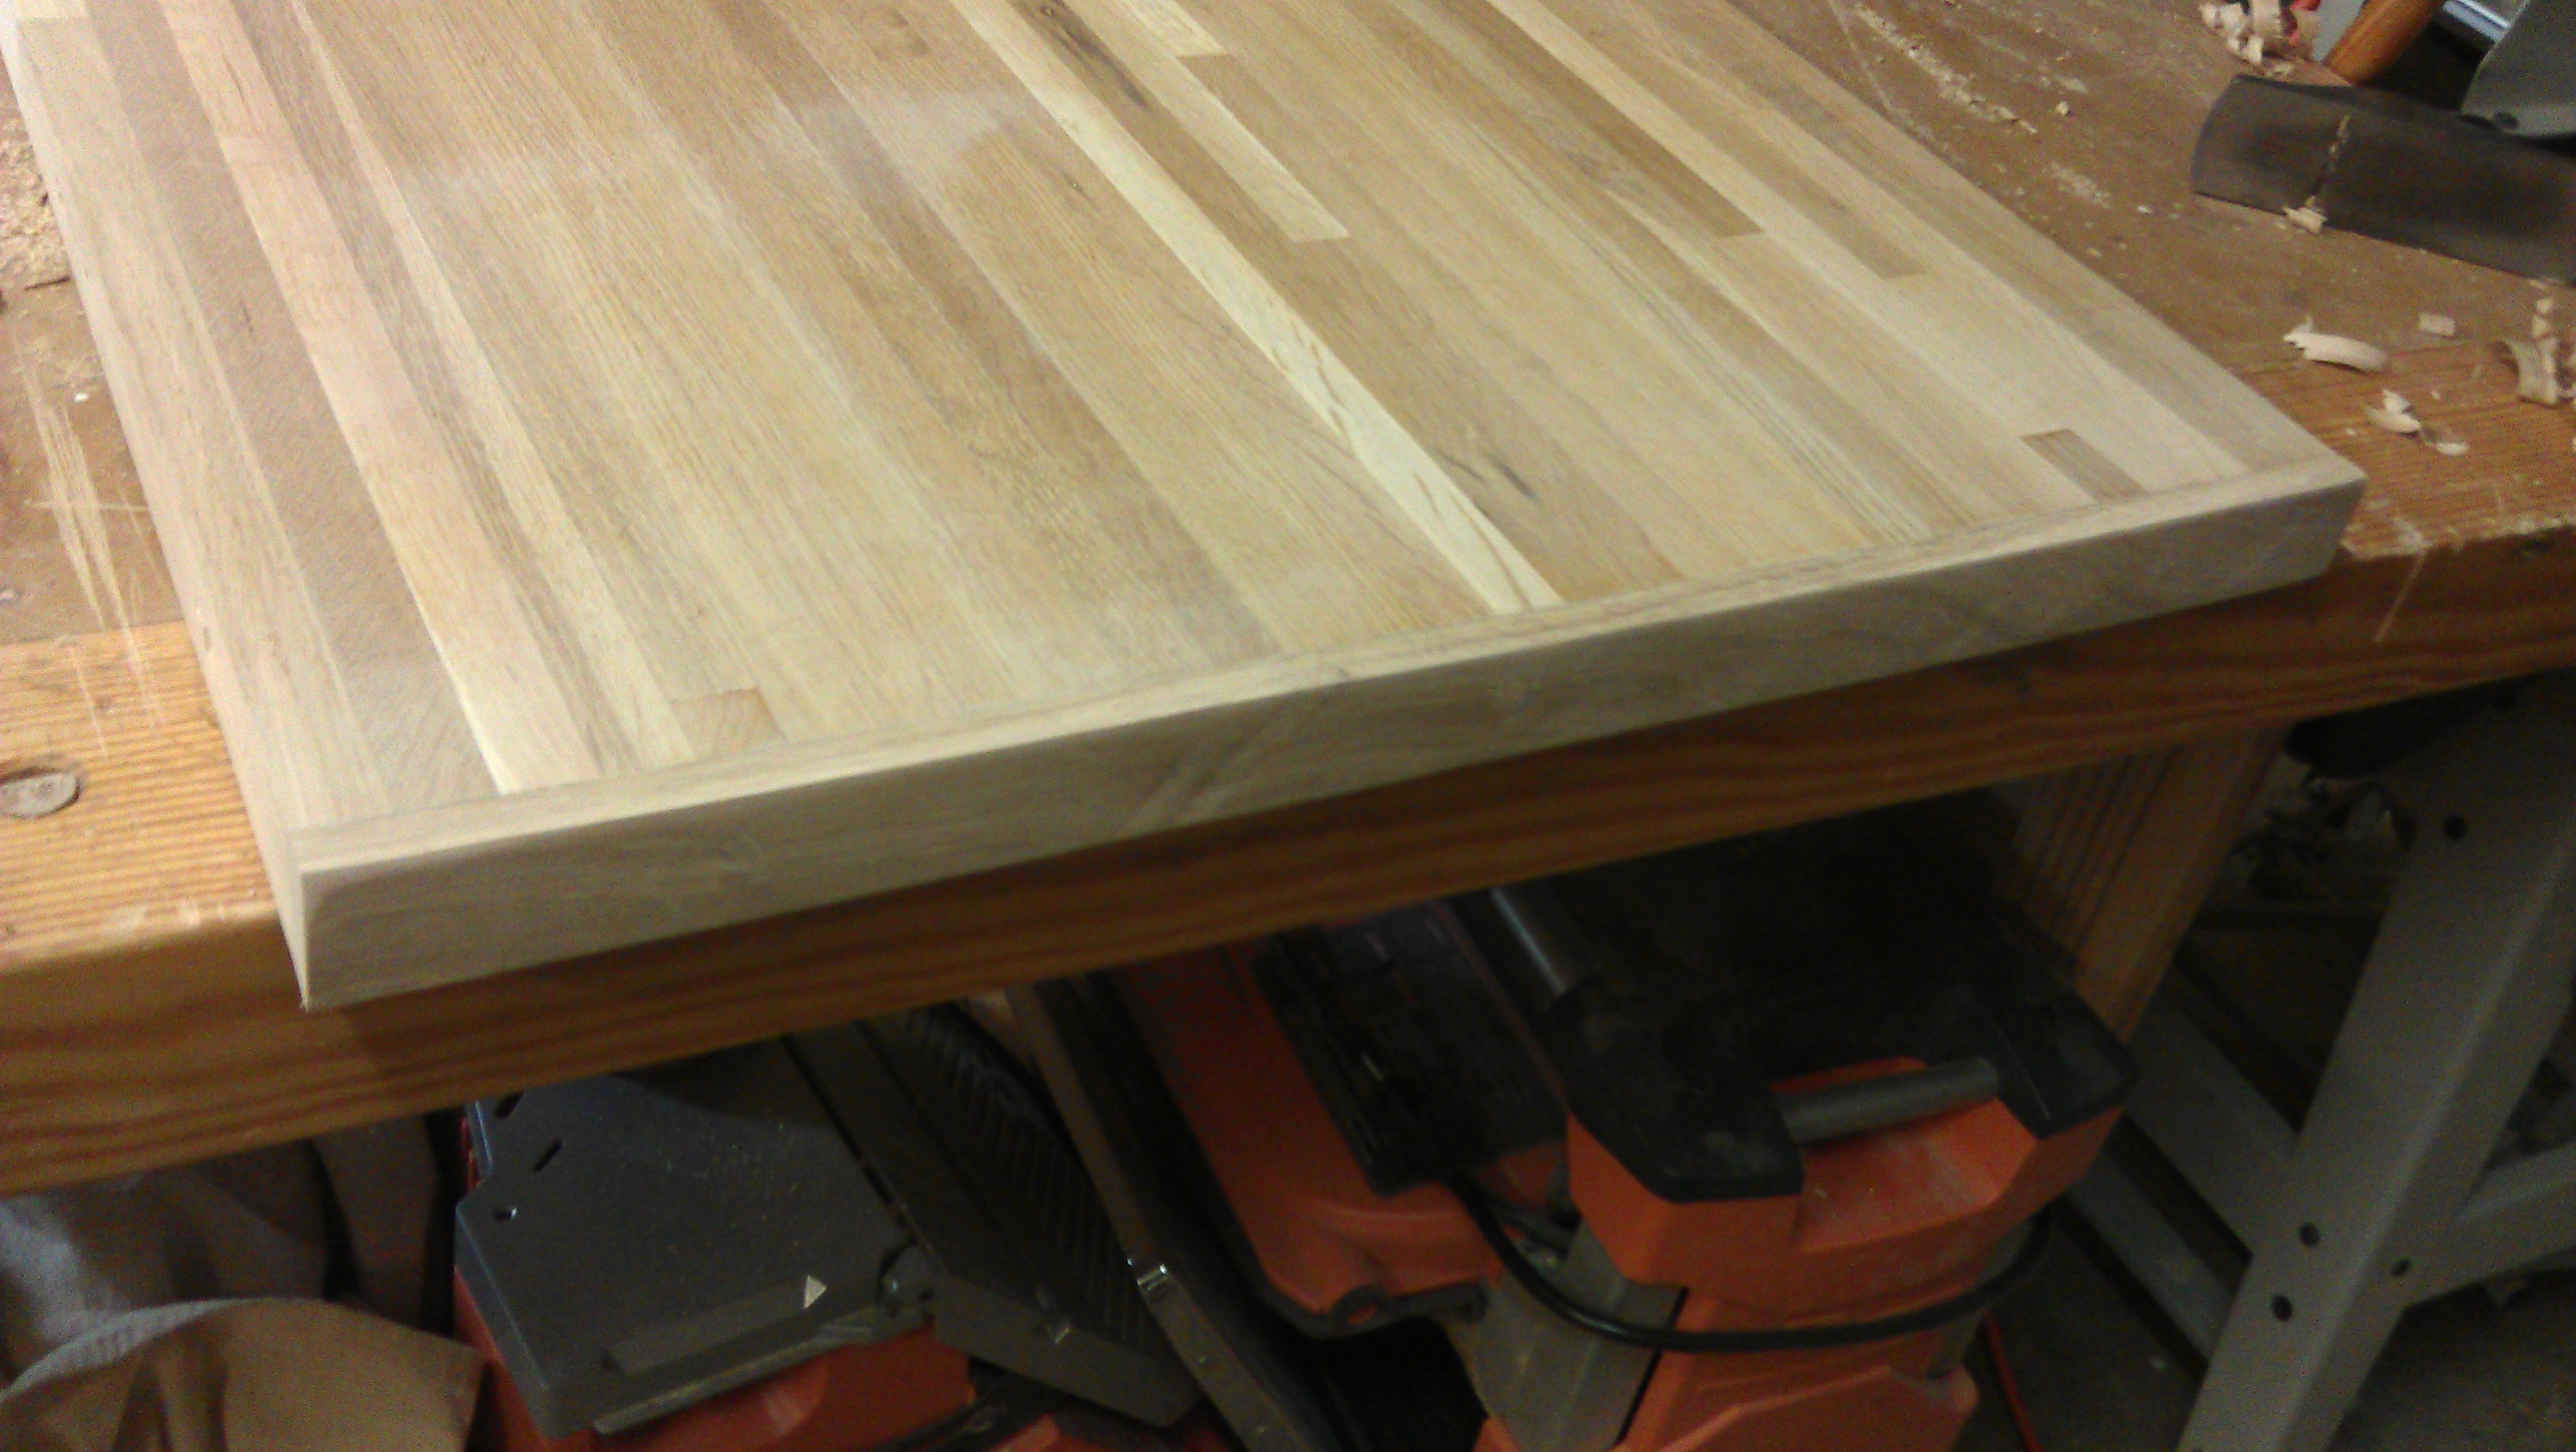
The end result? Gosh, I hope he likes it!
Nice job Tom.
It looks like it was designed that way.
A little disappointed that Miller Dowel didn’t sponsor up and donate a bunch of stuff to the blog though.
There’s room there with Bell, Infinity, Laguna, Bora & Tormek.
Maybe after seeing this nice job….. 🙂
Hey, who do you think I am? Marc Spagnuolo? 🙂
Marc’s sponsors have sponsors… 😉
Tom, I used Miller Dowels to build my woodworking table. There are no metal fasteners any where close to where they will be sharpened blades. They come in a variety of sizes and woods, I have never had one fail me either.
Nice blog entry showing folks something less well known.
cheers Ian W