Look at this picture.

Yup. Rust rings. From cold cans. On my table saw…
How scary is this picture?
[poll id=”144″]

What is modern as it applies to furniture?

Basically, it’s a design movement that started in the mid 20th century and broke with traditional furniture forms and sought to explore new materials. Charles and Ray Eames, a couple who worked as architects, film makers and furniture designers, stretched designed elements to give a radical new look to existing furniture forms.
This online gallery shows some of the radical design forms they helped bring to reality. Definitely poke around on this site to check out some of the more interesting furniture forms they worked on.
Can it be? Just a few weeks ago, flush from my return from Woodworking in America, I proclaimed my love for a new set of old English chisels…
They were beautiful… made in the 1950s… with curvaceous boxwood handles and legendary antique steel. These were going to be the Mack Daddy… the be all and end all of my hand tool collection. I envisioned myself in chisel Valhalla, able to slay my hand tool working demons.

It was easy to fall in love with them. They were on the table, still in their original box. My hand was drawn to them. I imagined the former owners working with them, creating perfectly pared dovetails on an heirloom project.
I was grinning from ear to ear flying back from Cincinnati, trophies safely stashed in my check on bag. I could almost imagine the TSA folks checking through my bag, stopping when they located my beautiful set of chisels to admire and fight off their desire to covet them for themselves.
The next day, after that pesky work thing was out of the way, I raced back to the shop with visions of freshly-honed chisel bevels dancing in my head. As soon as I could get changed into some dirty work clothes, I dashed off to the shop to retrieve my diamond stones and strop to begin the sharpening process.
Of course, I had to start with the backs. Can’t really sharpen chisels without ensuring the backs are nice and flat, right?

Well, that’s when I discovered a heartbreaking surprise. These chisels were – how shall I put it – not flat. Not by a long sight. They were plumb out of whack. I colored the back of the blades with a permanent marker and ground some, then checked my progress. My fears were confirmed.
Now, I can understand that decades ago, technology wasn’t quite what it is today. But, wow, these things were curved. I was rubbing the back against my coarse diamond stone to discover that the back of the blade only touched at the tip and right near the handle. I double – even triple checked to ensure I wasn’t trying to grind away the bolster, but no. The blade was lying as flat as I could make it…
I e-mailed Patrick Leach of Superior Tool Works to ensure I wasn’t seeing things. He and I had an exchange about the chisels and encouraged me to keep at it.
But, wow, those chisels were really out of whack.
I want to say this about Patrick and Superior Tool Works – he gets his hands one some sweet old tools, and he is a stand up guy… On his site, he writes:
Old tools have been an obsession now for some sixteen years, and this source has been selling old tools through the internet longer than anyone else. When you buy old tools from The Superior Works, you not only receive quality goods at fair prices, but you also get unlimited “road service” in their proper usage, tips for making them do stuff you might not imagine, advice on which is the correct or better tool for the job you have in mind, historical perspective of their design and use, construction advice from architecture to cabinetmaking (there isn’t just an anonymous merchant looking to part you from your money behind this screenful of text – much of this stuff is actually used here) and, of course, a 100% satisfaction guarantee.
Every word the man wrote is true. After some more work and a few more e-mails, I sent the chisels back to Patrick and received a prompt and courteous refund. The next time I go shopping for old tools, I’m checking with him first.
So, what now? Well, I have a birthday coming up, and the holiday season is right around the corner. Maybe I’ll drop a few hints to the Jolly Old Elf about finding a new set of chisels. Until then, I have decided to drop back and punt…
 blue chips")
I broke out my set of Marples Blue Chip chisels I have been using and started honing them on the equipment I already had out. I put a sweet edge on them, so nice they can pare end grain maple. That’s sharp. I’ll just have to keep an eye on them and be sure to hone the edges when they start to drag.
Besides, there’s lots of wood out there that’s waiting to get built into projects!
So, when last we left the rolling plane till project, I had just finished the outer shell of the case and just had to put in the dividers to hold the plane arsenal.
That’s just what I did. I had to choose a material to use for the dividers, and I went for more plywood. You must be thinking, “is there any end to the scraps coming out of Tom’s shop?” but WOW, a cabinet job leaves you with a bunch of ’em! I ripped larger pieces of 3/4″ plywood down to 1/2″ wide slats and then crosscut them so they would fit the length of the case. Once that was done, I had to start arranging planes to fit in the case.
OK, my bevel up jointer and my transitional fore plane took up some serious space. So, I had to run them parallel with the length of the case. They were also different widths, so I had to spend some time trying to match widths of planes as closely as possible. I discovered that my shop made bubinga plane was very close to the width of the transitional fore plane, so those babies went together. The old No. 5 jack (I’m still looking for a replacement cap iron), while thinner than the jointer, was a nice snug fit when I added a scrap of a slat.

After I laid the planes nose to tail, I glued the backs of the slats and bradded them into place. I’m sure I could have used a more sophisticated method of attaching them, but hey, I’m trying to get this done, alright?
Once I had the longer planes secured, I discovered that if I placed my longest shorter planes perpendicular to the flow of the first two rows, they would fit beautifully… YES! So, I measured out the slats and made repetitive cuts using a stop on the table saw to make a stack of sticks. After that, it was a piece of cake… put the next plane down, glue and brad the stick tight to the plane’s sole, then move to the next. I took the planes out ever so many sticks were attached to wipe any excess glue that may have leaked out from the box and the plane soles.
Then came the moment of truth. Could I stand the plane till up on its wheels to cart it around without the planes falling out?
I had spent a lot of time thinking this one over. Leather straps attached at each slat to wrap over the handles of each plane? Maybe a cut up bungie cord?

Turns out I didn’t have to do anything. Because the slats were attached tightly to the plane soles, they stuck firmly in their slots while I wheeled the till around the shop floor. I may still add something later, but for now, they rock.
An even tougher test was yet to come.. could I stand the till upright against the wall behind my side bench without having them all clatter out of their holders? To help stack the odds in my favor, I screwed at 1″ thick strip of maple from my scrap bucket to the plywood top to prevent the till from dropping to a full 90 degrees – it would stay tipped back just a little bit to help hold the planes in place. I hoisted the rather heavy case up onto the side bench and lifted it into place so the front edge sat on the maple strip. I eased the till back against the wall… BINGO…
The planes held their spots easily… and when I go to pull a plane out of its little cubby, it comes out smoothly. And, when it’s time to return it to its home, it slips right back into place. No fuss, no muss…
Since I had made the plane till so deep – probably 1.5″ deeper than it really needed to be, I have plenty of room to slip in a chisel roll and my nylon saw scabbard. This way, when I take these tools to my sons’ schools, I’ll just have to bring the one case.

Of course, with a project like this, it made me take a good hard look at the condition of my planes. And, yes, it was definitely time for me to do some sharpening, which is what I spent the majority of yesterday doing.
But, when you have a project that showcases the planes in your collection like this one, well, you never know when you’ll be asked to bring the iron out to show how well it works!
Woodworkers love to build projects, and few are as necessary or satisfying as those we build for the shop. Workbenches. Tool stands. Jigs and fixtures.
 Tool storage and transporting projects, however, are seen by many as a true sign of craftsmanship. I mean, when you roll up to a job with a boss tool tote or show off your hand crafted tool storage cart, well, now we’re talking.
This week, have you ever built your own tool storage and transport projects, and how’d you do?
[poll id=”143″]
Routers are versatile tools, capable of cutting profiles, joinery and doing other useful tasks. While a hand-held router is useful, mounting it under a table makes it even more useful. But, even with these two options, there are sometimes you may need the bit held a third way – horizontally.

That’s why woodworker Ron Fox has designed this horizontal router table. Using simple MDF and commonly found hardware, you can build this table to get your router into a horizontal position. From there, your router can be used to cut mortises or use a vertical panel raising bit with the wood pressed firmly against a table.
Life in the woodworking blogosphere has been a blast for me. I get the opportunity to write about a subject I have a tremendous passion for, and it gives me a chance to tell each of you how excited I am to be building in the shop.
Blogs such as mine, the Wood Whisperer, the Village Carpenter and Matt’s Basement Workshop have an established track record in the blogging community, and while we – and many other established bloggers – like to shine, it’s always exciting to welcome newer members to the community.
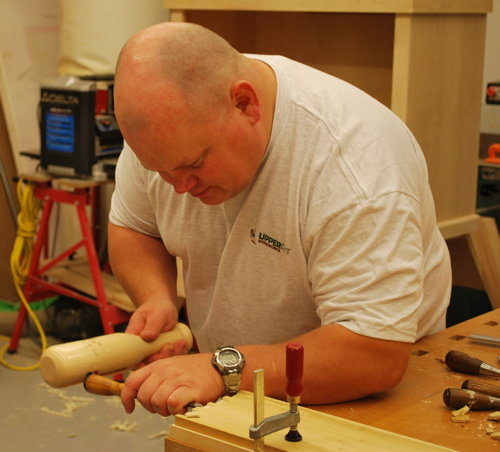
Case in point, I’d like you to meet Matt Gradwohl who runs Upper Cut Woodworks out of Washington state. And, as with many other woodworkers, he got his introduction to the craft at an early age watching his grandfather at work “He was a great inspiration. When I was seven or eight years old I built a wooden sled with orange Hot Wheels tracks for the runners. It was a clever idea but weighed a ton and worked horribly. I painted it with tempera paint that didn’t stand up to the wet snow and when I brought it home I was covered in brown paint. It went straight into the fire pit and I swore like a sailor about that “damn sled.” I wasn’t even ten years old but my mom didn’t punish me for the cusswords, she felt so bad for me and was laughing too hard inside.”
Fortunately, Matt wasn’t stopped by his early failure. Later, he converted part of his closet to a computer desk with the help of his grandfather. “I didn’t want anyone to see that I was a computer geek. My grandfather was the first woodworker to teach me proper handsaw technique.”

Today, Matt builds projects in his 25’ x 20’ shop in suburban Seattle. “I bought this house new and when I moved in I had the walls insulated & painted, the floors epoxied, lots of lighting and outlets installed, and a little gas stove installed for heat. I take most of my time off from my real job in the winter, so it’s great to have a warm and well-lit shop to work in.”
With the Pacific northwest such a heavily forested area, Matt loves to use the local timbers in his projects. “I’ve been to a lot of great places in the U.S. and abroad, and I’m always happy to return home. The most common native woods in Washington are Douglas Fir, Hemlock, Western Red Cedar, and Pine.” However, he’s also receptive to using more classic North American hardwoods such as maple, cherry and walnut. “I really like Walnut and especially enjoy the smell of fresh Walnut plane shavings.”
His shop also features a mix of power and hand tools. “I started out with hand tools, then moved to some power hand tools, and then got some big iron. I would call myself and most of the woodworkers I know ‘hybrid woodworkers’ because we use power tools and we’re actively seeking quality hand tools and learning proper hand tool techniques.”

While still working for software giant Microsoft, Matt is working hard to get his woodworking business off the ground. He has moved from building smaller projects into larger and more complicated ones to satisfy the needs of his clients. “Since starting the business earlier this year my first project was the Thomas Walnut Dresser. That was a great project, turned out well, and the client was very happy. I blogged about that project and recently George Walker posted positive comments about it, so that was very cool. The current projects are a custom maple cabinet for a saltwater fish tank, a modern Wenge buffet, and a set of walnut bases for U.S. Fencing Association trophies.”

And, part of Matt’s business plan is tied in to his blog. “I decided to get started because I wanted to learn and document the steps for starting a woodworking business. There are lots of blogs that cover design, materials, tools, and techniques and I love all of them. I think it is great that woodworkers help each other so much, I think that’s because we’re dedicated to our craft and we don’t really compete for business. So I am going through the process of starting the business and documenting the steps on the blog. Not only do we need to preserve the designs, materials, tools, and techniques, but we need to get our work into homes and that means creating successful businesses. There’s still so much to do and so much to write about, especially as I head into the end of the first year and the taxman comes knocking, so stay tuned.”
Until then, the blog is hungry, always looking to be fed. “Because I want to produce content for the web on a fairly regular schedule, I need to set aside shop time every week and also set aside time to update the blog. Sunday night has been shop night for me and I often post later that night.”
Matt is quick to point out that Upper Cut Woodworks is a long journey for him – someplace for him to head to after retirement. “In the long term, I’ll be retired from Microsoft woodworking full time, with a good set of design, build, and business skills; a great shop and set of paying customers. Who knows, maybe someday I’ll be writing articles for magazines, teaching woodworking in schools or helping tool manufacturers bring better products to market.”
