So, when last we left the rolling plane till project, I had just finished the outer shell of the case and just had to put in the dividers to hold the plane arsenal.
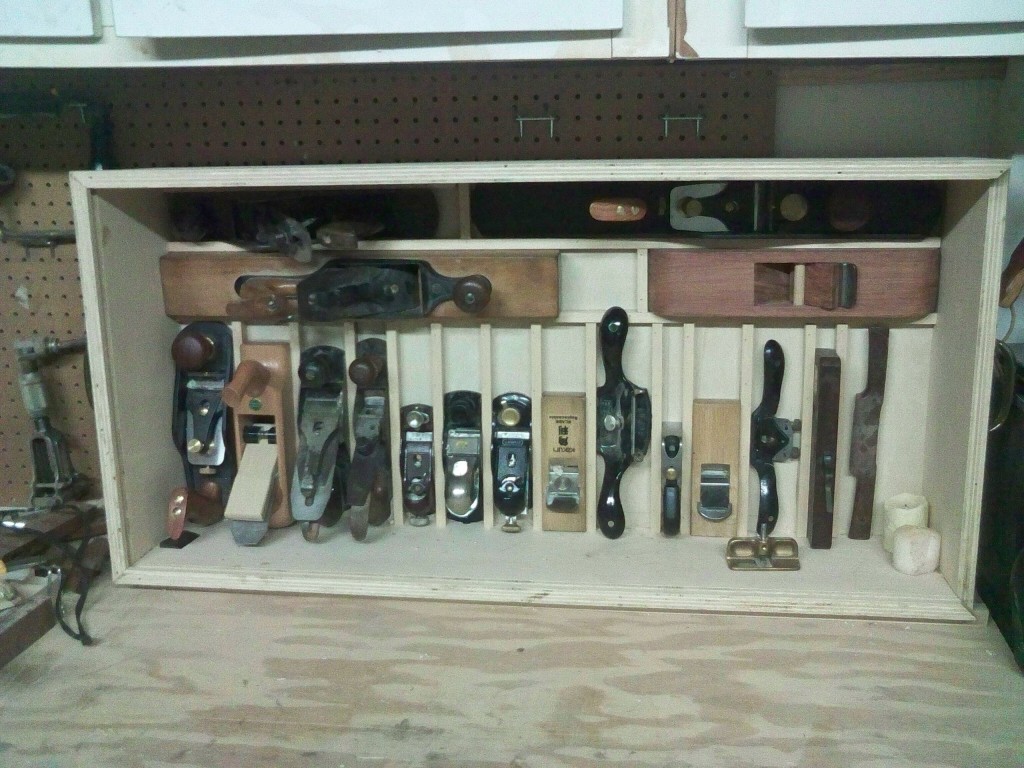
That’s just what I did. I had to choose a material to use for the dividers, and I went for more plywood. You must be thinking, “is there any end to the scraps coming out of Tom’s shop?” but WOW, a cabinet job leaves you with a bunch of ’em! I ripped larger pieces of 3/4″ plywood down to 1/2″ wide slats and then crosscut them so they would fit the length of the case. Once that was done, I had to start arranging planes to fit in the case.
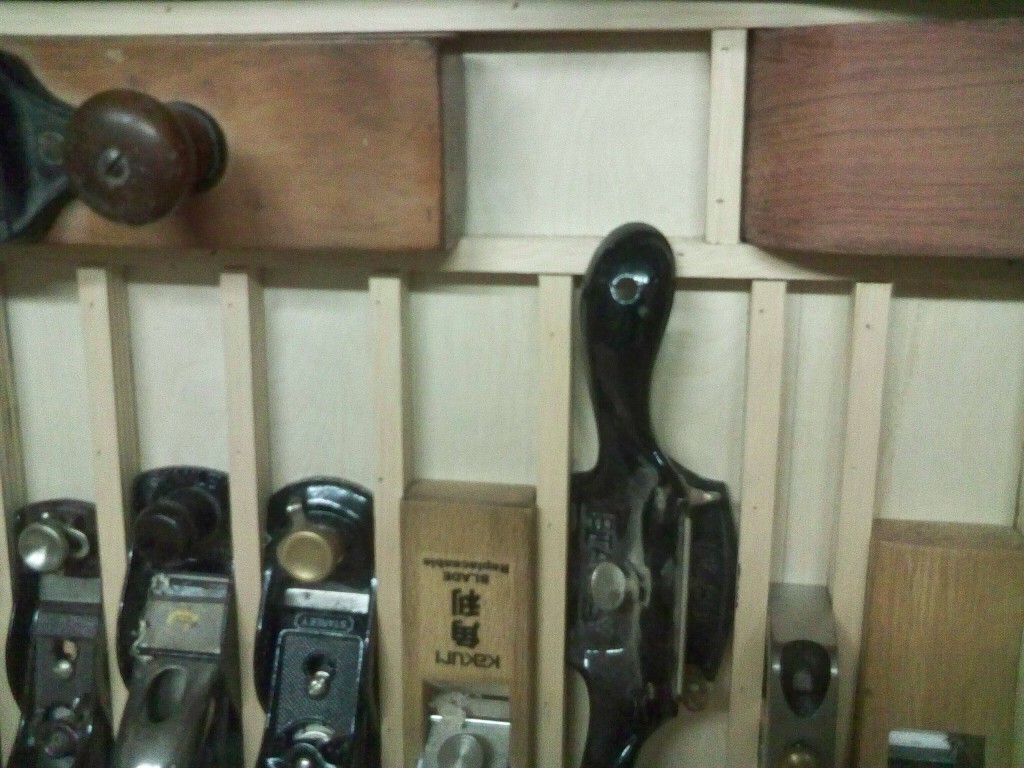
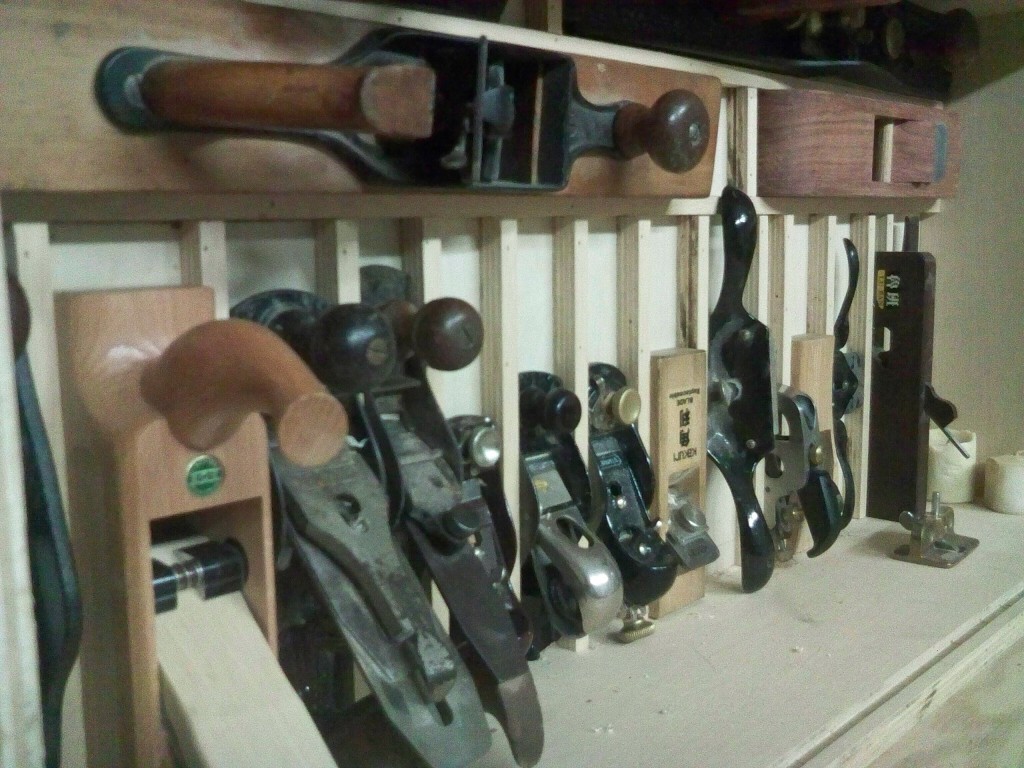
OK, my bevel up jointer and my transitional fore plane took up some serious space. So, I had to run them parallel with the length of the case. They were also different widths, so I had to spend some time trying to match widths of planes as closely as possible. I discovered that my shop made bubinga plane was very close to the width of the transitional fore plane, so those babies went together. The old No. 5 jack (I’m still looking for a replacement cap iron), while thinner than the jointer, was a nice snug fit when I added a scrap of a slat.
After I laid the planes nose to tail, I glued the backs of the slats and bradded them into place. I’m sure I could have used a more sophisticated method of attaching them, but hey, I’m trying to get this done, alright?
Once I had the longer planes secured, I discovered that if I placed my longest shorter planes perpendicular to the flow of the first two rows, they would fit beautifully… YES! So, I measured out the slats and made repetitive cuts using a stop on the table saw to make a stack of sticks. After that, it was a piece of cake… put the next plane down, glue and brad the stick tight to the plane’s sole, then move to the next. I took the planes out ever so many sticks were attached to wipe any excess glue that may have leaked out from the box and the plane soles.
Then came the moment of truth. Could I stand the plane till up on its wheels to cart it around without the planes falling out?
I had spent a lot of time thinking this one over. Leather straps attached at each slat to wrap over the handles of each plane? Maybe a cut up bungie cord?
Turns out I didn’t have to do anything. Because the slats were attached tightly to the plane soles, they stuck firmly in their slots while I wheeled the till around the shop floor. I may still add something later, but for now, they rock.
An even tougher test was yet to come.. could I stand the till upright against the wall behind my side bench without having them all clatter out of their holders? To help stack the odds in my favor, I screwed at 1″ thick strip of maple from my scrap bucket to the plywood top to prevent the till from dropping to a full 90 degrees – it would stay tipped back just a little bit to help hold the planes in place. I hoisted the rather heavy case up onto the side bench and lifted it into place so the front edge sat on the maple strip. I eased the till back against the wall… BINGO…
The planes held their spots easily… and when I go to pull a plane out of its little cubby, it comes out smoothly. And, when it’s time to return it to its home, it slips right back into place. No fuss, no muss…
Since I had made the plane till so deep – probably 1.5″ deeper than it really needed to be, I have plenty of room to slip in a chisel roll and my nylon saw scabbard. This way, when I take these tools to my sons’ schools, I’ll just have to bring the one case.
Of course, with a project like this, it made me take a good hard look at the condition of my planes. And, yes, it was definitely time for me to do some sharpening, which is what I spent the majority of yesterday doing.
But, when you have a project that showcases the planes in your collection like this one, well, you never know when you’ll be asked to bring the iron out to show how well it works!


Very nice Tom. I thought you might have used a rare-earth magnet to help hold them in place. Who knew friction would work so well? If you wanted to take advantage of the extra depth, you could attach a ledge strip around the perimeter and then add some smaller boxes that would slide along them. Just a thought…
There is NO way on God’s green earth that I could do that and expect everything to stay in place!!
I worry that after time and a little wear and tear, the slots will be too loose and not hold the planes in place. I vote for magnets or even a cross bar of some type for secuirty.
But other than that, it’s a very good job and well thought out and exicuted on that till.
Rog
Ya know, Rog, I think you may be right…. Gonna have to search through some options to see what I can do…
Tom,
Nice plane till. I’m with Roger for the Magnets. Recess them in with a Fortenser bit & some epoxy. Then stick some felt to the bottom of each slot and you’ll be all set, except for the wooden planes . . .
Regarding the Wooden planes, I have the same Stanley as you have installed in the bottom horizontal row on the left side. I picked it up used over the summer ( http://penultimatewoodshop.blogspot.com/2010/08/vacation-acquisitions.html ) and have yet to do any tune up. I’m nervous that if I take too much off the bottom (there are gouges in in now) I’ll mess up the geometry of the blade. Is that a valid fear?
Yeah, Dyami.. I’m thinking something non-magnetic for the metal soled planes… I’m afraid of magnetizing the soles and ‘something’ happening… what that ‘something’ is is anyone’s guess… I’m thinking of a ‘nautical’ solution…
I wouldn’t be too worked up about sanding the sole on a transitional plane. Unless you are trying to use the plane to smooth (mine is a fore plane), an open mouth isn’t the worst thing in the world to have…
Thanks, Tom. I’ll have to try sanding the sole (unfortunately the gouges are about 3/8″ deep, so I may use some cutting of one type or another before sanding).
Just had a thought…..Yea, it hurt a little….
How about a wooden ‘turn button’ at the top (front edge) of each plane? Kind of a little wooden latch made in an “L” shape and tall enough for the plane in question, and mounted with a screw through the axis and into the back of the till just to hook the nose and keep it in place. Maybe a stop for the heel too?
As I said, just a thought.
Rog
A very good thought.. but check out tomorrow’s post… I think I may have come up with something elegant.. I hope!